
How to Export a MySQL Database to an SQL File with MySQLdump
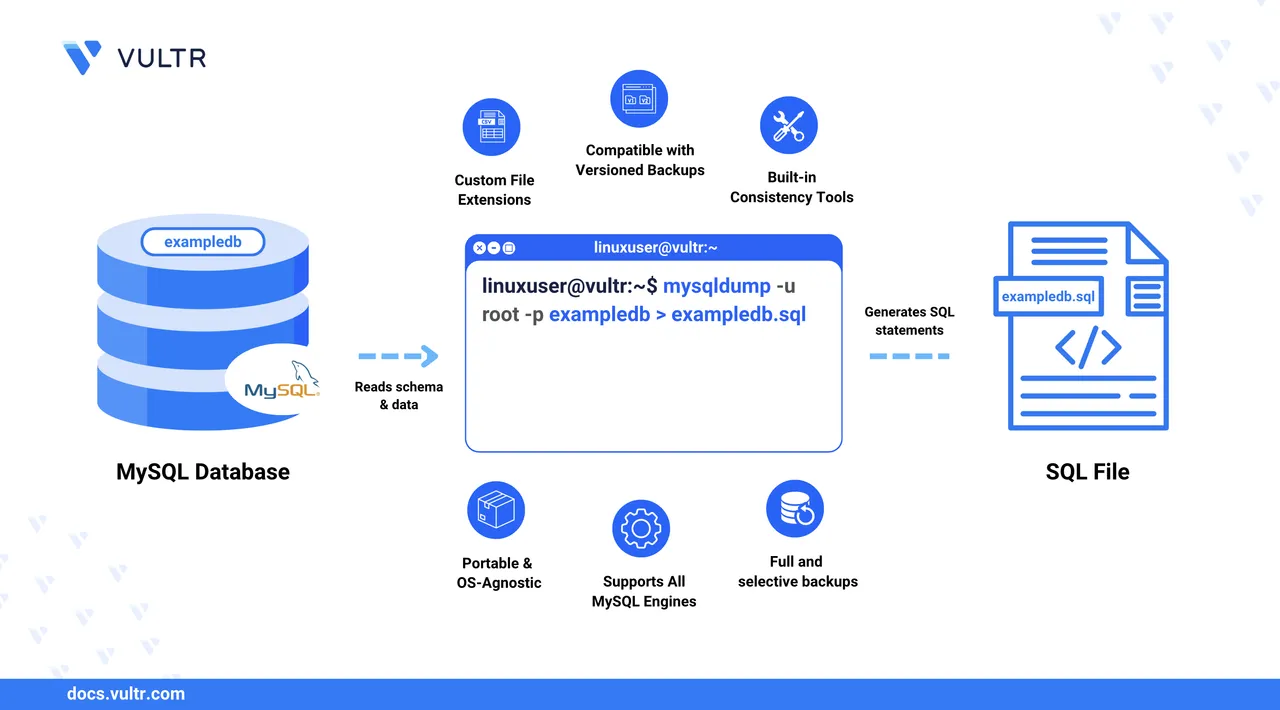
mysqldump is a built-in backup and recovery utility for MySQL. It exports a database’s schema and data to a text-based file that can be used to restore the database later. The exported file typically contains SQL statements such as CREATE, INSERT, and DROP, but it can also support non-SQL formats for further processing.
In this article, you will use mysqldump to export a single database or multiple databases to an .sql file or a non-SQL format such as .csv or .txt, and then restore the database using the MySQL client.
Prerequisites
Before you begin, you need to:
- Have access to an existing MySQL database server.
- A MySQL client installed.
mysqldump Command Syntax
mysqldump is part of the MySQL client package and allows you to export MySQL databases using the following syntax:
mysqldump -h [host] -u [user] -P [port] -p [database] > [export-file]-h [host]: The MySQL database host. Optional when connecting to a local database server.-u [user]: A MySQL user withSELECT,LOCK,VIEW, andTRIGGERprivileges on the target database.-P [port]: The MySQL server port. Optional for local servers.-p: Prompts for the MySQL user password.[database]: The database to export.> [export-file]: Writes the exported database to the specified file.
Common Export File Formats
You can export MySQL data to various formats using mysqldump, including:
.sql: Plain SQL file withCREATE,INSERT, andSELECTstatements..sql.gz: Gzip-compressed SQL dump..sql.zip: ZIP-compressed SQL dump..sql.tar: Tar-archived SQL dump..bak: Generic backup file..csv: Comma-separated values (CSV) file containing table data..txt: Plain text file..xml: XML-formatted dump..dump: Full schema and data dump, similar to.sql.
Prepare the MySQL Database to Export
Before exporting a database with mysqldump, log in to the MySQL database server, verify that the database exists, and prepare it for export if it is in use with existing applications. The following steps demonstrate how to access the MySQL database server and prepare the target database for export.
Log in to the MySQL database server as a user with sufficient privileges, such as
root, withSELECT,LOCK,VIEW, andTRIGGERprivileges on the target database.console$ mysql -u root -p
When prompted, enter the mysql root user password.
List the databases the user can access.
sqlmysql> SHOW DATABASES;
Identify the target database, for example
exampledb, in the output:+--------------------+ | Database | +--------------------+ | exampledb | | information_schema | | mysql | | performance_schema | | sys | +--------------------+ 5 rows in set (0.01 sec)Switch to the target database.
sqlmysql> USE exampledb;
List all tables in the database.
sqlmysql> SHOW TABLES;
Verify that the user has
SELECTprivileges by listing the records in any table.sqlmysql> SELECT * FROM table_name;
Export a MySQL Database to an SQL File with mysqldump
You can export one or more databases with mysqldump if your MySQL user has the required privileges to the target database. mysqldump connects to the database, dumps a copy of the database, and redirects the output to your target file. In the following steps, export a MySQL database to an SQL file with mysqldump.
Create a directory named
database-backupsto store your backup files.console$ mkdir database-backups
Navigate to the directory.
console$ cd database-backups
Export a single database like
exampledbto a.sqlfile usingmysqldump.console$ mysqldump -u root -p exampledb > exampledb.sql
To prevent changes during export (useful if the database is active), add the
--lock-all-tablesoption:console$ mysqldump -u root -p --lock-all-tables exampledb > exampledb.sql
Run the above command again for each database, specifying a unique filename.
Export all databases to a single
.sqlfile usingmysqldump.console$ mysqldump -u root -p --all-databases > all-databases.sql
The above command exports all databases the user can access on the MySQL database server.
List the files in your working directory and verify that the
.sqlfile is available.console$ lsOutput:
exampledb.sql all-databases.sql
Export a MySQL Database to a Non-SQL File
The mysqldump tool only produces SQL-formatted output, even if the file extension is .csv. To generate an actual CSV file, use a SQL query with the INTO OUTFILE clause from within the mysql shell.
Export a Single Table to CSV
Log in to the MySQL server.
console$ mysql -u root -p
Run a
SELECTstatement withINTO OUTFILEto export the table.sqlmysql> SELECT * FROM example_table INTO OUTFILE '/tmp/example_table.csv' FIELDS TERMINATED BY ',' ENCLOSED BY '"' LINES TERMINATED BY '\n';
This creates a CSV file at
/tmp/example_table.csvon the database server. You may need to adjust file permissions or usesudoto copy it.Exit the MySQL console.
sqlmysql> EXIT;
Copy the file to your current directory.
console$ sudo cp /tmp/example_table.csv .
Export Multiple Tables to CSV Using a Bash Script
Create the script file.
console$ nano export_all_csv.sh
Add the following content to the file:
bash#!/bin/bash DB_NAME="exampledb" MYSQL_USER="root" MYSQL_PASS="yourpassword" OUTPUT_DIR="/var/lib/mysql-files" tables=$(mysql -u "$MYSQL_USER" -p"$MYSQL_PASS" -e "SHOW TABLES IN $DB_NAME;" | tail -n +2) for table in $tables; do mysql -u "$MYSQL_USER" -p"$MYSQL_PASS" -e " SELECT * FROM $DB_NAME.$table INTO OUTFILE '$OUTPUT_DIR/${table}.csv' FIELDS TERMINATED BY ',' ENCLOSED BY '\"' LINES TERMINATED BY '\n'; " echo "Exported: $table -> $OUTPUT_DIR/${table}.csv" done
You can modify the script to customize delimiters, escape characters, or output locations. Make sure the
mysql-filesdirectory has proper write permissions for MySQL and copy access for your user.Make the script executable.
console$ chmod +x export_all_csv.sh
Run the script.
console$ sudo ./export_all_csv.sh
Test and Restore a MySQL Backup File
After exporting a MySQL database using mysqldump, verify that the backup file is intact before restoring. This section walks you through testing the dump using a temporary database, checking table integrity, and then restoring into the intended target database.
List the backup file and confirm it is not empty.
console$ ls -lh
Log in to the MySQL database server.
console$ mysql -u root -p
Create a test database such as
restore_db.sqlmysql> CREATE DATABASE restore_db;
Exit the MySQL console.
sqlmysql> EXIT;
Restore the backup to the
restore_dbdatabase.console$ mysql -u root -p restore_db < exampledb.sql
Log in to the MySQL database server with the
restore_dbdatabase.console$ mysql -u root -p restore_db
List the tables in the database and verify that they match the original database.
sqlmysql> SHOW TABLES;
Check the integrity of the table data for corruption or restoration errors.
sqlmysql> CHECK TABLE table_name;
Drop the
restore_dbtest database after verifying a successful restoration.sqlmysql> DROP DATABASE restore_db;
Exit the MySQL console.
sqlmysql> EXIT;
Back up the current production database.
console$ mysqldump -u root -p exampledb > backup-before-restore.sql
Restore the SQL file into the target database.
console$ mysql -u root -p exampledb < exampledb.sql
If the database does not exist, create it first.
console$ mysql -u root -p -e "CREATE DATABASE exampledb;"
Log in to verify the restored database.
console$ mysql -u root -p exampledb
Check the integrity of the restored tables.
sqlmysql> CHECK TABLE table_name;
Exit the MySQL console.
sqlmysql> EXIT;
Conclusion
In this article, you used mysqldump to export a MySQL database, verified the resulting SQL files, and tested data restoration to ensure structural and data integrity. These steps form the foundation of a reliable backup workflow in production environments. For extended options such as partial exports, triggers, or custom character sets, consult the mysqldump reference manual.