

Introduction
Asynchronous programming is a paradigm that enables task execution concurrently and independently. Tasks do not wait for each other to complete before running next. BullMQ is a queueing system that's implemented on top of Redis® to deliver a fast and scalable implementation of a distributed queue.
This article explains how to handle asynchronous tasks with Node.js and BullMQ. You are to create a queueing system that extracts audio from any given video. This is useful when converting videos into audio that for sharing on other platforms such as podcasts.
Prerequisites
Before you begin:
Deploy a Ubuntu 22.04 server on Vultr
Switch to the user
# su example-userInstall Nginx on the server
Redis® Installation
Redis® is an in-memory database commonly used as a cache or message broker. The in-memory capability makes Redis® a low-latency and high-throughput option. In this section, install the Redis® database server and use it to store videos in a queue before processing them into audio.
Redis® is available in the main Ubuntu APT repository, update the server packages
$ sudo apt updateInstall Redis® server
$ sudo apt install redis-serverBullMQ requires a Redis® version higher than 5.0. Verify the installed version
$ redis-server --versionOutput:
Redis server v=6.0.16 sha=00000000:0 malloc=jemalloc-5.2.1 bits=64 build=a3fdef44459b3ad6Verify that the Redis® database is running correctly
$ redis-cli PINGOutput:
PONG
Set Up the Project Directory
BULLMQ is the project's root directory, and below is the proper directory tree.
BULLMQ
    backend
        |_ utils
            | audioUtils.js
        |_ queues
            | audioQueue.js
        |_ routes
            | audioRoutes.js
        |_ public
            |_ audios
            |_ videos
        | index.js

    views
       | form.ejs
       | head.ejs
       | result.ejs
    public
       |_css
           | main.css
Switch to your user home directory
$ cd /home/example-user/Create the project directories using the following command
$ mkdir -p BULLMQ/backend/utils && touch BULLMQ/backend/utils/audioUtils.js && mkdir -p BULLMQ/backend/queues && touch BULLMQ/backend/queues/audioQueue.js && mkdir -p BULLMQ/backend/routes && touch BULLMQ/backend/routes/audioRoutes.js && mkdir -p BULLMQ/backend/public/audios && mkdir -p BULLMQ/backend/public/videos && touch BULLMQ/backend/index.js && mkdir -p BULLMQ/views && touch BULLMQ/views/form.ejs && touch BULLMQ/views/head.ejs && touch BULLMQ/views/result.ejs && mkdir -p BULLMQ/public/css && touch BULLMQ/public/css/main.css
Install Project Dependencies
Install all project dependencies using the following command
$ npm install @bull-board/api @bull-board/express bullmq express express-fileupload fluent-ffmpeg ioredisBelow is what each dependency handles in the project:
@bull-board/api- Provides an API for monitoring and managing Bull queues@bull-board/express- Acts as a middleware that adds a monitoring dashboard between Express.js and the Bull monitoring dashboardbullmq- The queue management system capable of handling background jobs and messagesexpress- The Web application framework for building REST APIsexpress-fileupload- Enables file uploads in Expressfluent-ffmpeg- A command line tool that opens a connection to FFmpegioredis- Enables a connection to the Redis® database
Install the
pm2process manager package$ sudo npm install -g pm2The above command installs the
pm2package used to load balance, monitor processes, clustering, and perform automatic restartsBy functionality,
pm2monitors the server created byexpress. Theexpress-fileuploadacts as a middleware that handles the video uploads. The system adds the video to thebullmqqueue for processing, andfluent-ffmpegfetches and processes the uploaded video in the queueIn the background, the queue utilizes a Redis® connection enabled by
ioredis.@bull-board/apiand@bull-board/expressenable a user interface that visualizes how and when the jobs in the queue get processedWhen successful, install FFmpeg
$ sudo apt install ffmpegThe above command install FFmpeg used to convert different video and audio formats, resize videos, alter sample rates, and capture video or audio streams
Set Up the Frontend Interface
On the web interface, video uploads use a form to select the target source file. In this section, use ejs to render the web pages required for this project. ejs is a templating engine commonly used with express to generate HTML within Javascript, and it's suitable for rendering dynamic content. Set up the necessary ejs files as described in the steps below.
Using a Linux text editor such as
Nano, edit theBULLMQ/views/head.ejsfile$ nano BULLMQ/views/head.ejsAdd the following code to the file
 <head>

 <meta charset="UTF-8" />
 <meta http-equiv="X-UA-Compatible" content="IE=edge" />
 <meta name="viewport" content="width=device-width, initial-scale=1.0" />
 <title>Image Processor</title>
 <link rel="stylesheet" href="css/main.css" />

 </head>
Save and close the file
The above code links the CSS file used to style all web pages in the project.
Edit the
BULLMQ/views/form.ejsfile$ nano BULLMQ/views/form.ejsAdd the following code to the file
 <!DOCTYPE html>
 <html lang="en">
   <%- include('./head'); %>
   <body>
     <div class="home-wrapper">
       <h1>Video Processor</h1>

       <form action="/upload" method="POST" enctype="multipart/form-data">
         <input
         type="file"
         name="fileupload"
         placeholder="Select Video from your computer"
       />

        <button type="submit">Upload Video</button>
       </form>
     </div>
    </body>
    </html>
Save and close the file
The above code includes the CSS styles linked in
head.ejs, and a form that accepts a POST request to the/uploadendpoint.The form only accepts files and assigns a name attribute of
fileuploadto the uploaded video. The name attribute identifies the file on the backend. When a user clicks the submit button, it triggers the form submission method.The final audio files display through the
BULLMQ/views/result.ejsfile, edit it to declare new code elements$ nano BULLMQ/views/result.ejsAdd the following code to the file
 <!DOCTYPE html>
  <html lang="en">
    <%- include('./head'); %>
    <body>
      <div class="gallery-wrapper">
        <% if (audioFiles.length > 0) { %>
          <p>The following are the processed audios:</p>
          <% for (let audioFile of audioFiles) { %>
            <audio controls>
              <source src="<%= audioFile %>" type="audio/mp3">
              Your browser does not support the audio element.
            </audio>
            <br>
           <% } %>
        <% } else { %>
          <p>
            The audio is being processed. Refresh after a few seconds to listen to the extracted audios.
          </p>
        <% } %>
      </div>
     </body>
  </html>
Save and close the file
The above webpage code displays processed audio. When a user uploads a video using
form.ejs, the request redirects toresult.ejswith a gallery view of the processed audio files. The<% if (audioFiles.length > 0) { %>directive verifies if available audios are successfully processed. When ready, they display on the webpage.To design the web page, edit the
BULLMQ/public/css/main.cssfile$ nano BULLMQ/public/css/main.cssAdd the following code to style the web page
 body {  background: #f8f8f8;  }
 h1  {  text-align: center; }
 p   {  margin-bottom: 20px; }

 /** Styles for the "Choose File"  button **/
 button[type="submit"] {
     background: none;
     border: 1px solid orange;
     padding: 10px 30px;
     border-radius: 30px;
     transition: all 1s;
 }

 button[type="submit"]:hover {
     background: orange;
 }

 /** Styles for the "Upload Image"  button **/
 input[type="file"]::file-selector-button {
     border: 2px solid #2196f3;
     padding: 10px 20px;
     border-radius: 0.2em;
     background-color: #2196f3;
 }

 ul {
     list-style: none;
     padding: 0;
     display: flex;
     flex-wrap: wrap;
     gap: 20px;
 }

 .home-wrapper {
     max-width: 500px;
     margin: 0 auto;
     padding-top: 100px;
 }

 .gallery-wrapper {
     max-width: 1200px;
     margin: 0 auto;
 }
Save and close the file
Set Up the Server using ExpressJS
In this section, create an express server that serves the following routes:
/admin- serves the Bull Dashboard/- renders theform.ejsand allows video uploads/result- renders theresult.ejswith all the processed audio files./upload- POST endpoint adds the uploaded video to the job queue awaiting processing, then redirects to the/result.
Edit the main express file
BULLMQ/backend/index.js$ nano BULLMQ/backend/index.jsAdd the following code to the file
 const express = require("express");
 const bodyParser = require("body-parser");
 const fileUpload = require("express-fileupload");
 const { createBullBoard } = require("@bull-board/api");
 const { BullMQAdapter } = require("@bull-board/api/bullMQAdapter");
 const { ExpressAdapter } = require("@bull-board/express");
 const path = require("path");
 const audioRoutes = require("./routes/audioRoutes");
 const { audioJobQueue, worker, queueEvents } = require("./queues/audioQueue");

 const serverAdapter = new ExpressAdapter();
 createBullBoard({
           queues: [new BullMQAdapter(audioJobQueue)],
            serverAdapter: serverAdapter,
           });
 serverAdapter.setBasePath("/admin");

 const app = express();
 app.use(express.static(path.join(__dirname, "public")));

 app.set("view engine", "ejs");
 app.use(bodyParser.json());
 app.use(bodyParser.urlencoded({ extended: true }));
 app.use(fileUpload());

 app.use(express.static("public"));
 app.use("/admin", serverAdapter.getRouter());
 app.use("/", audioRoutes);

 queueEvents.on("completed", () => {
 console.log(`Job  Initialized to Queue`);
  });

 worker
      .on("failed", (job, err) => {
                 console.log(`Job ${job} failed with error: ${err.message}`);
                 })
      .on("error", (err) => {
                 console.log("Worker error:", err);
                 })
      .on("stalled", (job) => {
                 console.log(`Job ${job} stalled`);
                });
 app.listen(4000, function () {
     console.log("Server running on port 4000");
  });
Below is the code breakdown:
Imports
createBullBoard,BullMQAdapter,ExpressAdapter: These modules set up the BullDashboard to monitor and manage BullMQ queuespath: The inbuilt NodeJs module for working with file pathsaudioRoutes: Custom module defined inBULLMQ/backend/routes/audioRoutesthat configures routes used in the applicationaudioJobQueue,workerqueueEvents: Modules that implement the BullMQ modules to set up the queue, worker, and queue events
BullBoard Setup
serverAdapteris an instance of theExpressAdapter. TheserverAdapterintegrates the BullDashboard into an express application. A BullBoard passes the queues and theserverAdapterto thecreateBullBoardfunctionserverAdapter.setBasePathsets the path to the dashboard as/admin. The express server runs on port4000, and so, the administrator page is accessible using the URLlocalhost:4000/admin
Setting up express
- An express instance starts as
app, and thebackend/publicdirectory served by theexpress.staticfunction contains uploaded videos.ejsis the view engine used to render the ejs templates in theviewsfolder bodyparserandfileUploadmiddleware handle JSON form data and uploads respectively.BULLMQ/public/used byexpress.staticas the static directory, contains styles used byejstemplates- The
/adminroute serves the BullDashboard while the/route serves the base route for routers in theaudioRoutesfunction
- An express instance starts as
Queue events and workers
- Adds the
completedevent listener to the queueEvents instance, and it logs a message per job addition failed,error, andstalledevent listeners added to theworkerinstance handle worker errors, failed jobs, and stalled jobs
- Adds the
Starting the server
- The server runs on port
4000with a callback function that logs a message to the terminal
- The server runs on port
Set Up the Project Server Routes
To define routers, edit the
audioRoutes.jsfile$ nano BULLMQ/backend/routes/audioRoutes.jsAdd the following code to the file
 const express = require("express");
 const path = require("path");
 const fs = require("fs");
 const { audioJobQueue } = require("../queues/audioQueue");
 const router = express.Router();

 router.get("/", function (req, res) {
       res.render("form");
 });

 router.get("/result", (req, res) => {
     const audioDirPath = path.join(__dirname, "../public", "audios");
     const audioFiles = fs.readdirSync(audioDirPath).map((audio) => {
         console.log("audios is ",audio)
         const decodedAudioName = decodeURIComponent(audio);
         console.log("decoded audio is ",decodedAudioName);
         return `/audios/${audio}`;
     });

    res.render("result", { audioFiles });
 });

 router.post("/upload", async function (req, res) {
     try {
         const {fileupload } = req.files;
         console.log("Uploading:", fileupload.name);
         if (!fileupload) return res.sendStatus(400);

         const videoFolderPath = path.join(__dirname, "../public", "videos");
         const videoFilePath = path.join(videoFolderPath, encodeURIComponent(fileupload.name));
         await fileupload.mv(videoFilePath);
         const videoPath = `/videos/${encodeURIComponent(fileupload.name)}`;
         await audioJobQueue.add("audioProcess", {
             video_path: videoPath,
         });

         res.redirect("/result");
     } catch (error) {
         console.log(error);
         res.status(500).json({ error: "Failed to process video" });
     }
 });

 module.exports = router;
Save and close the file
Below is what the code does:
- An instance of the
express.Router()function initializes asrouter router.get("/")defines a GET route that renders theform.ejstemplaterouter.get("/result")defines a GET route that retrieves all the audio file names in thepublic/audiodirectory as an array. The array forwards asaudioFilesto theresultviewrouter.post("/upload")defines a POST route that handles file uploads used by theform.ejstemplate. The uploaded file has a name field offileuploadsin thereq.filesobject. The file saves to thepublic/videosdirectory if it exists- The video path links to
audioJobQueue, through the add method, and theaudioProcessreferences the job type added to the queue.audioProcessis an arbitrary name that describe the job type added to the queue
- An instance of the
Queues
To establish a connection to the Redis® database, edit the
audioQueue.jsfile$ nano BULLMQ/backend/queues/audioQueue.jsAdd the following code to the file
 const { Queue, Worker, QueueEvents } = require("bullmq");
 const audioProcess = require("../utils/audioUtils");
 const Redis = require('ioredis');

 const connectionToRedis = new Redis({
      host: "localhost",
      port: 6379,
 });

 const audioJobQueue = new Queue("videoJobQueue", {
           connection: connectionToRedis,
 });


 const worker = new Worker("videoJobQueue", async (job) => {
               console.log("job added to queue")
                try {
                       await audioProcess(job);
                        }
                 catch (error) {
                      console.log(`Job ${job.id} failed with error: ${error.message}`);
              }
            });

const queueEvents = new QueueEvents("videoJobQueue");

module.exports = {
      audioJobQueue,
       worker,
      queueEvents,
    };
Save and close the file
Below is what the code does:
Queue,Worker, andQueueEventsare classes provisioned by thebullmqpackage.Workersis the process responsible for processing jobs.QueueEventsprovides a way to monitor the progress or status of a job in the queueaudioProcessis a module in theutils/audioUtilsthat performs the logic for converting videos to audioioredisis the NodeJS Redis® client that connects to the Redis® databaseconnectionToRedisinstantiates a Redis® connection with the default connection parametersaudioJobQueueinstantiates a Queue that utilizes the defined Redis® connection atconnectionToRedisworkeris an instance of the Worker class. The worker class listens for jobs added to thevideoJobQueuequeue. The catch block in the function logs any resulting errorsqueueEventslistens to events of all jobs added to thevideoJobQueue
Convert Videos to Audio using FFmpeg
To implement the
audioProcessfunction which handles the conversion process using FFmpeg, edit theaudioUtilsfile$ nano BULLMQ/backend/utils/audioUtilsAdd the following code to the file
 const ffmpeg = require("fluent-ffmpeg");
 const path = require("path");
 const fs = require('fs');

 const audioProcess = async (job) => {
 console.log("Processing job:", job.id);
 const { video_path } = job.data;
 console.log("job data is ", job.data);
 const videoFilePath = path.join(__dirname, "../public", video_path);
 const timestamp = Date.now();
 const newFileName = `${timestamp}.mp3`; // Rename the file

 const audioFolderPath = path.join(__dirname, "../public", "audios");
 const audioFilePath = path.join(audioFolderPath, newFileName);

 const convertVideoToAudio = ffmpeg(videoFilePath)
    .toFormat("mp3")
    .save(audioFilePath)
     .on("error", (err) => {
      console.error("FFmpeg error. Job processing terminated.", err);
   })
   .on("end", () => {
      console.log("Video successfully converted to audio.....");
      // Update job status to "complete"
       job.updateProgress(100);
      console.log("Job is successfully completed");
   });

  convertVideoToAudio.run();
   };

   module.exports = audioProcess;
Save and close the file
Below is what the above code does:
audioProcessis an asynchronous function that takes a job object as an argument. Thevideo_pathfrom thejob.dataobject extracts, andvideo_pathis the location of the video that needs processing to audiopathdefines an absolute path to the video using thevideo_pathand the base directory path. This becomes thevideoFilePath.audiofilePathjoins the base path, audios folder path, and thenewFileNamewith a timestamp. This means the audio extracted from the video renames to the server timestamp. This ensures that each audio has a unique name.convertVideoToAudioinitializes theffmpegcommand, the video to convert, and the conversion to mp3 with the.toFormat("mp3")option..savespecifies where to save the mp3 file as defined byaudiofilePath.
In case of an error, the
.on(error,..)event handler logs the error to the console. When the conversion is complete, the.on("end",...)event triggers and the job progress updates to 100.
Start the Server
To ensure that the server runs 24/7 without interruptions, use a process manager such as PM2. In this section, switch to the project directory and start the server using pm2 as described in the steps below.
Switch to the
BULLMQdirectory.$ cd BULLMQStart the server
$ pm2 start backend/index.jsThe above command starts the application server as a background process managed by
pm2Your output should look like one below.
    __/\\\\\\\\\\\\\____/\\\\____________/\\\\____/\\\\\\\\\_____
  _\/\\\/////////\\\_\/\\\\\\________/\\\\\\__/\\\///////\\\___
   _\/\\\_______\/\\\_\/\\\//\\\____/\\\//\\\_\///______\//\\\__
    _\/\\\\\\\\\\\\\/__\/\\\\///\\\/\\\/_\/\\\___________/\\\/___
     _\/\\\/////////____\/\\\__\///\\\/___\/\\\________/\\\//_____
      _\/\\\_____________\/\\\____\///_____\/\\\_____/\\\//________
       _\/\\\_____________\/\\\_____________\/\\\___/\\\/___________
        _\/\\\_____________\/\\\_____________\/\\\__/\\\\\\\\\\\\\\\_
         _\///______________\///______________\///__\///////////////__

 [PM2] Spawning PM2 daemon with pm2_home=/home/example-user/.pm2
 [PM2] PM2 Successfully daemonized
 [PM2] Starting /home/example-user/BULLMQ/backend/index.js in fork_mode (1 instance)
 [PM2] Done.
To view the process logs, run the following command:
$ pm2 logsWhen the application is running, the following output should display in your server logs:
0|index | Server running on port 4000Press :Key:Ctrl: + :key:C: to stop the
pm2log outputTest that the application server listens on port
4000.
Configure Nginx as a Reverse Proxy
To secure the server, expose the HTTP port 80 instead of the backend application port 4000 for access. Configure Nginx as a Reverse Proxy as described in the steps below.
Allow the HTTP port
80through the Firewall.$ sudo ufw allow 80/tcpThe above command allows incoming HTTP requests to the server through the default UFW firewall.
Disable the default Nginx configuration file
$ sudo rm /etc/nginx/sites-enabled/defaultCreate a new host configuration file
$ sudo touch /etc/nginx/sites-available/bullmqEdit the file
$ sudo nano /etc/nginx/sites-available/bullmqAdd the following configurations to the file
 server {
   listen 80 default_server;
   listen [::]:80 default_server;

   server_name _;

   location / {
           proxy_pass http://127.0.0.1:4000;
           try_files $uri $uri/ =404;
     }
  }
Save and close the file
Enable the configuration file
$ sudo ln -s /etc/nginx/sites-available/bullmq /etc/nginx/sites-enabled/bullmqTest the Nginx configuration for errors
$ sudo nginx -tRestart Nginx to apply changes
$ sudo systemctl restart nginx
Test
Using a web browser such as Firefox, visit your public server IP Address. Replace
192.0.2.1with your actual server addresshttp://192.0.2.1Verify that the application loads correctly with the
Choose FileandUpload VideobuttonsClick the
Choose Filebutton to browse a video file from your computerWhen selected, click
Upload Videoto start processing the video file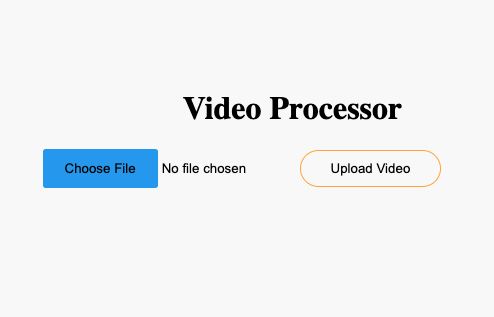
When the video-to-audio conversion is complete, your request redirects to the
/resultpage. Verify that you can play and download any of the generated audio files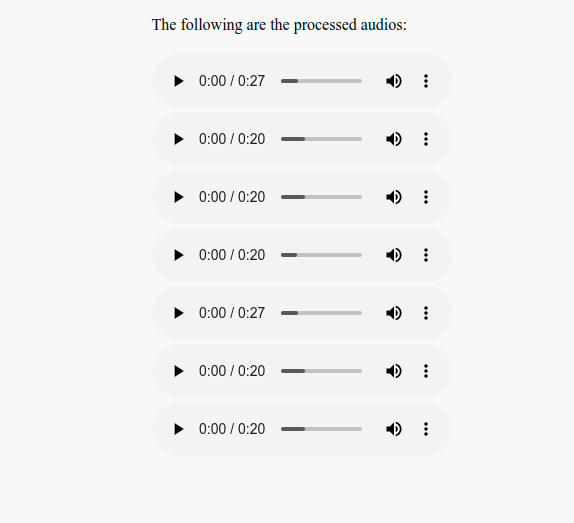
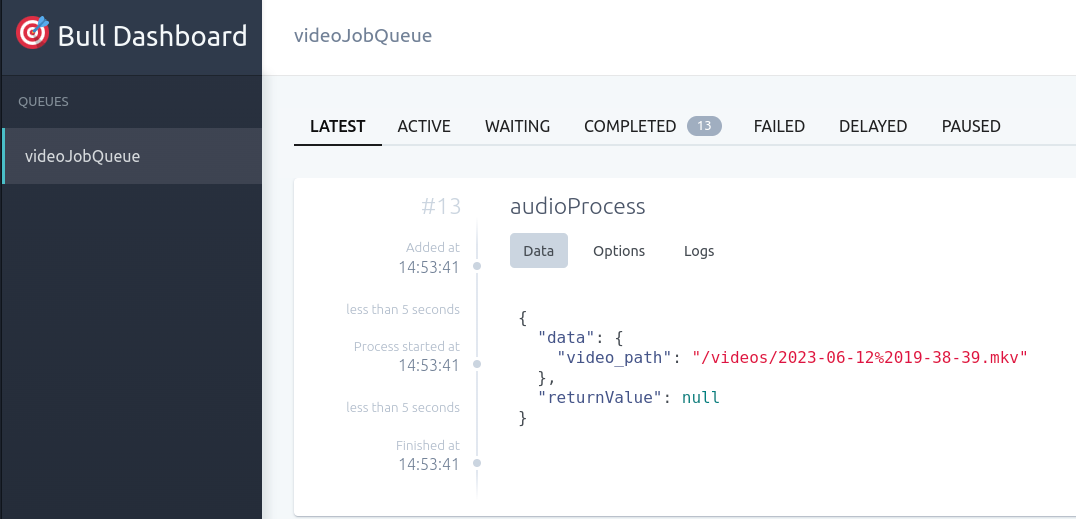
To view the BullDashboard, navigate to the
/admin/queue/videoJobQueuepath in your URLhttp://SERVER-IP/admin/queue/videoJobQueueVerify that all processed jobs and states display in the dashboard
To view the application status logs, run the following command in your SSH session
$ pm2 logsOutput:
 0|index    | Uploading: 1. Conclusion.mp4
 0|index    | job added to queue
 0|index    | Processing job: 2
 0|index    | job data is  { video_path: '/videos/1.%20Conclusion.mp4' }
 0|index    | Job  Initialized to Queue
 0|index    | audios is  1691771605201.mp3
 0|index    | decoded audio is  1691771605201.mp3
 0|index    | audios is  1691771984626.mp3
 0|index    | decoded audio is  1691771984626.mp3
 0|index    | Video successfully converted to audio.....
 0|index    | Job is successfully completed
 0|index    | Video successfully converted to audio.....
 0|index    | Job is successfully completed
Conclusion
In this article, you have developed a working application to handle asynchronous tasks with Node.js and BullMQ. By using BullMQ, you can make use of asynchronous programming in resource or time-intensive tasks. To change your interface design, edit the CSS file to add more style to the webpage elements. For more information about BullMQ, visit the official documentation.
Next Steps
To implement more solutions on your Vultr Cloud server, visit the following resources.
No comments yet.