How to Install Nginx Proxy Manager on Ubuntu 20.04

Introduction
If you're looking for an easy way to manage your reverse proxy configurations on Ubuntu, you can install Nginx Proxy Manager on Ubuntu. Nginx Proxy Manager is a reverse proxy management tool that allows you to create configuration files, set up security exceptions, streams, and SSL certificates through a simple web interface. In this write-up, you’ll learn how to install Nginx Proxy Manager on an Ubuntu 20.04 server running Docker, providing you with a robust solution for managing your network traffic securely.
Prerequisites
Setup the Database and Data Directories
Create the Nginx Proxy Manager directory in a widely accessible location like /opt.
# mkdir /opt/nginxproxymanagerUnder the directory, create a new databases subdirectory.
# mkdir /opt/nginxproxymanager/databasesCreate a new SQLite database file using the following command.
# touch /opt/nginxproxymanager/databases/nginxproxy.dbExit the SQLite database console.
Control + dInstall Nginx Proxy Manager On Ubuntu
Create a custom Docker network.
# docker network create nginxproxymanThe Nginx Proxy Manager network allows management and monitoring of attached containers.
Using a text editor, create and edit a docker-compose.yml file in the main /opt/NginxProxy directory.
# nano /opt/nginxproxymanager/docker-compose.ymlEnter the following configurations to the file:
version: "3"
services:
  app:
    image: 'jc21/nginx-proxy-manager:latest'
    container_name: 'nginxproxymanager'
    restart: unless-stopped
    ports:
      - '80:80'
      - '443:443'
      - '81:81'
    environment:
      DB_SQLITE_FILE: "/data/database.sqlite"

    volumes:
      - ./data:/data
      - ./letsencrypt:/etc/letsencrypt

networks:
  default:
    external:
      name: nginxproxyman
Nginx Proxy Manager listens on ports 80 and 443 for HTTP and HTTPS traffic, respectively. Port 81 provides access to the web management dashboard. To tighten server security, change the management port to a random combination.
Save and close the file.
Switch to the Nginx Proxy Manager directory.
# cd /opt/nginxproxymanagerInstall Nginx Proxy Manager by starting docker-compose in detached mode.
# docker-compose up -d Verify that Nginx Proxy Manager is up and running.
# docker psThe command output should look like the one below:
CONTAINER ID   IMAGE                             COMMAND                  CREATED             STATUS             PORTS                                            NAMES
f3a37d391293   jc21/nginx-proxy-manager:latest   "/init"                  33 minutes ago      Up 33 minutes      0.0.0.0:80-81->80-81/tcp, 0.0.0.0:443->443/tcp   nginxproxymanager
Configure Firewall
If you use UFW (enabled by default), allow the following access ports through the server.
Allow HTTP
# ufw allow 80Allow HTTPS
# ufw allow 443Allow the Nginx Proxy Manager web management dashboard.
# ufw allow 81Setup Nginx Proxy Manager
Visit your server's IP address and load the Nginx Proxy Manager web management dashboard on port 81.
http://Server_IP:81Log in to the management dashboard with the following credentials:
- USERNAME: admin@example.com
- PASSWORD: changeme
Change your default username, email address, and password to secure the server.
To proxy and forward requests to a backend application, attach a docker container to the Nginx Proxy Manager network. For example, the following command creates a new ownCloud container attached to the nginxproxy network.
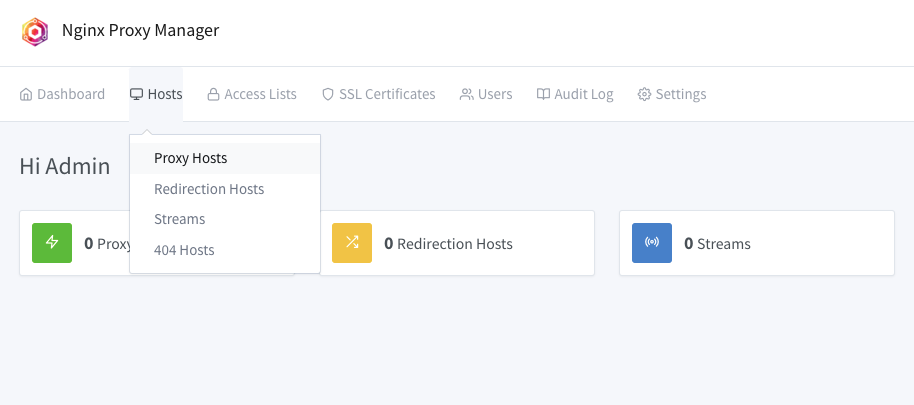
# docker run --network nginxproxyman --name owncloud -d owncloud:latestAccess the Nginx Proxy Manager web dashboard, and navigate to Hosts on the main navigation menu.
Click Add Proxy Host to enter a domain name, choose between HTTP or HTTPS scheme access, set up the target container name in the Forward Name/IP field, and toggle Save to continue.

Visit your domain name to confirm changes and start using the application.
http://example.comNext Steps
You have successfully installed Nginx Proxy Manager on Ubuntu 20.04 and set up ownCloud as a backend application attached to the Docker network. For further information, refer to the following articles: