
How to Install nopCommerce on Ubuntu 20.04

Introduction
nopCommerce is a free open source eCommerce application based on the ASP.NET framework. It is secure and fully customizable, making it an excellent choice for store owners because multiple customization tools are available for designing a user-friendly online shopping website.
In this guide, you will install nopCommerce on a Ubuntu 20.04 server running Nginx, MySQL as the web, and database server software, respectively.
Prerequisites
- Deploy a fresh Ubuntu 20.04 server
- SSH and Login as a user with sudo privileges
- Update the server
- Install LEMP
Step 1: Create a New nopCommerce Database
Login to MySQL.
$ mysql -u root -pCreate a new database.
mysql> create database nopcommerce; Create a database user with a strong password.
mysql> CREATE USER 'admin'@'localhost' IDENTIFIED BY 'password';Refresh MySQL Privileges.
mysql>FLUSH PRIVILEGES;Exit the console.
Step 2: Install ASP.NET Core
For nopCommerce it to run on, you need to install .NET (dot net) Core. But first, add the Microsoft package signing key to your server and install the necessary dependencies.
Download the Ubuntu 20.04 Microsoft Package Key.
$ wget https://packages.microsoft.com/config/ubuntu/20.04/packages-microsoft-prod.debInstall it on the server.
$ sudo dpkg -i packages-microsoft-prod.debThen, update the server.
$ sudo apt updateInstall aptitude transport for HTTPS downloads.
$ sudo apt install apt-transport-httpsNow, Install .NET Core runtime.
$ sudo apt install aspnetcore-runtime-5.0Verify the installation.
$ dotnet --list-runtimesOutput:
Microsoft.AspNetCore.App 5.0.13 [/usr/share/dotnet/shared/Microsoft.AspNetCore.App]
Microsoft.NETCore.App 5.0.13 [/usr/share/dotnet/shared/Microsoft.NETCore.App]
Step 3: Install nopCommerce
Create the nopCommerce webroot directory. Replace shop.example.com with your subdomain or preferred naming style.
$ sudo mkdir /var/www/shop.example.comNow, switch to the directory.
$ cd /var/www/shop.example.comThen, download the latest nopCommerce stable release from its GitHub repository. In this guide, release-4.40.4 is installed. Consider downloading the latest file.
$ sudo wget https://github.com/nopSolutions/nopCommerce/releases/download/release-4.40.4/nopCommerce_4.40.4_NoSource_linux_x64.zipExtract files from the Zip archive.
$ sudo unzip nopCommerce_4.40.4_NoSource_linux_x64.zipTo save space, delete the original zip archive.
$ rm nopCommerce_4.40.4_NoSource_linux_x64.zipGrant Nginx (running as www-data) ownership permissions to the directory.
$ sudo chown -R www-data:www-data /var/www/shop.example.comAll necessary files are now available on the server. Next, configure Nginx as a reverse proxy to serve these files on your subdomain.
Step 4: Configure Nginx
Create a new Nginx virtual host file.
$ sudo touch /etc/nginx/sites-available/shop.example.com.confOpen and edit the file.
$ sudo nano /etc/nginx/sites-available/shop.example.com.confPaste the following contents:
server {
    listen 80;
    listen [::]:80;

    root /var/www/html;
    server_name  shop.example.com;

    location / {

location / {
    proxy_pass         http://localhost:5000;
    proxy_http_version 1.1;
    proxy_set_header   Upgrade $http_upgrade;
    proxy_set_header   Connection keep-alive;
    proxy_set_header   Host $host;
    proxy_cache_bypass $http_upgrade;
    proxy_set_header   X-Forwarded-For $proxy_add_x_forwarded_for;
    proxy_set_header   X-Forwarded-Proto $scheme;
    }
    }
}
Save and close the file.
Test Nginx for errors.
$ sudo nginx -tRestart Nginx.
$ sudo service nginx restartStep 5: Configure nopCommerce as a Service
To start nopCommerce, it must be running as a service on the server. To do this, create a new service file in the systemd directory.
Open and edit the file.
$ sudo nano /etc/systemd/system/nopcommerce.servicePaste the following contents:
Unit]
Description=NopCommerce eCommerce application

[Service]
WorkingDirectory=/var/www/shop.example.com/
ExecStart=/usr/bin/dotnet /var/www/shop.example.com/Nop.Web.dll
Restart=always

# Auto restart nopCommerce in 10 seconds if .NET crashes

RestartSec=10
KillSignal=SIGINT
SyslogIdentifier=nopcommerce
User=www-data
Environment=ASPNETCORE_ENVIRONMENT=Production
Environment=DOTNET_PRINT_TELEMETRY_MESSAGE=false

[Install]
WantedBy=multi-user.target
Now, restart the systemd daemon.
$ sudo systemctl daemon-reloadThen, enable nopCommerce to start at boot time.
$ sudo systemctl enable nopcommerceStart nopCommerce.
$ sudo systemctl start nopcommerceCheck the current nopCommerce status.
$ sudo systemctl status nopcommerceRestart Nginx to start serving nopCommerce on the subdomain.
$ sudo systemctl restart nginxFinally, visit your subdomain to start the nopCommerce setup process through a web browser.
http://shop.example.comEnter the administrator email, username, password, and country. Then, select MySQL from the drop-down list of options in the database section.
Under Server name, enter localhost, then enter the database name, username, and password created on step 1.
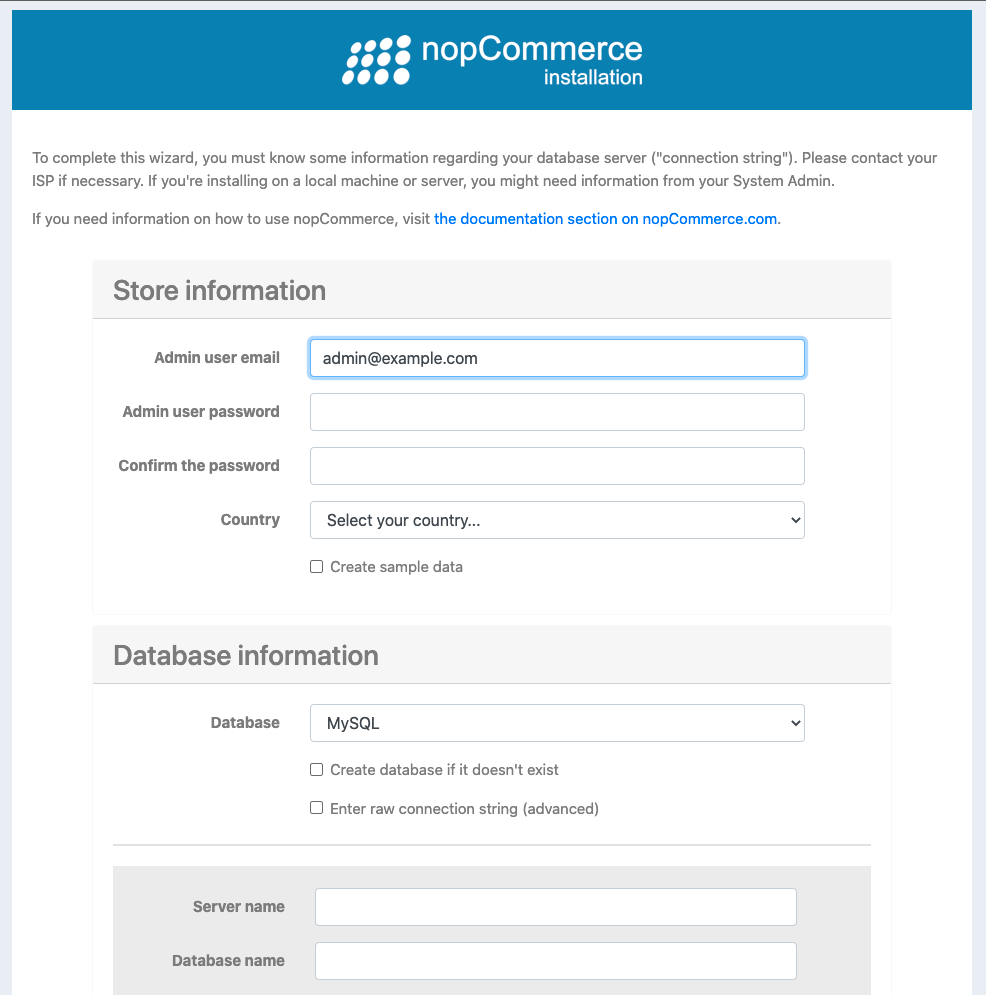
Click Install to proceed, nopCommerce will restart, and you may receive a 502 bad gateway error. Simply refresh your browser to log in and configure your online store.
Step 6: Secure the Server
By default, Uncomplicated Firewall (ufw) is enabled on Ubuntu 20.04, configure it to allow HTTP, HTTPS traffic on the server and block the rest.
Allow HTTP traffic.
$ sudo ufw allow 80/tcpAllow HTTPS traffic.
$ sudo ufw allow 443/tcpRestart the firewall
$ sudo ufw reloadRequest an SSL Certificate
Install Certbot.
$ sudo apt install certbot python3-certbot-nginxRequest for a free Let’s Encrypt SSL certificate. Replace example.com with your actual subdomain.
$ sudo certbot --nginx -d shop.example.com -d www.shop.example.comNow, set up a new Cron job to automatically renew the SSL certificate before every 30 days of expiry.
Open the crontab file.
$ sudo crontab -ePaste the following code:
0 12 * * * /usr/bin/certbot renew --quietSave and close the file.
Conclusion
Congratulations, you have installed nopCommerce on a Ubuntu 20.04 server. You can further configure to meet your customer and visitor standards using ready-made themes, plugins, and language packs.