
How to Install Nginx Webserver on Debian 12
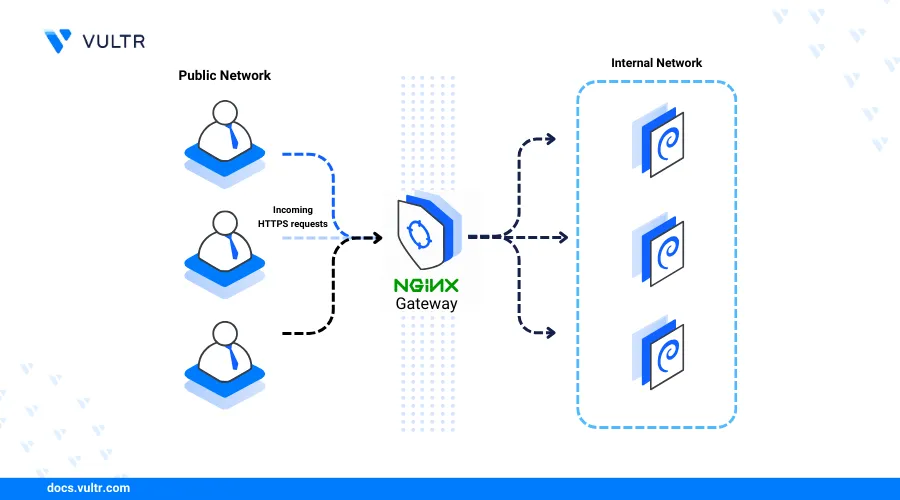
Nginx is an open-source, high-performance webserver that also works as a reverse proxy and a load balancer for backend applications. Nginx integrates with modern server-side scripting languages like Python, Golang, and PHP to run dynamic data-driven web applications.
This article explains how to install Nginx on Debian 12, set up virtual hosts, and secure the webserver with Let's Encrypt.
Prerequisites
Before you begin:
- Have access to a Debian 12 server as a non-root user with sudo privileges..
- Create a domain or subdomain with an A record pointing to your server's IP. For example,
app.example.com.
Install Nginx
Nginx is available in the default package repositories on Debian 12. Follow the steps below to update the server package index and install Nginx using the APT package manager.
Update the server's package information index.
console$ sudo apt update
Install Nginx.
console$ sudo apt install nginx -y
Allow HTTP port
80through the firewall.console$ sudo ufw allow 80/tcp
Allow HTTPS port
443through the firewall.console$ sudo ufw allow 443/tcp
Reload UFW to apply the firewall changes.
console$ sudo ufw reload
Visit your server's public IP address using a web browser such as Chrome to test access to the default Nginx welcome page.
http://SERVER-IP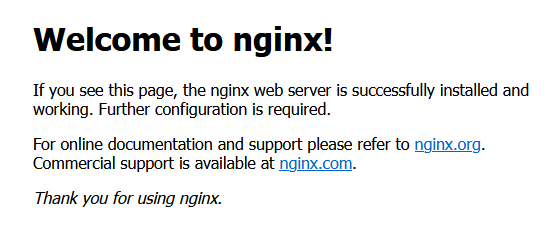
Manage the Nginx System Service
Nginx uses the nginx systemd service profile to manage the webserver application processes. To manage the service using systemctl, follow the steps below.
Enable the Nginx service to start at boot automatically.
console$ sudo systemctl enable nginx
Start the Nginx service.
console$ sudo systemctl start nginx
View the Nginx service status and verify that it's running.
console$ sudo systemctl status nginx
Output:
● nginx.service - A high performance webserver and a reverse proxy server
     Loaded: loaded (/lib/systemd/system/nginx.service; enabled; preset: enabled)
     Active: active (running) since Sat 2024-08-24 07:00:58 UTC; 1min 35s ago
...
Stop the Nginx service.
console$ sudo systemctl stop nginx
Restart the Nginx service.
console$ sudo systemctl restart nginx
Create a New Nginx Virtual Host
Nginx virtual host configurations enable the webserver to host multiple websites on a single server. A virtual host configuration consists of multiple directives that define the root directory, server name, error files, and index pages for a specific domain name. Follow the steps below to create a new Nginx virtual host.
Create a new Nginx virtual host configuration file. For example,
app.example.com.conf.console$ sudo touch /etc/nginx/conf.d/app.example.com.conf
Open the file using a text editor like
nano.console$ sudo nano /etc/nginx/conf.d/app.example.com.conf
Add the following contents to the file. Replace
app.example.comwith your actual domain.nginxserver { listen 80; listen [::]:80; server_name app.example.com; root /var/www/html/app.example.com; index index.html; location / { try_files $uri $uri/ =404; } }
Save and close the file.
The above Nginx configuration creates a new virtual host that listens for incoming connections for the
app.example.comdomain and delivers web application files from the/var/www/html/app.example.comdirectory.Create the virtual host's web root directory.
console$ sudo mkdir -p /var/www/html/app.example.com
Create a new
index.htmlweb application file in the directory.console$ sudo nano /var/www/html/app.example.com/index.html
Add the following contents to the file.
html<html> <head></head> <body> <h1>Greetings from Vultr</h1> </body> </html>
Save and close the file.
When you access the above HTML web application in a web browser, you will see a
Greetings from Vultrmessage.Grant the
www-datawebserver user and group ownership privileges to the/var/www/html/app.example.comdirectory.console$ sudo chown -R www-data:www-data /var/www/html/app.example.com
Test the Nginx configuration for errors.
console$ sudo nginx -t
Output:
nginx: the configuration file /etc/nginx/nginx.conf syntax is ok
nginx: configuration file /etc/nginx/nginx.conf test is successful
Restart the Nginx service to apply the changes.
console$ sudo systemctl restart nginx
Access your domain on a web browser and verify that your web application displays.
http://app.example.com
Secure the Nginx Webserver
Nginx listens for incoming HTTP connections on port 80. To secure the Nginx virtual host through the HTTP port 443, you must install a trusted SSL certificate. Follow the steps below to install a Let's Encrypt SSL certificate.
Install the Certbot Let's Encrypt client tool and the Nginx plugin.
console$ sudo apt install python3-certbot-nginx certbot -y
Generate a new SSL certificate for the virtual host. Replace
app.example.comwith your actual virtual host domain andhello@example.comwith your active email address.console$ sudo certbot --nginx -d app.example.com -m hello@example.com --agree-tos
Ensure Certbot can renew the SSL certificate.
console$ sudo certbot renew --dry-run
Restart Nginx to apply the configuration changes.
console$ sudo systemctl restart nginx
Visit your virtual host domain using HTTPS and verify that your web application displays.
https://app.example.com
Conclusion
You have installed Nginx on Debian 12, set up a new virtual host, and installed a Let's Encrypt Certificate. Nginx works as a webserver, a load balancer, or a reverse proxy. For more information, visit the Nginx documentation.