How to Install Nginx Webserver on Rocky Linux 9
Introduction
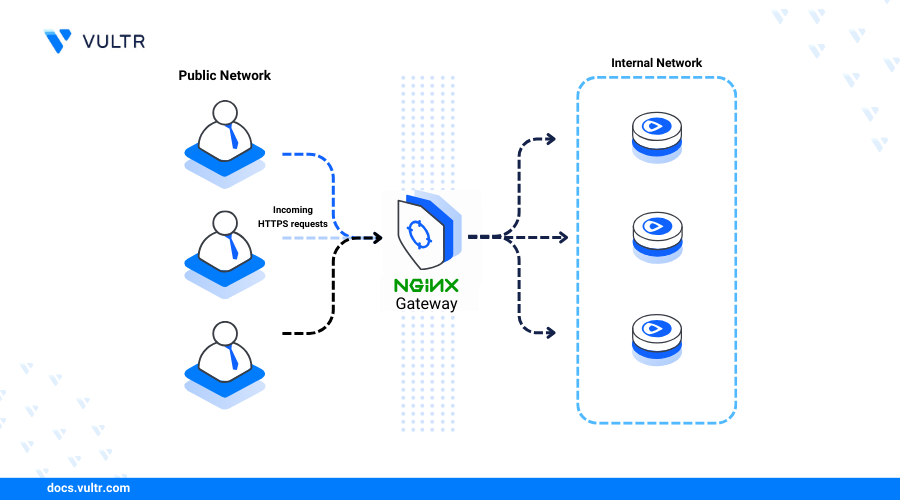
Nginx is an open-source, high-performance web server application widely used for hosting websites, reverse proxying, and load balancing to efficiently manage high traffic. It supports modern protocols like HTTP/2 and HTTPS, enabling the secure serving of static and dynamic web content, caching, and traffic encryption with SSL/TLS. To leverage its flexibility, scalability, and reliability, you can easily install Nginx webserver on Rocky Linux 9, making it a preferred choice for a wide range of web applications, from small websites to large-scale enterprise solutions.
This article explains how to install the Nginx webserver on Rocky Linux 9 and set up virtual hosts to run web applications on the server.
Install Nginx on Rocky Linux 9
Nginx is available in the default package repositories on Rocky Linux 9. Follow the steps below to update the server's package index and install Nginx using the dnf package manager.
Update the server's package information index.
CONSOLEInstall Nginx.
CONSOLEView the installed Nginx version.
CONSOLEOutput:
Allow network connections to the HTTP port
80through the default firewall.CONSOLEReload
firewall-cmdto apply the firewall changes.CONSOLE
Manage the Nginx System Service
The nginx systemd service profile controls the webserver's runtime and processes on a server. Follow the steps below to enable the Nginx system service to start at boot and manage it on your server.
Enable the Nginx service to automatically start at boot.
CONSOLEOutput:
Start the Nginx service.
CONSOLEView the Nginx service status and verify that it's running.
CONSOLEOutput:
The Nginx service is active and running based on the above
Active: active (running)output.Stop the Nginx service.
CONSOLERestart the Nginx service.
CONSOLEAccess your server's IP using a web browser such as Chrome to verify that the default Nginx page displays.
Create a New Nginx Virtual Host Configuration
Nginx virtual host configurations enable the webserver to map web application directories to specific network addresses or domains on a server. A virtual host configuration consists of multiple directives that include the server name, webroot directory, log paths, and index pages used to serve web applications. Follow the steps below to create a new Nginx virtual host to serve a basic HTML web application using the app.example.com domain.
Create a new virtual host webroot directory such as
app.example.com.CONSOLECreate a new
index.htmlweb application file in the directory.CONSOLEAdd the following HTML application contents to the file.
HTMLSave and close the file.
The above HTML web application displays a "Greetings from Vultr" message when accessed using the
app.example.comvirtual host domain.Grant the
nginxwebserver user and group ownership privileges to the webroot directory.CONSOLECreate a new
app.example.com.confNginx virtual host configuration in the/etc/nginx/conf.ddirectory.CONSOLEAdd the following configurations to the file. Replace
app.example.comwith your actual domain.NGINXSave and close the file.
The above Nginx configuration creates a new virtual host that listens for incoming connections using the
app.example.comdomain and delivers web application files from the/var/www/html/app.example.comwebroot directory.Test the Nginx configuration for errors.
CONSOLEOutput:
Reload the Nginx service to apply the configuration changes.
CONSOLEView the SELinux status on your server and verify that it's set to
Enforcing.CONSOLEOutput:
Set the
httpd_sys_content_tcontext on the webroot directory to allow Nginx to read the directory files.CONSOLEApply the SELinux context.
CONSOLEAccess your domain in a new web browser window and verify that the HTML web application displays.
Set Up Firewall Rules
Firewalld is available and active on Vultr Rocky Linux instances by default. Follow the steps below to configure the firewall to allow incoming HTTP and HTTPS network connections to the server.
Allow HTTP service through the firewall.
CONSOLEAllow HTTPS service through the firewall.
CONSOLEReload the firewall to apply the changes.
CONSOLEList all active firewall rules and verify that HTTP and HTTPS connections are allowed.
CONSOLEOutput:
Secure the Nginx Web Server
SSL certificates encrypt network connections between a user's web browser and the Nginx web server using HTTPS. Nginx listens for incoming connections using HTTP which is insecure by default. To secure network connections to the server using HTTPS, generate SSL certificates using a trusted certificate authority such as Let's Encrypt. Follow the steps to install the Certbot Let's Encrypt client and generate trusted SSL certificates to secure the Nginx web server.
Install the Certbot Let's Encrypt client tool and the Nginx plugin.
CONSOLEGenerate new SSL certificates using the Nginx plugin. Replace
app.example.comwith your actual domain andhello@example.comwith your active email address.CONSOLEVerify that Certbot autorenews the SSL certificate before expiry.
CONSOLERestart Nginx to apply the configuration changes.
CONSOLEAccess your
app.example.comvirtual host domain using HTTPS and verify that your web application loads correctly.
Conclusion
You have installed the Nginx web server on Rocky Linux 9 and created virtual host configurations to deliver web applications on the server. You can integrate Nginx with other application frameworks such as PHP to deliver dynamic web applications. In addition, you can use Nginx as a webserver, load balancer, or reverse proxy to securely serve backend applications. For more information and configuration options, visit the Nginx documentation.


0 Comments
Be the first to comment and share your perspective with the community.