
How to Serve Static Content on Vultr CDN using Push Zones
Introduction
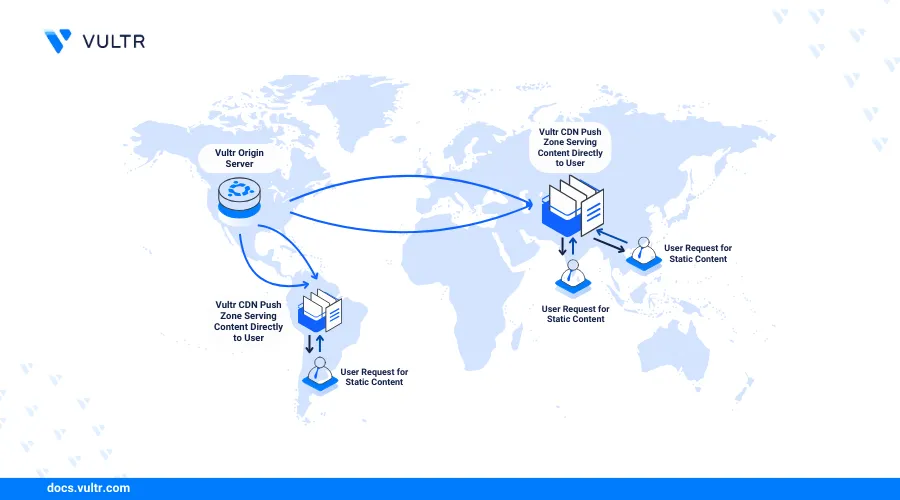
Vultr Push Zones offers a solution for efficiently delivering static assets to users across the globe. By leveraging Vultr Content Delivery Network (CDN), Push Zones ensure that your files are distributed and cached on servers strategically placed around the world, reducing latency and improving load times. This makes them an ideal choice for websites and applications that need to serve images, videos, scripts, and other static files to a large audience with minimal delay.
In this article, you'll be setting up a Vultr Push Zone. You'll cover everything from creating a Push Zone and uploading your assets to configuring a webpage to serve these static assets. Additionally, you'll be setting up Nginx for optimal performance, applying SSL for secure access, and accessing your content via a URL.
Prerequisites
Before you begin:
Deploy an Ubuntu 24.04 server instance on Vultr.
Set up your domain A record pointing to the server IP address.
Access the server using SSH as a non-root user with sudo privileges.
Create a Vultr Push Zone
Open the Vultr Console.
Click CDN within the Products navigation menu.
Click Push Zone to set up CDN Push Zones.
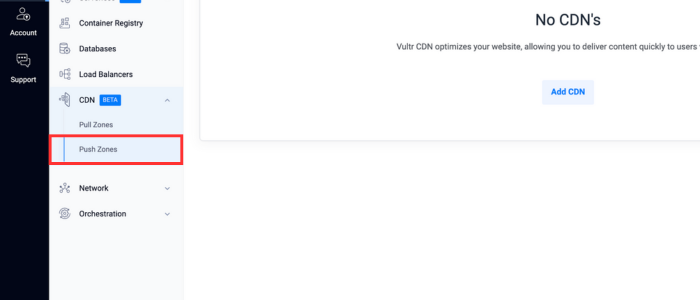
Click Add CDN to add the Push Zones
Enter a descriptive name in the Label field to identify your Vultr CDN resource. For example
my_cdn.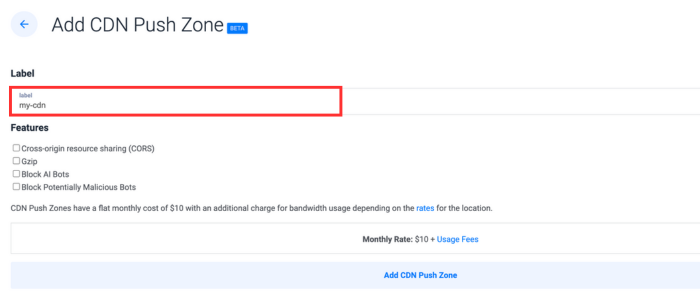
Select optional CDN features to enable on your Vultr CDN URL.
Click Add CDN Push Zone to create your Vultr CDN Push Zone endpoint.
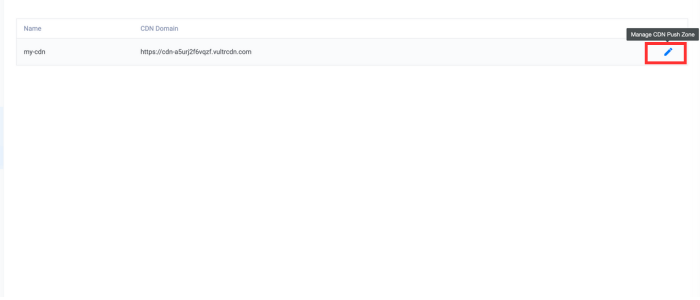
Manage your CDN Push Zone.
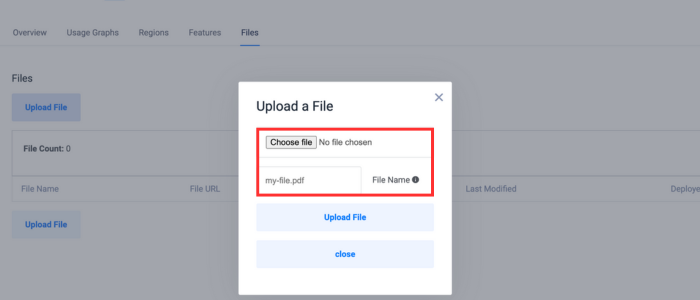
Click on Files to upload your static asset.
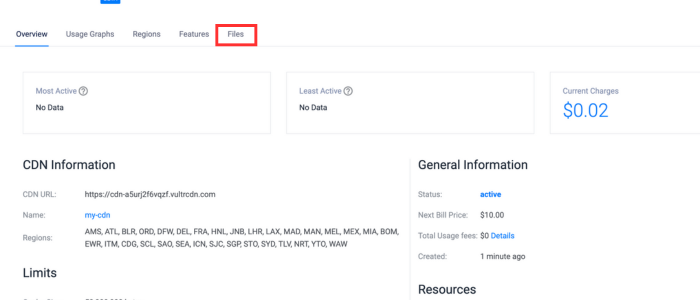
Upload a static asset.
Create a Webpage to Serve Static Assets
In this section, you are to create webpage that is going to serve the static asset you uploaded to the CDN Push Zones. Then you are configure Nginx as a reverse proxy server and at last install an SSL certificate for your domain using Certbot.
Create a directory for your webpage.
console$ sudo mkdir -p /var/www/example.com
Create a new HTML file in the directory.
console$ nano /var/www/example.com/index.html
Copy and paste the below code.
html<!DOCTYPE html> <html lang="en"> <head> <meta charset="UTF-8"> <meta name="viewport" content="width=device-width, initial-scale=1.0"> <title>Greetings from Vultr</title> <style> body { font-family: Arial, sans-serif; background-color: #f5f5f5; margin: 0; padding: 0; display: flex; justify-content: center; align-items: center; height: 100vh; } .container { text-align: center; } h1 { color: #333; font-size: 2rem; margin-bottom: 20px; } img { max-width: 100%; height: auto; border-radius: 10px; box-shadow: 0 0 10px rgba(0, 0, 0, 0.1); } </style> </head> <body> <div class="container"> <h1>Greetings from Vultr</h1> <img src="https://your_domain/image.png" alt="Vultr Image"> </div> </body> </html>
Save and close the file.
Configure Nginx as a Reverse Proxy Server
Install Nginx on your Vultr Ubuntu server.
console$ sudo apt install nginx
Open your Nginx virtual host configuration using a text editor such as Nano.
console$ sudo nano /etc/nginx/sites-available/cdn.conf
Add the following
sub_filterconfigurations in thelocationblock.initry_files $uri $uri/ =404; sub_filter_once off; sub_filter '<domain_url>' '<cdn_url>';
Make sure to the swap
<cdn_url>with the actual CDN URL in your Vultr dashboard.Save and close the file.
The above configuration substitutes all matching request patterns with your Vultr CDN URL. Within the configuration:
sub_filter '' '';: Modifies the original request URL '' to the destination URL ''. For example, all requests that match the URL pattern<domain_url>are modified to your Vultr CDN URL. File requests within the same URL scheme such as example.com/images/image.png match the request pattern to your Vultr CDN URL.sub_filter_once off;: Enables multiple content modification rules to consistently modify requests with your Vultr CDN URL.
Your modified Nginx configuration should look like the one below:
iniserver { listen 80; server_name <your_domain>; root /var/www/example.com; index index.html; location / { try_files $uri $uri/ =404; proxy_set_header Host $host; proxy_set_header X-Real-IP $remote_addr; proxy_set_header Accept-Encoding ""; proxy_pass http://backend_server_address; sub_filter '<domain_url>' '<cdn_url>'; sub_filter_once off; } }
Test the Nginx configuration for errors.
console$ sudo nginx -t
nginx: the configuration file /etc/nginx/nginx.conf syntax is ok
nginx: configuration file /etc/nginx/nginx.conf test is successful
Restart Nginx to apply your configuration changes.
console$ sudo systemctl restart nginx
Install an SSL Certificate using Certbot
Allow incoming connections on the HTTP port
80.console$ sudo ufw allow 443/tcp
Allow incoming connections on the HTTPS port
443.console$ sudo ufw allow 443/tcp
Install the
certbotpackage using thesnappackage manager.console$ sudo snap install --classic certbot
Request a new SSL certificate for your domain. Make sure to replace
your_domainwith your actual domain name.console$ sudo certbot --nginx -d <your_domain> --agree-tos
Open the Nginx configuration.
console$ sudo nano /etc/nginx/sites-available/cdn.conf
Verify the new Certbot directives in your configuration similar to the one below.
iniserver { server_name <your_domain>; root /var/www/example.com; index index.html; location / { try_files $uri $uri/ =404; sub_filter_once off; sub_filter '<domain_url>' '<cdn_url>'; } listen 443 ssl; # managed by Certbot ssl_certificate /etc/letsencrypt/live/<your_domain>/fullchain.pem; # managed by Certbot ssl_certificate_key /etc/letsencrypt/live/<your_domain>/privkey.pem; # managed by Certbot include /etc/letsencrypt/options-ssl-nginx.conf; # managed by Certbot ssl_dhparam /etc/letsencrypt/ssl-dhparams.pem; # managed by Certbot } server { listen 80; server_name <your_domain>; return 301 https://$server_name$request_uri; }
Save and close the file.
Restart Nginx to apply your configuration changes.
console$ sudo systemctl restart nginx
Access the webpage using your domain
https://your_domain. To confirm that the image is being served from the CDN Push Zone, right-click on the page and select inspect element. Verify that the index page includes the CDN URL to serve your static image from the nearest CDN Push Zone.
Use Cases and Benefits of a Vultr Push Zone
Enhanced Website Performance
Faster Load Times: By caching assets at multiple edge locations, a Vultr Push Zone ensures that users receive content from the nearest server, significantly reducing load times.
Reduced Server Load: Offloading static content delivery to the Vultr CDN Push Zone decreases the burden on your origin server, allowing it to handle dynamic requests more efficiently.
Improved User Experience
Consistency: Regardless of where your users are located, they can experience consistent performance due to the global content distribution.
Scalability: As your website traffic grows, a Vultr CDN Push Zone can handle increased load without requiring significant changes to your infrastructure.
Cost Efficiency
Bandwidth Savings: By utilizing Vultr CDN Push Zone, you can reduce bandwidth costs associated with serving static content from your origin server.
Optimized Resources: Efficient distribution and caching mean you can achieve high performance without investing in additional hardware.
Conclusion
You have explored the step-by-step process of creating a Push Zone, uploading assets, and configuring your web server to serve assets securely and efficiently. Implementing a Vultr Push Zone not only enhances user experience by reducing load times but also offloads traffic from your origin server, leading to better overall performance and scalability. Learn More