
How To Use Docker Compose
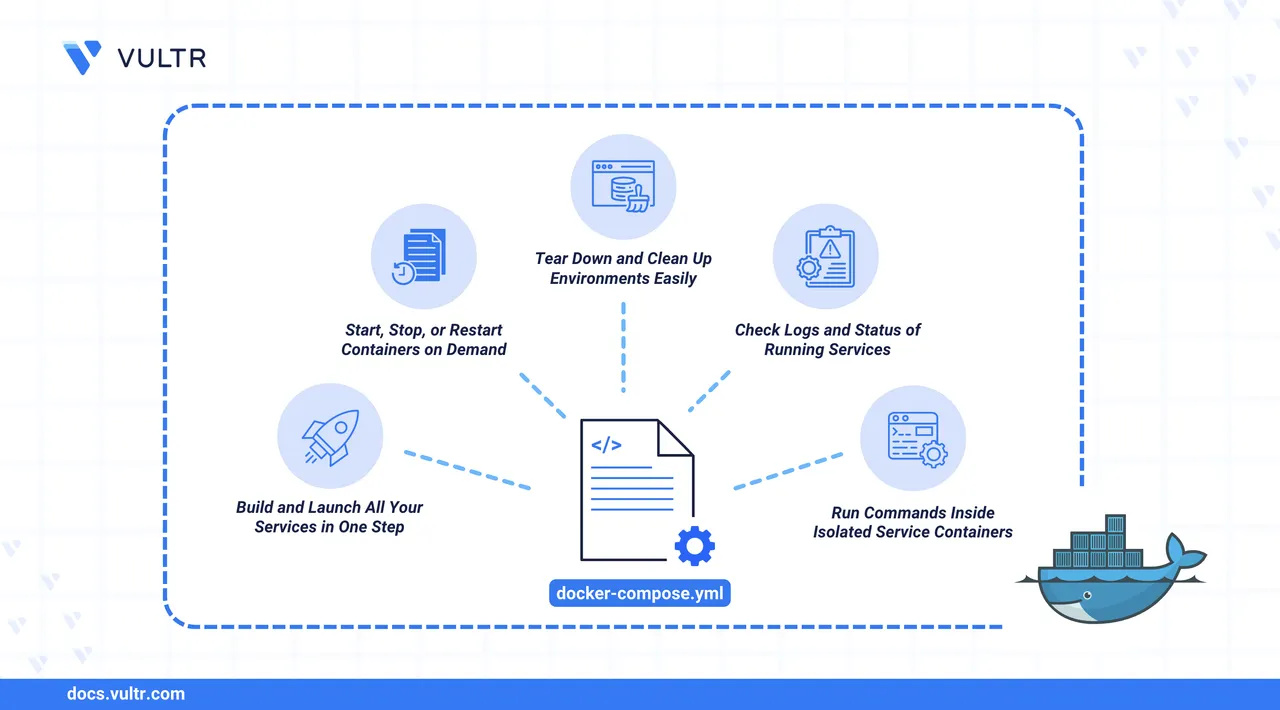
Docker Compose is a multi-container orchestration tool for a single host. It uses the Docker engine to manage and orchestrate the Docker containers. It simplifies setting up interconnected containers for local development. In CI/CD, it automates test environments by providing temporary isolation for testing.
This article explains how to use Docker Compose to create and manage containers. It covers the basics of the docker compose command, how to create a Docker Compose file, and how Docker Compose profiles run containers for different environments.
The Short Answer
Below are some basic Docker Compose commands that operate on a compose.yaml or docker-compose.yaml file.
# Create/build and start all services in the background.
$ docker compose up -d

# Stop and remove all service containers, networks, and volumes.
$ docker compose down

# Stop all services.
$ docker compose stop

# Start and run stopped services.
$ docker compose start

# View the status of running services.
$ docker compose ps

# Check the logs of all services.
$ docker compose logs
Create a Docker Compose File
This section covers creating a sample Docker Compose file compose.yaml for a sample Flask based application.
Download the sample application.
console$ git clone https://github.com/ndlrfz/flask-redis-postgresql
Navigate to the
flask-redis-postgresqlproject directory.console$ cd flask-redis-postgresql
The directory contains a file
compose.yamlwith the following contents.console$ cat compose.yml
You'll see the following Docker Compose manifest:
yamlname: myproject services: redis: image: "redis:alpine" restart: always ports: - 6379:6379 volumes: - redis:/data postgresql: image: "postgres:16-alpine" ports: - "5432:5432" volumes: - pgdata:/var/lib/postgresql/data environment: POSTGRES_USER: ${DATABASE_USER} POSTGRES_PASSWORD: ${DATABASE_PASSWORD} POSTGRES_DB: ${DATABASE_NAME} flask: build: . restart: always env_file: - ".env" depends_on: - redis - postgresql ports: - "8000:5000" volumes: - ./:/code volumes: redis: driver: "local" pgdata: driver: "local"
In this file,
name: Sets the project name tomyproject.services: Defines the individual containers that make up your application.- Define the
redisservice with these details:image: Creates the service from theredis:alpineimage.restart: always: Sets a policy to always restart this container if it stops.ports: Maps port6379on the host to port6379in the container.volumes: Mounts the named volumeredisto the/datadirectory inside the container for persistent data.
- Define the
postgresqlservice with the following:image: Creates the service from thepostgres:16-alpineimage.ports: Maps port5432on the host to port5432in the container.volumes: Mounts the named volumepgdatato the/var/lib/postgresql/datadirectory for persistent data.environment: Sets environment variables inside the container. The values for${DATABASE_USER},${DATABASE_PASSWORD}, and${DATABASE_NAME}are substituted from your shell's environment (often loaded from an.envfile).
- Define the application service
flaskwith the following:build: .: Builds a Docker image in the current directory from theDockerfile.restart: always: Sets a policy to always restart this container if it stops.env_file: Loads environment variables for the service directly from a.envfile.depends_on: Controls the startup order. Theflaskservice will start only after theredisandpostgresqlservices have been started.ports: Maps port8000on the host to port5000inside the container.volumes: Mounts the current project directory on the host to the/codedirectory inside the container.
volumes: Defines two named volumes,redisandpgdata, using thelocaldriver. These are managed by Docker and stored on the host machine.
Create a file
.env.console$ nano .env
Add the following environment variables for PostgreSQL credentials. You can replace the following details with your credentials.
iniDATABASE_USER=app_user DATABASE_PASSWORD=app_password DATABASE_NAME=appdb DATABASE_HOST=postgresql DATABASE_PORT=5432
Save and exit the file.
Build and start your services.
console$ docker compose up -d
The option
-dallows you to run containers in the background.Run the command below to check the running containers or services.
console$ docker compose ps
Output:
NAME                     IMAGE                COMMAND                  SERVICE      CREATED              STATUS              PORTS
myproject_flask-1        myproject_flask      "flask run --debug"      flask        About a minute ago   Up About a minute   0.0.0.0:8000->5000/tcp, [::]:8000->5000/tcp
myproject_postgresql-1   postgres:16-alpine   "docker-entrypoint.s…"   postgresql   About a minute ago   Up About a minute   0.0.0.0:5432->5432/tcp, [::]:5432->5432/tcp
myproject_redis-1        redis:alpine         "docker-entrypoint.s…"   redis        About a minute ago   Up 32 seconds       0.0.0.0:6379->6379/tcp, [::]:6379->6379/tcp
Output explanation:
flaskservice is running on port8000on the host machine, which is based on the Docker imagemyproject_flask.postgresqlservice running on port5432based on the Docker imagepostgres:16-alpine.redisservice is running on port6379based on the Docker imageredis:alpine.
Check the list of images that are used by your services.
console$ docker compose images
Output:
CONTAINER                REPOSITORY          TAG                 IMAGE ID            SIZE
myproject_flask-1        myproject_flask     latest              1c3d151b6276        254MB
myproject_postgresql-1   postgres            16-alpine           b56133b65cd3        275MB
myproject_redis-1        redis               alpine              d470ca4bc10c        60.5MB
Open a web browser and visit
http://<SERVER-IP>:8000/to verify that your application is running.
Manage Docker Compose Stack
The following table describes the common docker compose commands for managing your application stack.
| Command | Description | Example |
|---|---|---|
build |
Build or rebuild containers | docker compose build |
up |
Create and start containers | docker compose up -d |
down |
Stop and remove containers | docker compose down |
start |
Start existing containers | docker compose start app |
stop |
Stop containers | docker compose stop app |
kill |
Force stop containers | docker compose kill app |
ps |
Check running containers | docker compose ps |
logs |
Check logs for containers | docker compose logs app |
exec |
Execute command in the container | docker compose exec app bash |
images |
Listing images used by containers | docker compose images |
rm |
Remove stopped containers | docker compose rm |
pull |
Download the latest images for services | docker compose pull |
Use Docker Compose Profiles
Profiles enable selective service execution based on the environment or use cases, such as development and production.
Edit the
compose.ymlfile.console$ nano compose.yml
Add the following configuration under the
flaskservice.yamladminer: image: adminer restart: always depends_on: [postgresql] profiles: [dev] ports: - 8080:8080 redis-insight: image: redis/redisinsight:latest restart: always profiles: [dev] depends_on: [redis] ports: - "8001:8001"
Save and close the file.
In this configuration:
adminer: Defines a service namedadminerthat uses theadminerDocker image.restart: always: Sets a policy to always restart the container if it stops.depends_on: Ensures theadminerservice starts only after thepostgresqlservice starts.profiles: Assigns thedevprofile to the service.ports: Maps port8080on the host to port8080in the container.
redis-insight: Defines a service namedredis-insightthat uses theredis/redisinsight:latestDocker image.restart: always: Sets a policy to always restart the container if it stops.depends_on: Ensures theredis-insightservice starts only after theredisservice starts.profiles: Assigns thedevprofile to the service.ports: Maps port8001on the host to port8001in the container.
Start the
adminerservice.console$ docker compose --profile dev up -d
Use the
--profile devoption to activate and start services assigned to thedevprofile. This tells Docker Compose to include theadminerservice, which it ignores by default.Check the running container with the following command.
console$ docker compose ps
You'll see the
adminerservice is running.NAME IMAGE COMMAND SERVICE CREATED STATUS PORTS myproject-adminer-1 adminer "entrypoint.sh docke…" adminer 2 seconds ago Up 1 second 0.0.0.0:8080->8080/tcp, [::]:8080->8080/tcp myproject-flask-1 myproject-flask "flask run --debug" flask 2 seconds ago Up 1 second 0.0.0.0:8000->5000/tcp, [::]:8000->5000/tcp myproject-postgresql-1 postgres:16-alpine "docker-entrypoint.s…" postgresql 3 seconds ago Up 2 seconds 0.0.0.0:5432->5432/tcp, [::]:5432->5432/tcp myproject-redis-1 redis:alpine "docker-entrypoint.s…" redis 3 seconds ago Up 2 seconds 0.0.0.0:6379->6379/tcp, [::]:6379->6379/tcp myproject-redis-insight-1 redis/redisinsight:latest "./docker-entry.sh n…" redis-insight 3 seconds ago Up 1 second 5540/tcp, 0.0.0.0:8001->8001/tcp, [::]:8001->8001/tcpTo stop a service, for example
adminer, use the command below.console$ docker compose stop adminer
Remove the stopped
adminerservice.console$ docker compose rm adminer
Destroy all services (including the
devprofile).console$ docker compose --profile dev down
Update Service Images to the Latest Version
Docker Compose makes it easy to update services to newer container images. The exact update process depends on whether your services use the latest tag or a hard-coded version tag in the docker-compose.yml file.
If your service uses the
latesttag in its image, such asimage: traefik:latest:Pull the newest version.
console$ docker compose pull
Docker downloads the updated image. Only services with updated images are re-pulled.
Recreate your services.
console$ docker compose up -d
If your service uses a version-specific tag in its image, such as
image: gitea/gitea:1.25.1:Edit the Docker Compose file to specify the new version.
Pull the newly specified image.
console$ docker compose pull
Recreate and restart the updated containers.
console$ docker compose up -d
docker compose up -d stops the old containers, starts new ones with the updated image version, and preserves all data stored in volumes.
Conclusion
In this article, you've explored how to use Docker Compose to manage container stacks. You have learned how to start, stop, restart, and destroy containers using the docker compose command, how to create the compose.yaml file for your application stack, and the basic usage of Docker Compose Profiles for selectively running containers depending on your environment. For more information, check the Docker Compose documentation.