

Introduction
OpenTelemetry is an efficient observability framework that enables developers to gain insights into the behavior and performance of distributed systems. By integrating OpenTelemetry into your applications, you can collect and analyze telemetry data, including metrics, logs, and traces, to understand the interactions and dependencies between different components. It aims at providing a standardized and vendor-agnostic way of instrumenting code across various components in distributed systems.
In this article, you will explore how to use OpenTelemetry with Streamlit, a popular framework for building interactive and data-driven web applications. You will learn how to instrument a Streamlit application with OpenTelemetry to enable distributed tracing, which allows you to trace requests across various services and understand their performance characteristics.
Concept of OpenTelemetry
At its core, OpenTelemetry focuses on distributed tracing, which involves tracking the flow of requests and operations across different services and components. It helps developers gain insights into the performance, behavior, and dependencies of their applications.
OpenTelemetry offers a range of instrumentation libraries, SDKs, and exporters that simplify the process of integrating tracing into applications. By instrumenting code with OpenTelemetry, developers can generate traces and capture valuable data points at key points in their application's execution.
Key Components of OpenTelemetry
OpenTelemetry consists of several key components that work together to provide observability:
Tracers: Are responsible for generating and managing spans, which represent individual units of work or operations within an application. Tracers instrument code to create spans that capture important details, such as timing, context, and metadata.
Spans: These are units of work or operations that are tracked within a distributed system. They capture information about the duration, context, and relationships between different spans, allowing developers to understand the flow and performance characteristics of requests.
Exporters: Send telemetry data, such as spans, to external systems or backends for storage, visualization, and analysis. They provide integrations with popular monitoring platforms like Jaeger, Prometheus, and Zipkin, enabling developers to gain insights into the behavior and performance of their applications.
Benefits of Using OpenTelemetry for Distributed Tracing
Using OpenTelemetry for distributed tracing offers several benefits such as:
Visibility: OpenTelemetry provides visibility into the behavior of distributed systems by capturing traces and capturing timing information at each step of the request flow. This visibility helps identify performance bottlenecks, latency issues, and dependencies between services.
Troubleshooting: With distributed tracing, developers can troubleshoot issues by examining the captured traces. By analyzing spans and their timings, they can pinpoint problematic areas and trace the root cause of performance or functional problems.
Optimization: OpenTelemetry allows developers to optimize the performance of their applications by identifying areas of high latency or inefficient operations. By analyzing spans and understanding the request flow, developers can make targeted optimizations to improve response times and overall system performance.
Standardization: OpenTelemetry offers a standardized approach to instrumentation and telemetry collection. With its vendor-agnostic design, it allows consistent monitoring and observability across different technologies, frameworks, and programming languages.
By using OpenTelemetry and leveraging its distributed tracing capabilities, developers can gain valuable insights into the behavior and performance of their applications. This leads to more efficient troubleshooting, optimization, and overall improvement of their systems.
Streamlit Overview
Streamlit is a Python library that simplifies the process of building interactive web applications for data science and machine learning tasks. It provides a straightforward API for creating user interfaces and rendering data visualizations, making it an ideal choice for quickly prototyping and sharing data-driven applications.
Prerequisites
Before you begin, make sure you
- Deploy an A100 Cloud GPU server with the Docker marketplace application.
- Use SSH to access the server as a non-root sudo user.
- Install Python 3.10, and PIP version 22.0 or later.
- Have basic python programming skills.
Set up the Streamlit Application
Create a new project directory.
$ mkdir myprojectChange to the directory.
$ cd myprojectInstall Tensorflow and other dependecies.
$ python3 -m pip install pandas numpy scikit-learn tensorflowInstall the python virtual environment package.
$ sudo apt install python3.10-venvWithin the project directoty, create a new virtual environment.
$ python3 -m venv .venvActivate the environment.
$ source .venv/bin/activateWhen activated, your terminal prompt changes and starts with
(.venv)as below.(.venv) user@vultr-server:~$Install Streamlit in the environment:
$ python3 -m pip install streamlitAllow the default Streamlit port
8501through the firewall.$ sudo ufw allow 8501Start Streamlit in the background.
$ streamlit hello &Output:
 Welcome to Streamlit. Check out our demo in your browser.

 Network URL: http://192.0.2.100:8501
 External URL: http://192.0.2.100:8501

 Ready to create your own Python apps super quickly?
 Head over to https://docs.streamlit.io

 May you create awesome apps!
In a web browser such as Safari, visit your server IP and load the Streamlit port
8501to access the application.http://192.0.2.100:8501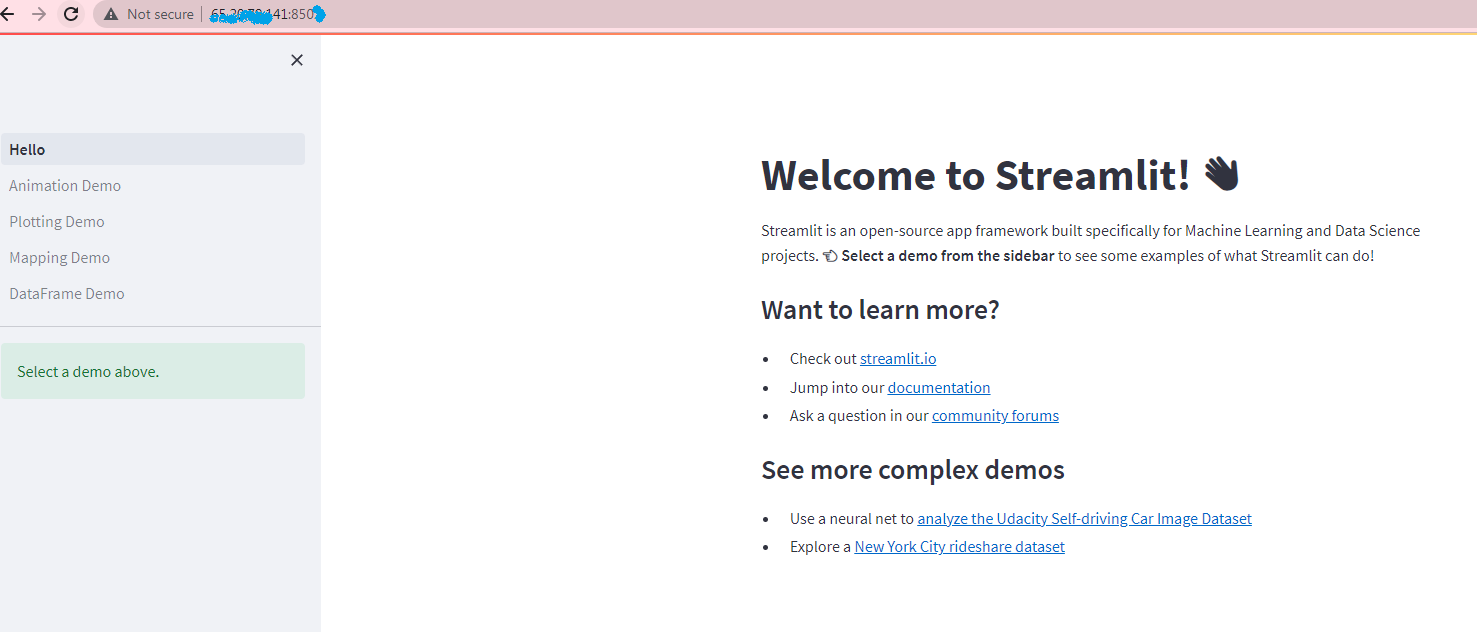
Stop the Streamlit applicaition. Verify its job id using
jobs, then stop it using thekillcommand.$ kill %1Import a production-ready Streamlit application to your project directory to implement image recognition.
$ git clone https://github.com/rahuldev-17/streamlit.gitTo train your own model from raw image data and deliver it using Streamlit. You can learn how to deploy a deep learning model with streamlit.
After cloning the repository, change to the
streamlitdirectory.$ cd streamlitList files in the directory.
$ lsOutput:
'desert(10).jpg' dog.jpg Forest_1419.jpg main.py ModelS.h5 README.md SeaLake_1032.jpgIn the above output, you should have two files
ModelS.h5,main.pyand other files. The fileModelS.h5is a Tensorflow model that containes the architecture of the Tensorflow neural network and final weights for the parameters of the model from the already conducted training. Code in themain.pyfile loads the model and predicts the label of the test image uploaded via web interface generated from the Streamlit framework.Start Streamlit in the background.
$ streamlit run main.py &Instead of the
helloapplicaiton, Streamlit uses code from themain.pyfile to start.Your output should look like the one below.
 You can now view your Streamlit app in your browser.

 Network URL: http://192.0.2.100:8501
 External URL: http://192.0.2.100:8501
In your web browser, access the Streamlit web interface.
http://192.0.2.100:8501Verify that the Streamlit application changes with a new interfae.
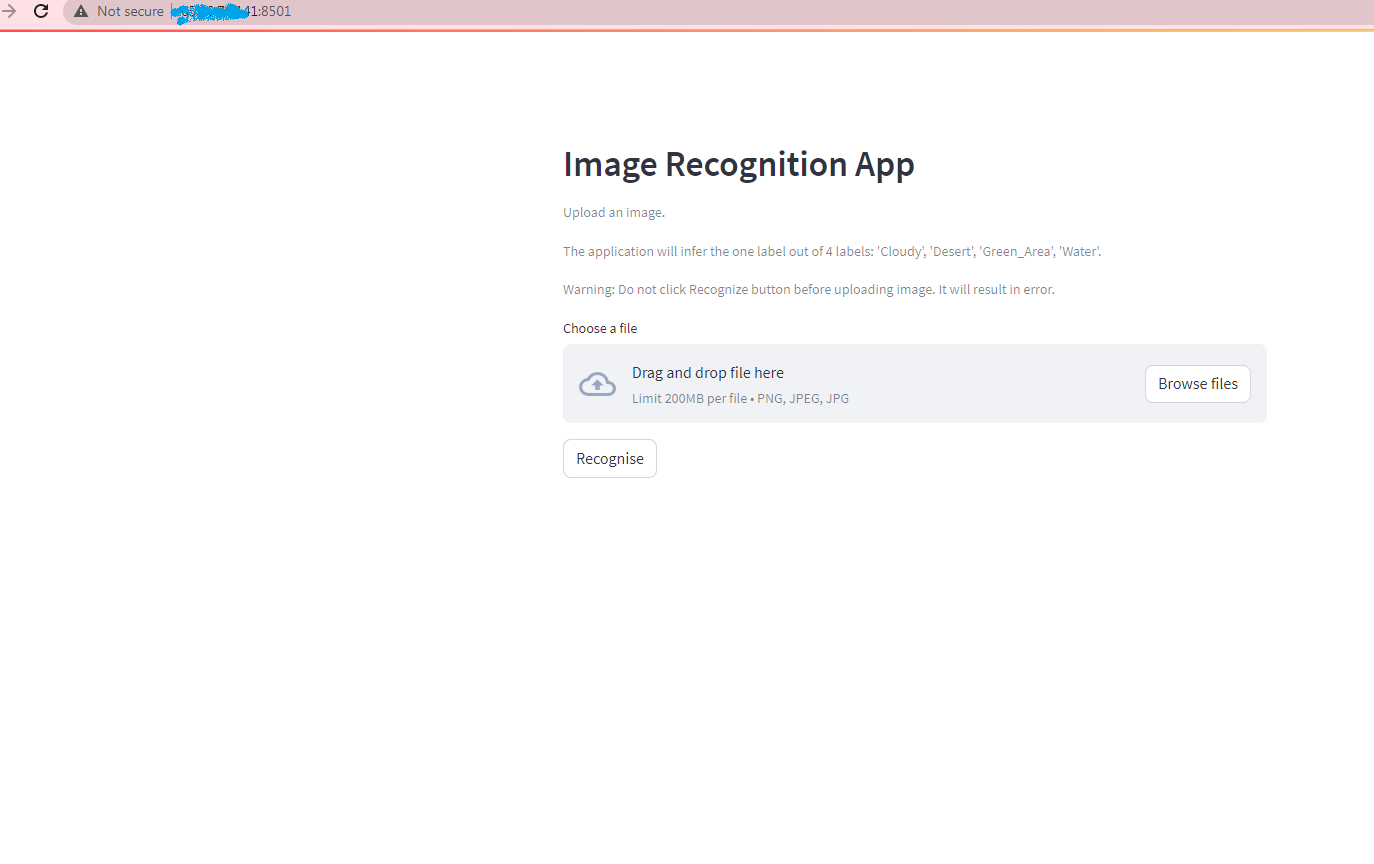
To test the application, click the Browse files in the web application. Locate and upload a test image file from your computer.
When the upload is complete, click Recognize to receive the program prediction.
Stop the Streamlit application.
$ kill %1
After testing the program functionality, you can setup Jaeger to collect the telemetry data as described in the following section.
Install Jaeger using Docker
Pull the Jaeger Docker image to your server.
$ sudo docker pull jaegertracing/all-in-one:latestStart the Jaeger container using the command below.
$ sudo docker run -d --name=jaeger -p 16686:16686 -p 6831:6831/udp jaegertracing/all-in-one:latestThe above command creates and starts a new Docker container named
jaegerusing the Jaeger all-in-one image. It maps the container TCP port16686(for the Jaeger UI) and6831/udp(for the Jaeger agent) to the corresponding host ports on your server.Allow the Jaegar ports through the firewall.
$ ufw allow 16686/tcp && sudo ufw allow 6831/udpIn a web browser, visit your Server IP and access the Jaeger UI on port
16686.http://192.0.2.100:16686The Jaegar web interface should load correctly without any errors if well installed.
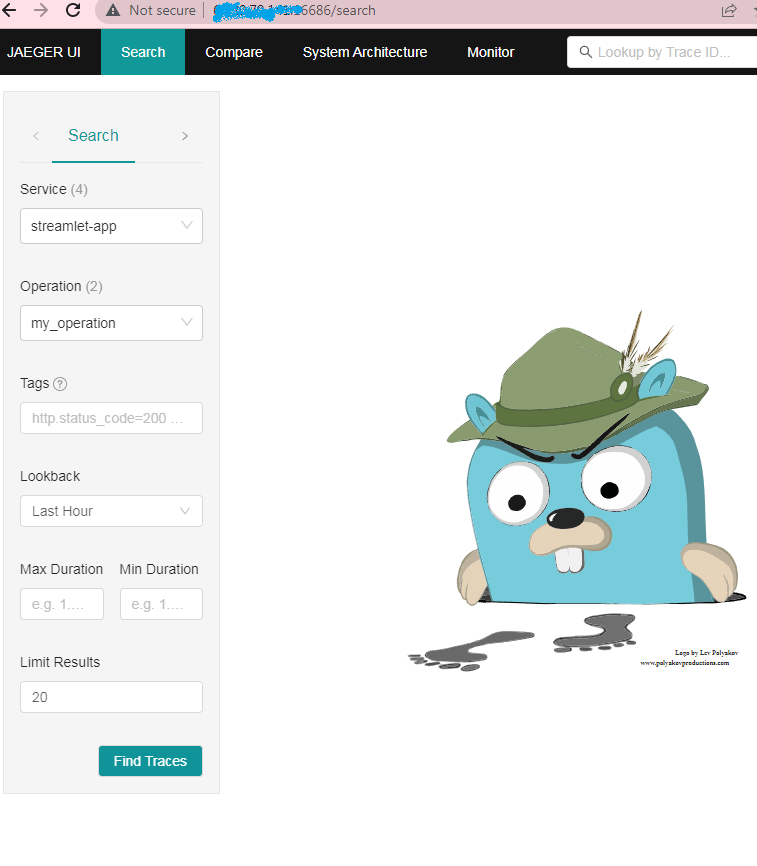
Jaegar is installed, up and running on the server. To send traces to Jaeger from the Streamlit application, follow the next section to instrument your application and collect traces for further analysis.
Instrument the Streamlit Application with OpenTelemetry
Install Tracing Dependencies
Using pip, install the OpenTelemetry API and exporter for Jaeger.
$ python3 -m pip install opentelemetry-api opentelemetry-sdk opentelemetry-exporter-jaegerInitialize OpenTelemetry
To star tracing your Streamlit application, initialize the OpenTelemetry SDK and configure the Jaeger exporter by adding the following code between the lines from PIL import Image and st.header("Image Recognition App") in the application main.py file.
Verify that you are operating the Streamlit application directory.
$ pwdOutput:
/home/user/myproject/streamlitUsing a text editor such as
VIM, edit themain.pyfile.$ vim main.pyAdd the following configurations between
from PIL import Imageandst.header("Image Recognition App").# Import opentelemetry files from opentelemetry import trace from opentelemetry.sdk.trace import TracerProvider from opentelemetry.sdk.trace.export import BatchSpanProcessor from opentelemetry.exporter.jaeger.thrift import JaegerExporter from opentelemetry.sdk.resources import SERVICE_NAME, Resource trace.set_tracer_provider( TracerProvider( resource=Resource.create({SERVICE_NAME: "streamlet-app"}) ) ) exporter = JaegerExporter( agent_host_name="localhost", # Update with your Jaeger backend host agent_port= 6831 # Update with your Jaeger backend port ) # Initialize the OpenTelemetry tracer trace.set_tracer_provider(TracerProvider()) span_processor = BatchSpanProcessor(exporter) trace.get_tracer_provider().add_span_processor(span_processor)Adjust the
service_name,agent_host_name, andagent_portto match your specific environment.Save and close the file.
After initializing the tracer with your service name as streamlet-app”. You can instrument functions to use different methods available in OpenTelemetry.
Instrument OpenTelemetry Functions
When instrumenting functions in Streamlit with OpenTelemetry, there are different approaches you can take to create spans and trace their execution. In this section, you will explore two common approaches: using the @trace decorator for automatic span creation and manually creating spans using the start_as_current_span method.
Using the @trace Decorator for Automatic Span Creation
OpenTelemetry provides a @trace decorator that automatically creates spans around function invocations. This approach allows seamless instrumentation without modifying the function's implementation. To use the @trace decorator, follow the steps below.
Edit the
main.pyfile.$ vim main.pyAdd the following configuration before the
predict_label(image2)function.… tracer = trace.get_tracer(__name__) @tracer.start_as_current_span("do_work") def predict_label(image2): …Save and close the file.
In the above configuration, the
nameparameter in the@tracedecorator specifies the span name that is created for the function. The first line creates an instance of the trace assigned to the variabletracer, and the second line applies the decorator to the wholepredict_labelfunction.By applying the
@trace(here@tracer) decorator to the function, OpenTelemetry will automatically create a span when the function is invoked. The span will encompass the entire execution of the function, providing insights into its duration and any child spans created within the function.Your modified
main.pyfile should look like the one below.import streamlit as st from tensorflow.keras.models import load_model import numpy as np from tensorflow.keras.preprocessing.image import load_img, img_to_array from PIL import Image # opentelemetry files import from opentelemetry import trace from opentelemetry.sdk.trace import TracerProvider from opentelemetry.sdk.trace.export import BatchSpanProcessor from opentelemetry.exporter.jaeger.thrift import JaegerExporter from opentelemetry.sdk.resources import SERVICE_NAME, Resource trace.set_tracer_provider( TracerProvider( resource=Resource.create({SERVICE_NAME: "streamlit-app"}) ) ) exporter = JaegerExporter( agent_host_name="localhost", # Update with your Jaeger backend host agent_port= 6831 # Update with your Jaeger backend port ) # Initialize the OpenTelemetry tracer trace.set_tracer_provider(TracerProvider()) span_processor = BatchSpanProcessor(exporter) trace.get_tracer_provider().add_span_processor(span_processor) st.header("Image Recognition App") st.caption("Upload an image. ") st.caption("The application will infer the one label out of 4 labels: 'Cloudy', 'Desert', 'Green_Area', 'Water'.") st.caption("Warning: Do not click Recognize button before uploading image. It will result in error.") # Load the model model = load_model("ModelS.h5") # Define the class names class_names = ['Cloudy', 'Desert', 'Green_Area', 'Water'] # Fxn @st.cache_data def load_image(image_file): img = Image.open(image_file) return img imgpath = st.file_uploader("Choose a file", type =['png', 'jpeg', 'jpg']) if imgpath is not None: img = load_image(imgpath ) st.image(img, width=250) tracer = trace.get_tracer(__name__) @tracer.start_as_current_span("do_work") def predict_label(image2): imgLoaded = load_img(image2, target_size=(255, 255)) # Convert the image to an array img_array = img_to_array(imgLoaded) #print(img_array) #print(img_array.shape) img_array = np.reshape(img_array, (1, 255, 255, 3)) # Get the model predictions predictions = model.predict(img_array) #print("predictions:", predictions) # Get the class index with the highest predicted probability class_index = np.argmax(predictions[0]) # Get the predicted class label predicted_label = class_names[class_index] return predicted_label if st.button('Recognise'): predicted_label = predict_label(imgpath) st.write("The image is predicted to be '{}'.".format(predicted_label))Start the Streamlit application.
$ streamlit run main.py &In your web browser, access the Streamlit application.
Upload a test image and click Recognize to start the Streamlit functionality.
As the Streamlit application runs, OpenTelemetry automatically collects traces based on the instrumentation you have set up. Spans are created around the instrumented functions and operations, capturing the execution details.
Traces collected by OpenTelemetry are exported to the configured backend application Jaegar. To visualize the exported traces, use the Jaeger web interface.
Visualize Traces using the Jaeger UI
To visualize the exported traces in the Jaeger UI, follow the steps below.
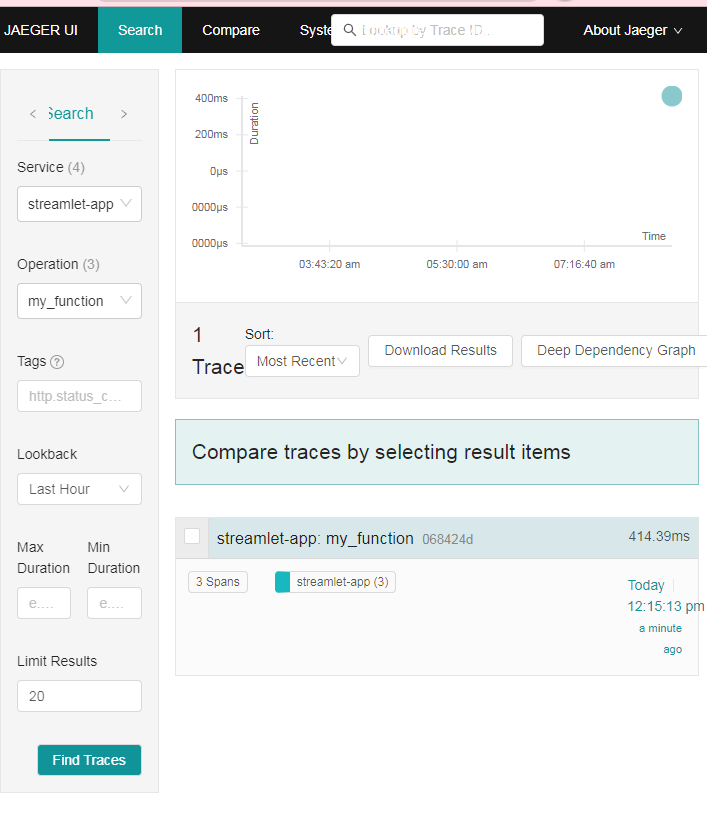
In your web browser, navigate to the Jaeger UI.
Within the Jaeger UI, locate the service name dropdown menu and select the name of your service ‘streamlet-app’ from the list. This filters traces specific to the Streamlit application.
In case you do not see the
streamlet-appoption on your Service drop down menu, refresh the web page.Explore the traces in the Jaeger UI, which provides a comprehensive view of the request flow, spans, and their timings. You can analyze the performance, identify bottlenecks, and gain insights into the behavior of your Streamlit application.
By setting up the Jaeger exporter and visualising exported traces in the Jaeger UI, you can effectively monitor and analyze the behavior and performance of your Streamlit application.
Create Manual Spans
You can manually create spans using the start_as_current_span method provided by the OpenTelemetry API. This approach gives you more fine-grained control over when and where to create spans. To manually create spans, follow the steps below.
Edit the
main.pyfile.$ vim main.pyComment out using
#on the two configuration lines you previous added to the file as below.#tracer = trace.get_tracer(__name__) #@tracer.start_as_current_span("do_work") def predict_label(image2):Within the
predict_label()function, use thestart_as_current_spanmethod to create a span:def predict_label(image2): tracer = trace.get_tracer(__name__) with tracer.start_as_current_span("my_function"): imgLoaded = load_img(image2, target_size=(255, 255)) # Convert the image to an array img_array = img_to_array(imgLoaded) #print(img_array)By using the
start_as_current_spanmethod within a with statement, you create a span that encompasses the code block inside it. You can provide a descriptive name for the span using the name parameter.Save and close the file.
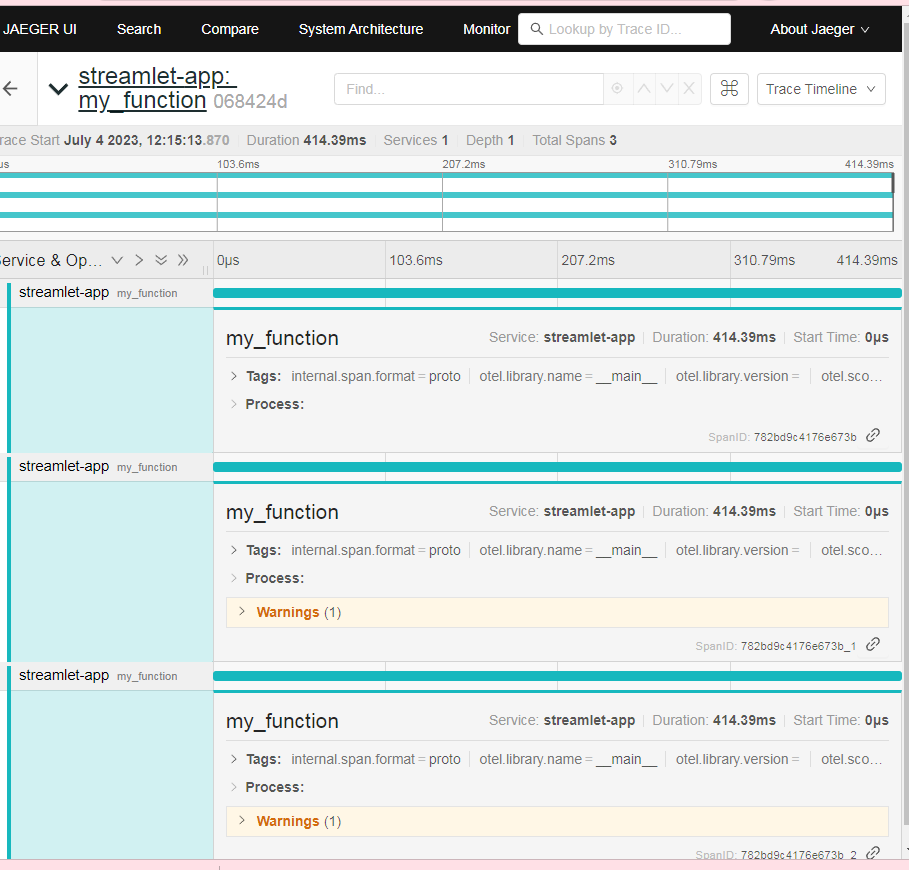
In the Streamlit web interface, recognise one image, and start observing the trace in Jaeger. You output will look the one in the graphic below.
When you click the span bar, you can see the individual spans as follows:
The manual approach allows you to have more control over span creation, allowing you to create spans at specific points in your code and nest them as needed. It's useful when you want to trace specific parts of a function or when you need to create child spans within a function as nested spans. To observe it in action, modify the code in
main.pyfile as below.def predict_label(image2): tracer = trace.get_tracer(__name__) with tracer.start_as_current_span("my_function") as parent: imgLoaded = load_img(image2, target_size=(255, 255)) # Convert the image to an array img_array = img_to_array(imgLoaded) #print(img_array) #print(img_array.shape) img_array = np.reshape(img_array, (1, 255, 255, 3)) # Get the model predictions with tracer.start_as_current_span("predict") as child: predictions = model.predict(img_array) #print("predictions:", predictions) # Get the class index with the highest predicted probability class_index = np.argmax(predictions[0]) # Get the predicted class label predicted_label = class_names[class_index] return predicted_labelSave and close the file.
In the above configuration, you have added three code lines – two lines below
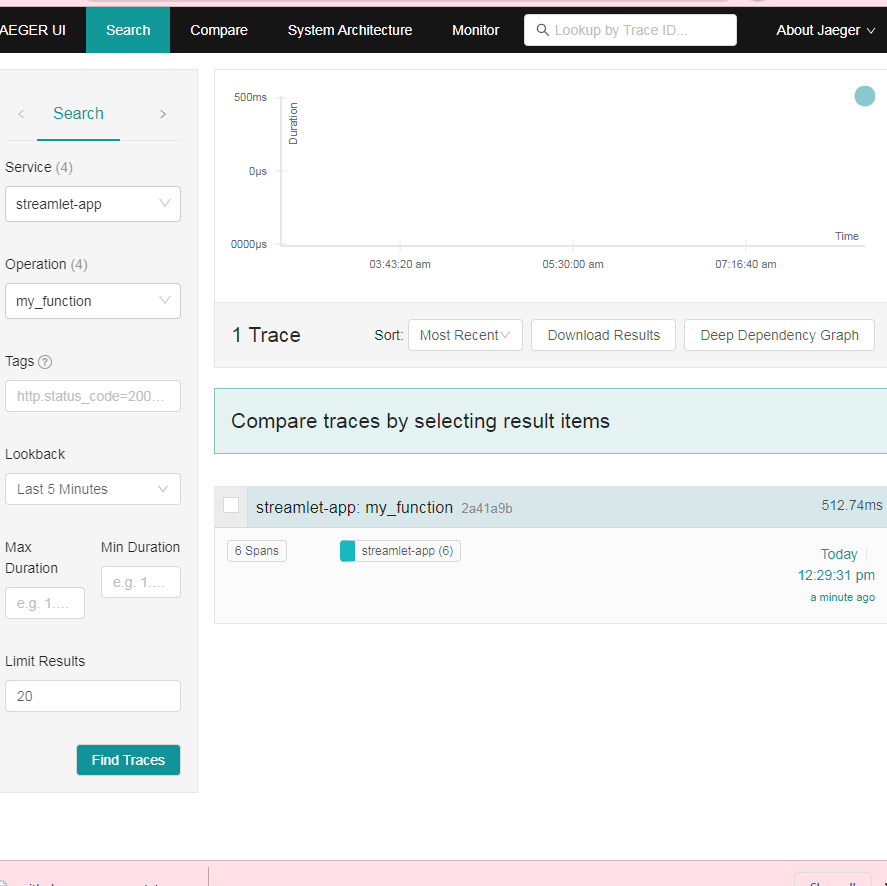
def predict_label(image2):and one line beforepredictions = model.predict(img_array)in yourmain.pyfile to create nested spans.Run the application using the above instrumentation and use it to predict one image. Access the Jaeger UI and refresh the web interface. In the
Operationdrop down menu, themy_functionis displayed similar to the graphic below.Spans for the nested trace.
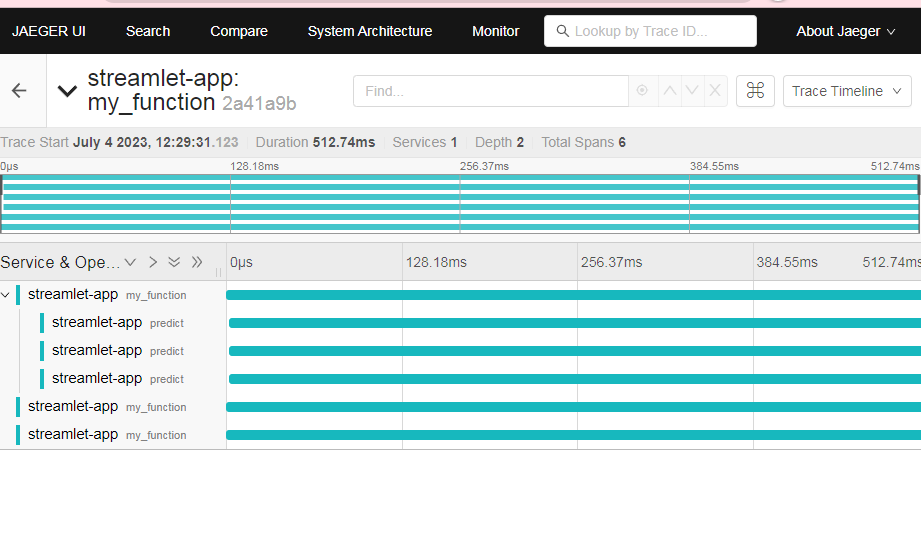
By choosing either the
@tracedecorator or manual span creation, you can effectively instrument your functions in the Streamlit applications with OpenTelemetry. This enables the tracing of function invocations and provides valuable insights into their execution and performance characteristics.
Conclusion
In this article, you integrated OpenTelemetry with Streamlit applications brings for observability and understanding of application performance. By leveraging OpenTelemetry's tracing capabilities, you gain valuable insights into the behavior, timing, and performance of your Streamlit application.
For more information about OpenTelemetry and Streamlit, visit the following resources.
No comments yet.