How to Use the Locate Command in Linux

Introduction
The locate command in Linux is an alternative to the find command. Unlike find, the locate command looks for files in a regularly updated database in the system instead of searching the entire file system. This approach makes searching faster and convenient, especially when working with many files.
This article explains how to use the locate command to effectively search for files and directories in Linux.
Advantages of locate Over find Command
While both find and locate commands have their use cases, locate operates much faster. locate uses a database that Linux builds automatically in the background to allow for faster results. The results from locate may not always reflect the state of the system if the database is out of date. However, you can regularly update the database manually or schedule a cron job.
Alternatively, the find command in Linux provides more precise results by searching in real-time, making it ideal for locating files based on specific criteria.
Understand the locate Database
The locate command relies on a database that indexes file locations across your file system. By default, Linux updates this database periodically via a background job. However, it's important to update the database manually in case you make changes to the file system.
Update the Database Manually
You can manually trigger the system to update the locate database using the following command.
$ sudo updatedb
The above command ensures the system indexes the most recent files and directories.
Find the locate Database
By default, you'll find the locate database in the following location on most Linux systems.
/var/lib/mlocate/mlocate.dbHowever, you can specify a different database file when searching by passing the -d option:
$ locate -d /path/to/other/db pattern
The above command allows you to specify custom databases, especially when working on multiple mounted filesystems or network shares.
Install locate Command
Most Linux systems pre-install the locate command by default. However, if you don't find the command, follow the steps below to install it.
Check whether the
locatecommand is installed.console$ locateIf
locateis not installed, the command prints the following output.locate: command not found
Install locate on Ubuntu and Debian
Follow the steps below to install locate on Ubuntu and Debian.
Update your system's package information index.
console$ sudo apt update
Install the
locatepackage.console$ sudo apt install plocate
The above command installs the
plocatepackage, which provides thelocatecommand on Ubuntu and Debian systems.
Install locate on CentOS and Fedora
Follow the steps below to install locate on CentOS and Fedora.
Update your system's package information index.
console$ sudo yum -y update
Install the
locatepackage.console$ sudo yum install mlocate
This command installs the
mlocatepackage, which provides thelocatecommand on CentOS and Fedora systems.
To securely transfer files between local and remote systems, explore the scp command in Linux for efficient file management.
The locate Command Syntax
The following is a basic locate command syntax:
locate [options] patternIn the above locate command:
[options]: Defines optional flags that modify the command's behavior.pattern: Specifies the file or directory name to search for.
Set up Example Files and Directories
Follow the steps below to create sample files and directories to test the locate command.
Create three empty
.txtfiles.console$ touch vultr.txt Vultr.txt VULTR.txt
Create two empty
.exefiles.console$ touch VULTR.exe file.exe
Create a
dirdirectory and a subdirectory. Replace/path/to/parent/with your actual path.console$ mkdir -p dir /path/to/parent/dir1/sub_dir
The above command creates the
dirdirectory andsub_dirsubdirectory under/path/to/parent/dir1/. The-poption creates parent directories if they don't exist.Find your active working directory.
console$ pwd
This command displays the full path of your working directory.
Create a file like
logfile.txtand write some sample data with a text editor such asNano.console$ nano logfile.txt
Add the following contents to the
logfile.txtfile.2024-09-01 09:00:00 ERROR User login failed 2024-09-01 10:00:00 INFO User profile updated 2024-09-01 11:00:00 ERROR Database connection error 2024-09-01 12:00:00 ERROR User login failed 2024-09-01 13:00:00 WARN Disk space low 2024-09-01 14:00:00 ERROR User login failedSave and close the file.
Most Common locate Options
Here are the most common locate command options in Linux.
| Option | Description |
|---|---|
-i |
Ignore case distinctions |
-c |
Print only the count of matching file names |
-n N |
Limit the number of results to N |
-r |
Use basic regular expressions for pattern matching |
--existing |
Print only existing files (ignore deleted files) |
--regex |
Interpret pattern as an extended regular expression |
-d |
Specify the database to use |
--basename |
Match only the base file name |
--wholename |
Match the whole file name |
Run Practical locate Command in Linux Examples
Run the following samples to learn how to use the linux locate command.
Update the
locatedatabase to index any new files and directories.console$ sudo updatedb
Search for a specific file named
vultr.txt.console$ locate vultr.txt
This command lists all paths that match the
vultr.txtfilename and displays all instances from the database.Output:

Perform a case-insensitive search for all files named
vultr.txt.console$ locate -i vultr.txt
This command performs a case-insensitive search, so it will return results for
vultr.txt,Vultr.txt, and other case variations.Output.

Count the number of files that match
example.txt.console$ locate -c example.txt
This command returns the total count of files that match
example.txt, without listing them.Output.

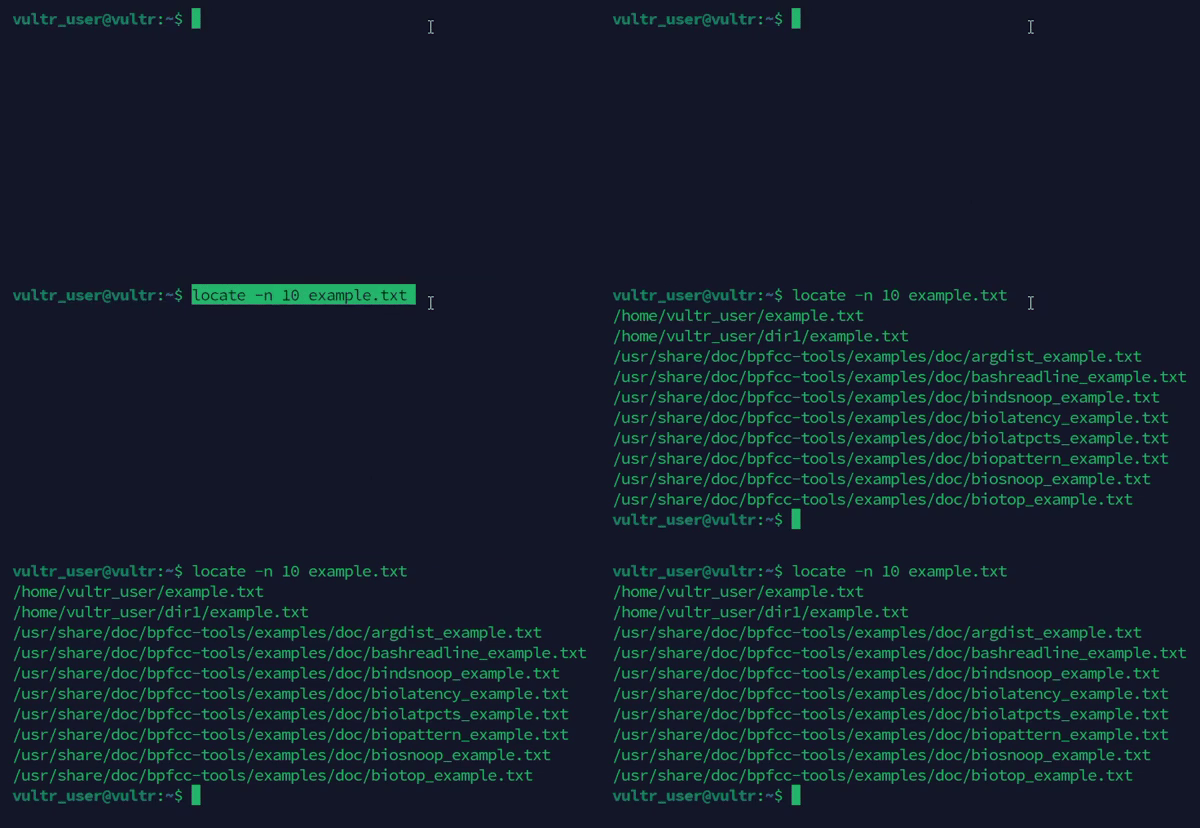
Limit the search results to
10.console$ locate -n 10 example.txt
This command limits the output to the first
10matches forexample.txt.Output.
Search for files that end with
.exeusing a regular expression.console$ locate -r '\.exe$'
Output.

Run Advanced locate Command Examples
Follow the steps below to run advanced locate command searches.
Search for a directory named
dir.console$ locate -r '/dir$'
This command uses a regular expression to match directories matching
dirat the end of the path.Output.

Search for all
.pdfextension files.console$ locate -r '\.pdf$'
This command finds all files with a
.pdfextension at the end using a regular expression.Output.

Combine options to search for
.logfiles, ignore cases, and limit the results to5.console$ locate -ir '\.log$' -n 5
This command performs a case-insensitive search for files that end with
.logextension and limits the results to 5.Output.

Combine
locatewithawkto extract specific fields from the search results.console$ locate logfile.txt | xargs grep -i 'error' | awk '{$1=$2=$3=""; print substr($0, 4)}'
This command finds the file path using
locate, searches forerrorin that file withgrep, and usesawkto remove the date, time, and log level from the output, displaying only the error messages.Output.

Combine
locatewithsortanduniqto count unique matches and sort them.console$ locate logfile.txt | xargs cat | grep -i 'error' | sort | uniq -c | sort -nr
This command finds the file path using
locateand displays its contents withcat. The command then searches for lines containingerrorusinggrepand sorts these lines alphabetically while counting the occurrences of each unique error message withuniq -c. The command then sorts the counts in descending order showing the most frequent errors at the top.Output.

Combine
locatewithsedto perform inline editing on the search results.console$ locate logfile.txt | xargs cat | sed 's/error/ERROR/g'
This command finds the file path using
locate, displays its contents withcat, and replaces all occurrences oferrorwithERRORusingsed. The command transforms the case of theerrorterm throughout the file content.Output.

Combine
locatewithteeto save and display output simultaneously.console$ locate logfile.txt | xargs cat | grep 'ERROR' | tee output.txt
This command finds the file path using
locate, displays its contents withcat, searches for lines containing the termERRORusinggrep, and writes the matching lines to the terminal and theoutput.txtfile usingtee.Output.

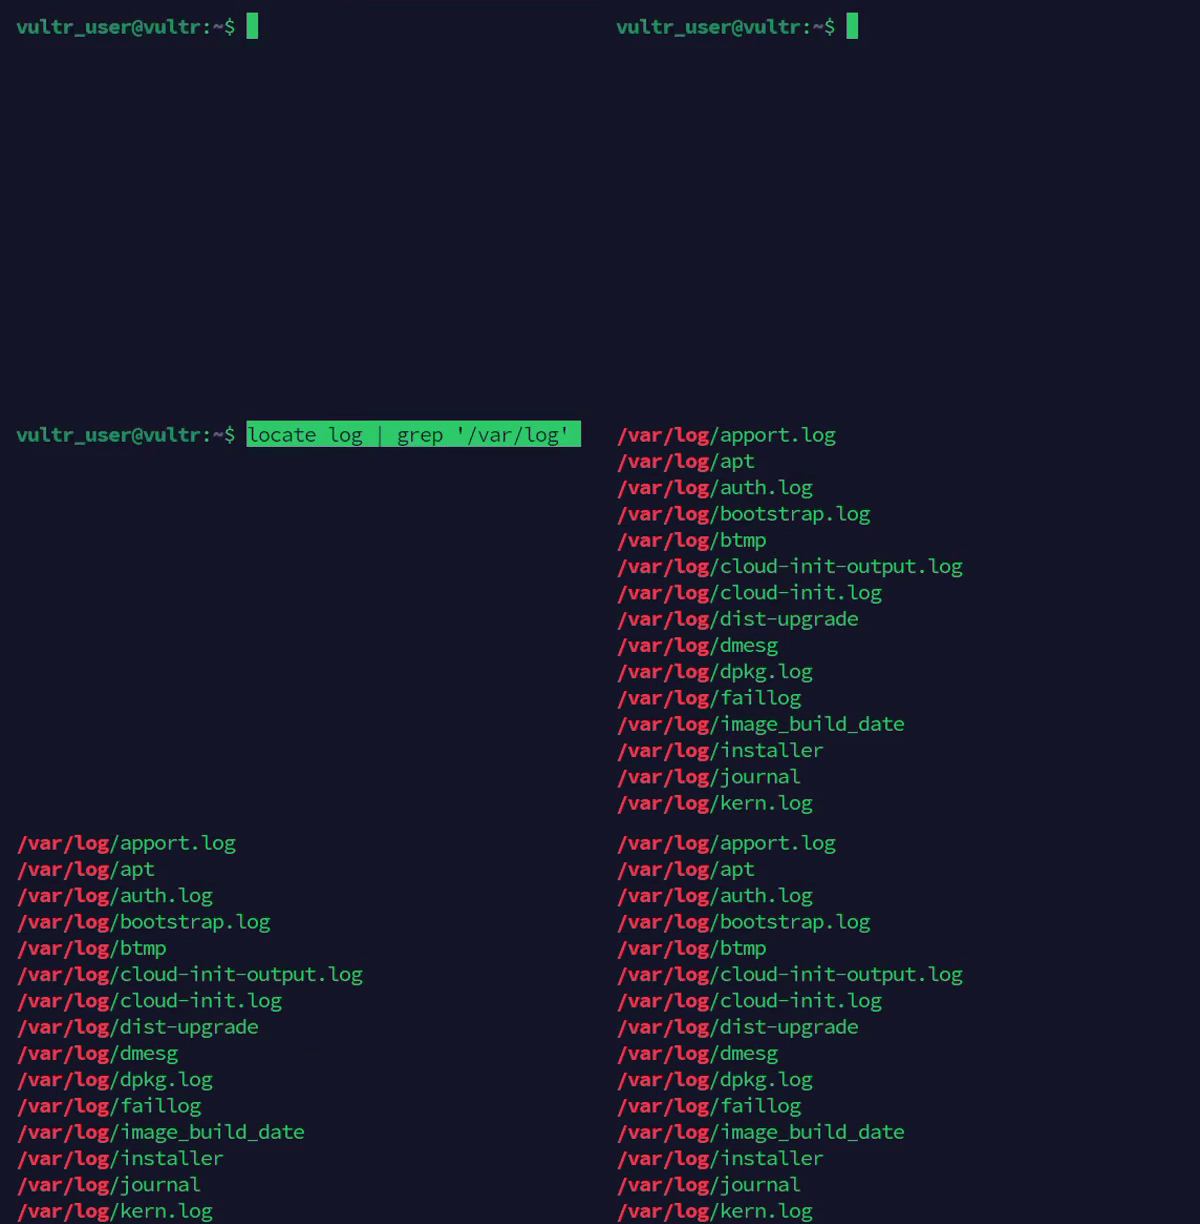
Search files containing the word
logand filter the results using thegrepcommand.console$ locate log | grep '/var/log'
The above command first finds all file names containing
logand then pipes the output togrepto filter the results, showing only the files in the/var/logdirectory.Output.
Delete all files that match
vultr.txtby combininglocatewithxargs.console$ locate vultr.txt | xargs rm -f
This command finds all files named
vultr.txtand pipes the list toxargs, which then deletes the file using therm -fcommand.Output.

Use
locateto search for files and run advanced actions using `find.console$ locate Vultr.txt | xargs -I {} find {} -type f -exec ls -l {} \;
The above command finds all files named
Vultr.txtand passes the list tofindwhich executesls -lon each file to display detailed information.Output.

Set locate Command Environment Variables
The following Linux environment variables affect the locate command.
LOCATE_PATH: Specifies the path to thelocatedatabase.LOCATE_CONFIG: Specifies the path to thelocateconfiguration file.
The LOCATE_PATH Variable
This environment variable lets you define a custom path for the locate database. By default, locate searches through its pre-configured database, which is usually located in /var/lib/mlocate/mlocate.db.
You can set a different locate database path by running the following command. Then run locate to search for example.txt in that database.
$ export LOCATE_PATH='/var/lib/plocate/plocate.db'
$ locate example.txt
The LOCATE_CONFIG Variable
This environment variable specifies a custom configuration file path that determines how locate behaves. The default configuration file controls important parameters, such as which directories to exclude from the database or which files to ignore during the search. By customizing this file, you can fine-tune the locate command behavior to meet your specific needs.
While it's less commonly used compared to LOCATE_PATH, the LOCATE_CONFIG variable is useful when working in environments where the default configuration does not fit your requirements. You can point the variable to a custom configuration file that defines how the database is updated, which paths are indexed, and more.
You can set the LOCATE_CONFIG variable by running the following command.
$ export LOCATE_CONFIG='/path/to/my/locate.conf'
Use locate with mlocate and slocate Commands
mlocate and slocate commands are variants of the locate command but they offer additional features and security. These commands are often used interchangeably with locate.
The mlocate (Merging Locate) Command
mlocate is a variant of locate that only updates the parts of the database that have changed. This makes it faster and more efficient when updating the database, especially on systems with many files. mlocate sophisticated privacy features ensure users can only locate files they have permission to see.
Example of mlocate command.
$ sudo updatedb.mlocate
$ locate example.txt
The first command above updates the mlocate database and the subsequent locate command searches for example.txt in the database.
The slocate (Secure Locate) Command
slocate is another variant of locate that emphasizes on security. The command ensures that users can only see results for files they have the proper permissions to access. This is especially useful in multi-user environments where users shouldn't be able to locate files they don't have access to. slocate includes more advanced file permission checks when creating the database and searching files.
Example of slocate command.
$ sudo updatedb.slocate
$ locate example.txt
Just like in mlocate, the updatedb.slocate commad updates the database and then uses the locate command to perform your search. The key difference lies in the way the results are filtered based on user permissions, which may yield fewer results compared to a standard locate.
Conclusion
In this article, you've installed the locate command in Linux, covered the command's syntax, command options, and run practical examples. With the locate command, you can quickly and efficiently search for files and directories on your system. By utilizing the different locate command advanced use cases, you can enhance your search and streamline your workflow in Linux.