

Introduction
Dotclear is an open-source web publishing platform for LAMP. This guide explains how to install Dotclear on a Vultr Ubuntu 20.04 cloud server.
Prerequisites
Before starting this guide:
- Install an Ubuntu 20.04 server.
- Add a non-root user with sudo privileges.
- Install a LAMP Stack.
You can also use Vultr's Ubuntu 20.04 LAMP Marketplace application.
1. Install Dependencies
SSH to your server and update the package information index.
$ sudo apt updateInstall the required PHP extensions for Dotclear.
$ sudo apt install libapache2-mod-phpRestart Apache to load the extensions.
$ sudo systemctl restart apache2
2. Create the Database and User Account
Log in to your database server as
root.$ sudo mysql -u root -p
Create a
dot_cleardatabase and adot_clear_useraccount. ReplaceEXAMPLE_PASSWORDwith a strong password.If you use MySQL:
 mysql> CREATE DATABASE dot_clear;
        CREATE USER 'dot_clear_user'@'localhost' IDENTIFIED WITH mysql_native_password BY 'EXAMPLE_PASSWORD';
        GRANT ALL PRIVILEGES ON dot_clear.* TO 'dot_clear_user'@'localhost';
        FLUSH PRIVILEGES;
If you use MariaDB:
 MariaDB> CREATE DATABASE dot_clear;
          GRANT ALL PRIVILEGES on dot_clear.* TO 'dot_clear_user'@'localhost' identified by 'EXAMPLE_PASSWORD';
Exit the database server.
mysql> QUIT;
3. Create the Directory Structure
Create a
dot_cleardirectory under the web root.$ sudo mkdir -p /var/www/dot_clearTake ownership of the directory.
$ sudo chown -R $USER:$USER /var/www/dot_clearChange to the directory.
$ cd /var/www/dot_clearDownload the installation script.
$ wget https://download.dotclear.org/loader/dotclear-loader.phpChange the ownership of the
/var/www/dot_cleardirectory to the Apache userwww-data.$ sudo chown -R www-data:www-data /var/www/dot_clear
4. Create a Virtual Host File
Disable the default virtual host configuration.
$ sudo a2dissite 000-default.confCreate a new virtual host configuration file.
$ sudo nano /etc/apache2/sites-available/dot_clear.confPaste the information below into the file. Replace
example.comwith your server's public IP address or domain name.<VirtualHost *:80> ServerName example.com DocumentRoot "/var/www/dot_clear" <Directory "/var/www/dot_clear"> Require all granted Options Indexes FollowSymLinks AllowOverride All Order allow,deny Allow from all </Directory> ErrorLog ${APACHE_LOG_DIR}/error.log CustomLog ${APACHE_LOG_DIR}/access.log combined </VirtualHost>Save and exit the file.
Enable the new Dotclear virtual host.
$ sudo a2ensite dot_clear.confRestart Apache to load the new host configuration.
$ sudo systemctl restart apache2
5. Test the Installation
Visit the URL below in your web browser. Replace
example.comwith your server's public IP address or domain name.http://example.com/dotclear-loader.phpYou should see the following welcome page.
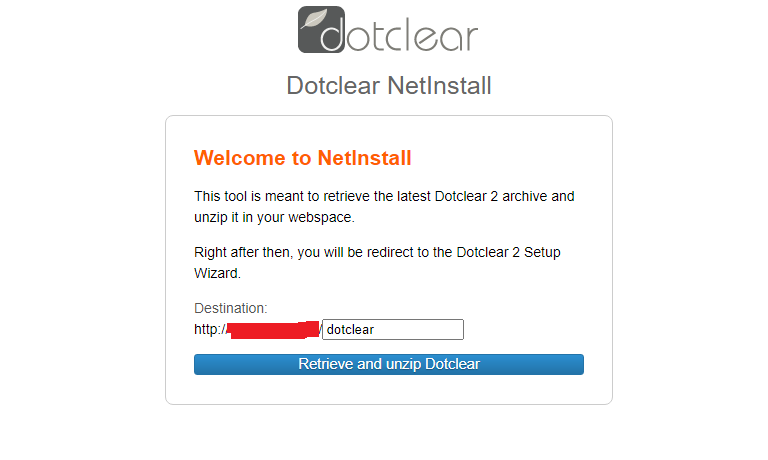
Click Retrieve and unzip Dotclear to proceed.
Enter the database settings in the provided fields and click Continue

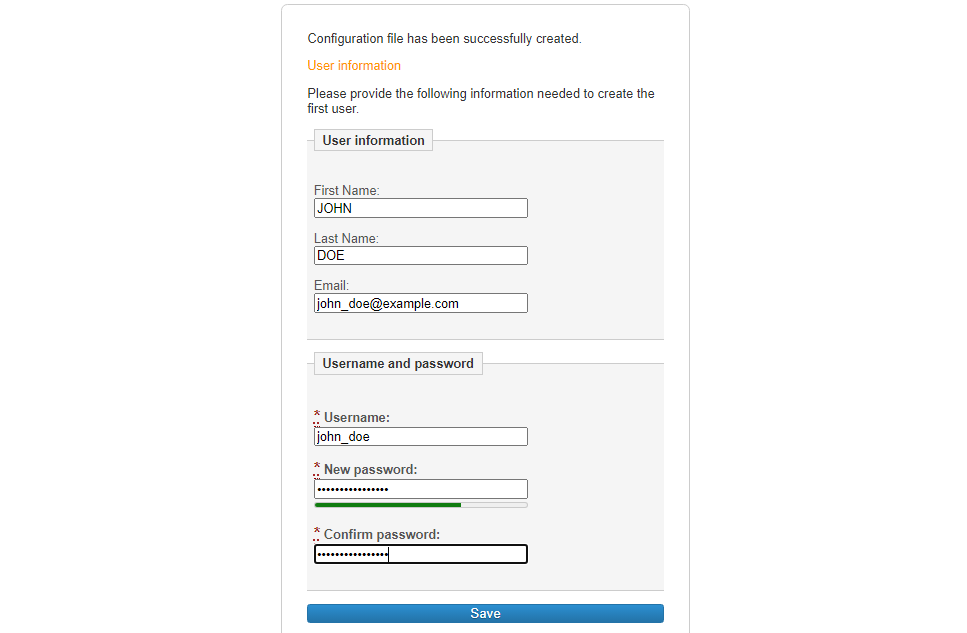
Create a user account and click Save.
Navigate to this URL to see your new site.
http://example.com/dotclear/index.php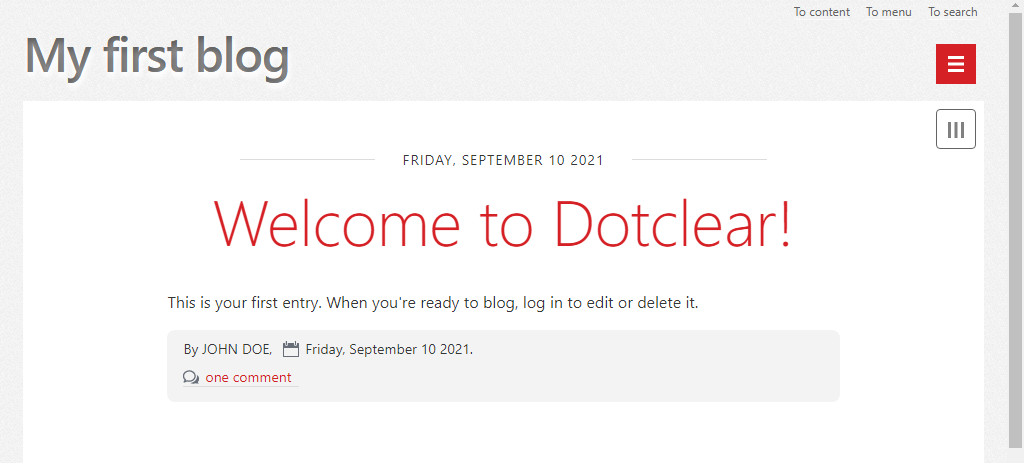
To access the Dotclear admin interface, visit the URL below and log in.
http://example.com/dotclear/admin/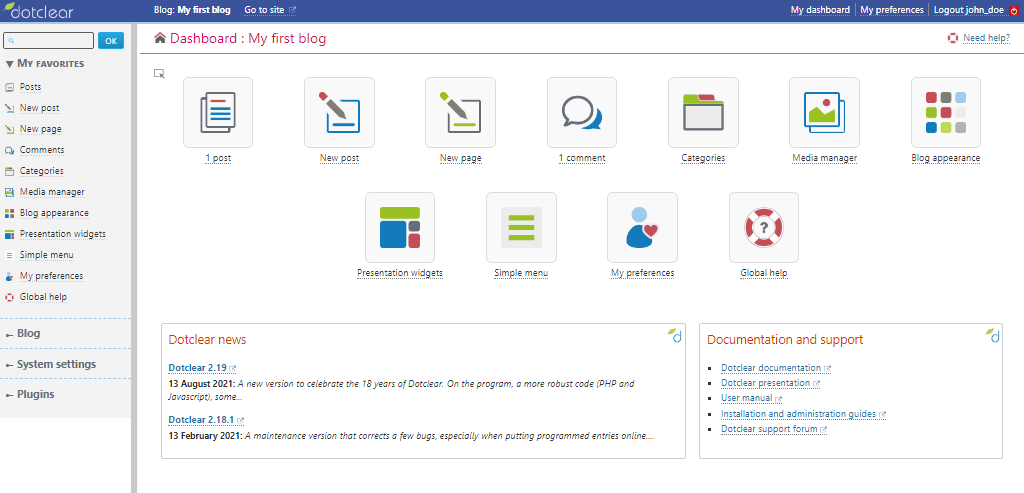
Your installation is complete.
No comments yet.