Introduction
pgAdmin is an open-source software project designed for the administration and management of PostgreSQL database servers. It offers a user-friendly graphical interface, an SQL query tool, a procedural code debugger, and many other powerful features. Whether you're a database administrator or developer, pgAdmin makes interacting with PostgreSQL simpler and more efficient. This guide will take you through the steps to install pgAdmin 4 for PostgreSQL on an Ubuntu Linux system, helping you set up the essential tools for configuring, monitoring, and managing your databases effectively.
Prerequisites
- Deploy a fully updated Ubuntu Linux LTS server at Vultr with at least 2GB of RAM and 1 vCPU cores.
- Create a non-root user with sudo access.
1. Install and Configure PostgreSQL Database Server
Import the repository PGP signing key for PostgreSQL.
$ wget --quiet -O - https://www.postgresql.org/media/keys/ACCC4CF8.asc | sudo apt-key add -Add PostgreSQL APT repository.
$ sudo sh -c 'echo "deb http://apt.postgresql.org/pub/repos/apt/ `lsb_release -cs`-pgdg main" >> /etc/apt/sources.list.d/pgdg.list'Then, install PostgreSQL database server.
$ sudo apt install postgresql-12 postgresql-client-12 -yEnable the database server to start automatically on a reboot.
$ sudo systemctl enable postgresqlStart the database server.
$ sudo systemctl start postgresqlChange the default PostgreSQL password.
$ sudo passwd postgresSwitch to the postgres user.
$ su - postgresCreate a new database user named pgadmin.
$ createuser pgadminLog in to the PostgreSQL instance.
$ psqlSet a secure password for the user pgadmin by changing the value of secure_password.
ALTER USER pgadmin WITH ENCRYPTED password 'secure_password';Create a database named testdb and set the owner to pgadmin.
CREATE DATABASE testdb OWNER pgadmin;Grant all the privileges on the testdb database to the user pgadmin.
GRANT ALL PRIVILEGES ON DATABASE testdb to pgadmin;Exit PostgreSQL instance.
\qReturn to your non-root sudo user account.
$ exit2. Change PostgreSQL Configurations
Default PostgreSQL config only allow connection to localhost (or 127.0.0.1) interface. We should edit the config files postgresql.conf and pg_hba.conf to allow for remote connection. These files are located in the /etc/postgresql/*/main directory.
Open the file postgresql.conf.
$ sudo nano /etc/postgresql/*/main/postgresql.conf
Find the following line.
#listen_addresses = 'localhost'To listen to all IP addresses, change the line to the below code and save the file.
listen_addresses = '*'Open the file pg_hba.conf.
$ sudo nano /etc/postgresql/*/main/pg_hba.conf
At the end of the file add the following lines and save the file.
host    all             all              0.0.0.0/0              md5
host    all             all              ::/0                   md5
Restart the PostgreSQL Database Server service to ensure the changes are saved.
$ sudo service postgresql restart3. Install pgAdmin 4
Install all required dependencies for pgAdmin 4 installation.
$ sudo apt-get install curl gnupg2 -yImport the repository PGP signing key for pgAdmin.
$ sudo curl https://www.pgadmin.org/static/packages_pgadmin_org.pub | sudo apt-key addAdd pgAdmin 4 APT repository.
$ sudo sh -c 'echo "deb https://ftp.postgresql.org/pub/pgadmin/pgadmin4/apt/$(lsb_release -cs) pgadmin4 main" > /etc/apt/sources.list.d/pgadmin4.list && apt-get update --allow-insecure-repositories'Install the web-based version of pgAdmin 4 tool for your platform.
$ sudo apt install pgadmin4-web -yConfigure the web mode. You'll be required to enter an email address and a password for later login.
$ sudo /usr/pgadmin4/bin/setup-web.shFor UFW firewall configured, allow http or https traffic depending on what you are using.
$ sudo ufw allow http
$ sudo ufw allow https
After installation, open your browser and go to http://ServerIP/pgadmin4 to access the pgAdmin 4 user interface. For example:
http://192.0.2.48/pgadmin4Login with the email address and password that you set during pgAdmin 4 web mode configuration.
4. Connect to Database Server on pgAdmin 4
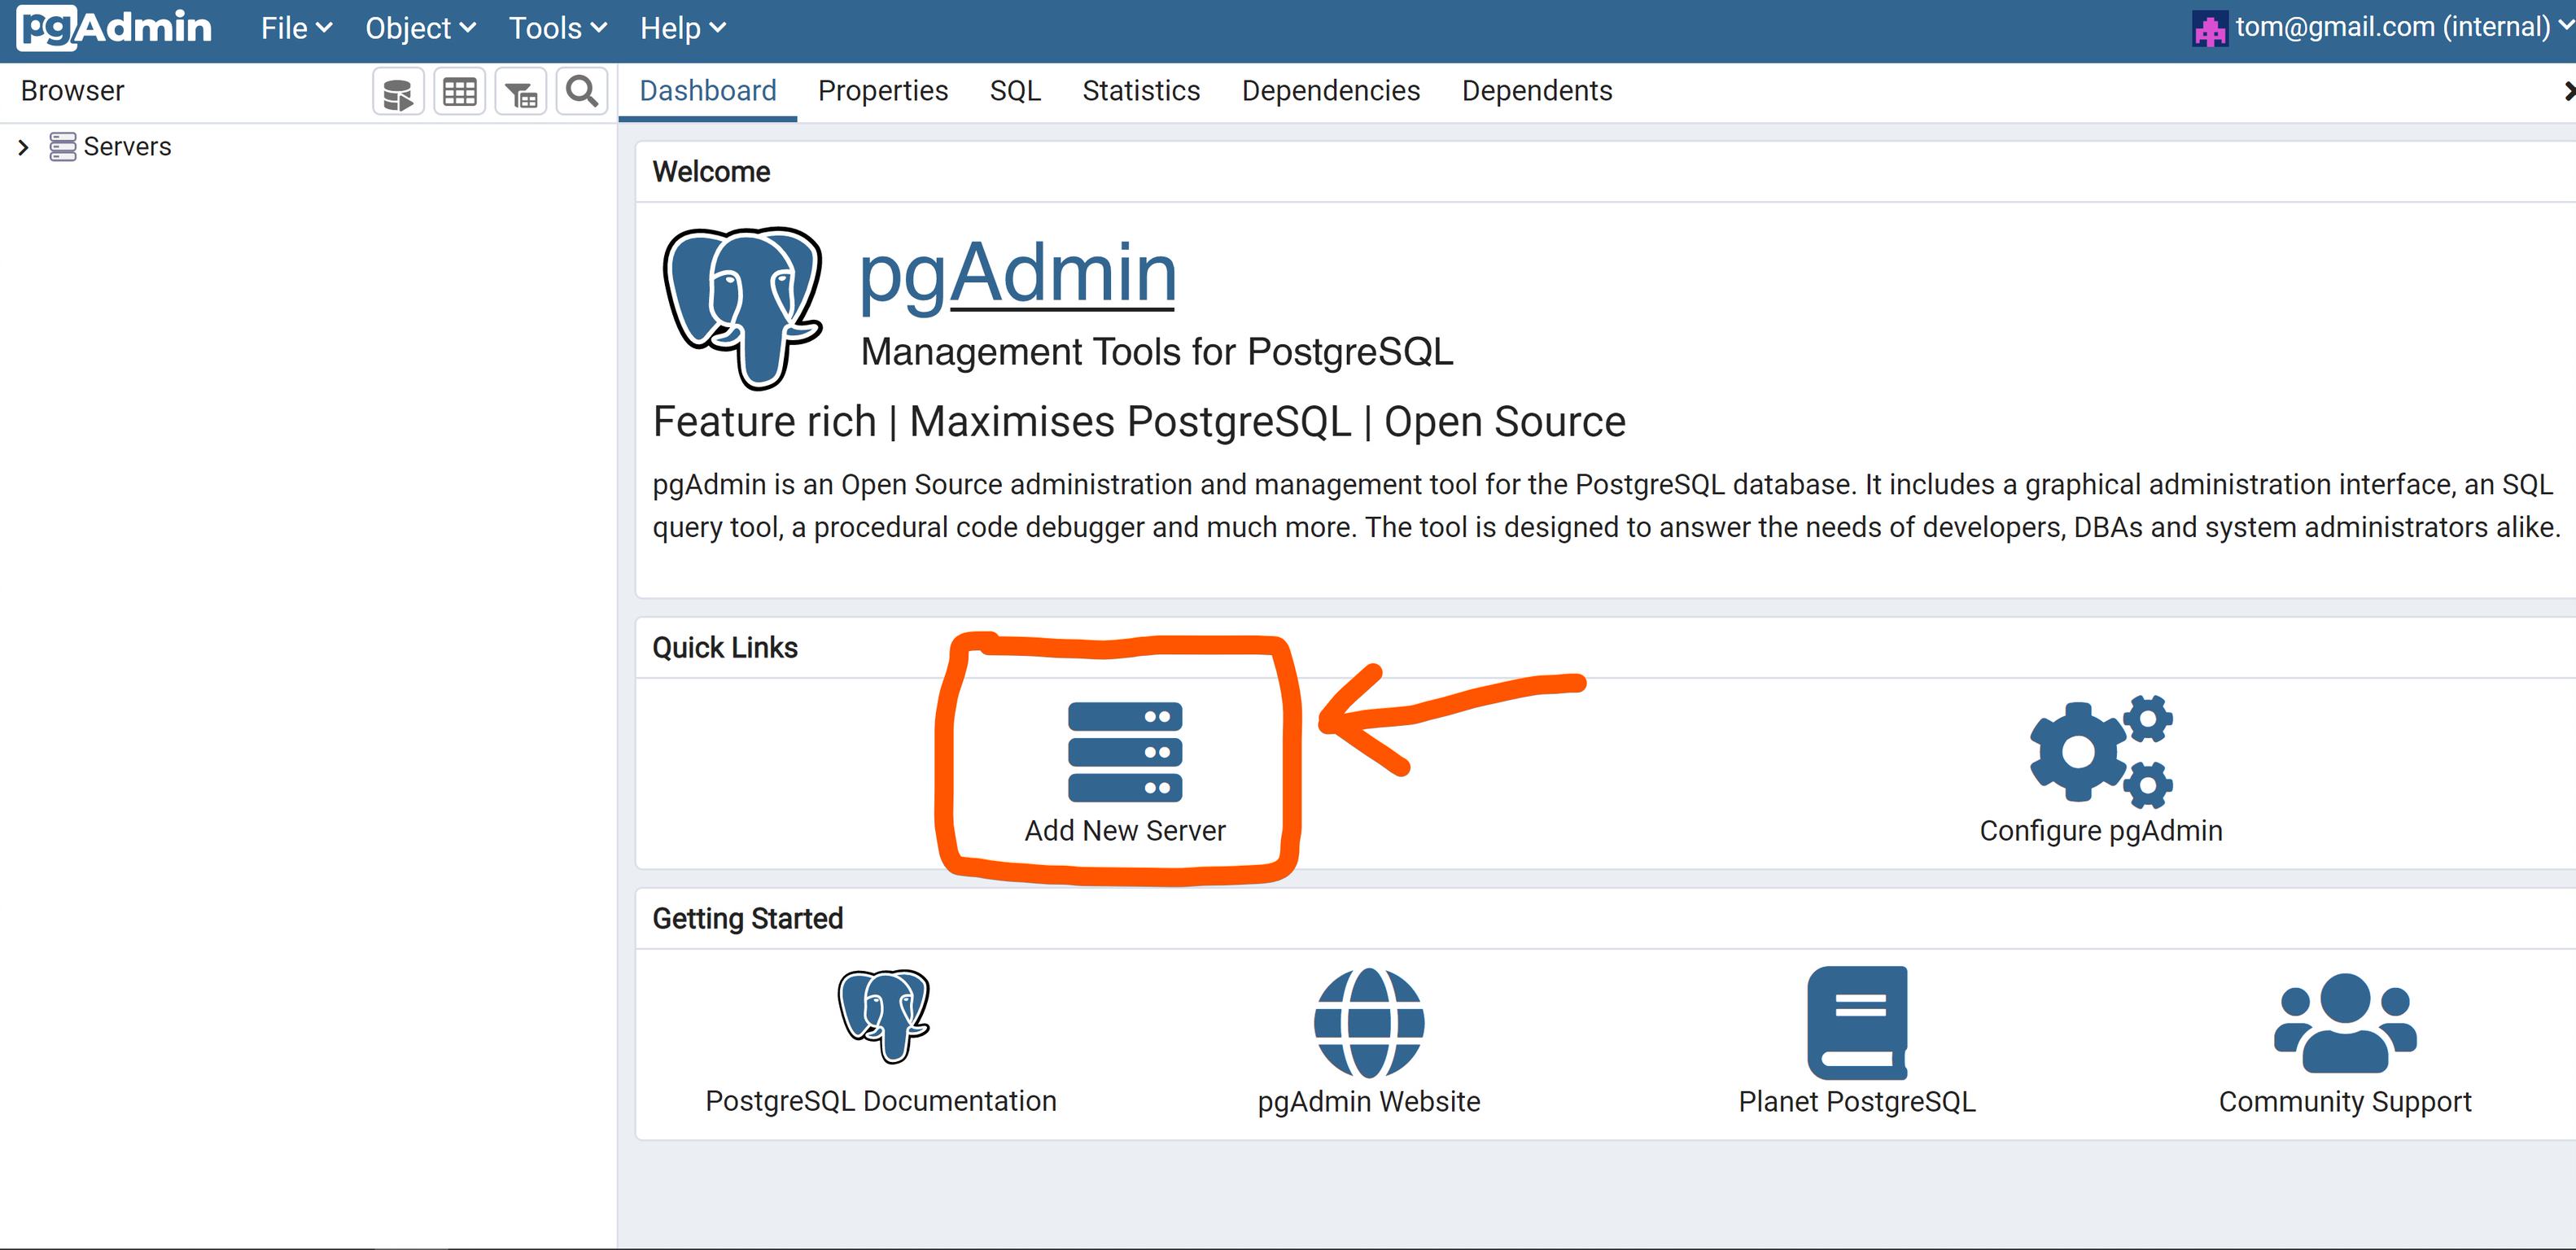
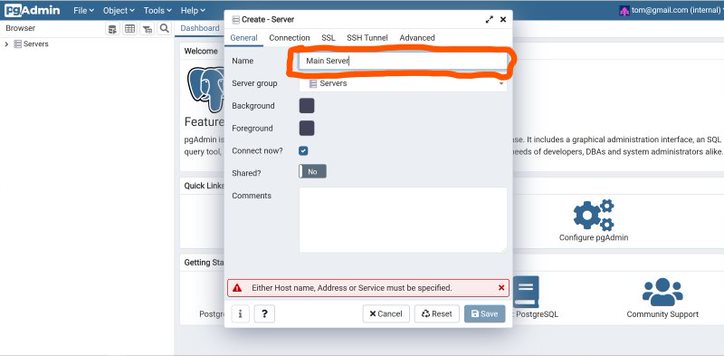
On the web interface of your preinstalled pgAdmin 4, locate the dashboard and click, Add New Server, you'll get a dialogue box where you'll enter your preferred name for that server.

Enter the preferred name of the server in the Name input section.

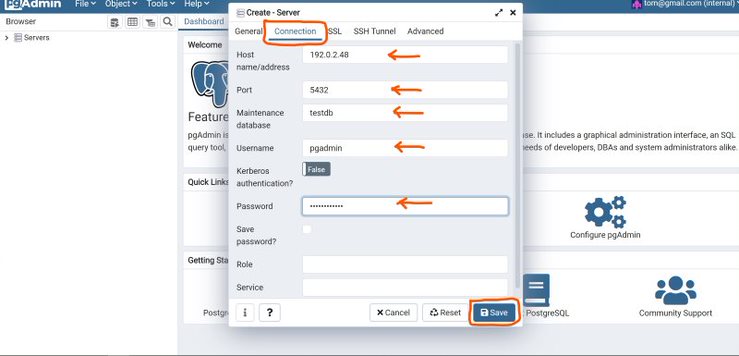
On the pop up dialogue box, switch to the Connection tab and enter the required fields with the appropriate data.
- Enter your IP address under the Host name/address.
- Leave Port value as 5432.
- Enter
testdbunder Maintenance database. - Enter
pgadminunder Username. - Enter
secure_passwordas password. Modify thesecure_passwordvalue with the actual value used in Step 1. - Click Save to login to the server.

After the connection is successful, go to the upper left corner of the dashboard, and you will see your server. browse through by expanding the arrows to access your database testdb.

Conclusion
You have now successfully browsed to the database. You'll be able to see the database server metrics on the main dashboard on graphs. You can then begin to fully manage the server and add more databases.
No comments yet.