

Magneto is an open source e-commerce application owned by eBay. It operates using a LAMP stack on most Linux distributions. This guide will focus on how to setup Magento on Ubuntu 15.04 - but the steps here should work for other versions as well.
Please note that Magento is a very resource-heavy application. For a test server, PHP requires a minimum of 512MB of RAM, but you should use at least 1GB for a small store and 4GB for a medium to large store with hundreds of products.
This tutorial assumes that you are using a freshly created VPS with no installed packages.
Installing
LAMP Stack
First, ensure that the apt-get package library is up to date by running the command below. This will ensure that the latest version of the packages are installed.
$ apt-get updateAfter this has completed, it is time to install the LAMP components that powers Magento (Linux, Apache, MySQL, PHP). Run the following command with sudo to install all 3 packages in one go. Alternatively, you may install these packages separately using this tutorial.
$ sudo apt-get install lamp-server^You will need to specify a password for the MySQL root user. Make sure this password is secure and note it down as it will be needed later.
Apache Setup
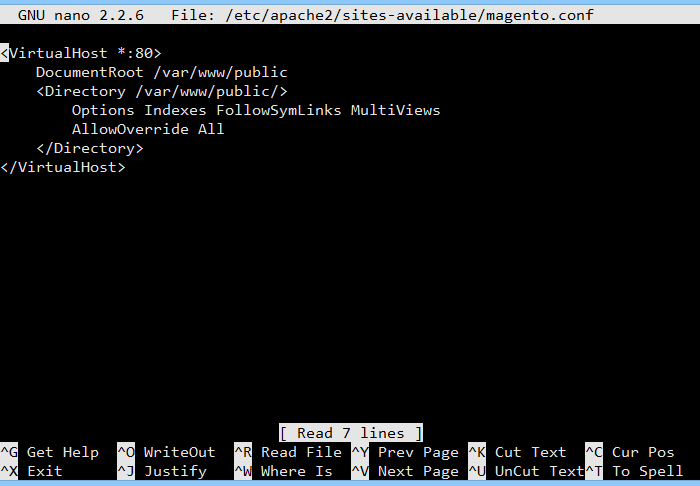
Before Magneto is installed, we need to configure Apache to properly redirect and rewrite the incoming traffic. Create a virtual host file for Apache using the following command. Here, we use the nano editor, however any text editor could be used.
$ sudo nano /etc/apache2/sites-available/magento.confInside this file, copy and paste our setup options into the nano interface.
<VirtualHost *:80>
    DocumentRoot /var/www/public
    <Directory /var/www/public/>
        Options Indexes FollowSymLinks MultiViews
        AllowOverride All
    </Directory>
</VirtualHost>
It should look similar to the screenshot below.
Save and close the file using Control + O and Control + X. Next, we have to tell Apache to use the new config file, and to ignore the default config file. Execute the following commands below (in order):
$ sudo a2ensite magento.conf

$ sudo a2dissite 000-default.conf
Then, reload Apache using the command.
$ sudo service apache2 reloadPHP Setup
PHP also needs to be configured to properly handle the Magento application. As it is an extremely resource heavy application, we need to increase the memory allocation given to PHP. In this case, I will allocate 512MB as this will only be running a test store, however most stores require 1-4GB of memory.
First, open the php.ini config file with a text editor.
$ sudo nano /etc/php5/apache2/php.iniFind the line which declares the memory limit for PHP and change it to your desired number (in this case, 512MB).
memory_limit = 512M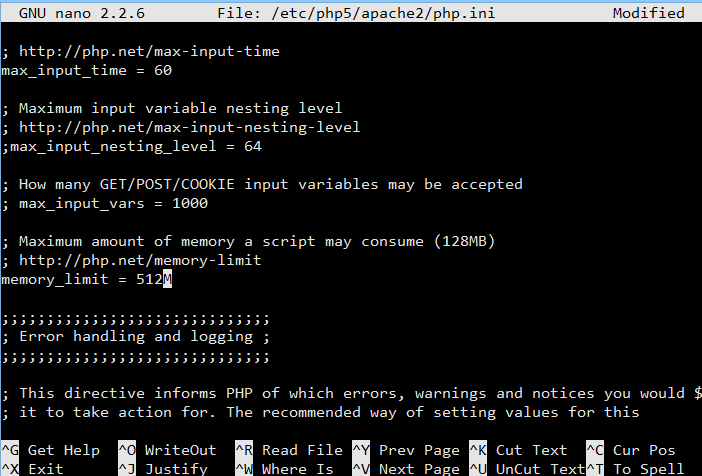
Save and close the file using Control + O and Control + X.
Magento also needs some additional PHP modules which can be installed using apt-get. Execute the following command.
$ sudo apt-get install php5-mcrypt php5-curl php5-gd libcurl3 php5-intl php5-xslOnce the install finishes, run the following commands.
$ sudo a2enmod rewrite
$ sudo php5enmod mcrypt
Finally, restart Apache.
$ sudo service apache2 restartMySQL Setup
Magento uses MySQL to store almost all the data associated with the site. We need to create a database for the application to use. Start the MySQL commandline using the command below, using the password from the LAMP setup earlier.
$ mysql -u root -pNext, execute the command below to create the database.
CREATE DATABASE magento;Leave the MySQL commandline using Control + C.
Installing Magento
Install composer with the following command:
$ curl -sS https://getcomposer.org/installer | sudo php -- --install-dir=/usr/local/bin --filename=composerWe need to generate a keypair to clone the Magento repo. Since this requires authentication, see the Magento developer documentation for the latest instructions.
Next, place these keys in the auth file for composer using the command below.
$ sudo nano /root/.composer/auth.jsonCopy and paste the contents below into the file.
{
"http-basic": {
      "repo.magento.com": {
         "username": "<your public key>",
         "password": "<your private key>"
      }
   }
}
CD to the web directory.
$ cd /var/wwwClone the Magento Github repo.
$ git clone -b 2.0 https://github.com/magento/magento2.git publicCD into the cloned folder.
$ cd publicRun composer install to update the dependencies.
$ composer installBrowser Setup
Simply navigate to the IP address of your Vultr VPS and you will be greeted by the Magento setup page. The IP address of your VPS is located within the Vultr control panel.
You can complete the Magento setup by following the wizard. Remember to input the database details from earlier in this tutorial.
Enjoy your new Magento web store!
No comments yet.