

Introduction
Object detection is a computer vision technology that identifies/locates instances of objects of a given class, such as humans, buildings, or vehicles, in digital images or videos. Object detection has uses in several computer vision tasks, including image annotation, face detection, object tracking, activity recognition, and vehicle counting.
Tensorflow is an open-source end-to-end platform for building machine learning powered applications. It contains rich tools and libraries primarily focused on the training and inference of neural networks.
This guide uses Tensorflow to build an object detection application.
Prerequisites
You'll need the following:
- Working knowledge of Python
- A properly installed and configured Python toolchain, including pip (Python version >= 3.8)
- The latest version of Protobuf for Python installed
How Object Detection Works
Object detection is usually carried out by generating small segments of the input image, with feature extraction used to validate if the segment is a valid object and combining overlapping segment boxes into a single bounding rectangle.
Object detection typically has two approaches - non-neural and neural network-based approaches. Non-neural approaches include:
- Viola-Jones object detection framework - which is based on Haar features that were originally proposed for face detection but can be extended for other object detection. By calculating pixel intensities of two neighboring rectangular regions and finding differences between the summation, the characteristics of an image section can be captured.
- Histogram of Oriented Gradients (HOG) features - This method is a feature descriptor that counts occurrences of gradient orientation in localized portions of an image. The HOG feature descriptor not only focuses on the object's structure or shape but can also provide edge direction. The gradient orientations are calculated in localized portions - by breaking down the image into smaller regions, with the gradients and orientation calculated for each region. This method works well for pedestrian detection.
- Scale-Invariant Feature Transform (SIFT) - involves detecting keypoints (local features) in an image. A set of object keypoints are extracted from reference images and stored in a database; objects from new images are recognized by individually comparing features from the new image against the database. Matching features are found based on the euclidean distance of their feature vectors. SIFT has an additional advantage as it's not affected by the size or orientation of the image.
Neural network-based object detection usually involves designing and training a neural network architecture from scratch or leveraging a pre-trained network already trained on a large dataset using custom datasets (called transfer learning). Transfer learning is a method of reusing previous knowledge gained from solving a problem and applying the same knowledge to a separate but associated problem. Neural network approaches include:
- You Only Look Once (YOLO) - is a state-of-the-art real-time object detection system that works by applying a single neural network to an entire image. The neural network splits the image into separate regions and predicts bounding boxes and probabilities for each region. The bounding boxes are weighted by the predicted probabilities. YOLO is very fast as it goes through the image only once.
- Region-Based Convolutional Neural Networks (R-CNN) - use region proposals to localize objects within an image using a selective search algorithm. The CNN extracts features, and the output dense layer consists of features extracted from the image, fed into an SVM to classify the object's presence within the specific region proposal. R-CNNs are a series of algorithms that include R-CNN, fast R-CNN, and faster R-CNN.
- RetinaNet - is a one-stage object detection model that uses a focal loss function to solve class imbalances during training. RetinaNet is a single unified network composed of a backbone network responsible for computing a convolutional feature map over the entire input image and two task-specific subnetworks. The first subnet does convolutional object classification on the backbone network's output. The second subnet performs convolutional bounding box regression.
Neural network-based object detection is more prevalent in modern-day scenarios as it yields better results and is more state-of-the-art.
Setting Up The Project Virtual Environment
Create an isolated virtual environment for the application:
Install the
virtualenvPython package:$ pip install virtualenvCreate the project directory:
$ mkdir obj_detectionNavigate into the new directory:
$ cd obj_detectionCreate the virtual environment:
$ python3 -m venv envThis creates a new folder named
envcontaining scripts to control the virtual environment, including program libraries.Activate the virtual environment:
$ source env/bin/activate
Installing TensorFlow
To install TensorFlow, enter the following command:
$ pip install tensorflowTensorFlow Object Detection API
The TensorFlow Object Detection API is an open-source framework that simplifies constructing, training, and deploying object detection models built on TensorFlow. It contains a set of pre-trained models in their framework - referred to as Model Zoo. These pre-trained models are trained on various datasets, including:
- Common Objects in Context (COCO) - is a large-scale object detection, captioning, and segmentation dataset with a plethora of features, including Recognition in context, 1.5 million object instances, and over 220k labeled images.
- Karlsruhe Institute of Technology and Toyota Technological Institute (KIITI) - is a dataset for use in autonomous driving and mobile robotics.
This guide makes use of a pre-trained model trained on the COCO dataset.
Installing TensorFlow Object Detection API
To install the TensorFlow Object Detection API, clone the repository within the project directory:
$ git clone https://github.com/tensorflow/modelsThe project directory should have a models directory inside it. Navigate to the research directory:
$ cd models/researchTensorFlow Object Detection API uses Protobufs to configure model and training parameters. Using the protoc command:
$ protoc object_detection/protos/*.proto --python_out=.Installing COCO API
The pycocotools package is the official API for the COCO dataset, and it is a dependency of the TensorFlow Object Detection API. To install, navigate back to the project directory:
$ cd ../..Clone the cocoapi repository:
$ git clone https://github.com/cocodataset/cocoapi.gitSwitch directory:
$ cd cocoapi/PythonAPIRun the make command to build the library:
$ makeAfter the build runs successfully, copy the pycocotools subfolder into the research folder from the cloned TensorFlow Object Detection API repository:
$ cp -r pycocotools ../../models/researchInstalling the Object Detection API
To install the Object Detection API, run the following commands within the models/research folder:
$ cp object_detection/packages/tf2/setup.py . && python -m pip install .This installs all the project dependencies.
Building the Object Detector
This guide utilizes a pre-trained object detection model trained on the COCO dataset. To get started, create the main.py file within the project directory:
$ touch main.pyImport Libraries
Import the required libraries by adding the following lines:
import tensorflow as tf
import numpy as np
from PIL import Image
from object_detection.utils import label_map_util
from object_detection.utils import visualization_utils as viz_utils
Numpy is used for array arithmetic and computation, and the Image class from the pillow library is used for image manipulation. The classes imported from object_detection have the following functions:
label_map_util: used to load a label map for plotting. Label maps correlate index numbers to category names, if an object detection has an index of 1 - this maps the detection as a person.visualization_utils: contains functions for overlaying labeled boxes over detected objects.
Downloading the Model
Several models pre-trained on the COCO dataset can be downloaded and used out of the box, as listed in the models repository. In this guide, the pre-trained model used is the SSD ResNet152 V1 FPN 1024x1024 (RetinaNet152).
Create a model download function:
def download_model(model_name, model_date):
    base_url = 'http://download.tensorflow.org/models/object_detection/tf2/'
    model_file = model_name + '.tar.gz'
    model_dir = tf.keras.utils.get_file(fname=model_name,
                                        origin=base_url + model_date + '/' + model_file,
                                        untar=True)
    return str(model_dir)
This function takes the model name and model date as an argument and downloads the specified model using the get_file function from TensorFlow. It returns the downloaded model directory as a string.
Using the function, download the given model:
# Download model
model_name = "ssd_resnet152_v1_fpn_1024x1024_coco17_tpu-8"
model_date = "20200711"
PATH_TO_MODEL_DIR = download_model(model_name, model_date)
This downloads the passed model and saves the model path to a variable. To load the model for use within the application, add the following line:
# Load model
model_fn = tf.saved_model.load(PATH_TO_MODEL_DIR + "/saved_model")
The load function loads a SavedModel from the directory passed as an argument. This returns a trackable object with a signatures attribute mapping from signature keys to functions. This object can be called like a function on an image for object inference. Here the saved_model directory within the downloaded model is passed as an argument.
Load Labels
As mentioned earlier, label maps correlate index numbers to category names. When a detected object returns an index number, the label maps categorize the object. For example, objects detected with an index of 1 are classified as a person.
To load the label map used to correlate index numbers to category names, add the following lines:
# Load labels
PATH_TO_LABELS = 'models/research/object_detection/data/mscoco_label_map.pbtxt'
category_index = label_map_util.create_category_index_from_labelmap(PATH_TO_LABELS, use_display_name=True)
The path to the label map file is saved in a variable and passed to the create _category_index_from_labelmap function. This function reads a label map and returns a categories list containing dictionaries representing all possible categories.
Load Image
This guide uses the images below:
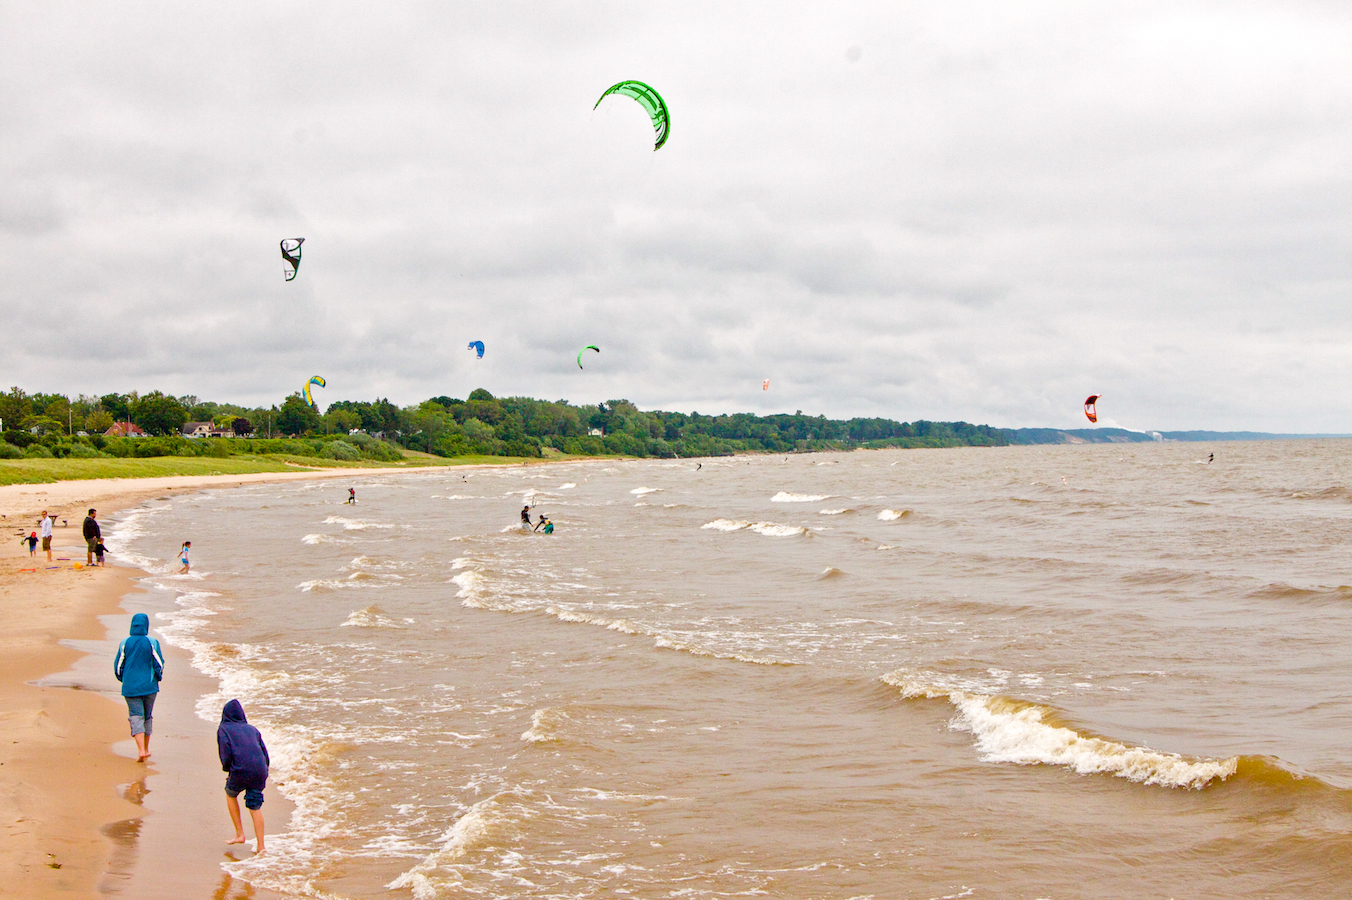
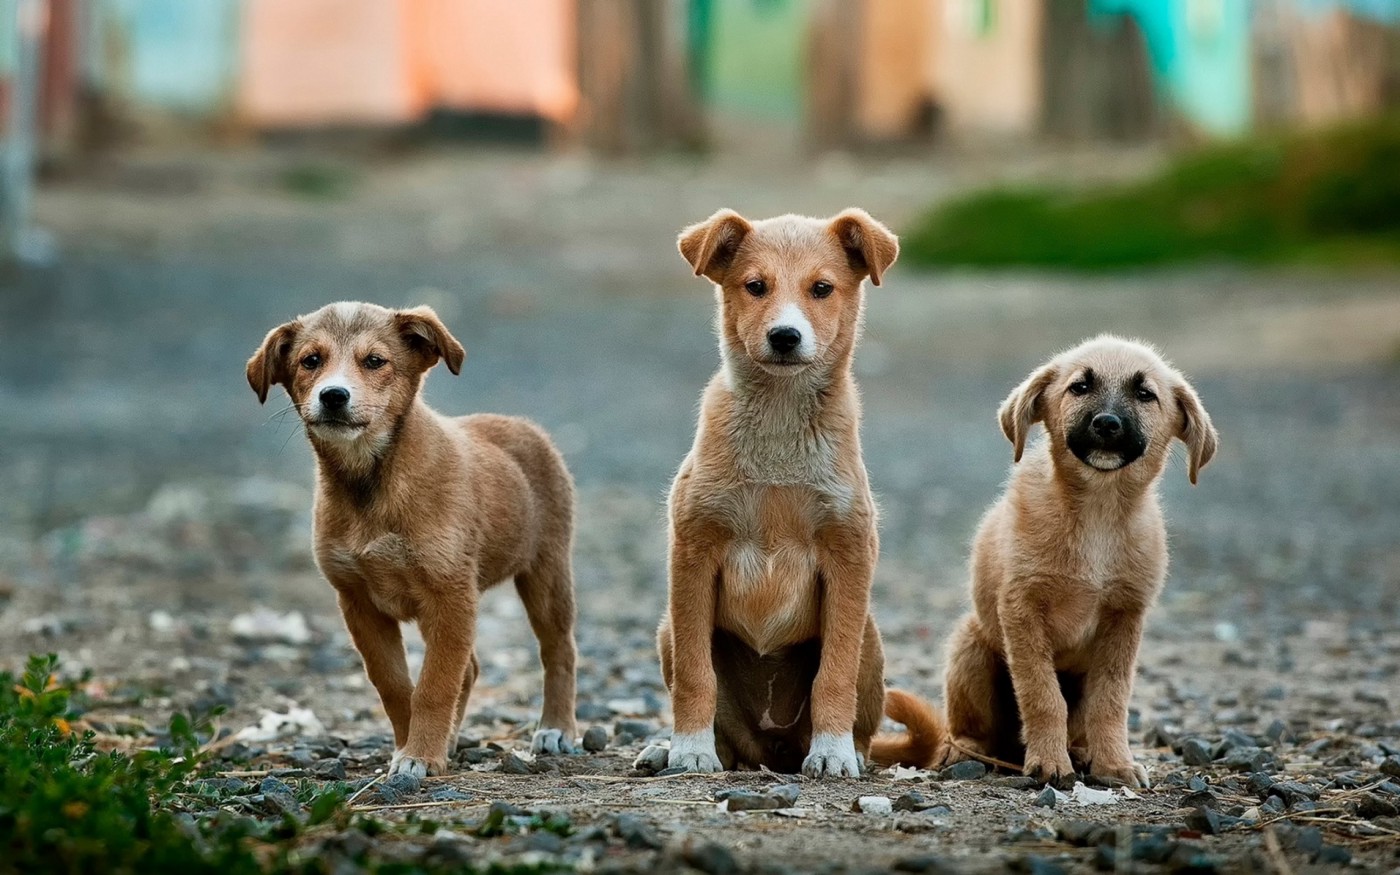
Download the images, save them as image1.jpg and image2.jpg respectively, then place them within the project directory. The project directory should look like this:
.
├── env/
└── models/
└── cocoapi/
└── main.py
└── image1.jpg
└── image2.jpg
Add the following lines to the main.py file:
# Images to run detection
images = ["image1.jpg", "image2.jpg"]

for image in images:
    print(f"Running inference for image - {image}")

    # Load image into a numpy array
    image_np = np.array(Image.open(image))

    # Convert image to tensor
    input_tensor = tf.convert_to_tensor(image_np)

    # Add an axis
    input_tensor = input_tensor[tf.newaxis, ...]
Using the Image.open function, the image is opened and loaded into a numpy array using the array function from numpy. The object detector takes tensors as input, so the image must be converted to a tensor using the convert_to_tensor function. A new axis is also added as the model expects a batch of images.
Running Inference
To infer objects from the image, add the following line:
    # Run inference
    detections = model_fn(input_tensor)
The model is called with the input tensor as an argument, this runs the tensor through the model and the detection takes place returning outputs as tensor batches marking boundaries of detected objects.
    # Outputs are tensor batches.
    # Convert to numpy arrays, and take index [0] to remove the batch dimension.
    num_detections = int(detections.pop('num_detections'))
    detections = {key: value[0, :num_detections].numpy()
                  for key, value in detections.items()}
    detections['num_detections'] = num_detections

    # detection_classes cast as ints.
    detections['detection_classes'] = detections['detection_classes'].astype(np.int64)
The above lines convert the tensor batches to numpy arrays, remove the batch dimension as it's not needed, and updates the number of detections after cleaning up. The detection classes are then cast as integers from their float representations.
Visualizing Detections
To draw boxes around detected objects from the image, add the following lines:
    image_np_with_detections = image_np.copy()

    viz_utils.visualize_boxes_and_labels_on_image_array(
            image_np_with_detections,
            detections['detection_boxes'],
            detections['detection_classes'],
            detections['detection_scores'],
            category_index,
            use_normalized_coordinates=True,
            max_boxes_to_draw=200,
            min_score_thresh=.30,
            agnostic_mode=False,
            line_thickness=8)
A copy of the image is made using the copy method, and the visualize_boxes_and_labels_on_image_array function - overlays labeled boxes on the image with the formatted label names and scores. It takes 5 arguments:
- Image - the image to be overlaid with boxes as a uint8 numpy array.
- Boxes - a numpy array with a shape [N, 4].
- Classes - a numpy array with a shape [N]. Class indices match the keys in the label map and are 1-based.
- Scores - a numpy array of shape [N] or None. If set to None, the function assumes the boxes to be plotted are ground-truth, and also plots boxes with no classes or scores as black.
- Category Index - a dictionary containing category dictionaries composed of index IDs and category names, keyed by indices.
The required arguments are passed with additional optional arguments. In this example, using the optional arguments, the max number of boxes to draw is set to 200, and the line thickness is set to 8.
Saving the Image with Detections
To save the image with the overlaid boxes representing detections, add the following lines:
    # Save image with detections
    img = Image.fromarray(image_np_with_detections)
    img_filename = image[0:-4] + "_detect" + image[-4:]
    img.save(img_filename)
The new image is saved with _detect appended to its original name.
Final Code
For reference purposes, the full code:
import tensorflow as tf
import numpy as np
from PIL import Image
from object_detection.utils import label_map_util
from object_detection.utils import visualization_utils as viz_utils

def download_model(model_name, model_date):
    base_url = 'http://download.tensorflow.org/models/object_detection/tf2/'
    model_file = model_name + '.tar.gz'
    model_dir = tf.keras.utils.get_file(fname=model_name,
                                        origin=base_url + model_date + '/' + model_file,
                                        untar=True)
    return str(model_dir)

# Download model
model_name = "ssd_resnet152_v1_fpn_1024x1024_coco17_tpu-8"
model_date = "20200711"
PATH_TO_MODEL_DIR = download_model(model_name, model_date)

# Load model
model_fn = tf.saved_model.load(PATH_TO_MODEL_DIR + "/saved_model")

# Load labels
PATH_TO_LABELS = 'models/research/object_detection/data/mscoco_label_map.pbtxt'
category_index = label_map_util.create_category_index_from_labelmap(PATH_TO_LABELS, use_display_name=True)

# Images to run detection
images = ["image1.jpg", "image2.jpg"]

for image in images:
    print(f"Running inference for image - {image}")

    # Load image into a numpy array
    image_np = np.array(Image.open(image))

    # Convert image to tensor
    input_tensor = tf.convert_to_tensor(image_np)

    # Add an axis
    input_tensor = input_tensor[tf.newaxis, ...]

    # Run inference
    detections = model_fn(input_tensor)

    # Outputs are tensor batches.
    # Convert to numpy arrays, and take index [0] to remove the batch dimension.
    num_detections = int(detections.pop('num_detections'))
    detections = {key: value[0, :num_detections].numpy()
                  for key, value in detections.items()}
    detections['num_detections'] = num_detections

    # detection_classes cast as ints.
    detections['detection_classes'] = detections['detection_classes'].astype(np.int64)

    image_np_with_detections = image_np.copy()

    viz_utils.visualize_boxes_and_labels_on_image_array(
            image_np_with_detections,
            detections['detection_boxes'],
            detections['detection_classes'],
            detections['detection_scores'],
            category_index,
            use_normalized_coordinates=True,
            max_boxes_to_draw=200,
            min_score_thresh=.30,
            agnostic_mode=False,
            line_thickness=8)

    # Save image with detections
    img = Image.fromarray(image_np_with_detections)
    img_filename = image[0:-4] + "_detect" + image[-4:]
    img.save(img_filename)
Running the Code
To run the code, enter the following command from the project directory:
$ python main.pyOutput:
Downloading data from http://download.tensorflow.org/models/object_detection/tf2/20200711/ssd_resnet152_v1_fpn_1024x
1024_coco17_tpu-8.tar.gz
504180168/504180168 [==============================] - 133s 0us/step

Running inference for image - image1.jpg
Running inference for image - image2.jpg
The code successfully downloads the model and infers objects from the images. Within the project directory, the saved object-detected images are present:
.
├── env/
└── models/
└── cocoapi/
└── main.py
└── image1.jpg
└── image1_detect.jpg
└── image2.jpg
└── image2_detect.jpg
Open the new images:

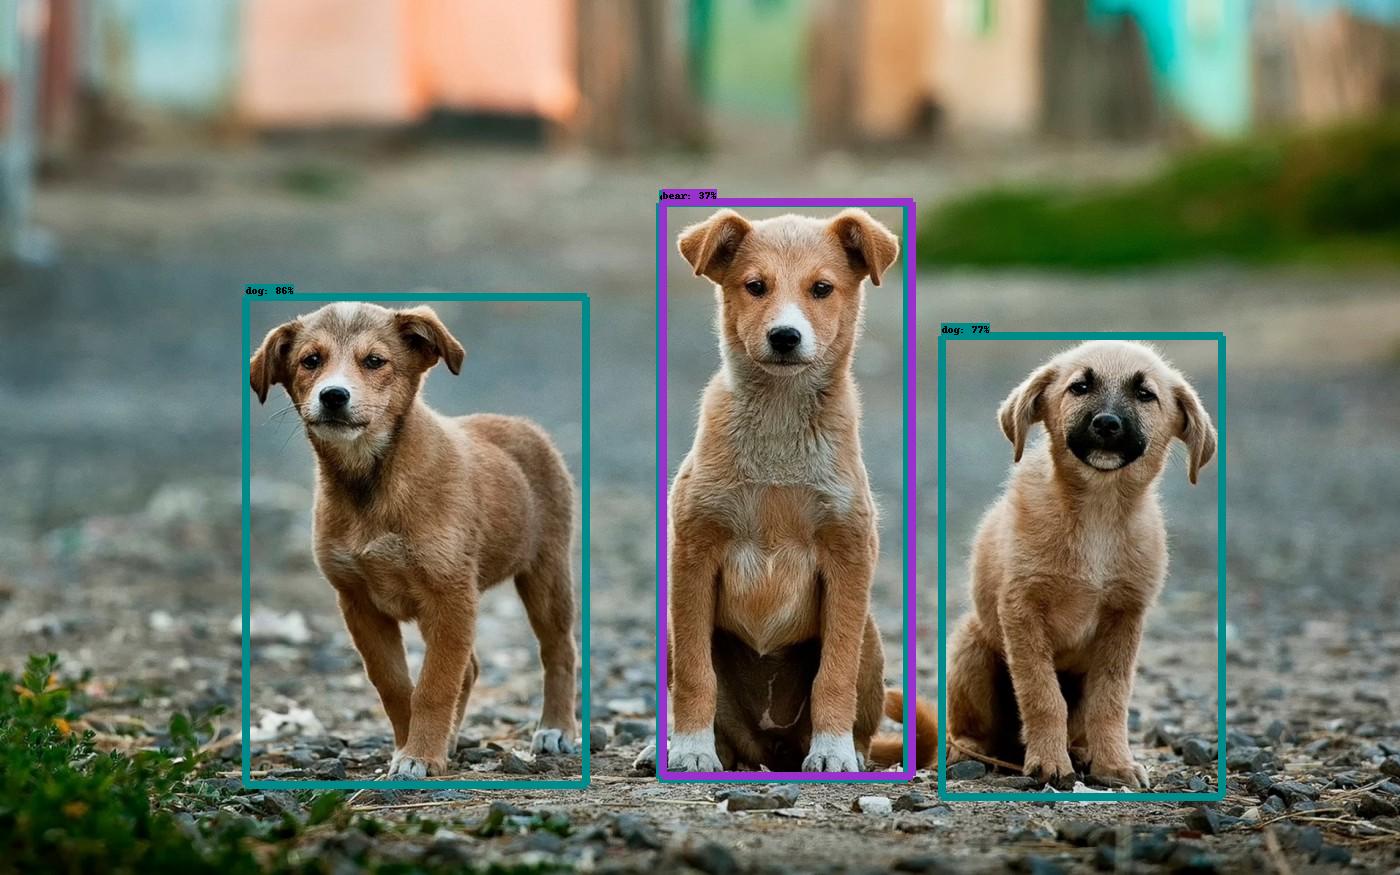
In the first image, the object detector correctly labels all the objects, while in the second image it recognised 3 animals but classified the dog in the middle as a bear due to strikingly similar features.
Conclusion
This guide covered object detection and how to build an object detector in TensorFlow.
No comments yet.