How to Mount Vultr Block Storage Volume on Windows Server
Updated on 11 September, 2025A family of Microsoft operating systems that provides a graphical user interface and supports various applications and services for personal and business computing.
Mounting Vultr Block Storage volume on Windows provides flexible and scalable file storage for Vultr Cloud Compute instances. Windows Server supports NVMe and HDD-based Vultr Block Storage volumes.
Follow this guide to mount Vultr Block Storage volume on Windows Server.
Attach Vultr Block Storage volume to Windows Server.
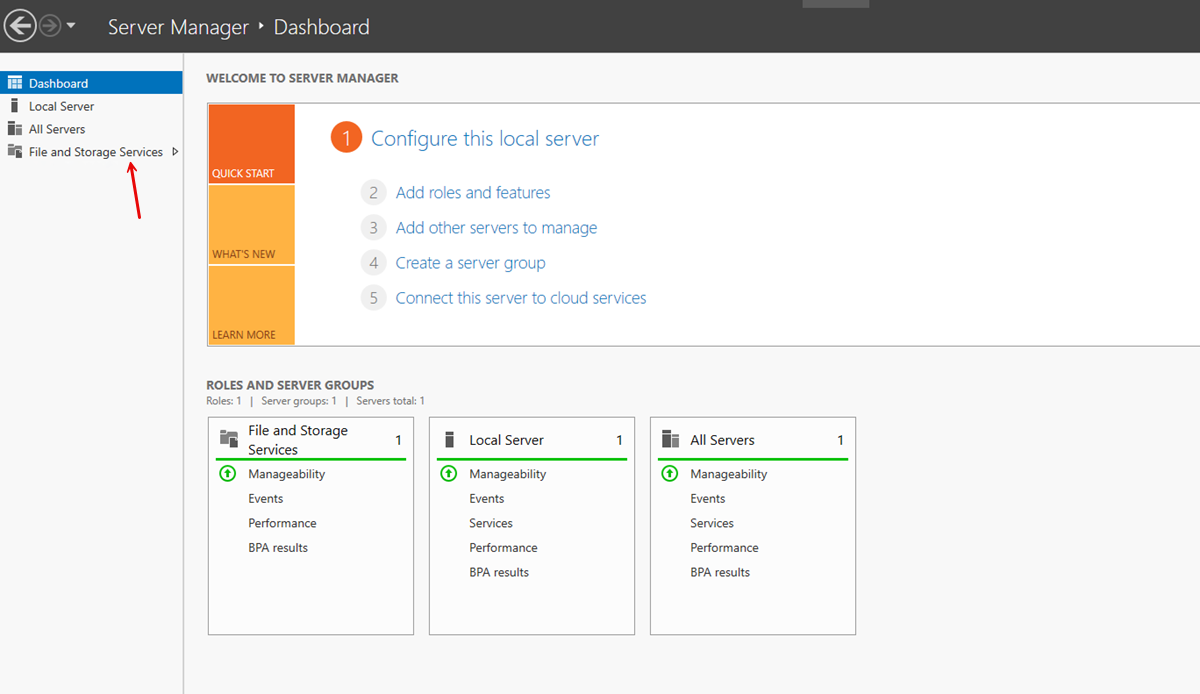
Open the Windows Server Manager application and click File and Storage Services on the left navigation menu.
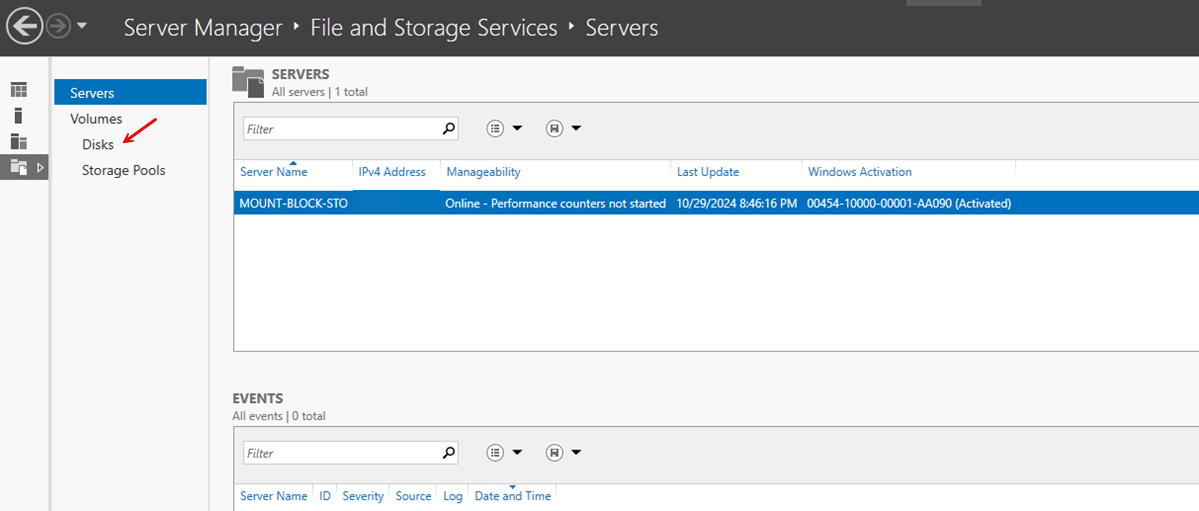
Click Disks.
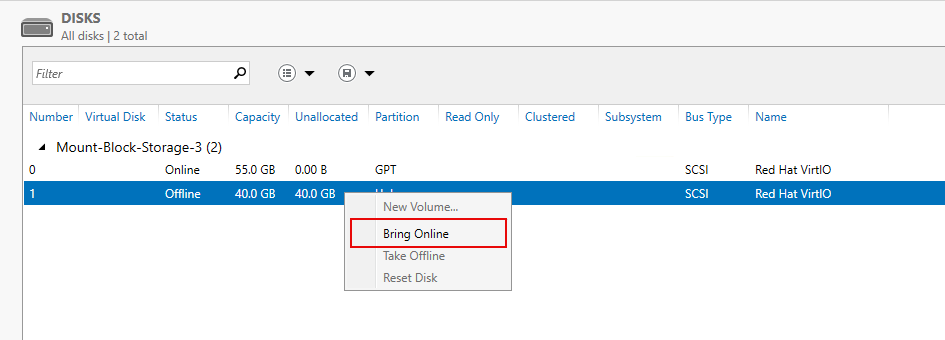
Find the Vultr Block Storage volume and verify that its status is Offline.
Right-click the Vultr Block Storage volume and select Bring Online.
Click Yes when prompted to bring the disk online.
Right-click the disk again and select Initialize to set up Vultr Block Storage volume as a GPT disk.
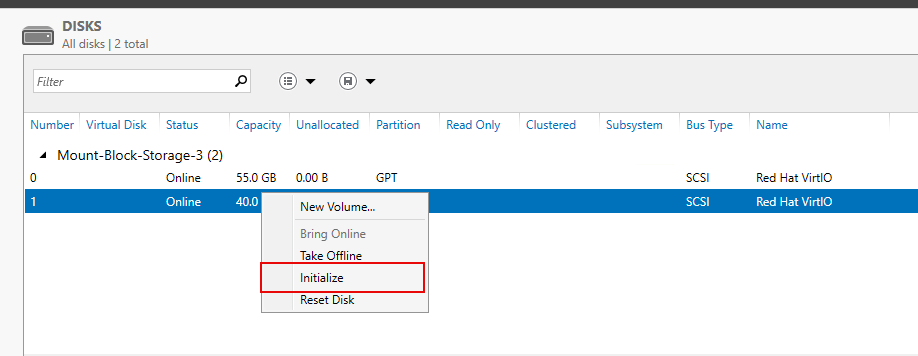
Click Yes when prompted to initialize the disk.
Right-click the Vultr Block Storage volume again and select New Volume.
Click Next in the New Volume Wizard.
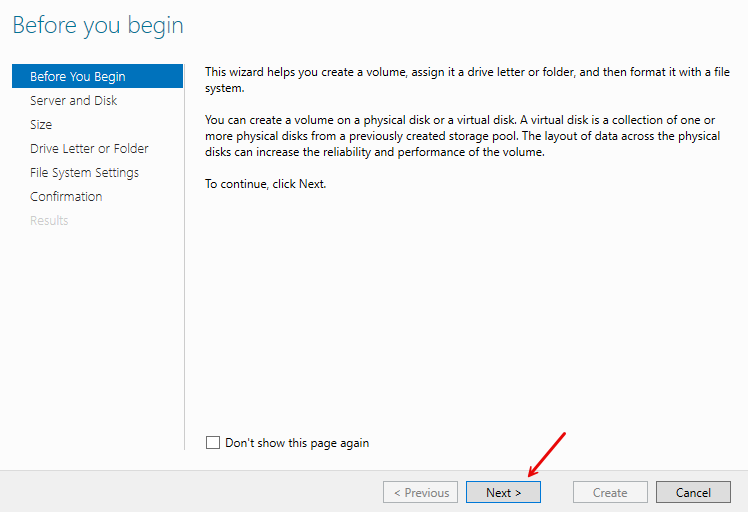
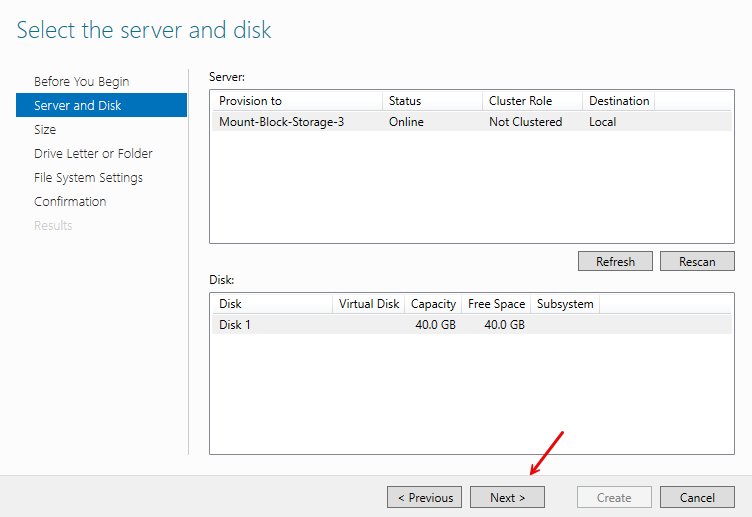
Select the target Windows Server, verify the Vultr Block Storage volume capacity, and click Next to set up the size.
Keep the default value in the Volume Size field or enter a new value to set the Vultr Block Storage volume partition size.
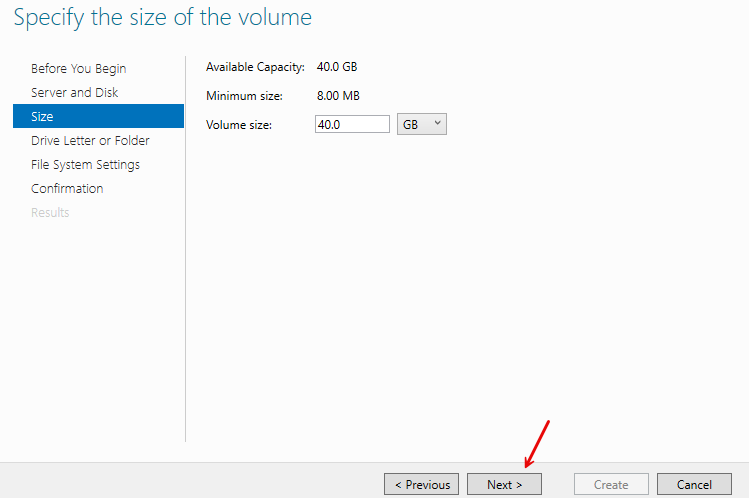
Click Next to set up additional partition details.
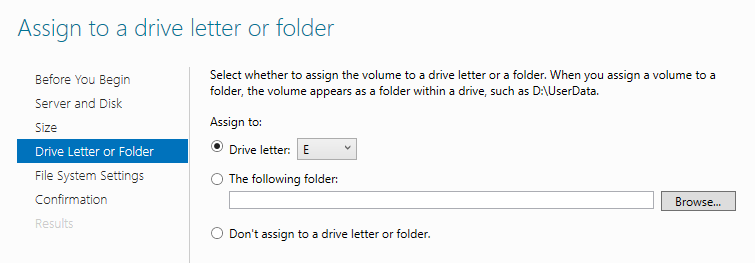
Click the Drive letter drop-down to select a letter to assign the Vultr Block Storage volume partition and click Next.
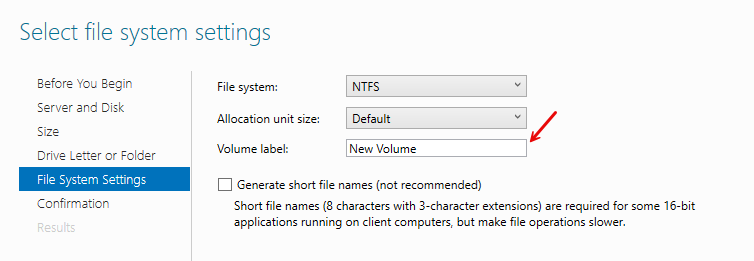
Select the partition file system, enter a custom name in the Volume label field to identify the Vultr Block Storage volume partition, and click Next.
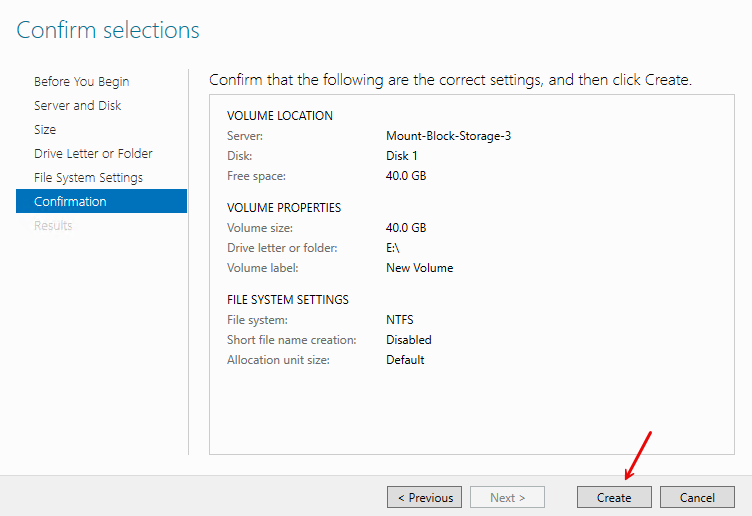
Verify the Vultr Block Storage volume settings and click Create to apply changes.
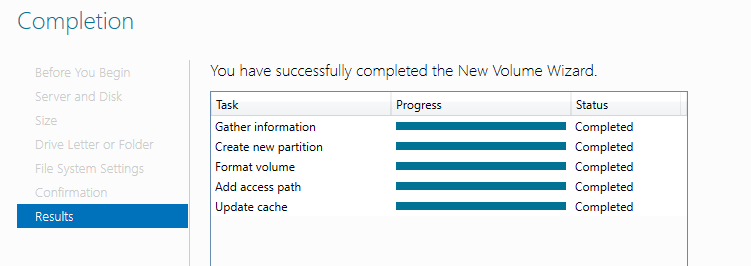
Monitor the partitioning process, verify that all tasks are completed, and click Close.
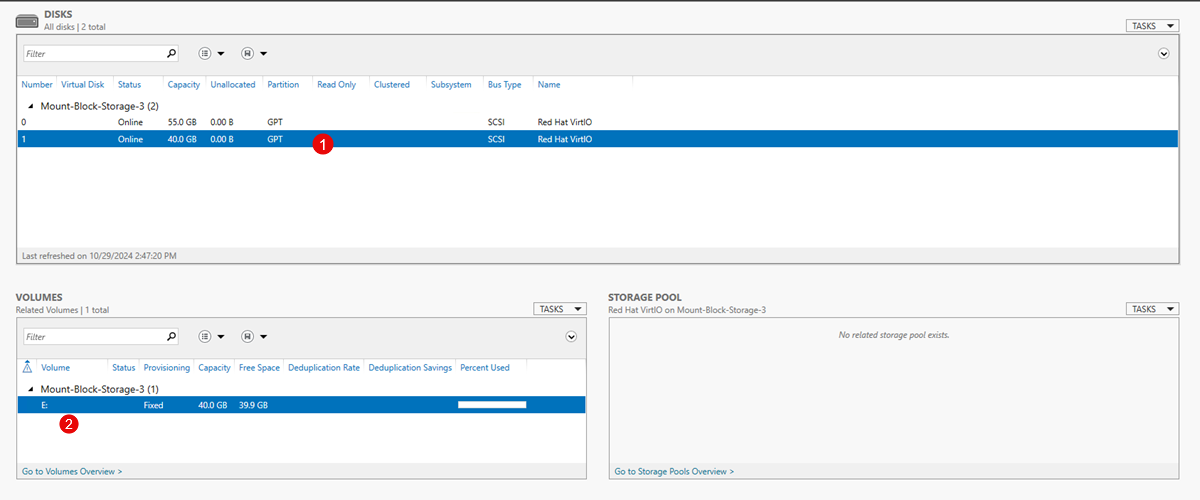
Click the Vultr Block Storage volume and verify that the new volume is available in the Volumes section.
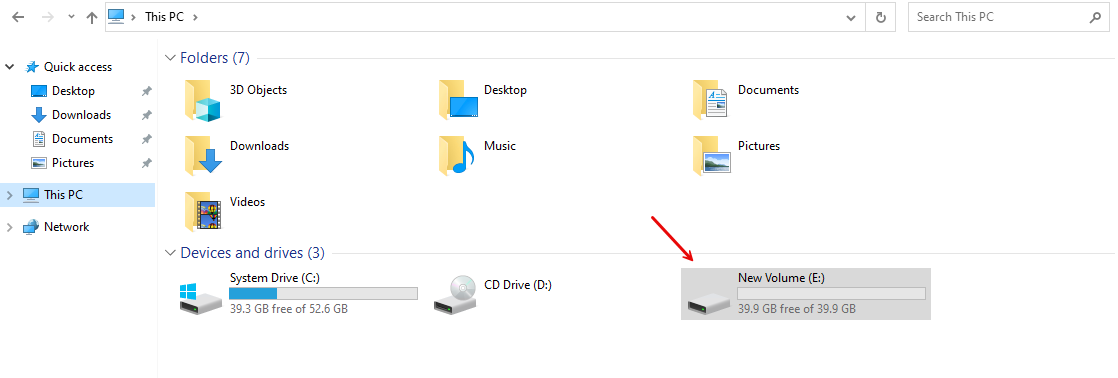
Open the Windows File Explorer and click This PC on the left navigation menu to view all active storage volumes.
Verify that the Vultr Block Storage volume is available.
