
AI Generated Videos with Stable Video Diffusion and Vultr Cloud GPU

Introduction
Stable Video Diffusion (SVD) model is an image-to-video diffusion model developed by StabilityAI that is capable of generating high-quality videos from image prompts. The model works by taking an image as an input and generating a series of images that match the prompt, then, the generated images are merged and converted into a single video.
To generate images, the SVD model uses a diffusion process which iteratively adds noise and removes it until the desired image is generated. The model can generate 2 to 4 seconds of video length conditioned to the provided input.
This article explains how to generate AI videos with Stable Video Diffusion on a Vultr Cloud GPU server. You are to install the required Stable Diffusion dependencies, then, start a Streamlit server to infer the model for video generation using a web user interface. When deployed, you can also infer the model using a Command Line Interface (CLI).
Prerequisites
Before you begin:
- Deploy a fresh A100 Ubuntu 22.04 Vultr Cloud GPU server using the Vultr marketplace application with at least
80 GBGPU RAM. - Access the server using SSH as a non-root user with sudo privileges.
Model Variants
The Stable Video Diffusion (SVD) model has undergone 3 layers of training, first, the model is trained on images, then the image model for video generation is extended by inserting temporal layers that are pretrained on a larger dataset. The final step involves fine-tuning the model with a smaller dataset of high-quality videos. Hence, the model has 4 variants that are which include the base SVD model, SVD XT, SVD Image Decoder, and SVD XT Image Decoder as described below:
SVD: Generates short videos with 14 frames using a
576x1024resolution. It uses an f8-decoder that decodes the compressed image using a lossless compression algorithm to achieve temporal consistency between the frames.SVD XT: The fine-tuned version of the base model capable of generating 25 frames at a
576x1024resolution given a context frame of the same size. Similar to the base variant, it uses an f8-decoderSVD Image Decoder: This model is capable of generating short videos with 14 frames, but uses the image decoder instead of an f8-decoder used by the base variant.
SVD XT Image Decoder: This model is capable of generating short videos with 25 frames and uses the image decoder instead of the f8-decoder.
Both the f8 and image decoders offer different functionalities, and to find the right approach to use the models, experiment with both methods to find the best implementation that fits your use case.
Set Up the Development Environment
To implement the Stable Video Diffusion model, clone the model repository, download the model checkpoints in a Safetensors format, install the required Python packages and the ffmpeg package to encode your videos as described in the steps below.
Switch to your user home directory.
console$ cd
Clone the Stability AI
generative-modelsrepository.console$ git clone https://github.com/Stability-AI/generative-models
Switch to the new model directory.
console$ cd generative-models/
Create a new
checkpointsdirectory to store the model checkpoints.console$ mkdir checkpoints
Download the model checkpoints using the
wgetutility.console$ wget -O checkpoints/svd.safetensors 'https://huggingface.co/stabilityai/stable-video-diffusion-img2vid/resolve/main/svd.safetensors?download=true' $ wget -O checkpoints/svd_image_decoder.safetensors 'https://huggingface.co/stabilityai/stable-video-diffusion-img2vid/resolve/main/svd_image_decoder.safetensors?download=true' $ wget -O checkpoints/svd_xt.safetensors 'https://huggingface.co/stabilityai/stable-video-diffusion-img2vid-xt/resolve/main/svd_xt.safetensors?download=true' $ wget -O checkpoints/svd_xt_image_decoder.safetensors 'https://huggingface.co/stabilityai/stable-video-diffusion-img2vid-xt/resolve/main/svd_xt_image_decoder.safetensors?download=true'
The above commands download all Stable Video Diffusion model variant checkpoints in a Safetensors format. Safetensors is a fast and secure way to store tensors. The format is designed to be safe from code execution attacks and also compatible with multiple programming languages and frameworks for the efficient sharing of machine learning models.
Install the required Python packages using Pip.
console$ pip install requirements/pt2.txt --ignore-installed
Install the
ffmpegpackage.console$ sudo apt install ffmpeg
The Stable Video Diffusion model produces raw videos that consist of uncompressed video frames. This makes raw videos complex to store and share.
ffmpegconverts the raw video produced by the model and encodes it in the H.264 format. This process removes any redundant information and reduces the video size for convenient storage and sharing.
Inference the Model using the Streamlit Web Interface
Streamlit is an open-source Python library that provides a convenient development environment for the creation of custom machine learning and data science web applications. You can build visualizations, develop interactive tools for model training and machine learning, then, share the final application with your target audience.
Follow the steps below to start a Streamlit server, access the web user interface, and generate videos using the Stable Diffusion Model files by providing custom image inputs.
Start the Streamlit Server
Create a new
PYTHONPATHenvironment variable to store your Stable Video Diffusion filesgenerative-modelsdirectory path.console$ export PYTHONPATH=$PYTHONPATH:$HOME/generative-models
The above command adds your Stable Video Diffusion files path
generative-modelsto thePYTHONPATHenvironment variable. This enables the Streamlit script to import local directories as modules for execution in the correct format and indexing by the Python interpreter.Allow incoming connections to the Streamlit port
8501through the default server firewall.console$ sudo ufw allow 8501
Start the Streamlit web server.
console$ streamlit run scripts/demo/video_sampling.py
The above command starts a new Streamlit session using the
PYTHONPATHvariable and runs thevideo_sampling.pyscript to generate videos based on the input prompt.Access the Streamlit interface using a web browser such as Firefox.
http://SERVER-IP:8501
Generate Videos using Stable Video Diffusion
In this section, select a target model for your use case, and load the model to initialize its pipeline. Then, upload a base input image and start the image-to-video generation process.
Within the Streamlit interface, click the Model Version dropdown to select your target model from the list.
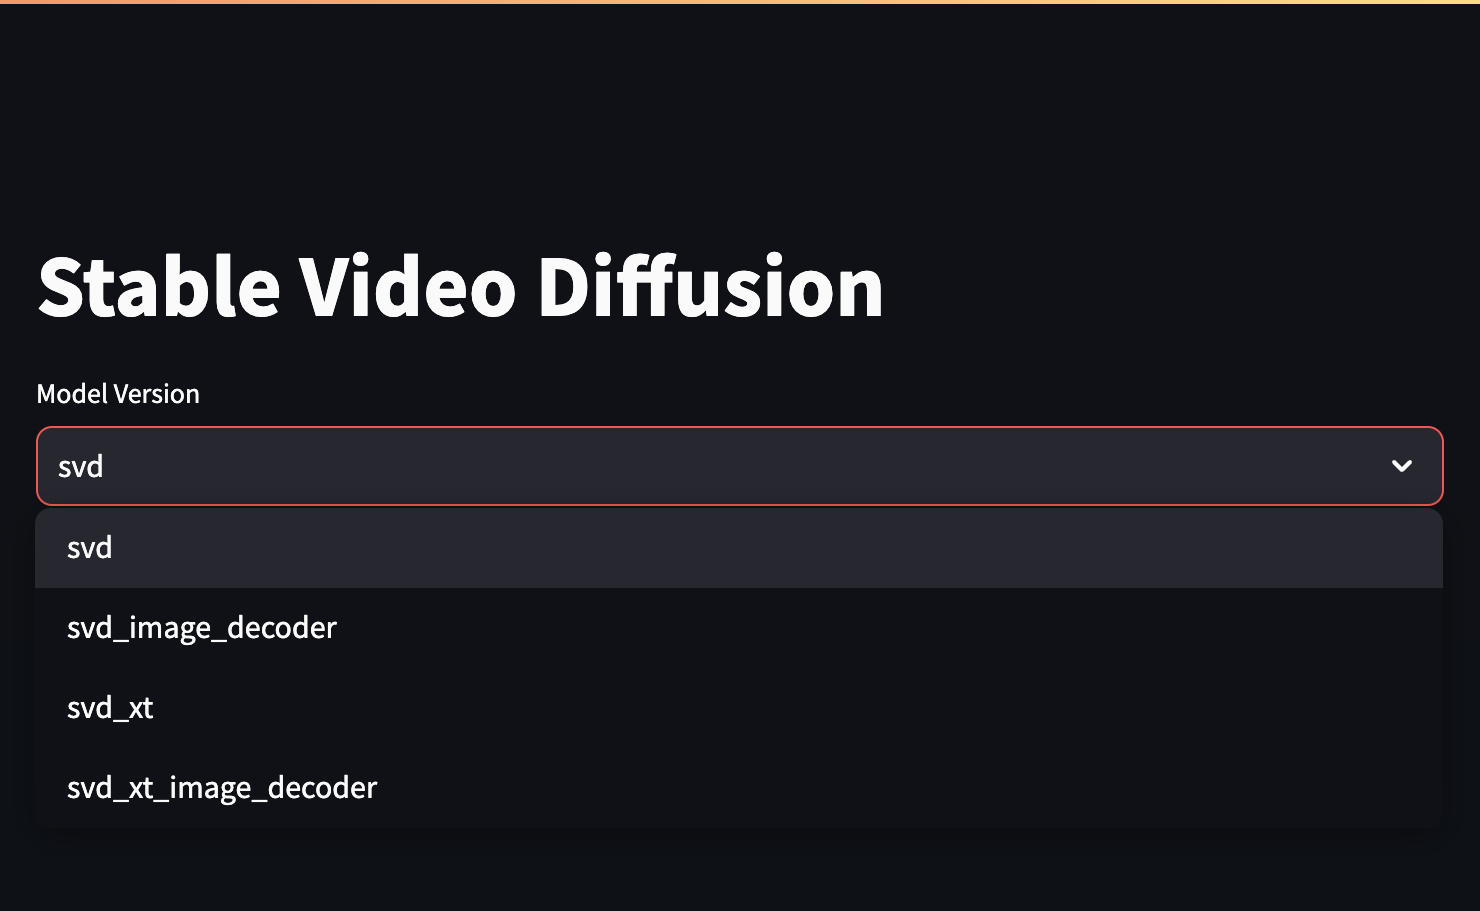
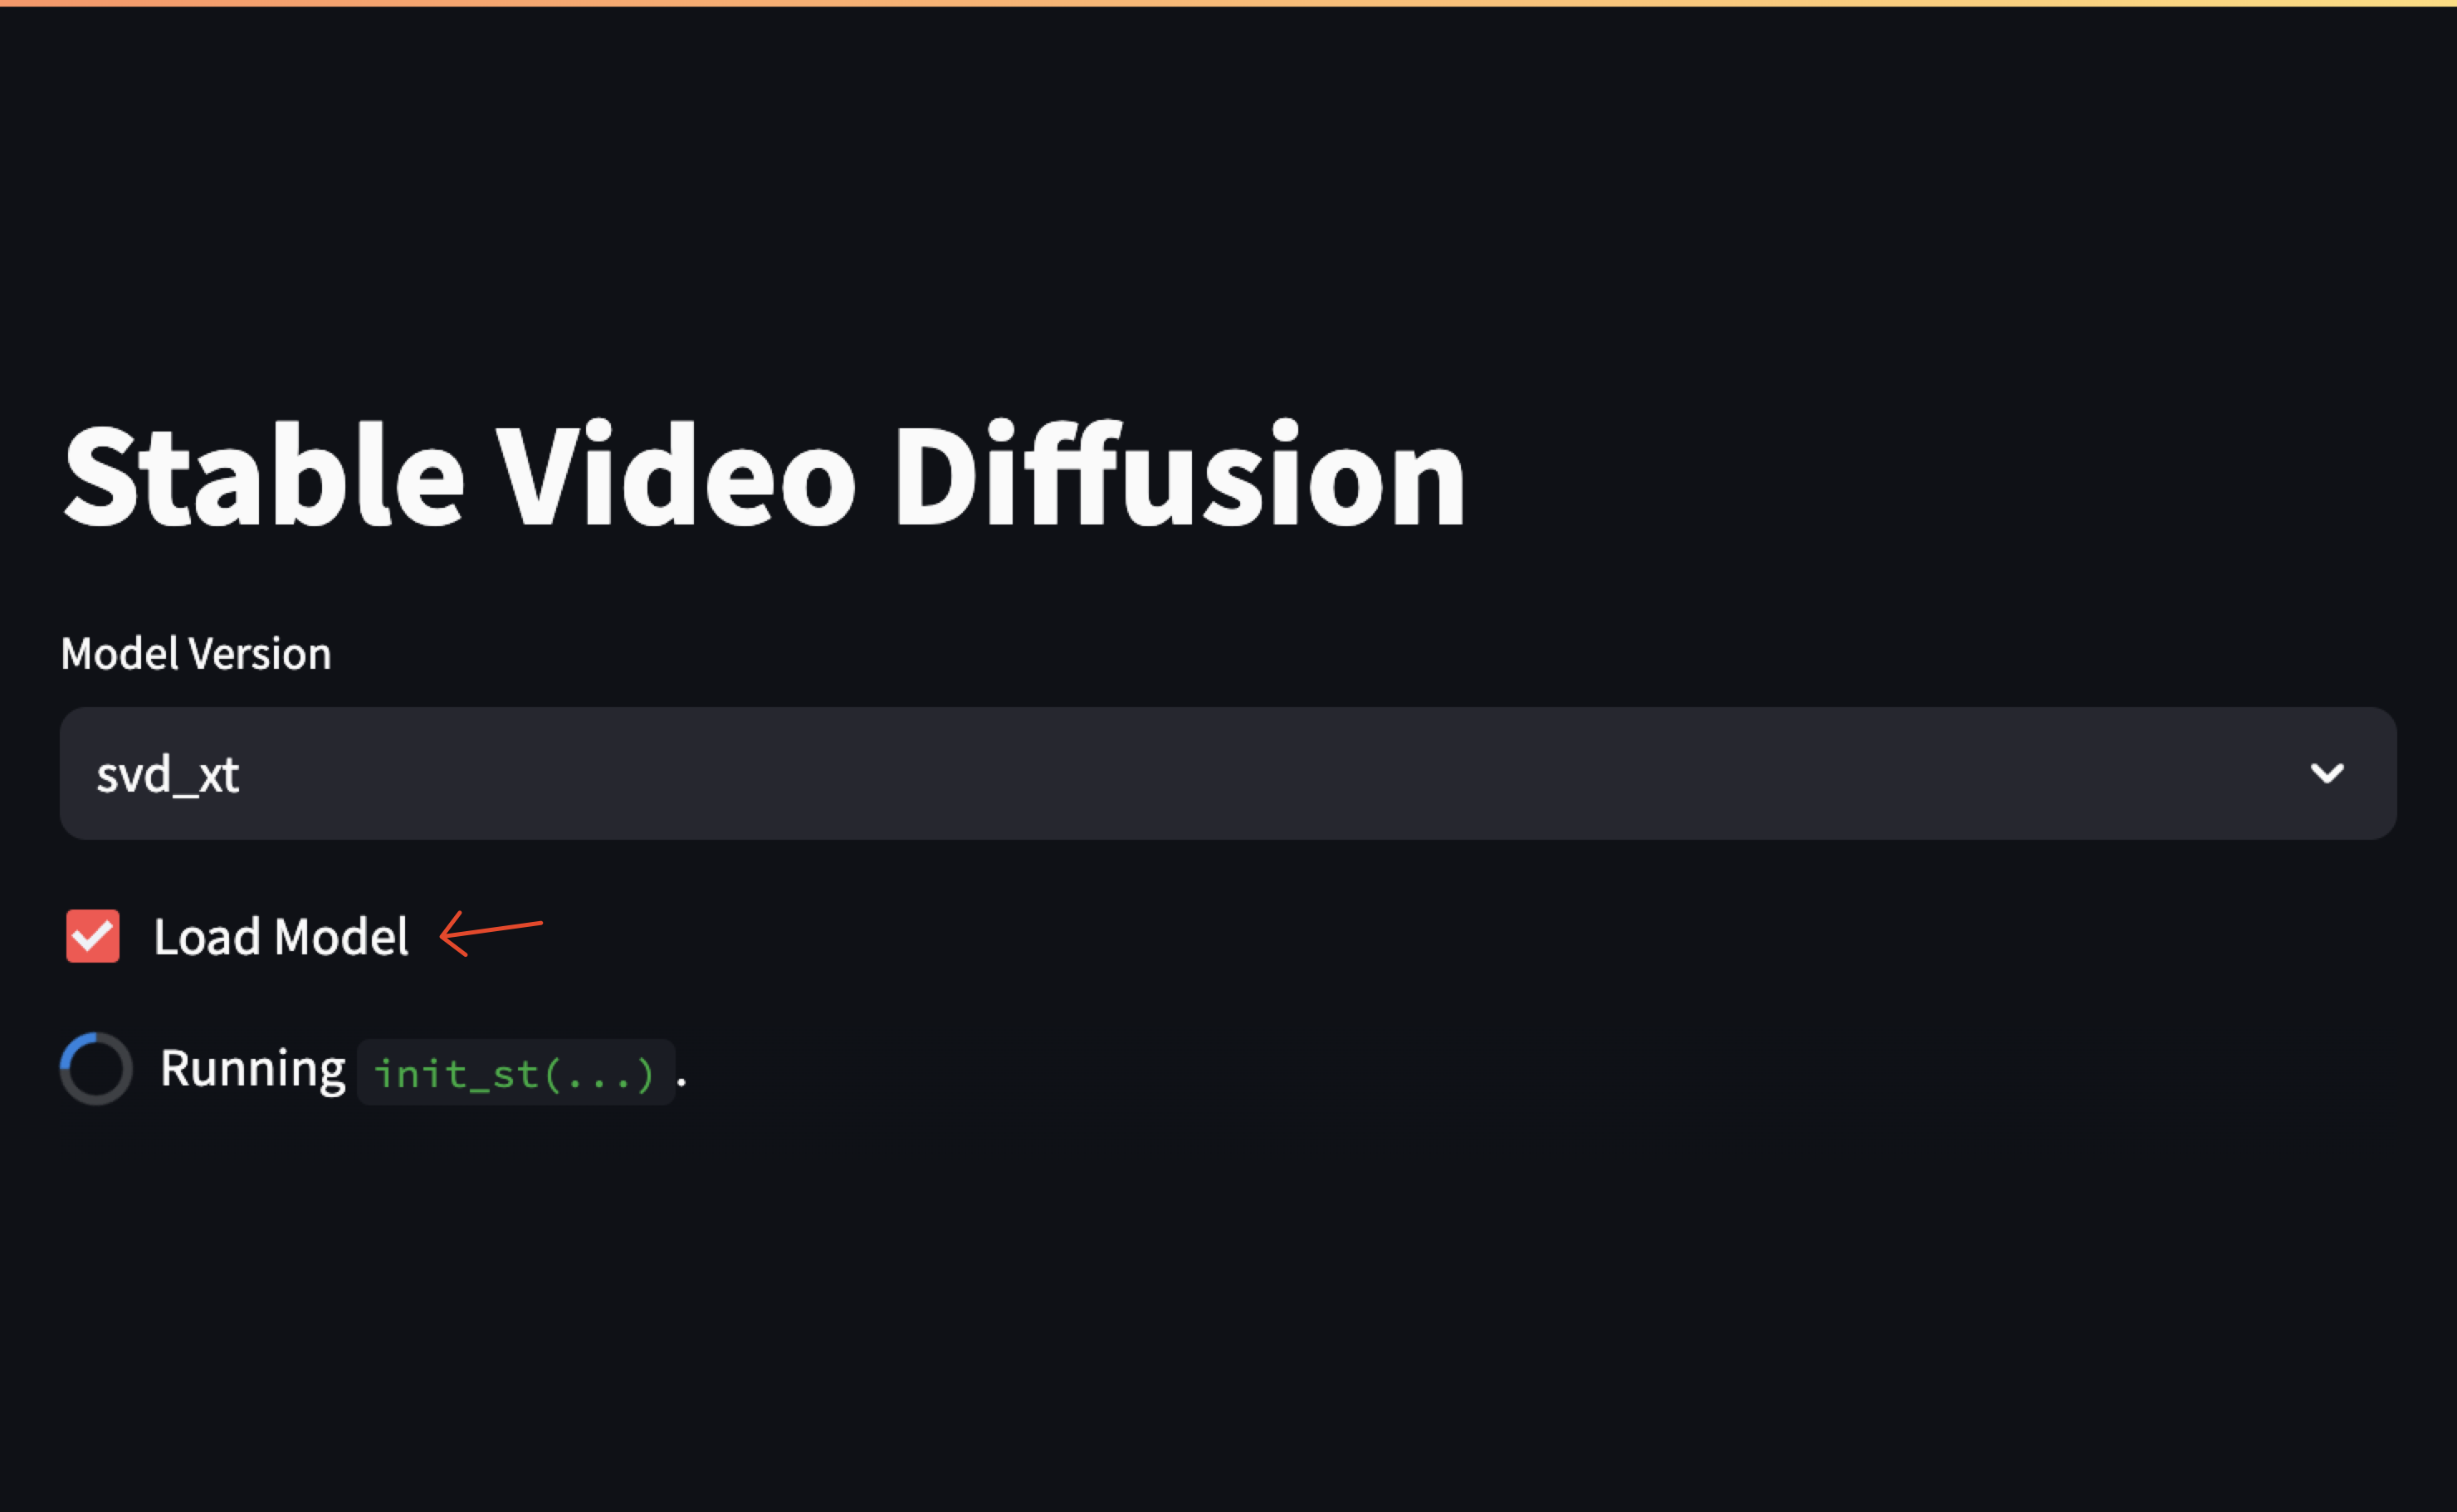
For purposes of this article, select the SVD XT model variant that offers higher video frame rates.
Check the Load Model box to start the model and its pipeline.
Within the Input section, click Browse Files to upload the base image from your local computer directories.

When the upload is complete, the processes your base image and displays the input and output frames. If the shape image dimensions are wrong, adjust the
HandWparameters from the left sidebar.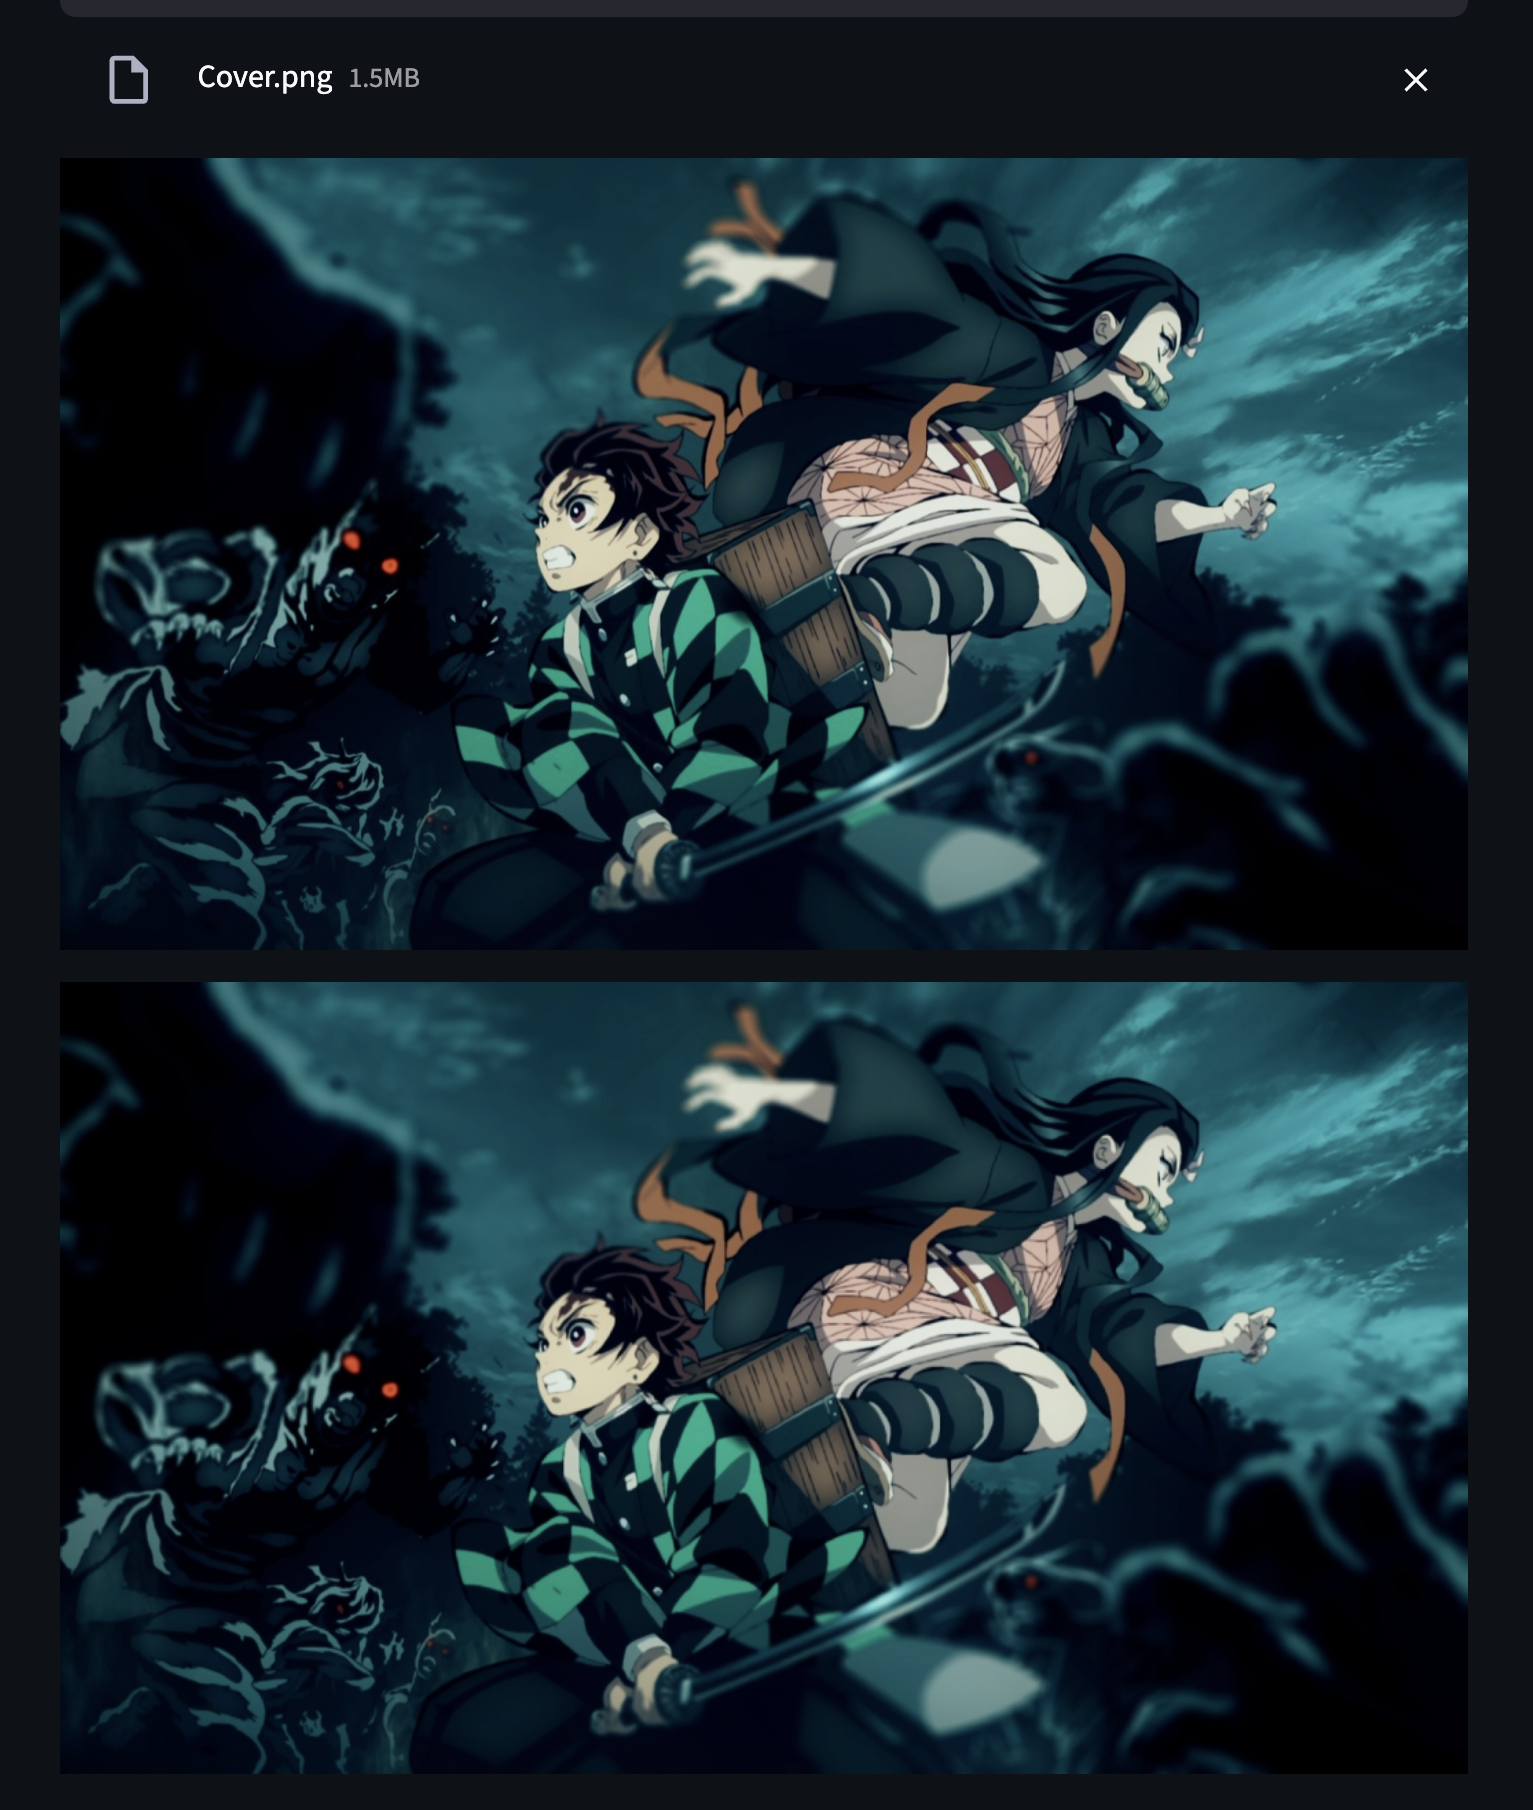
Keep
14selected as your decode frames, then click the Sample button to start the generation process.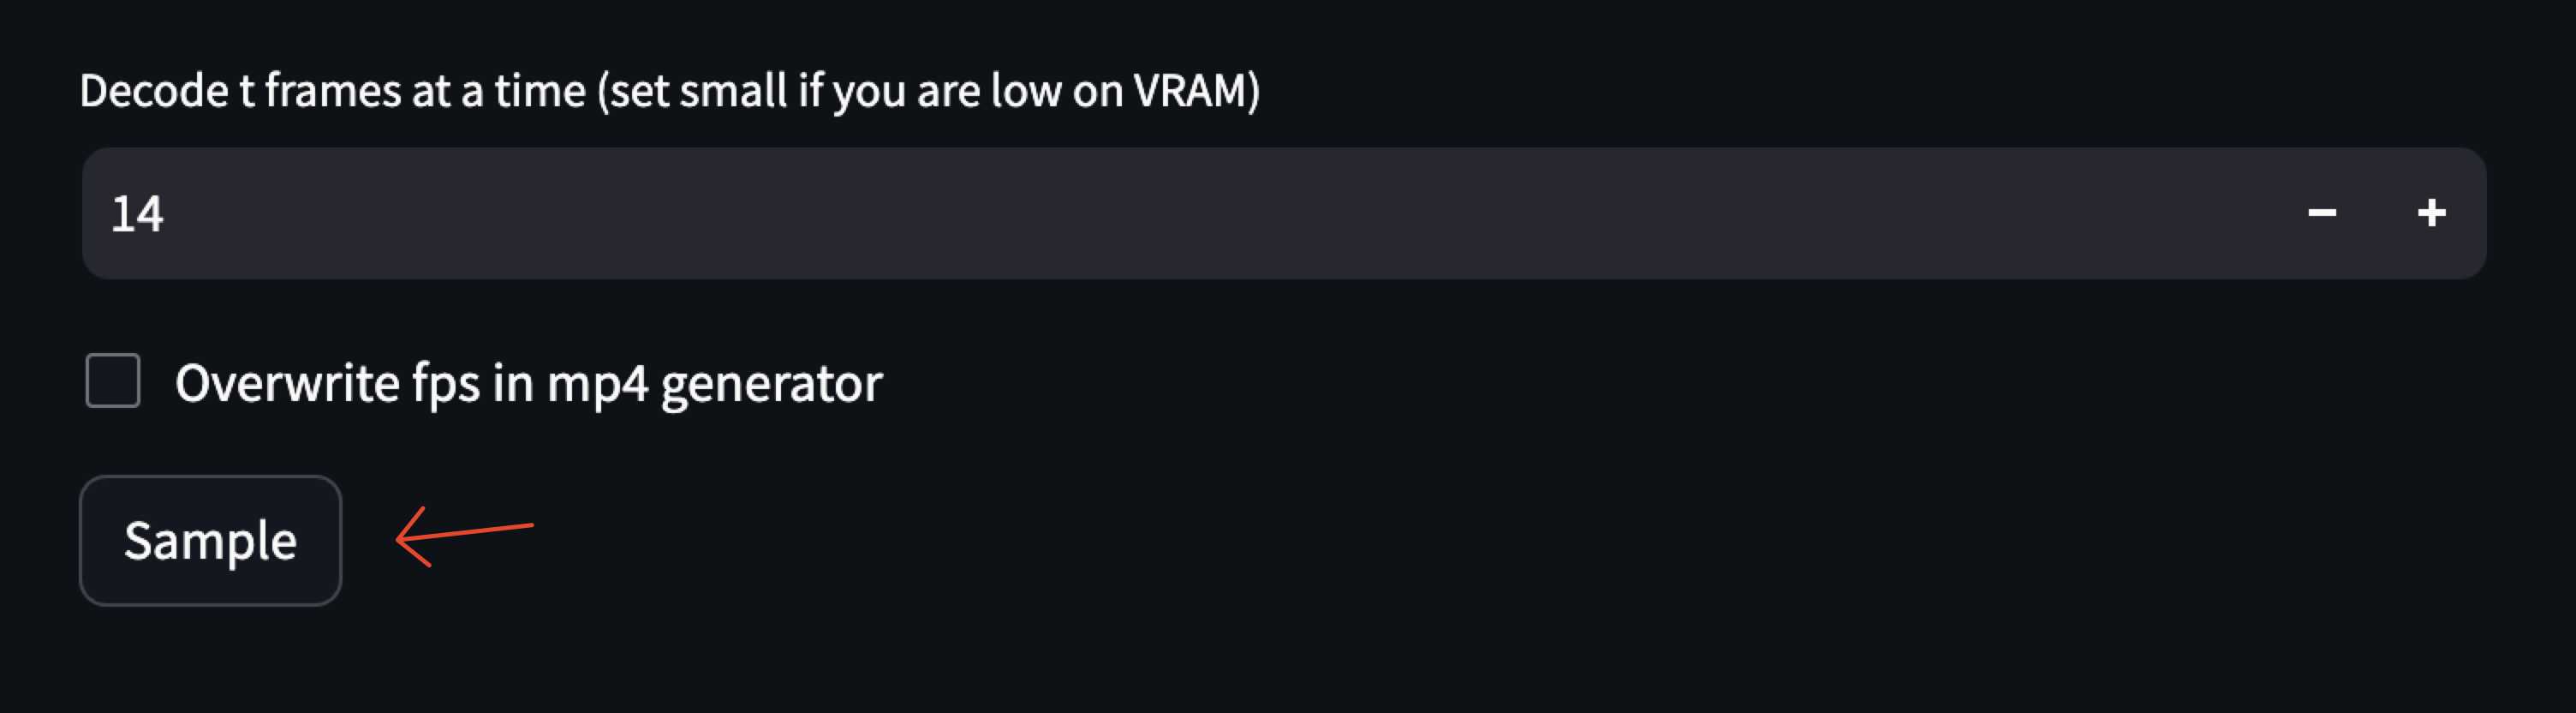
Verify that an image grid with all the generated frames displays together with the final H264-encoded video.
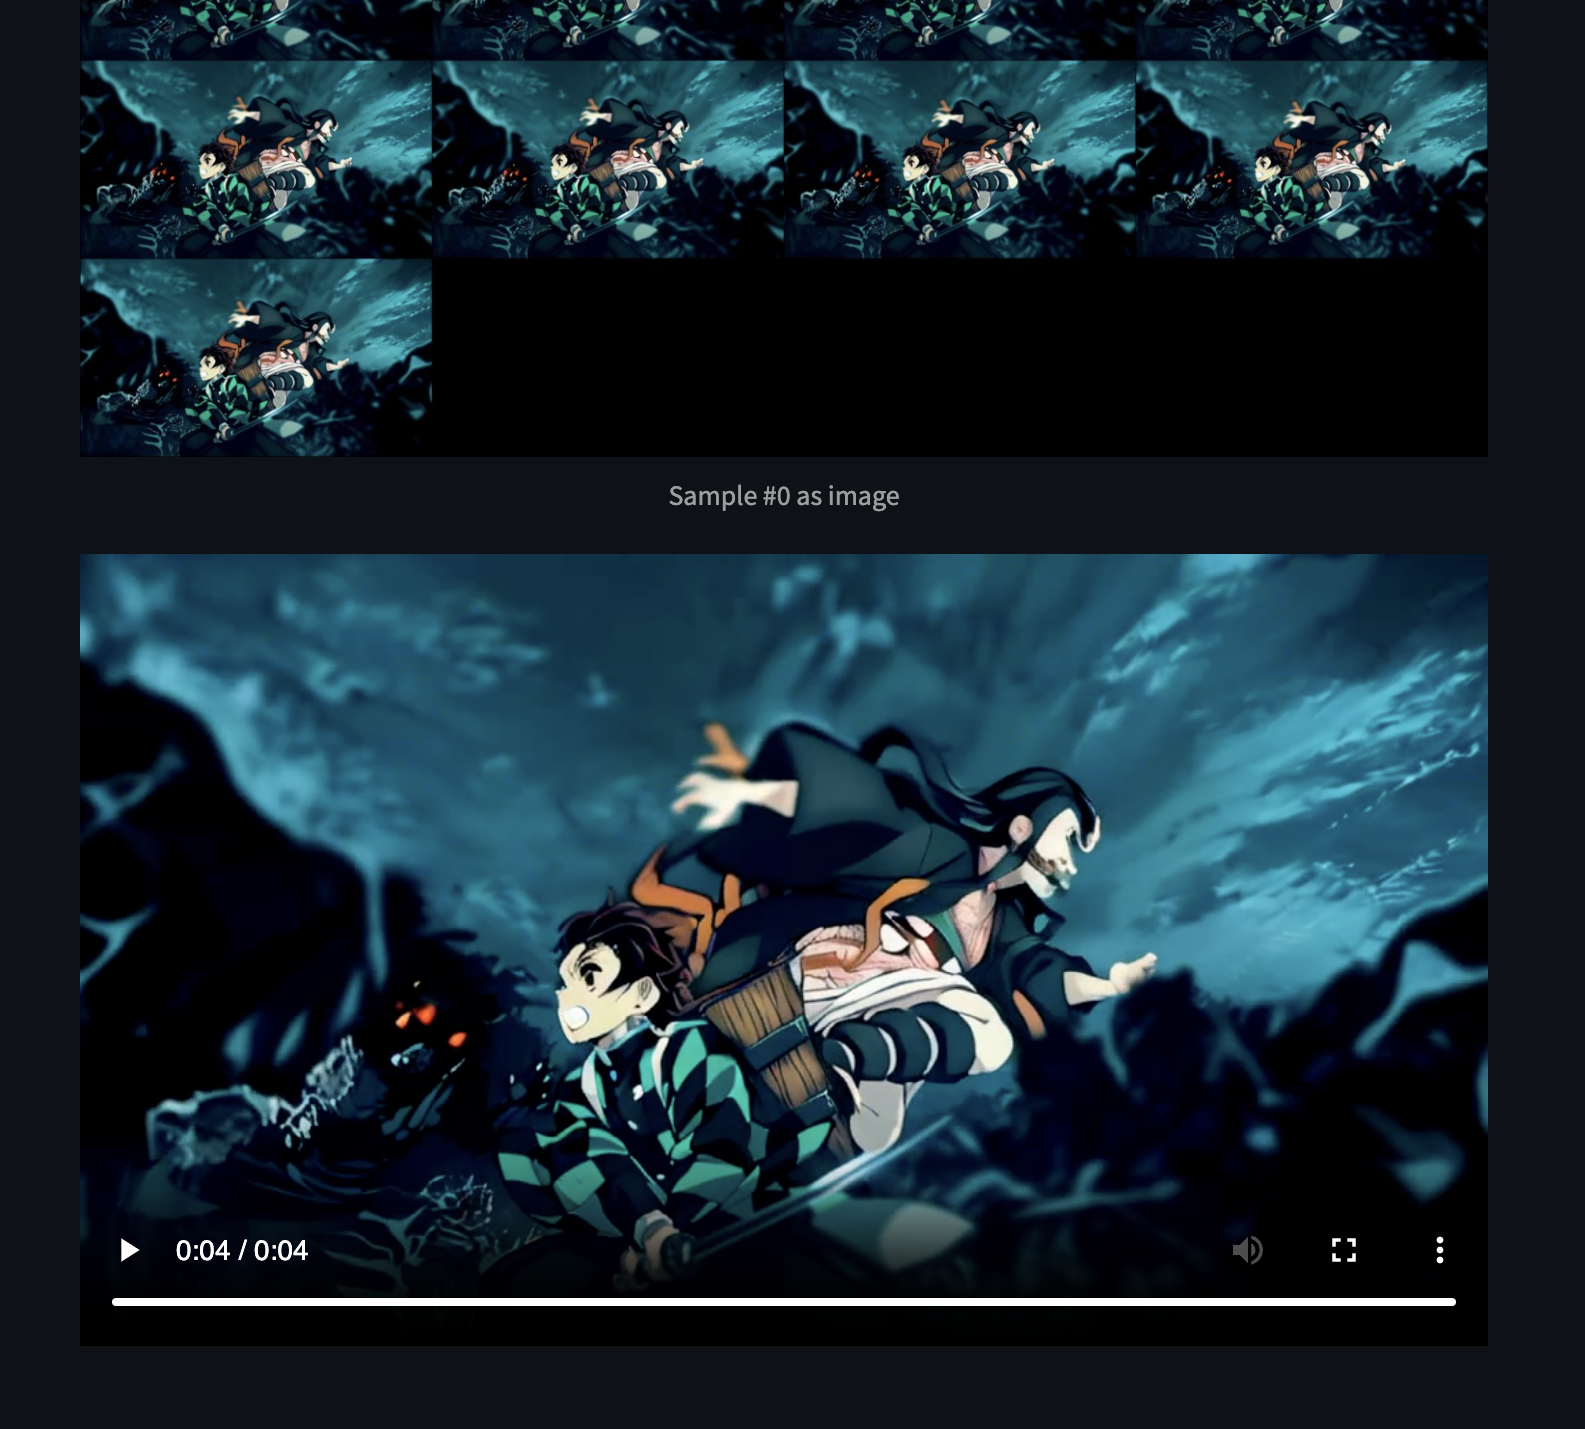
Click the Play button to view the generated video, and verify it's exported to the default
samplesdirectory in your model directory pathgenerative-models/outputs/demo/vid/$VERSION/samples/.
Inference Stable Video Diffusion via CLI
In addition to generating videos using the web interface, you can generate videos via CLI in your SSH session using the simple_video_sample.py script. The sample() function in the script contains the core logic of video generation that can be replicated in other applications with slight configuration changes. The function also comes with Fire CLI implementation which simplifies the creation of CLI applications.
Follow the steps in this section to infer the Stable Video Diffusion model via CLI using the simple_video_sampling.py script. Then, generate videos for singular and multiple images at once using additional parameters available in the script.
Create the
PYTHONPATHenvironment variable that points to your model files directory.console$ export PYTHONPATH=$PYTHONPATH:$HOME/generative-models
Switch to the
/scripts/sampling/directory using your model files path.console$ cd $HOME/generative-models/scripts/sampling
To generate videos using Stable Video Diffusion, use the following options:
--input_path: Defines the path to the input image file or directory that contains the base input image files. The default value isassets/test_image.png.--num_frames: An optional argument that specifies the number of video frames. The default value depends on your selected model version.--num_steps: Specifies the number of inference steps.--version: Specifies the model version to use. The default value issvdwhile other possible values includesvd_xt,svd_image_decoder, andsvd_xt_image_decoder.--fps_id: Specifies the frames per second ID. When unspecified, the default value is set to6.--motion_bucket_id: Specifies the motion bucket ID. The default value is127.--cond_aug: Specifies the conditional augmentation value. The default value is0.02.--seed: Specifies the seed for the random number generator. The default value is23.--decoding_t: Specifies the number of frames decoded at a time. This parameter increases the amount of VRAM usage, reduce it when necessary depending on your GPU memory. By default, it's set to14.--device: Specifies the system device to use for computation tasks. The default value iscudawhich represents NVIDIA GPU drivers.--output_folder: Specifies the output folder to export generated videos to. The default value isgenerative-models/outputs/simple_video_sample/$VERSION/.
For example:
console$ python3 simple_video_sample.py --input_path="path_to_your_image" --num_frames=20 --version="svd_xt"
The above command runs the
simple_video_sample.pyscript with your specified source image, 20 frames, and thesvd_xtmodel version while the rest of the parameters use the respective default values. To specify more values on each option, modify your command similar to the one below:console$ python3 simple_video_sample.py --input_path="path_to_your_image" --num_frames=20 --version="svd_xt" --fps_id=5 --motion_bucket_id=100 --cond_aug=0.01 --seed=42 --decoding_t=10 --device="cpu" --output_folder="path_to_your_output_folder"
The above command runs the script with all the specified parameters. Replace
"path_to_your_image"and"path_to_your_output_folder"with your actual path generation paths. When using multiple images, the script generates a sample for each image.
Conclusion
You have explored the different Stable Video Diffusion variants, and generated videos using the model. You performed inference steps using the Streamlit web interface and the Python CLI interpreter. For additional deployment options, visit the Stable Video Diffusion model page.