

Introduction
Pix2Pix is a type of Generative Adversarial Network (GAN) that maps input images to corresponding output images. It's extended by InstructPix2Pix which is a Stable-Diffusion that combines the Pix2Pix framework with the ability to generate visually stunning outputs based on textual instructions or prompts using Natural Language Processing (NLP).
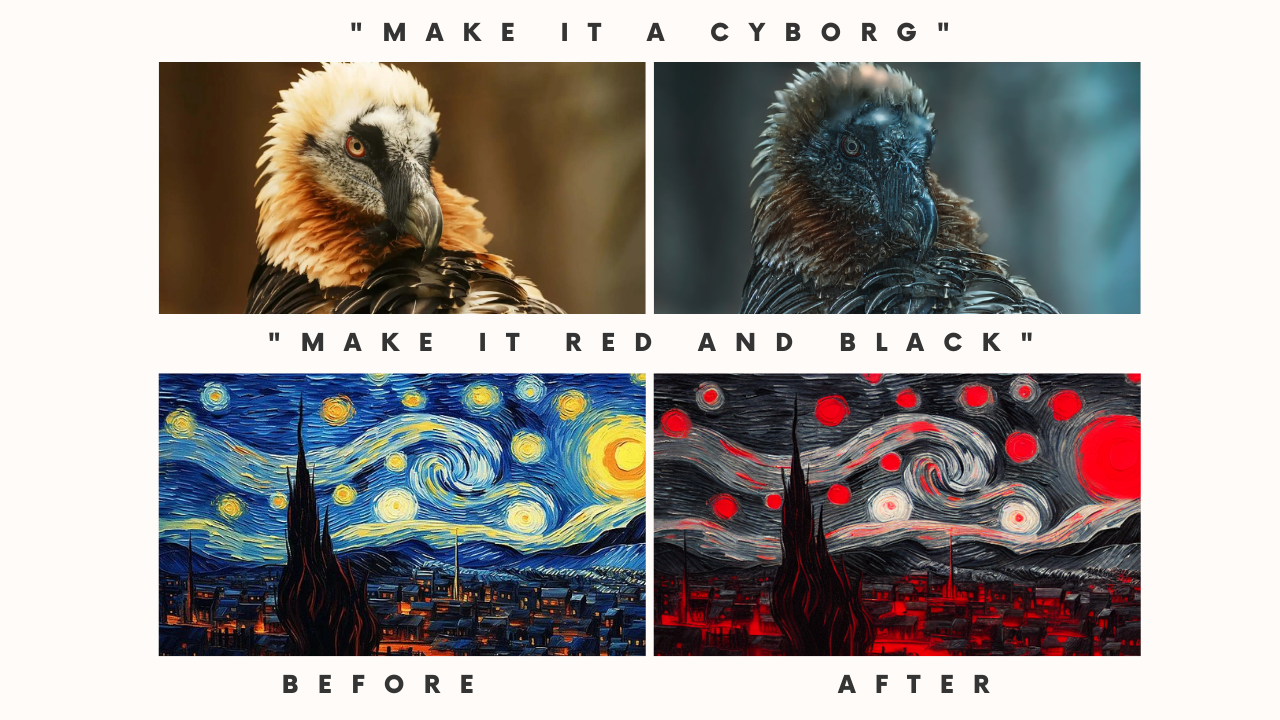
This article explains how to carry out AI Image Manipulation with InstructPix2Pix on a Vultr Cloud GPU server. Using the InstructPix2Pix text-guided image manipulation model, you can generate images from prompts on your server as described in the article steps.
Prerequisite
Before you begin:
Deploy a Ubuntu A100 Cloud GPU server with at least:
- 1/3 GPU
- 20 GB VRAM.
- 3 vCPUs
- 30 GB Memory
Use SSH to access the server as a non-root user with sudo privileges.
Set Up the Server
In this section, set up the server to run the InstructPix2Pix model with the necessary dependency packages as described in the steps below.
In your user home, create a new directory to store generated images.
$ mkdir ~/imagesInstall PyTorch.
$ pip3 install torch --index-url https://download.pytorch.org/whl/cu118The above command installs PyTorch with pre-built CUDA 11.8 libraries.
Install Jupyter Notebook.
$ pip3 install notebookBy default, UFW is active on Vultr servers, configure the firewall to allow connections to the Jupyter Notebook port
8888.$ sudo ufw allow 8888Restart the firewall to save changes.
$ sudo ufw reloadStart Jupyter Notebook.
$ jupyter notebook --ip=0.0.0.0The above command starts Jupyter Notebook listening to incoming connections on all Server IP Addresses.
When successful, your output should look like the one below:
 [I 2023-07-30 13:06:10.312 ServerApp]     http://127.0.0.1:8888/tree?token=285dc780f9a3d7e483ca9df32015eff6c1b0cf2549271bc0
 [I 2023-07-30 13:06:10.312 ServerApp] Use Control-C to stop this server and shut down all kernels (twice to skip confirmation).
 [W 2023-07-30 13:06:10.316 ServerApp] No web browser found: Error('could not locate runnable browser').
 [C 2023-07-30 13:06:10.316 ServerApp]

     To access the server, open this file in a browser:
         file:///home/example-user/.local/share/jupyter/runtime/jpserver-11174-open.html
     Or copy and paste one of these URLs:
         http://HOSTNAME:8888/tree?token=285dc780f9a3d7e483ca9df32015eff6c1b0cf2549271bc0
         http://127.0.0.1:8888/tree?token=285dc780f9a3d7e483ca9df32015eff6c1b0cf2549271bc0
In a web browser such as Firefox, access Jupyter Notebook using the token generated in your command output.
http://SERVER-IP:8888/tree?token=TOKEN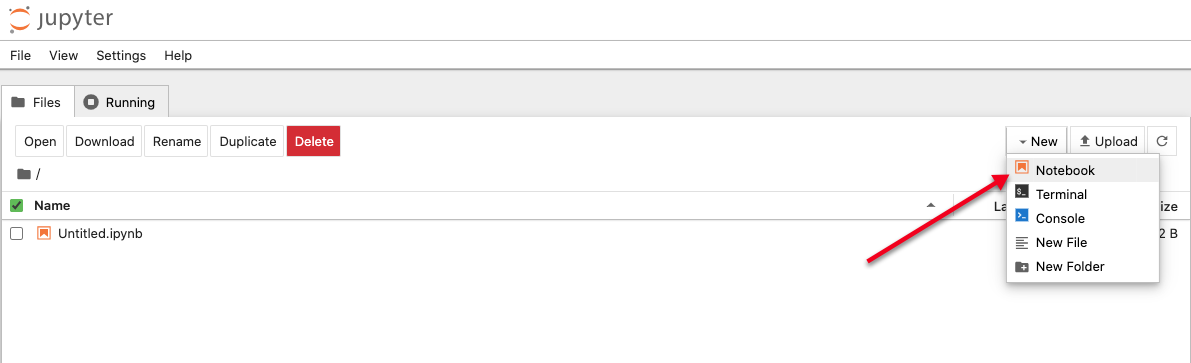
Import Libraries
In this section, use Jupyter Notebook to install the required libraries, create the model, and run it on the server as described in the steps below.
On the Jupyter Notebook interface, click New in the top right corner, and select Notebook from the list.
In the new Notebook window, enter commands line by line, and click the play button to execute a command.
Install the required model libraries.
!pip3 install diffusers accelerate safetensors transformers pillowThe above commands install the following packages:
diffusers: Provides an implementation of various diffusion-based algorithms used for image generation, image manipulation, and other tasks related to generative models.accelerate: Optimizes the performance of computations on various hardware architectures, including GPUs and multi-GPUs. It accelerates training and inference processes.safetensors: Provides additional safety measures and runtime checks for tensor operations. It helps detect and prevent issues such as memory leaks, out-of-bounds errors, and NaN (Not-a-Number) values.transformers: An NLP toolkit that provides a wide range of pre-trained models, architectures, and utilities for tasks related to text such as text classification, text recognition, and text generation.Pillow: Provides image capabilities to perform tasks such as manipulatation, and image processing.
Click run, or press
Control + Enterto install the libraries.Import the required libraries.
 import PIL
 import requests
 import torch
 from diffusers import StableDiffusionInstructPix2PixPipeline, EulerAncestralDiscreteScheduler
Below are the imported libraries:
PIL: Python Imaging Library (PIL) provides image processing capabilities. In the InstructPix2Pix model, it's used for operations, such as opening and image processing.requests: Download an image from a specified URL.torch: Used as the deep learning framework to work with theStableDiffusionInstructPix2PixPipelinemodel.diffusers: Provides implementations of diffusion-based algorithms. It includes classes and functions related to image generation and manipulation tasks, particularly for generative models.EulerAncestralDiscreteScheduler: This is a class from the diffusers library. It refers to a specific scheduler implementation for the Euler Ancestral Sampling method used in diffusion models.
Upgrade Jupyter Notebook and the
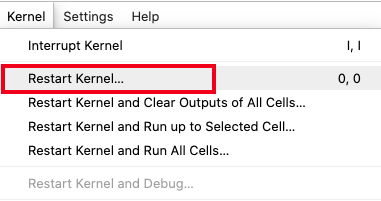
ipywidgetspackage.!pip3 install --upgrade jupyter ipywidgetsClick Kernel on the main Notebook bar, and select Restart Kernel from the dropdown list to use the updated packages.
Process the Image
In this section, process an image before further analysis with the model as described in the steps below.
Define the image URL.
url="https://example.com/image.png"Verify that your URL points to an image with a visible file extension in the URL.
Define the
download_image()function.def download_image(url): image = PIL.Image.open(requests.get(url, stream=True).raw) image = PIL.ImageOps.exif_transpose(image) image = image.convert("RGB") return imageThe above code creates a new function named
download_image()with the image URL as an argument. The function commands inside thedownload_image()include:PIL.Image.open(requests.get(url, stream=True).raw): Sends anHTTP GETrequest to retrieve the image specified in theurl.requests.get()returns the response object in turn,.rawgrants access to the retrieved raw content, andPIL.Image.open()opens the raw content using thePILlibrary.PIL.ImageOps.exif_transpose(): Adjusts the image orientation to ensure that the image is correctly oriented for proper display. Many images containEXIFinformation used to set the proper orientation.image = image.convert("RGB"): Converts the URL image to the RGB (red, green, blue) format which is a standardized color representation and has more compatibility with various models and algorithms.
Set Up the Model
Define the Model Pipeline.
model_id = "timbrooks/instruct-pix2pix"
pipe = StableDiffusionInstructPix2PixPipeline.from_pretrained(model_id, torch_dtype=torch.float16, safety_checker=None)
pipe.to("cuda")
pipe.scheduler = EulerAncestralDiscreteScheduler.from_config(pipe.scheduler.config)
The above code configures an instance for the StableDiffusionInstructPix2PixPipeline class, including loading a pre-trained model, specifying the data type, enabling GPU acceleration, and configuring the scheduler for diffusion steps during the inference process.
The following are the pipeline parameters:
model_id: Assigns the model identifiertimbrooks/instruct-pix2pixto the variablemodel_id.pipe: Creates an instance ofStableDiffusionInstructPix2PixPipeline.from_pretraineduses a class to initialize the pipeline with a pre-trained model.safety_checkerApplies no safety checks as set toNoneduring the inference process.torch.float16Enforces the data type for computations in half-precision (16) floating-point format. When blank, it's set to 32-bit full precision.pipe.to("cuda"): Moves the pipeline objectpipeto the CUDA device, which enforces computations to run on the GPU.pipe.scheduler: Assigns a scheduler to the scheduler attribute of the pipeline objectpipe. TheEulerAncestralDiscreteSchedulerclass manages diffusion steps scheduling during the inference process.
Run the Model
Manipulate the image with a text prompt. Replace Hello World with an actual text prompt of your choice.
image = download_image(url)
prompt = "Hello World"
images = pipe(prompt, image=image, num_inference_steps=10, image_guidance_scale=1).images
The above code downloads the image, defines a prompt, and instructs the model to generate output based on the following parameters:
prompt: Includes changes to apply to the image.num_inference_steps: Specifies the number of diffusion steps performed during the inference process.image_guidance_scale: This parameter determines the strength of the guidance or influence of the input image on the generated output.
Both num_inference_steps and image_guidance_scale values are in a balanced state which means changing the command values is not recommended.
Display the Generated Images
Display the generated image.
images[0]The above command unpacks the first element from the list of images stored in the
imagesvariable.Save the generated image with your target name and destination. For this article, the
imagesdirectory you created earlier. Replaceimage.pngwith your desired filename.images[0].save("/home/example-user/image.png")The above command uses the
.save()method with the desired output path to save the generated image to disk.
Download the Generated Images
In this section, use sftp to download generated images to your local computer as described below.
Open a new terminal session on your computer, and connect to your server using SFTP.
$ sftp example-user@SERVER-IPReplace
example-user, andSERVER-IPwith your server details.Switch to the
imagesdirectory.sftp> cd imagesDownload generated images in the directory. For this article
image.pngas saved earlier.sftp> get image.pngThe above command downloads
image.pngto your working directory.Open a new file explorer window, find and open your downloaded image to use it.
Monitor GPU Resources
Check the GPU usage statistics.
!nvidia-smiThe above command displays information about connected GPU devices and their statistics. It includes a summary of the available GPU devices and the respective usage statistics.
Output:
+-----------------------------------------------------------------------------+
| Processes:                                                                  |
|  GPU   GI   CI        PID   Type   Process name                  GPU Memory |
|        ID   ID                                                   Usage      |
|=============================================================================|
|    0   N/A  N/A     10879      C   /usr/bin/python3                 6427MiB |
+-----------------------------------------------------------------------------+
As displayed in the above output, the InstructPix2Pix model uses up to 6 GB of GPU memory.
When using torch_dtype as torch.float16:
+-----------------------------------------------------------------------------+
| Processes:                                                                  |
|  GPU   GI   CI        PID   Type   Process name                  GPU Memory |
|        ID   ID                                                   Usage      |
|=============================================================================|
|    0    0    0      45337      C   /usr/bin/python3                16191MiB |
+-----------------------------------------------------------------------------+
As displayed in the output, the model with 16-bit precision takes up to 6GB of VRAM which makes the model less precise but faster.
Conclusion
In this article, you carried out AI Image Manipulation with Instruct Pix2Pix on a Vultr Cloud GPU server. You set up the server, installed necessary libraries, and performed processed images using prompts. By running the InstructPix2Pix model on a Vultr Cloud GPU server, it accelerates the model's performance and speed.
More Information
For more information on how to generate AI images, visit the following resources.
No comments yet.