
How to Add Swap Memory in Ubuntu 20.04
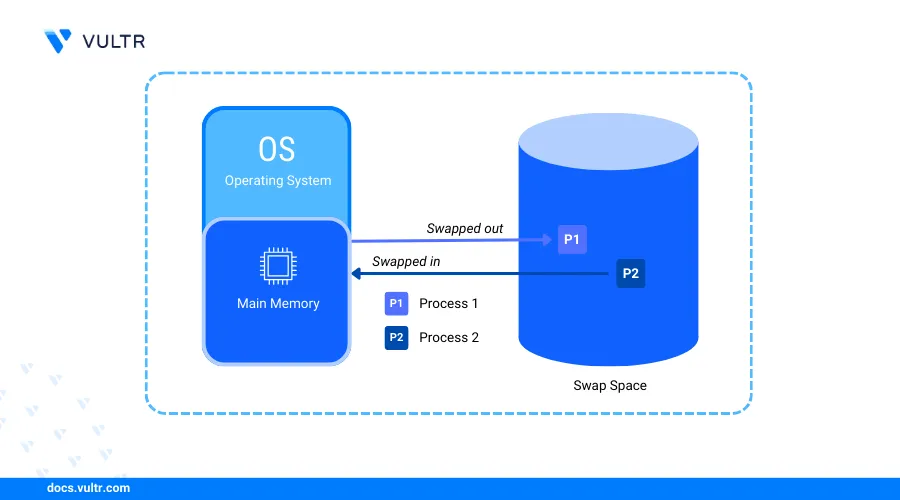
Swap memory is a portion of storage used as virtual memory when your server's RAM is fully utilized. It helps prevent crashes by moving less-used processes from RAM to swap space, keeping the system stable under heavy load.
This article shows how to add swap memory on Ubuntu 20.04 using a swap file and Vultr Block Storage to expand your server’s available memory.
Prerequisites
Before you begin:
Have an Ubuntu 20.04 server.
Have an existing block storage.
Access the server using SSH as a non-root user with sudo privileges.
View Existing Swap Memory
Follow the steps below to check existing swap usage before adding more.
View the available server memory including RAM and Swap using the free utility.
$ sudo free -h
Verify the Swap memory available on your server similar to the output below.
                  total        used        free      shared  buff/cache   available
    Mem:          955Mi       317Mi       201Mi       1.2Mi       598Mi       638Mi
    Swap:         2.3Gi       268Ki       2.3Gi
Based on the above output, the server includes a 2GB Swap memory volume.
Create Swap Memory
Swap memory is storage space—either on your server's disk or a block storage volume—used as virtual memory. Utilize the section below to create swap space with a swap file or a dedicated block storage volume.
Create Swap Memory using a Swapfile
Create a new Swapfile with a specific size such as
2GBusing thefallocateutility in your root directory/.console$ sudo fallocate -l 2G /swapfile.img
Modify the Swapfile permissions to allow only the root user to read and write changes on the file.
console$ sudo chmod 0600 /swapfile.img
Format the file as swap using
mkswap.console$ sudo mkswap /swapfile.img
Verify the new swam memory size, label information and UUID similar to the following output.
Setting up swapspace version 1, size = 2 GiB (2147479552 bytes)
no label, UUID=2ed3e083-fac2-4571-bbdf-e9967aa1fc03
Create Swap Memory using Vultr Block Storage
List the storage devices available on your server using the
lsblkutility. The new disk is attached as/dev/vdband it has no partitions.console$ lsblkOutput:
NAME   MAJ:MIN RM  SIZE RO TYPE MOUNTPOINTS
sr0     11:0    1 1024M  0 rom
vda    253:0    0   25G  0 disk
├─vda1 253:1    0  512M  0 part /boot/efi
└─vda2 253:2    0 24.5G  0 part /
vdb    253:16   0    40G  0 disk
The Vultr Block Storage device is attached as
vdbbased on the above output with a40GBsize.Initialize the volume using the GPT partition table.
console$ sudo parted -s /dev/vdb mklabel gpt
Create a new partition using the entire block storage volume.
console$ sudo parted -s /dev/vdb unit mib mkpart primary 0% 100%
List the server storage devices again and verify that the new block storage partitiion is available.
console$ lsblkOutput:
NAME   MAJ:MIN RM  SIZE RO TYPE MOUNTPOINTS
sr0     11:0    1 1024M  0 rom
vda    253:0    0   25G  0 disk
├─vda1 253:1    0  512M  0 part /boot/efi
└─vda2 253:2    0 24.5G  0 part /
vdb    253:16   0   40G  0 disk
└─vdb1 253:17   0   40G  0 part
Convert the new block storage partition to swap.
console$ sudo mkswap /dev/vdb1
Output:
Setting up swapspace version 1, size = 40 GiB (42947571712 bytes)
no label, UUID=7b3b6fa6-b344-41bd-b25b-f8657caa36b4
View your block devices information and verify that the new swap partition is available.
console$ sudo blkid
Output:
/dev/vda2: UUID="95e88749-c308-4c15-aca0-f47049d0c699" BLOCK_SIZE="4096" TYPE="ext4" PARTUUID="48874572-7e1f-4766-93e7-431038bd78f3"
/dev/vda1: UUID="D587-7645" BLOCK_SIZE="512" TYPE="vfat" PARTUUID="96ca28e5-4696-482c-9359-24b87f2ea53e"
/dev/vdb1: UUID="ca230c16-b5a4-44e6-b5a8-930bb1f33fcf" TYPE="swap" PARTLABEL="primary" PARTUUID="7897c216-dc99-4e91-be17-abc1a0dba849"
Note the swap partition
UUIDvalue to use when mounting the volume automatically at boot time.
Enable Swap Memory
Enable the Swapfile as swap memory using the
swaponutility.console$ sudo swapon /swapfile.img
View the server swap memory and verify that the new Swapfile is active.
console$ sudo swapon -s
Output:
Filename                                Type            Size            Used            Priority
/swapfile                               file            2457596         268             -2
/swapfile.img                           file            2097148         0               -3
Run the following command to enable the Vultr Block Storage swap partition as swap memory. Replace
/dev/vdb1with your actual partition path.console$ sudo swapon /dev/vdb1
View the server swap memory and verify that the swap partition is active.
console$ sudo swapon -s
Output:
Filename                                Type            Size            Used            Priority
/swapfile                               file            2457596         268             -2
/swapfile.img                           file            2097148         0               -3
/dev/vdb1                               partition       41940988        0               -4
Configure the File System Table (fstab) to Enable Automatic Mounting
The fstab file controls how file systems mount at boot. Follow the steps below to configure it for automatically mounting your swap memory at startup.
Backup the original
fstabconfiguration on your server.console$ sudo cp /etc/fstab /etc/fstab.bak
Open the
fstabconfiguration file using a text editor such asnano.console$ sudo nano /etc/fstab
Add the following Swapfile configuration at the end of the file.
ini/swapfile.img swap swap defaults 0 0Save and close the file.
The above configuration enables automatic mounting using the
/swapfile.imgfile. Within the configuration:swap: Enables the swap file system type.swap: Sets the swap mount point.0: Disables backups on the swap file system.0: Disables file system checks on the swap memory.
View your block devices information and copy the UUID of new
/dev/vdb1.console$ sudo blkid
Output:
/dev/vda2: UUID="95e88749-c308-4c15-aca0-f47049d0c699" BLOCK_SIZE="4096" TYPE="ext4" PARTUUID="48874572-7e1f-4766-93e7-431038bd78f3"
/dev/vda1: UUID="D587-7645" BLOCK_SIZE="512" TYPE="vfat" PARTUUID="96ca28e5-4696-482c-9359-24b87f2ea53e"
/dev/vdb1: UUID="ca230c16-b5a4-44e6-b5a8-930bb1f33fcf" TYPE="swap" PARTLABEL="primary" PARTUUID="7897c216-dc99-4e91-be17-abc1a0dba849"
Add the block storage swap partition using its
UUIDvalue to enable automatic mounting on the volume.iniUUID=ca230c16-b5a4-44e6-b5a8-930bb1f33fcf swap swap sw 0 0
Replace
UUID=ca230c16-b5a4-44e6-b5a8-930bb1f33fcfwith your server block deviceUUID.You have enabled automatic mounting of swap memory on your server. The server automatically mounts and enables the swap memory at boot time.
Configure Swappiness
The swappiness setting controls how aggressively your server uses swap memory compared to RAM. Lower values reduce swap usage, while higher values increase it. Below is a breakdown of how the values behave:
0: Avoids swapping unless absolutely necessary.1–49: Uses swap sparingly; prefers RAM until nearly full.50: Balanced use of RAM and swap.51–99: More aggressive swapping from RAM to swap.100: Prioritizes swap usage; RAM is freed more frequently.
Follow the steps below to configure the swappiness value on your server.
Run the following command to modify the
/etc/sysctl.confwith your swappiness value. Replace50with your desired swapping level.console$ echo "vm.swappiness = 50" | sudo tee -a /etc/sysctl.conf
Output:
vm.swappiness = 50Reload the
sysctlconfiguration to apply the configuration changes.console$ sudo sysctl -p
Test the Swap Memory
View all available swap volumes on your server.
console$ sudo swapon -s
Output:
Filename                                Type            Size            Used            Priority
/swapfile                               file            2457596         268             -2
/swapfile.img                           file            2097148         0               -3
/dev/vdb1                               partition       41940988        0               -4
Run the following command to activate all inactive swap volumes in your
/etc/fstabconfiguration.console$ sudo swapon -a
View your server memory and verify the amount of swap memory actively in use.
console$ sudo free -h
Output:
               total        used        free      shared  buff/cache   available
Mem:           955Mi       348Mi       155Mi       1.2Mi       613Mi       607Mi
Swap:           44Gi       268Ki        44Gi
Remove Swap Memory
Disable swap using the
swapoffcommand followed by the swap file or partition path. For example, to disable the default swap file.console$ sudo swapoff /swapfile
View the swap volumes on your server and verify that the default Swapfile is disabled.
console$ sudo swapon -s
Output:
Filename                                Type            Size            Used            Priority
/swapfile.img                           file            2097148         0               -2
/dev/vdb1                               partition       41940988        0               -3
Conclusion
You’ve successfully added swap memory on an Ubuntu 20.04 server, extending your system’s available memory. While swap is slower than RAM, it helps maintain performance by offloading less-used or resource-intensive processes from main memory.