
How to Add Swap Memory in Rocky Linux 9
Introduction
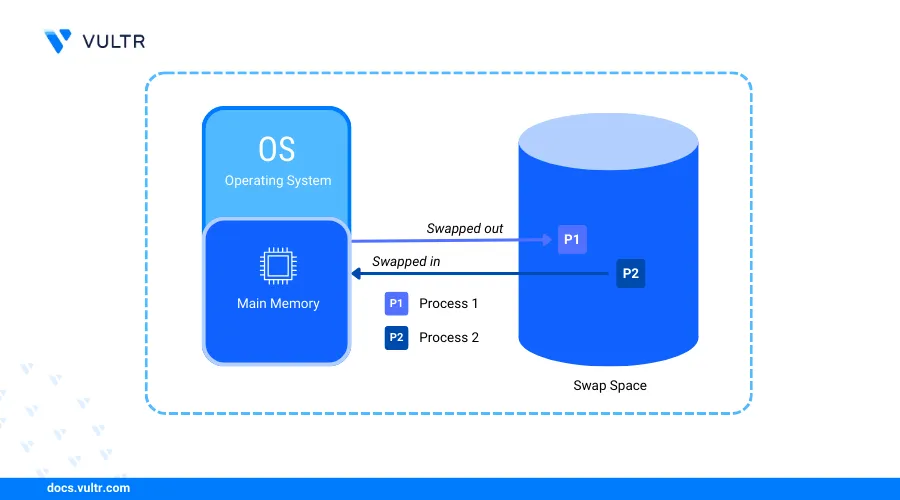
Add Swap Memory in Rocky Linux 9 to enhance system performance by utilizing dedicated disk storage as virtual memory. It is especially beneficial for managing unexpected memory usage spikes and running memory-intensive applications on systems with limited RAM, as it helps free up the primary memory for critical processes.
Follow this guide to add swap memory on Rocky Linux 9 using a dedicated swap file and Vultr Block Storage to increase the available memory on a server.
Prerequisites
Before you begin:
- Deploy a Rocky Linux 9 instance on Vultr and enable the Limited User Login feature.
- Deploy a Vultr Block Storage volume and attach it to the server.
- Access the instance using SSH.
- Update the instance.
Check Existing Swap Memory in Rocky Linux 9
Swap memory is pre-configured and available on Vultr Rocky Linux 9 servers by default, but the available memory may not be enough based on your needs. Follow the steps below to check the existing swap memory on your server before adding new memory.
Use the
freeutility with thehhuman readable option to view the server memory usage information.console$ free -h
Your output should be similar to the one below.
               total        used        free      shared  buff/cache   available
Mem:           3.6Gi       449Mi       3.0Gi        16Mi       359Mi       3.1Gi
Swap:          2.8Gi          0B       2.8Gi
The above output includes the total, used, and free memory including swap memory information on the server. The
Swaprow includes the memory usage information about the active swap memory.Use the
swapon --showcommand to view detailed information about the active swap memory.console$ swapon --show
Your output should be similar to the one below.
NAME TYPE SIZE USED PRIO /swapfile file 2.8G 0B -2/swapfileis the active swap memory on the server with a total size of2.8 GBbased on the above output.
Create Swap Memory
You can create swap memory using a specific file or a disk storage partition. Follow the sections below to create swap memory using a swap file and a Vultr Block Storage device attached to the server.
Create Swap Memory Using a Swap File
Follow the steps below to create swap memory using a swap file while retaining the default swap memory.
Create a new
swapfile.imgswap file with a specific size such as2 GBusing thefallocateutility in the root directory.console$ sudo fallocate -l 2G /swapfile.img
Use the
ddutility in casefallocateis not available to create the swap file.console$ sudo dd if=/dev/zero of=/swapfile.img bs=1M count=2048
Change the swap file permissions to
600to grant only the root user read and write privileges to the file.console$ sudo chmod 600 /swapfile.img
Format the file as swap memory using the
mkswapcommand.console$ sudo mkswap /swapfile.img
Verify the new swap memory size, label information, and
UUIDvalue in your output similar to the one below.Setting up swapspace version 1, size = 2 GiB (2147479552 bytes) no label, UUID=4eb99497-a61f-4ff6-979a-aa46453ca02a
If you're using Ubuntu, follow this guide to add swap memory on Ubuntu and optimize your system's performance.
Create Swap Memory Using Vultr Block Storage
Follow the steps below to create swap memory using a Vultr Block Storage device attached to the server.
List all storage devices available on your server using the
lsblkutility and verify your Vultr Object Storage disk name.console$ lsblkOutput:
NAME   MAJ:MIN RM  SIZE RO TYPE MOUNTPOINTS
sr0     11:0    1 1024M  0 rom
vda    253:0    0   30G  0 disk
├─vda1 253:1    0  260M  0 part /boot/efi
└─vda2 253:2    0 29.7G  0 part /
vdb    253:16   0   10G  0 disk
The
vdbVultr Block Storage volume is10 GBin size and attached to the server asvdbwith no active partitions based on the above output.Initialize the
vdbblock storage volume using the GPT partition table.console$ sudo parted -s /dev/vdb mklabel gpt
Create a new partition that fills the entire block storage volume.
console$ sudo parted -s /dev/vdb unit mib mkpart primary 0% 100%
List all storage devices again and verify that the new block storage partition is available.
console$ lsblkOutput:
NAME   MAJ:MIN RM  SIZE RO TYPE MOUNTPOINTS
sr0     11:0    1 1024M  0 rom
vda    253:0    0   30G  0 disk
├─vda1 253:1    0  260M  0 part /boot/efi
└─vda2 253:2    0 29.7G  0 part /
vdb    253:16   0   10G  0 disk
└─vdb1 253:17   0   10G  0 part
The new Vultr Block Storage partition is
vdb1based on the above output.Format the
vdb1partition as swap using themkswapcommand.console$ sudo mkswap /dev/vdb1
Copy the partition's UUID value in your output similar to the one below.
Setting up swapspace version 1, size = 40 GiB (42947571712 bytes)
no label, UUID=f8f14363-b7d9-43a6-a797-b981ee5015ba
View the detailed information about all disk partitions and verify that the
vdb1swap partition is available.console$ sudo blkid
Output:
/dev/vda2: UUID="3fd6de38-a182-477b-aa6b-7e1881f8c34b" TYPE="ext4" PARTUUID="848fc436-7280-4877-b160-68c3fc776044"
/dev/vdb1: UUID="f8f14363-b7d9-43a6-a797-b981ee5015ba" TYPE="swap" PARTLABEL="primary" PARTUUID="42115bb4-17dc-42b4-a075-978facea99b7"
/dev/vda1: SEC_TYPE="msdos" UUID="438B-EA60" TYPE="vfat" PARTLABEL="EFI System Partition" PARTUUID="7d0fc24e-43d0-4c1b-83c1-7ca3e769b067"
Enable Swap Memory
Follow the steps below to enable the swap memory you created using a file or the Vultr Block Storage partition on your server.
Enable
swapfile.imgas swap memory using theswaponcommand.console$ sudo swapon /swapfile.img
View the available swap memory on your server and verify that the
swapfile.imgfile is active.console$ sudo swapon -s
Your output should be similar to the one below.
Filename                                Type            Size            Used            Priority
/swapfile                               file            2969596         0               -2
/swapfile.img                           file            2097148         0               -3
Enable the Vultr Block Storage swap partition as swap memory. Replace
/dev/vdb1with your actual swap partition.console$ sudo swapon /dev/vdb1
View the available swap memory and verify that the swap partition is active.
console$ sudo swapon -s
Your output should be similar to the one below.
Filename                                Type            Size            Used            Priority
/swapfile                               file            2969596         0               -2
/swapfile.img                           file            2097148         0               -3
/dev/vdb1                               partition       10483708        0               -4
If you're using FreeBSD 14.0, follow this guide to add swap memory on FreeBSD and enhance your system's memory management.
Configure fstab to Automatically Enable Swap Memory
The File Systems Table (fstab) enables automatic mounting of volumes and disk partitions using information in the /etc/fstab configuration file. Follow the steps below to configure fstab to automatically enable swap memory on your server.
Backup the default
/etc/fstabconfiguration.console$ sudo cp /etc/fstab /etc/fstab.bak
Open the
/etc/fstabfile using a text editor such asnano.console$ sudo nano /etc/fstab
Add the following directive at the end of the file to automatically enable swap memory using the swap file at boot.
console/swapfile.img swap swap defaults 0 0
The above configuration enables automatic mounting using the
/swapfile.imgfile you created earlier. Within the configuration:/swapfile.img: Specifies the swap file to enable.swap: Enables the swap file system type.swap: Sets the swap mount point.0: Disables backups on the swap file system.0: Disables file system checks on the swap memory.Add the Vultr Block Storage swap partition using its
UUIDvalue such asceccf757-a255-4ee2-b4eb-a00d706359b2you copied earlier to automatically mount the volume at boot.consoleUUID=ceccf757-a255-4ee2-b4eb-a00d706359b2 swap swap sw 0 0
Add the following directive to automatically enable swap memory using the block storage partition.
console/dev/vdb1 none swap sw 0 0
Save and close the file.
Configure Swappiness
Swappiness is a kernel parameter that determines how often the system swaps processes from main memory (RAM) to swap memory. Its values range from 0 to 100, with lower values like 0 minimizing swapping and higher values like 100 prioritizing swapping processes from RAM to swap memory.
0: Configures the system to avoid swapping processes out of physical memory.1–49: Enables swapping but reduces its usage unless RAM is at full capacity.50: Balances swapping and memory caching on the server.51–99: Gradually increases the swapping of processes from RAM to swap memory.100: Maximizes swapping, continuously moving processes from RAM to swap memory.
Check the active swappiness value on your server.
console$ cat /proc/sys/vm/swappiness
Your output should be similar to the one below.
30Change the swappiness to a new value such as
10.console$ sudo sysctl vm.swappiness=10
The above command changes the swappiness value from the default
30to10which configures the system to avoid using swap memory unless necessary.Output:
vm.swappiness=10Reload the
sysctlconfiguration to apply the configuration changes.console$ sudo sysctl -p
View the active swappiness value again and verify that it's set to
10.console$ cat /proc/sys/vm/swappiness
Output:
10
Manage Swap Memory
Swap memory is available and automatically enabled on your server at boot based on the configurations you applied earlier. Follow the steps below to manage the swap memory on your server and switch processes with the main memory (RAM).
View all available swap volumes on the server.
console$ swapon -s
Output:
Filename                                Type            Size            Used            Priority
/swapfile                               file            2969596         0               -2
/swapfile.img                           file            2097148         0               -3
/dev/vdb1                               partition       10483708        0               -4
Enable all inactive swap volumes listed in your
/etc/fstabconfiguration.console$ sudo swapon -a
View the memory usage on your server and verify the swap memory usage.
console$ free -h
Output:
               total        used        free      shared  buff/cache   available
Mem:           3.6Gi       457Mi       3.0Gi        16Mi       362Mi       3.1Gi
Swap:           14Gi          0B        14Gi
Reboot your server to verify that swap memory is automatically enabled at boot.
console$ sudo reboot
Run the following
swapon --showcommand and verify that the swap memory is enabled.console$ swapon -s
Output:
Filename                                Type            Size            Used            Priority
/swapfile                               file            2969596         0               -2
/swapfile.img                           file            2097148         0               -3
/dev/vdb1                               partition       10483708        0               -4
Remove Swap Memory
Follow the steps below to remove swap memory from your server.
Use the
swapoffcommand to disable the default swap file.console$ sudo swapoff /swapfile
For the Vultr Block Storage swap partition:
console$ sudo swapoff /dev/vdb1
Delete the default swap file to use the modified
/swapfile.imgswap memory.console$ sudo rm /swapfile
View the active swap memory on your server and verify that the default swap file is disabled.
console$ swapon -s
Output:
Filename                                Type            Size            Used            Priority
/swapfile.img                           file            2097148         0               -2
Open the
/etc/fstabfile and comment out the automatic mounting directive for the target swap memory.console$ sudo nano /etc/fstab
Conclusion
You have added swap memory on a Rocky Linux 9 server and extended the default system swap memory. Swap memory is slower in performance as compared to RAM but improves the server response rate when running memory-intensive applications. Ensure to monitor the swap memory and increase its size to match your needs depending on the number of active processes. For more swap memory options, run the man swapon command to view the swap manual on your server.