
How to Create a Vultr Virtual Private Cloud 2.0 (VPC 2.0)
Introduction
Vultr Virtual Private Cloud 2.0 (VPC 2.0) is an upgraded version of the original VPC service (formerly Private Networking). The new version of VPC includes better performance, scalability, and solid base technology for deploying future Vultr networking capabilities. In most respects, it works the same as the original service, but there are some minor differences in behavior. Refer to Introduction to Vultr Virtual Private Cloud 2.0.
You can use VPC 2.0 to segment your cloud servers into logical groups or harden your public interface while allowing permissive access to other cloud servers in the same VPC 2.0. You can run your backups, replication, and other back-end tasks in complete privacy without exposing the traffic to the public Internet.
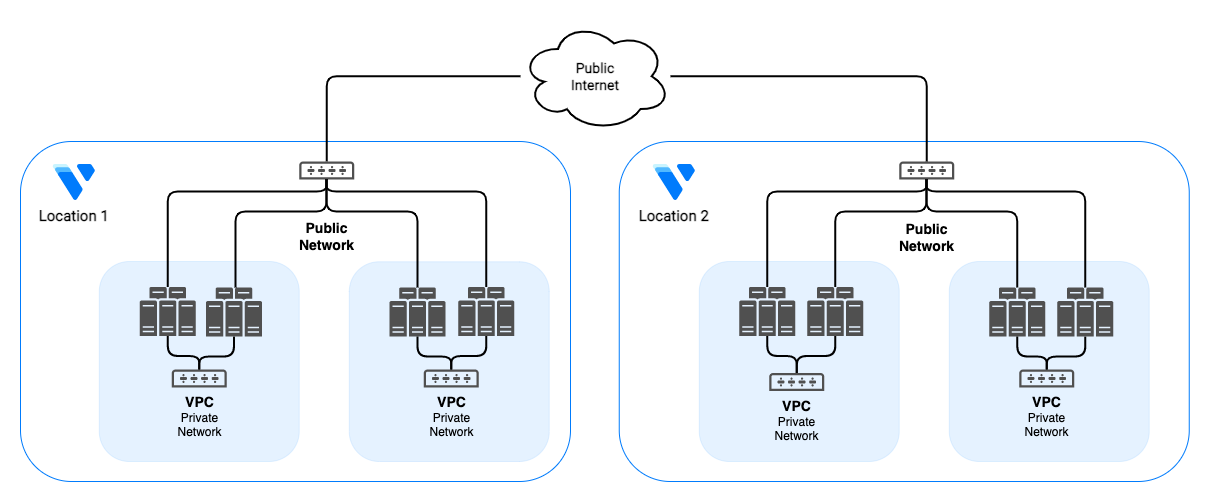
Vultr does not bill for VPC 2.0 bandwidth. VPC 2.0s are entirely private, even from each other. Other customers cannot see traffic on your VPC 2.0 private network, and your VPC 2.0s cannot pass traffic to each other. Currently, VPC 2.0 does not support VPC peering. Future development of VPC 2.0 will enable support for VPC Peering and more.
VPC Limitations
- VPC 2.0s cannot span locations.
- VPC 2.0 does not support Broadcast or Multicast Ethernet traffic.
- For optimal performance, set the VPC 2.0 adapter MTU to 1450.
- VPC 2.0 does not support DHCP. Your cloud instance will automatically assign the VPC 2.0 attachment IP address to the interface via cloud-init.
- You can create up to five VPC 2.0s per location. If you require more, please submit a support ticket.
- VPC 2.0s are supported on all cloud instances and Bare Metal servers with two network adapters.
- If you use Bare Metal and do not have the option to connect the second adapter to a VPC 2.0, please submit a support ticket requesting that we attach the networks to your server.
We provide network configuration examples for many popular operating systems on the server's Settings page.
Note: Your network adapter name may not match these examples. See How to Find the Network Adapter Names for a Vultr Cloud Server to learn more.
How to Create a VPC 2.0
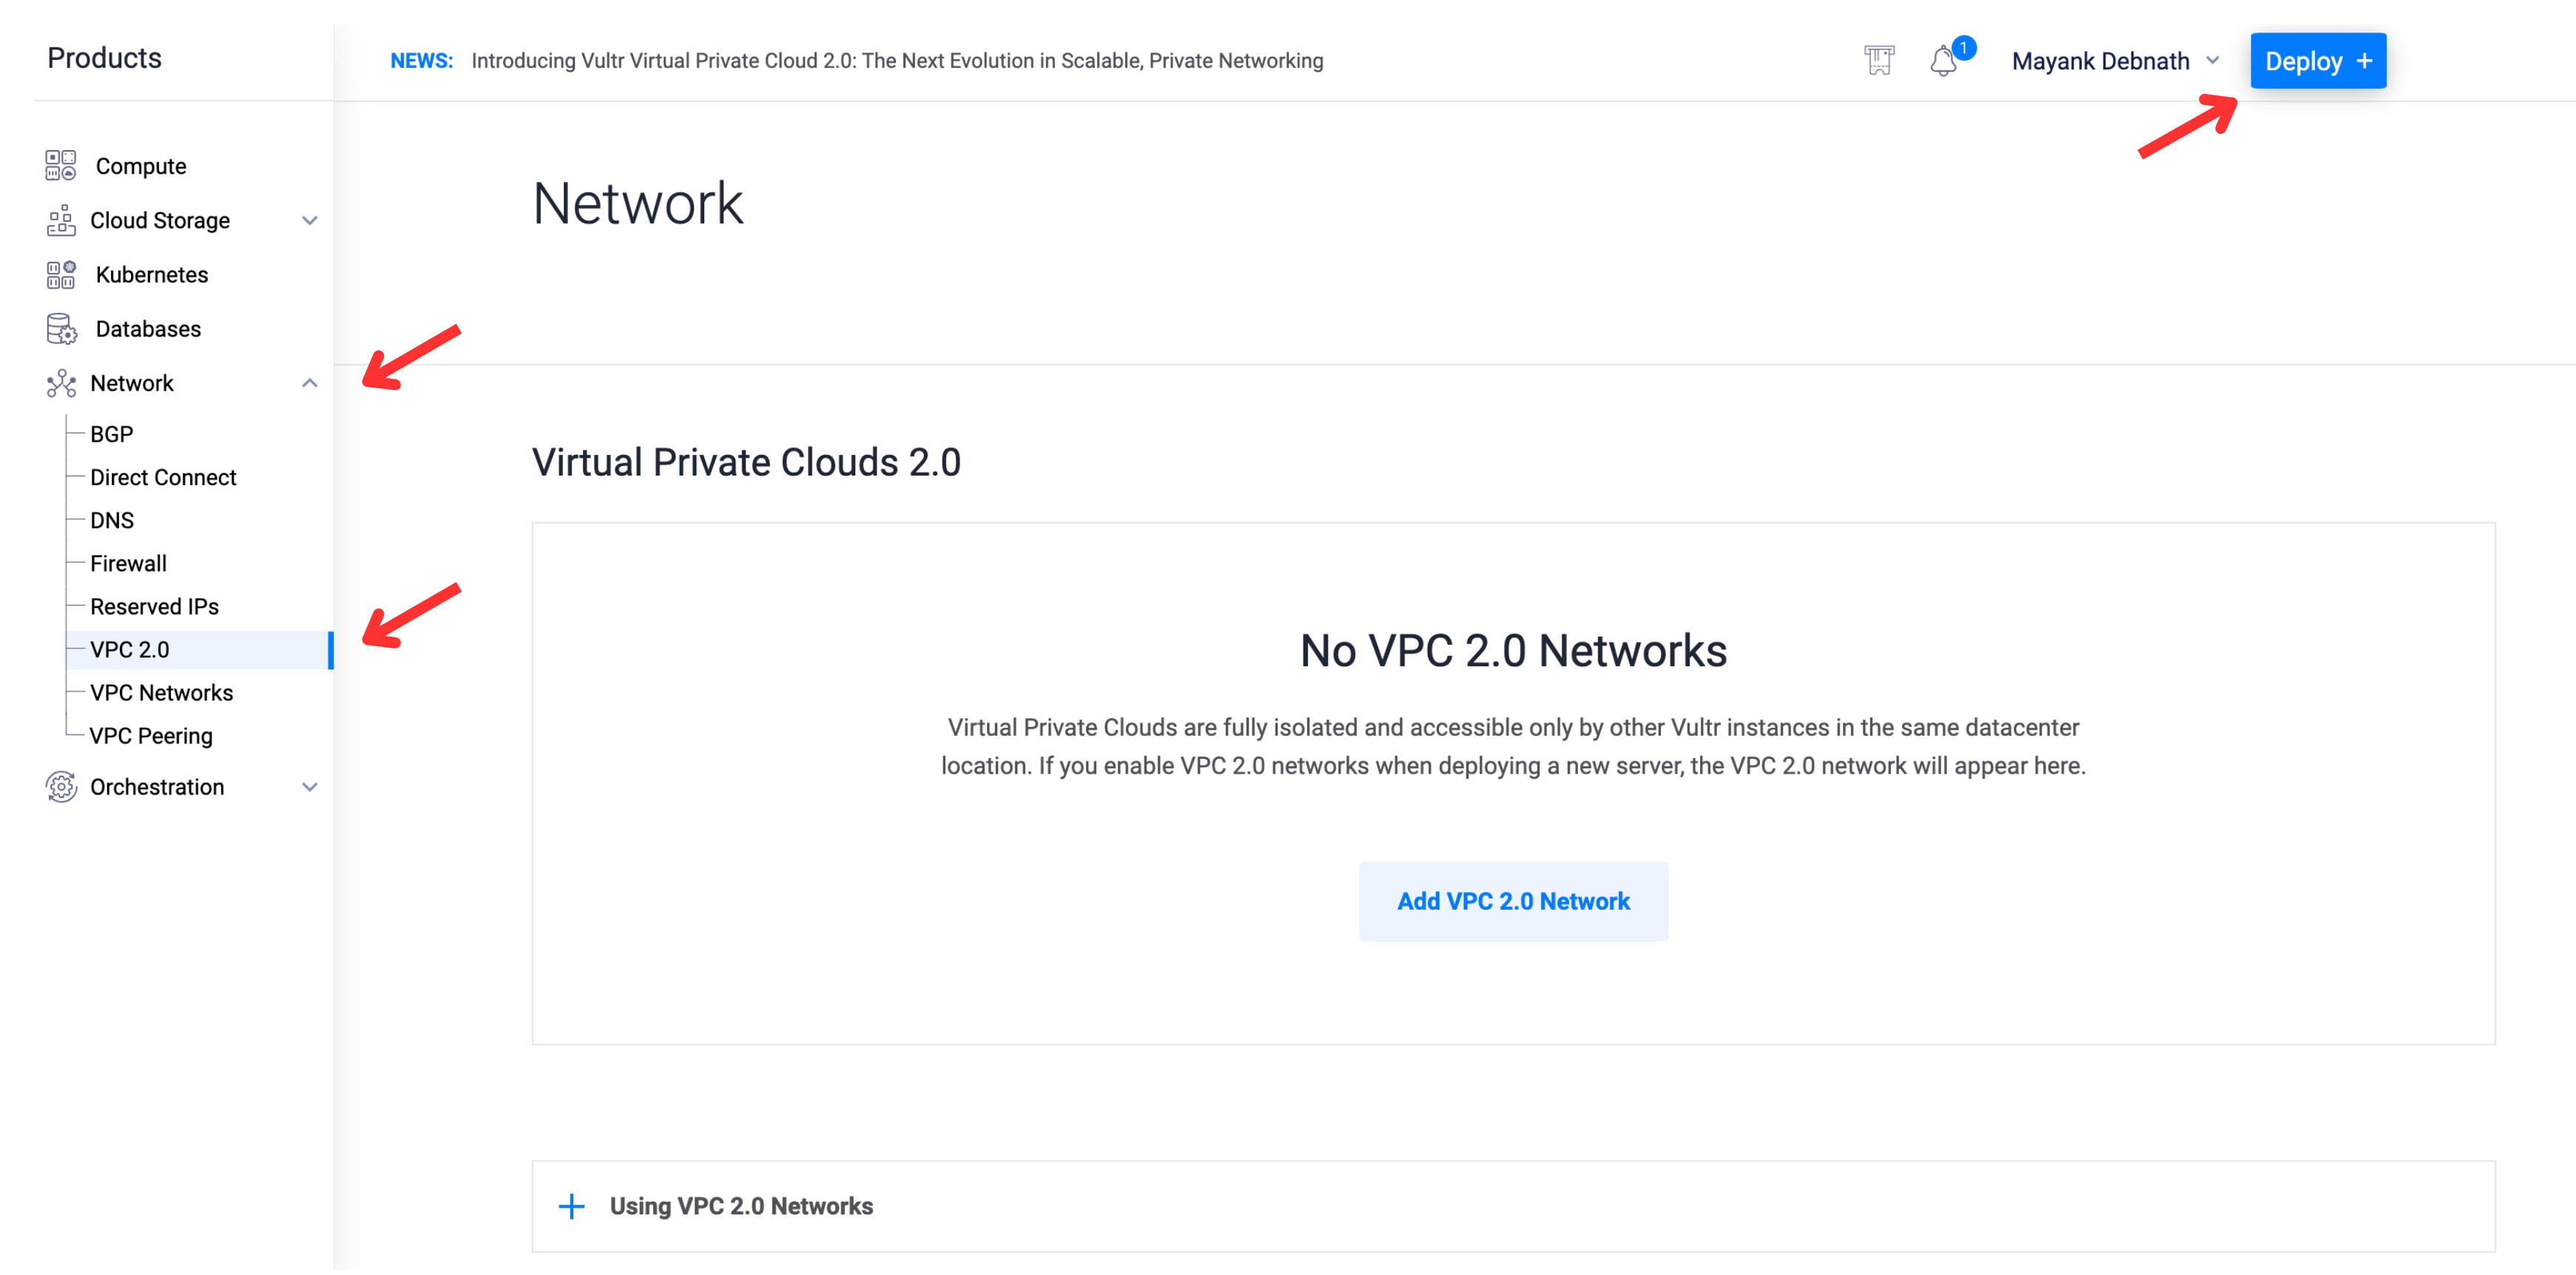
- Expand the Network dropdown.
- Select the VPC 2.0 menu item.
- Click the Deploy button.
- Select a location.
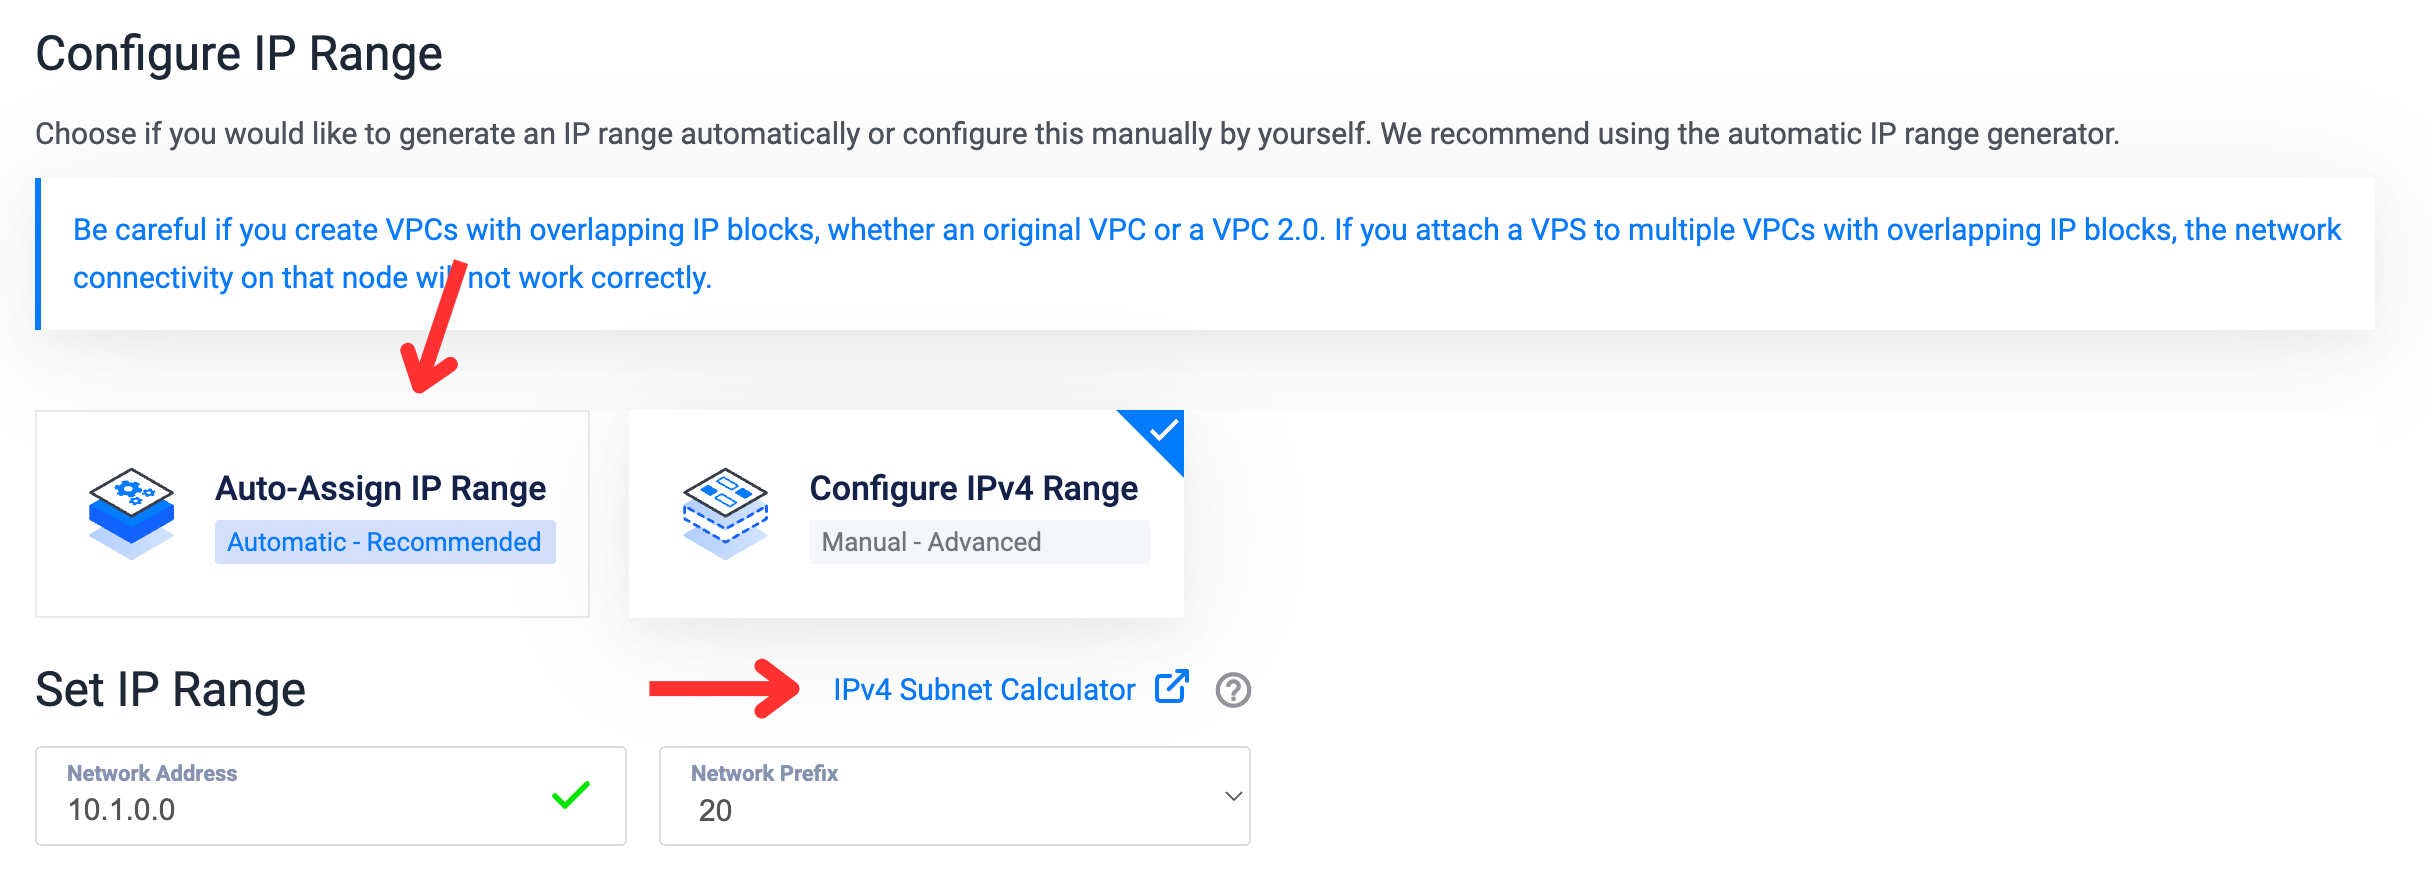
- Accept an automatic IP range or configure it manually. If you choose manual configuration, you'll find a helpful link to our subnet calculator.
- Give the VPC 2.0 a name and click Add Network
After you've created a VPC 2.0 network, you can attach it to an instance. With VPC 2.0, you must use the IP address on your instance that the Vultr portal has listed or the VPC 2.0 connectivity will not work.
Attach an Instance to, or Detach and Instance from, VPC 2.0
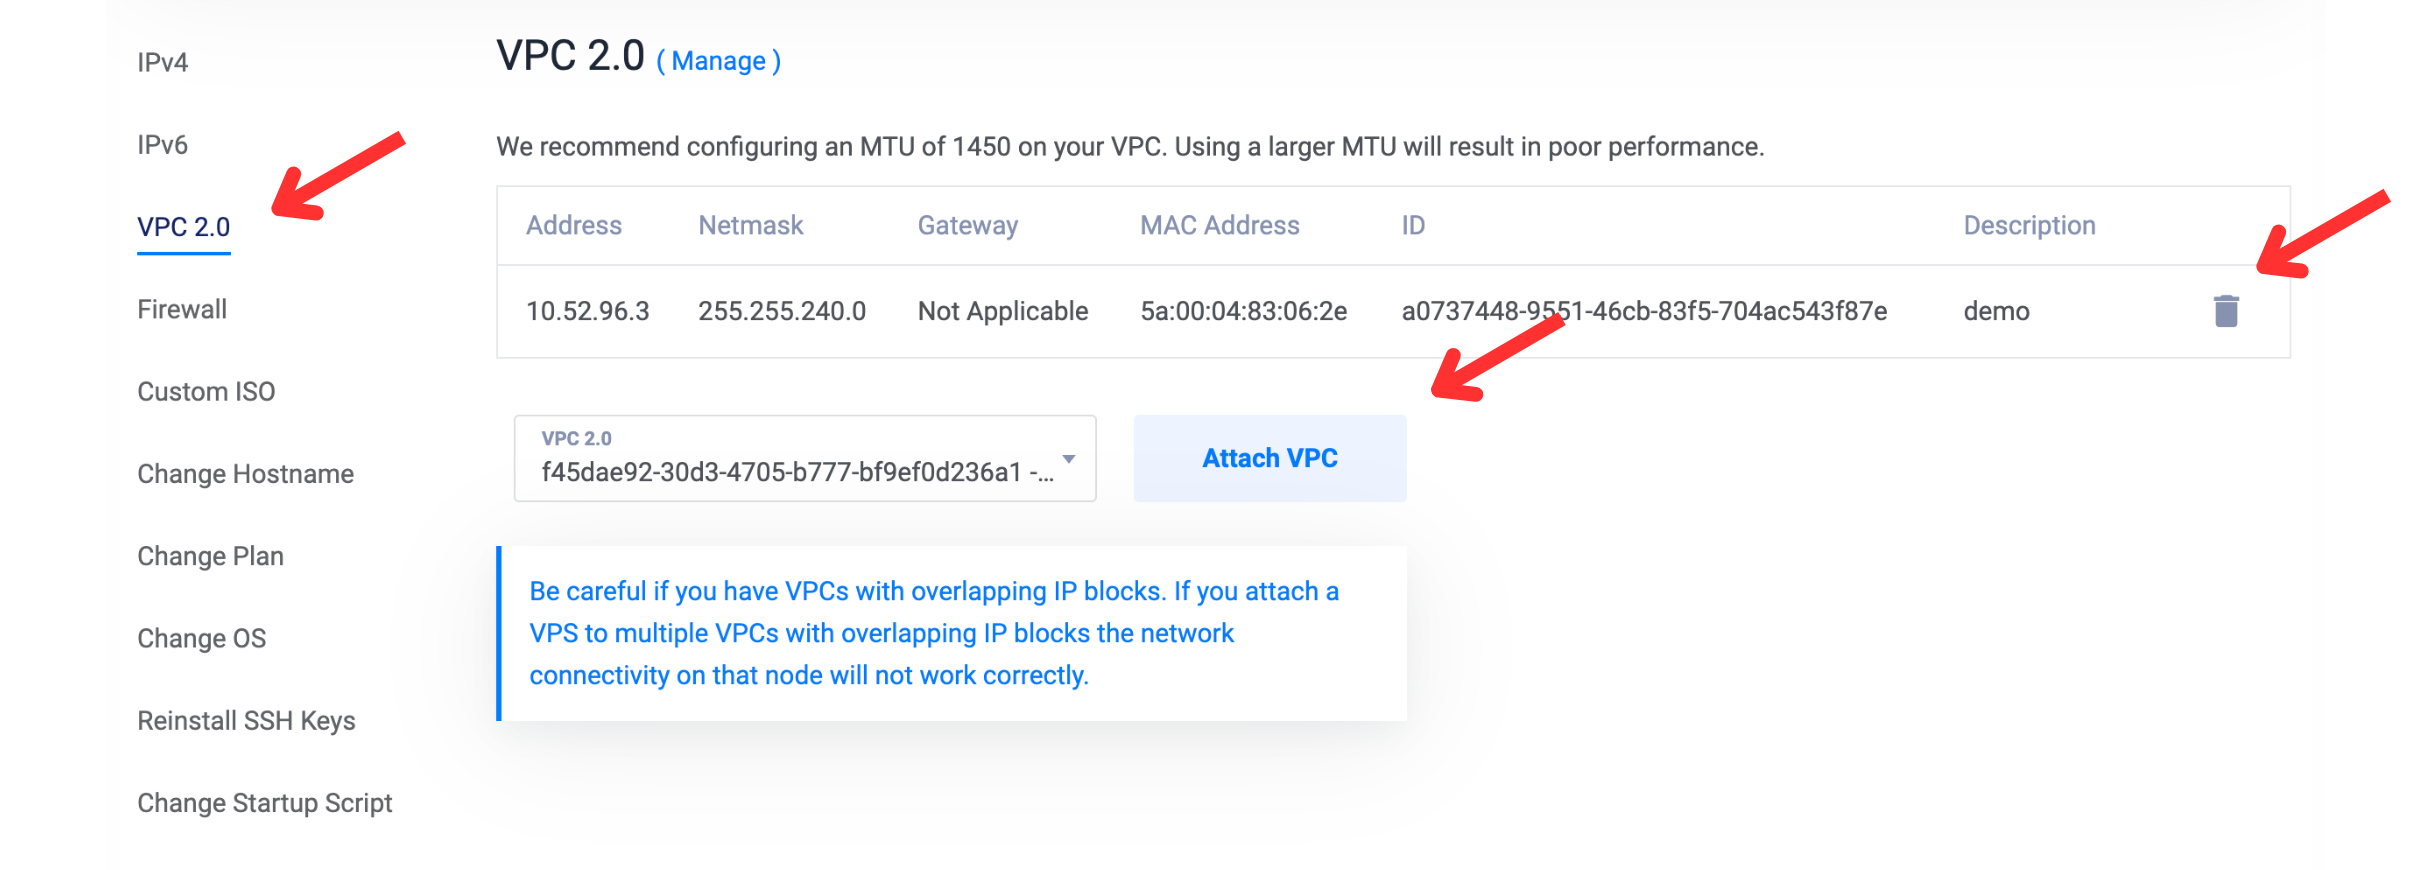
Navigate to the Instance's page, select Settings, and then select VPC 2.0.
- To detach an instance from a VPC 2.0, use the trashcan icon.
- To attach an instance to a VPC 2.0, select the VPC 2.0 network from the drop-down selector, then click Attach VPC.
The server will reboot to activate the network adapter.
Manage VPC 2.0 Networks via the API
The Vultr API offers several endpoints to manage VPC 2.0 networks.
List All Networks
- Get a list of all VPC 2.0 networks in your account.
Manage a Network
- Create a new VPC 2.0 network in a region.
- Get information about a VPC 2.0 network.
- Update information for a VPC 2.0 network.
- Delete a VPC 2.0 network.