
How to Deploy a New Linux VDI Solution on Vultr Cloud GPU Using Cendio ThinLinc
Virtual Desktop Infrastructure (VDI) delivers a secure, fully managed desktop operating system from a central server. Cendio ThinLinc is an open-source, enterprise-ready remote desktop solution designed for this purpose on Linux.
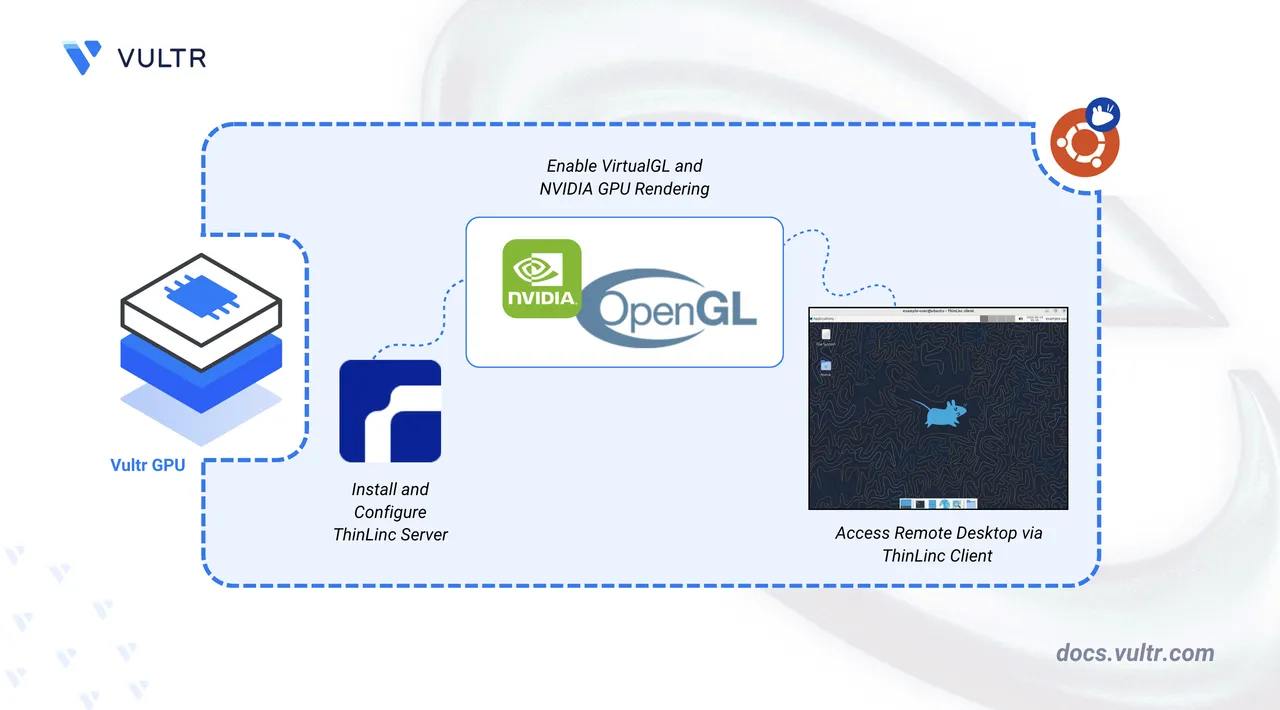
In this guide, you'll deploy a ThinLinc server on a Vultr Cloud GPU instance, configure GPU acceleration, and connect to your virtual desktop from both a web browser and the ThinLinc client application.
Prerequisites
Before you begin, ensure you:
- Deploy the Ubuntu Desktop (XFCE) Marketplace application on an NVIDIA-based Vultr Cloud GPU instance.
- Access the server using SSH as a non-root user with sudo privileges.
Install ThinLinc Server
ThinLinc provides a Virtual Desktop Infrastructure (VDI) layer that allows multiple users to connect to your Ubuntu Desktop through a web browser or a dedicated client. Follow the steps below to download and install the ThinLinc server.
Update your system's package index.
console$ sudo apt update
Visit the Cendio ThinLinc download page and download the latest server package.
console$ wget https://www.cendio.com/downloads/server/tl-4.19.0-server.zip
Extract the downloaded archive file.
console$ unzip tl-4.19.0-server.zip
Navigate to the extracted directory.
console$ cd tl-4.19.0-server
Start the ThinLinc installation.
console$ sudo ./install-server
The script installs the core server package and then launches the setup wizard. You'll get several configuration prompts.
Run ThinLinc setup now?: EnterYes.Accept the license agreement?: Enteryes.Server type?: EnterMaster.
The wizard then checks for required system dependencies, such as
ghostscript,nfs-common, and Python modules. Respondyesto the prompts to allow the wizard to install any missing packages automatically.When prompted, configure the server's network and administrative details:
Externally reachable address to use?: Enterip.Administrator email?: Enter your email address, for example,user@example.com.Web Administration password?: Enter a strong password.
Finally, the wizard handles system integrations. Respond
yesto the prompts to automatically configure the firewall and AppArmor for ThinLinc. After these steps, the script starts the necessary services to finish the installation.After installation, verify that all ThinLinc services are running.
console$ sudo systemctl status vsmserver vsmagent tlwebaccess
A brief explanation of each service is shown below:
vsmserver: Manages user authentication, session handling, and reconnections.vsmagent: Launches and maintains user desktop sessions on the server.tlwebaccess: Provides browser-based access to ThinLinc desktops over HTTPS.
Enable VirtualGL for GPU Acceleration
ThinLinc requires VirtualGL to take advantage of the NVIDIA GPU on your Vultr instance. VirtualGL redirects OpenGL commands from applications running in ThinLinc sessions to the GPU for smooth 3D rendering. Follow the steps below to install VirtualGL.
Download the GPG key for the VirtualGL repository.
console$ wget -qO- https://packagecloud.io/dcommander/virtualgl/gpgkey | sudo gpg --dearmor -o /usr/share/keyrings/virtualgl-archive-keyring.gpg
Add the VirtualGL repository to your system sources.
console$ echo "deb [signed-by=/usr/share/keyrings/virtualgl-archive-keyring.gpg] https://packagecloud.io/dcommander/virtualgl/any any main" | sudo tee /etc/apt/sources.list.d/virtualgl.list
Update the package index to include the new repository.
console$ sudo apt update
Install VirtualGL and Glmark2 for GPU rendering and OpenGL testing.
console$ sudo apt install virtualgl glmark2 xterm -y
Verify the installation.
console$ vglrun --version
Output.
VirtualGL v3.1.4 (Build 20251007)Configure VirtualGL to set permissions and access rules for GPU rendering in ThinLinc sessions.
console$ sudo /opt/VirtualGL/bin/vglserver_config
When prompted, choose the following options:
Select Option 1 to configure the server for use with VirtualGL (GLX + EGL back ends):
Choose: 1Restrict 3D X server access to the vglusers group (recommended):
Restrict 3D X server access to vglusers group (recommended)? [Y/n] YRestrict framebuffer device access to the vglusers group (recommended):
Restrict framebuffer device access to vglusers group (recommended)? [Y/n] YDisable the XTEST extension for security (recommended):
Disable XTEST extension (recommended)? [Y/n] YExit the configuration menu:
Choose: X
Add your ThinLinc user to the
vglusersgroup to access the GPU.console$ sudo usermod -aG vglusers example-user
Stop the display manager and NVIDIA persistence daemon.
console$ sudo systemctl stop sddm nvidia-persistenced
Unload NVIDIA kernel modules to be reloaded with VirtualGL configurations applied.
console$ sudo modprobe -r nvidia_uvm nvidia_drm nvidia_modeset nvidia
Restart your server to apply the configuration changes.
console$ sudo reboot
Access Ubuntu Desktop via ThinLinc Client
Follow the steps below to install the ThinLinc client package and access your Ubuntu desktop remotely.
Log in to your local desktop system and download the ThinLinc client package from the Cendio website.
console$ wget https://www.cendio.com/downloads/clients/thinlinc-client_4.19.0-4005_amd64.deb
Install the downloaded package file.
console$ sudo apt install ./thinlinc-client_4.19.0-4005_amd64.deb
Open the ThinLinc Client from the application menu.
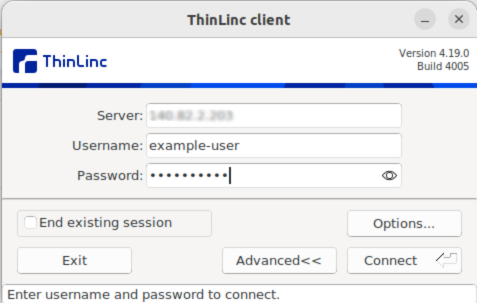
Enter your server’s IP address, username, and password, and click Connect. You should see your Linux desktop environment running on the Vultr Cloud GPU instance.
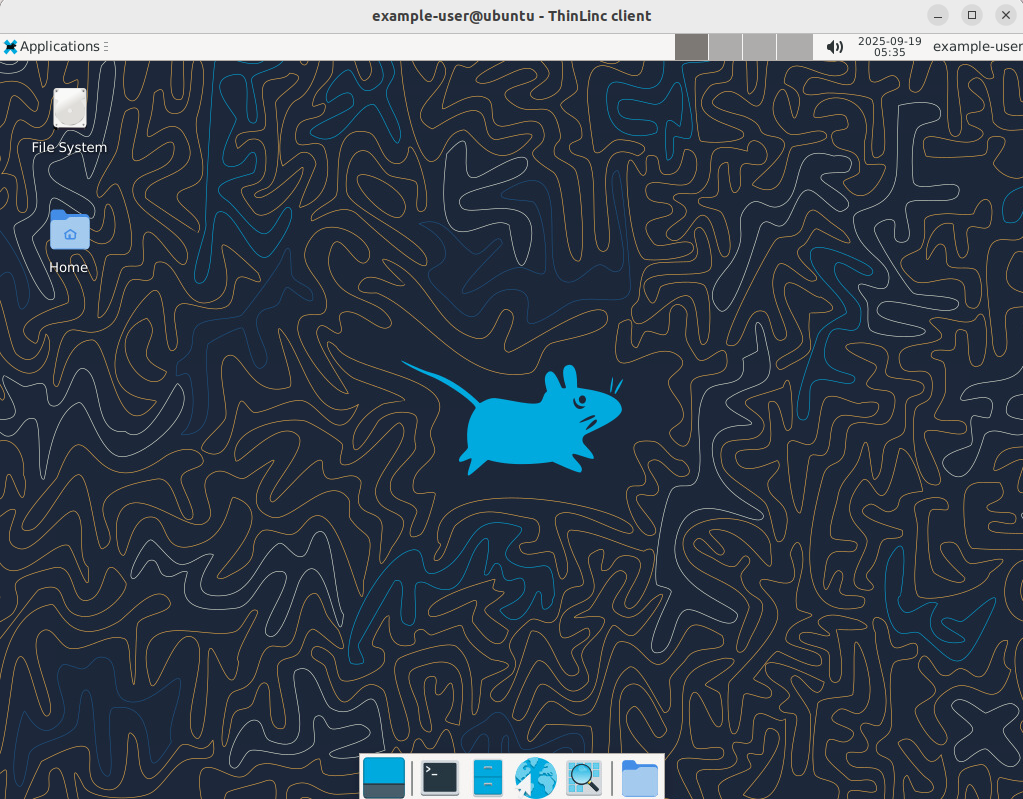
Access Ubuntu Desktop via Web Browser
ThinLinc also lets you access your Ubuntu desktop session via a web browser. Follow the steps below to access your Desktop session and verify that the VDI solution is working with GPU acceleration.
Open your web browser and access your Ubuntu desktop on port 300.
https://SERVER_IP:300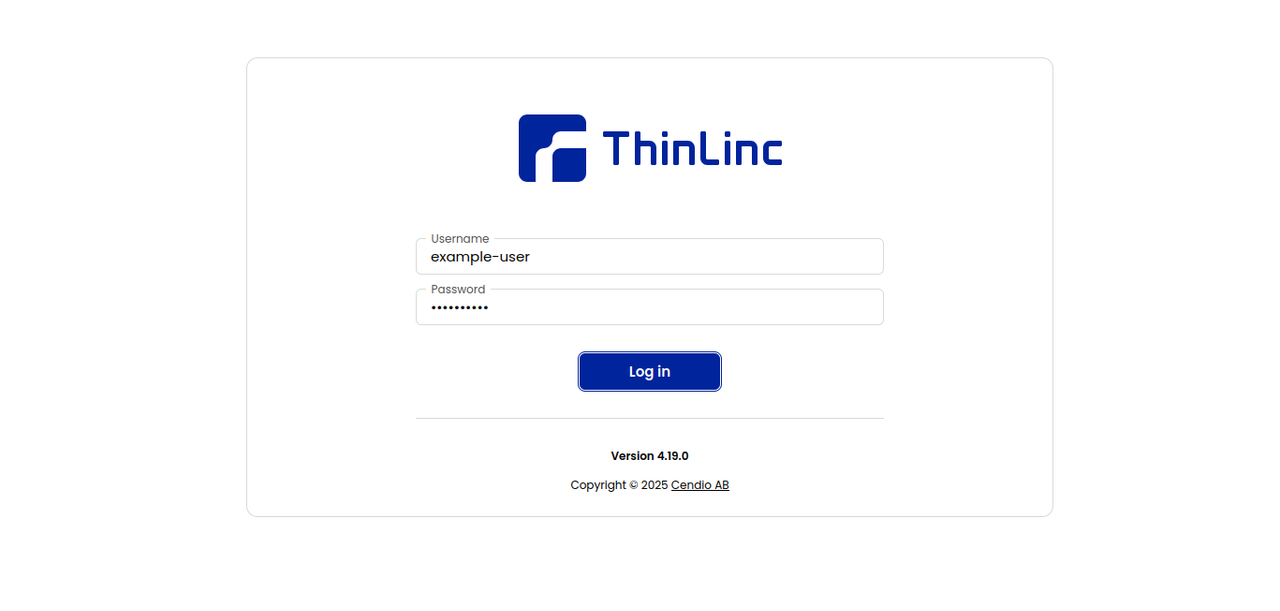
Log in with your ThinLinc credentials. After logging in, you will see your full desktop session inside the browser window.
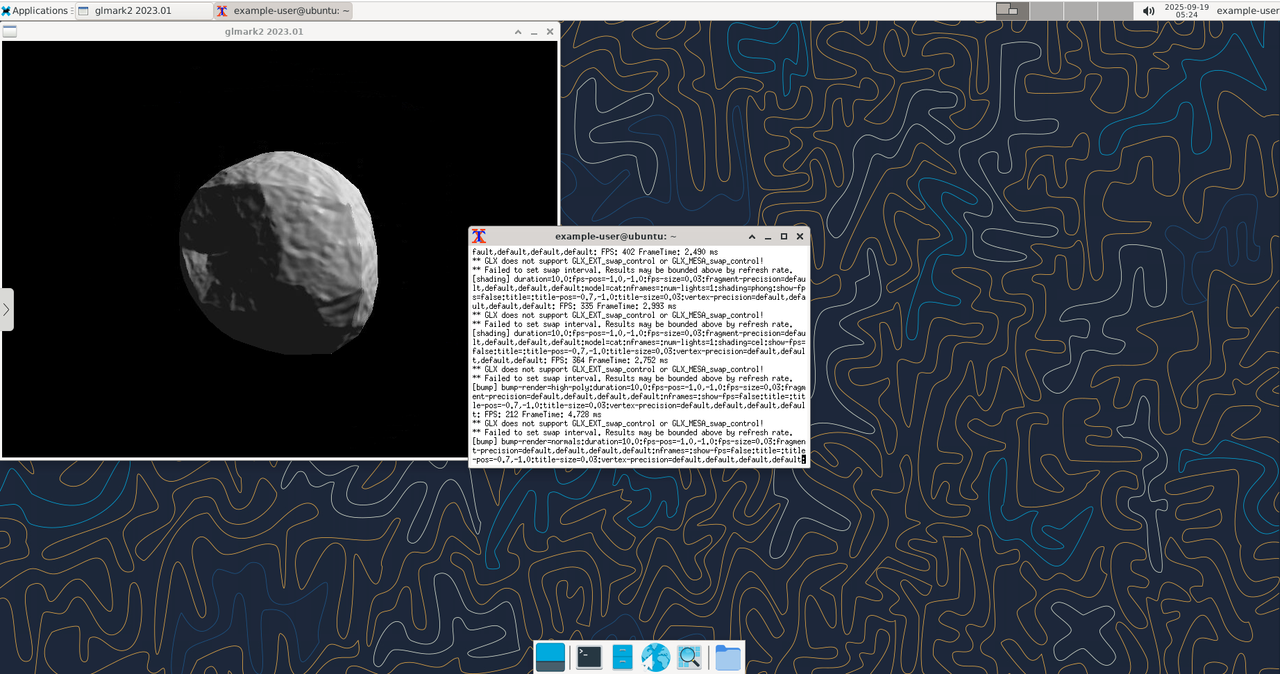
From within your ThinLinc desktop session, open a terminal and run the
glmark2benchmarking tool to test the performance of your graphics hardware.console$ glmark2 --show-all-options
You should see the OpenGL benchmark results, confirming GPU acceleration is working.
Open another terminal and run the command below to confirm that your session is utilizing the NVIDIA GPU on the Vultr instance.
console$ sudo nvidia-smi
Access ThinLinc Control Panel
The ThinLinc Control Panel is a web-based interface that provides administrators with tools to manage their ThinLinc environment. It allows you to configure settings, manage users and sessions, and monitor the status of the server.
Open your web browser and access your ThinLinc control panel on port 1010.
https://SERVER_IP:1010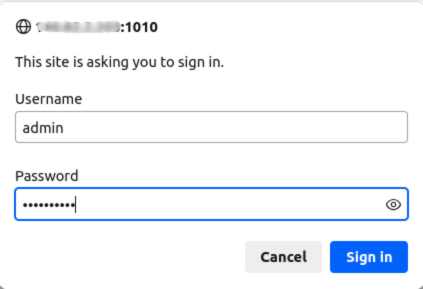
Log in with the default username
adminand the password set during installation. You will see the interface as shown in the screenshot above. The menu on the left provides quick access to different administrative areas.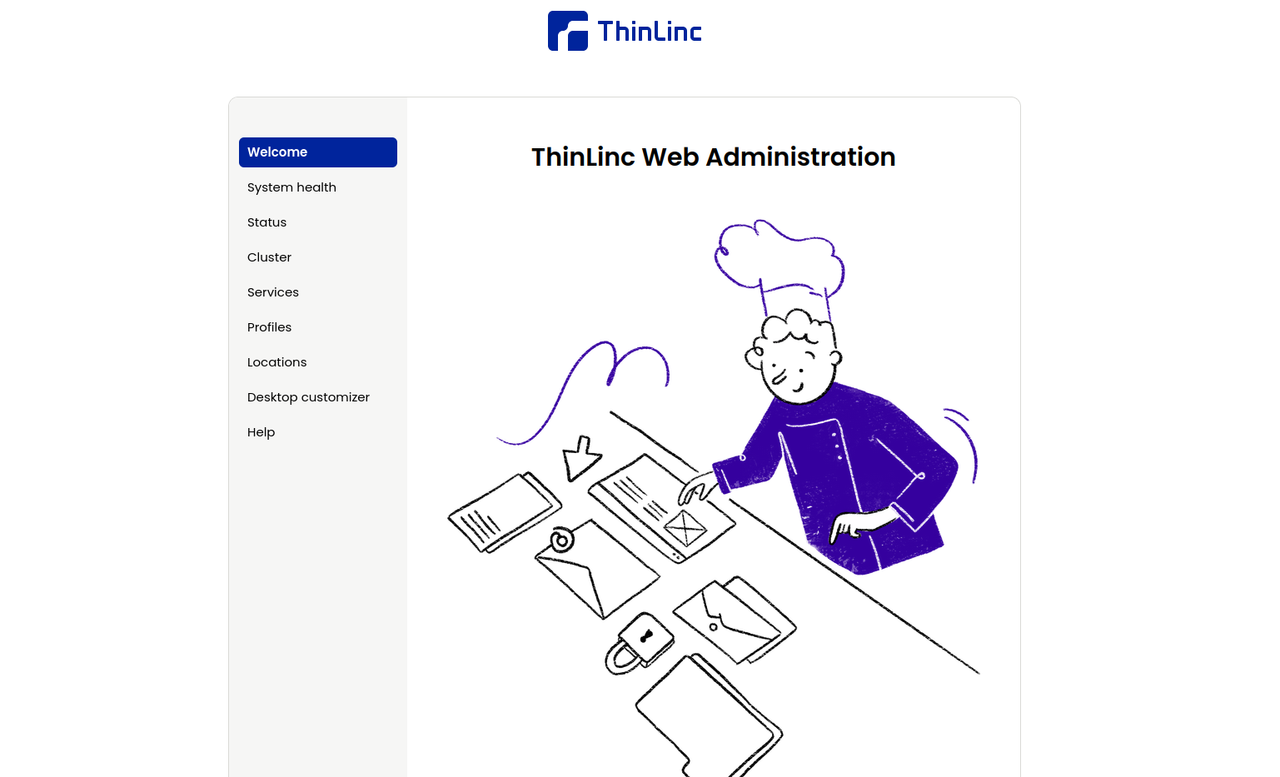
You can now administer your VDI environment directly from a browser.
Conclusion
In this guide, you deployed a Linux Virtual Desktop Infrastructure (VDI) solution on a Vultr Cloud GPU instance using Cendio ThinLinc. You installed and configured the ThinLinc server, enabled VirtualGL for GPU acceleration, and verified performance with tools like glmark2 and nvidia-smi. You also connected to your virtual desktop from the ThinLinc Client and a web browser, confirming that remote sessions benefit from hardware-accelerated OpenGL rendering using the NVIDIA GPU.