
How to Deploy CapRover – Self-Hosted PaaS for Docker Applications
CapRover is an open-source, self-hosted Platform as a Service (PaaS) that automates application deployment using Docker containers and an Nginx reverse proxy. It initializes a Docker Swarm cluster on your server to orchestrate containers, manage networking, and handle SSL certificate provisioning through Let's Encrypt.
This article covers deploying CapRover with Docker Compose on Linux, configuring HTTPS through Let's Encrypt, and deploying Uptime Kuma through the one-click app marketplace to verify the deployment workflow.
Prerequisites
Before you begin, you need to:
- Have access to a Linux-based server as a non-root user with
sudoprivileges. - Install Docker and Docker Compose.
- Point a wildcard DNS A record (for example,
*.apps.example.com) to your server's public IP address.
A record at your domain registrar before proceeding. Point it to your server's IP address (do not use proxy services such as Cloudflare's orange-cloud proxy, as CapRover does not support proxied DNS). DNS propagation can take some time. Verify propagation at mxtoolbox.com by querying a random subdomain such as myapp.apps.example.com.
Set Up the CapRover Environment
The Docker Compose configuration file and environment variables define the initial admin password, terms acceptance, and root domain reference that CapRover reads at startup.
Create the project directory.
console$ mkdir -p ~/caprover
Enter the project directory.
console$ cd ~/caprover
Create the environment variable file.
console$ nano .env
Add the following configuration variables.
iniACCEPTED_TERMS=true DEFAULT_PASSWORD=StrongPassword-321 CAPROVER_ROOT_DOMAIN=apps.example.com
Replace
StrongPassword-321with a secure password of your choice, and replaceapps.example.comwith your actual root domain.The environment variables serve the following purposes:
ACCEPTED_TERMS: Accepts the CapRover terms and conditions. CapRover refuses to start without this variable set totrue.DEFAULT_PASSWORD: Sets the initial dashboard login password. Without this variable, CapRover defaults tocaptain42. The default password is publicly known and actively targeted by automated scanners. Always set a strong custom password before deploying.CAPROVER_ROOT_DOMAIN: Stores your root domain for reference during the dashboard configuration step later in this article. You enter this value when setting up the root domain through the web interface.
Save and close the file.
Deploy with Docker Compose
The Compose file defines port mappings, volume mounts, and environment variables that CapRover needs to manage Docker services on the host.
Create the Docker Compose Configuration
Create the Docker Compose file.
console$ nano docker-compose.yml
Add the following configuration:
yamlservices: caprover: image: caprover/caprover:1.14.1 ports: - "80:80" - "443:443" - "3000:3000" environment: ACCEPTED_TERMS: "${ACCEPTED_TERMS}" DEFAULT_PASSWORD: "${DEFAULT_PASSWORD}" volumes: - /var/run/docker.sock:/var/run/docker.sock - /captain:/captain
The configuration defines the following:
image: Pulls the official CapRover Docker image at version1.14.1. Visit the CapRover Docker Hub page to check for newer releases.ports: Maps three required ports to the host. Port80handles HTTP traffic and Let's Encrypt Automatic Certificate Management Environment (ACME) certificate challenges. Port443handles HTTPS traffic. Port3000serves the initial administration dashboard before domain configuration.environment: Passes theACCEPTED_TERMSandDEFAULT_PASSWORDvalues from the.envfile into the container at runtime.volumes: Mounts the Docker socket at/var/run/docker.sock, which allows CapRover to create and manage Docker Swarm services directly on the host. The/captaindirectory on the host stores all persistent data, including SSL certificates, application configurations, Nginx settings, and the built-in Docker registry storage.
Save and close the file.
Configure the Firewall
CapRover initializes a Docker Swarm cluster during its first startup. Open the required TCP and UDP ports for web traffic, the administration dashboard, the built-in Docker registry, and Docker Swarm inter-node communication.
Allow SSH connections to prevent losing remote access when the firewall activates.
console$ sudo ufw allow OpenSSH
Open the CapRover TCP ports.
console$ sudo ufw allow 80,443,996,7946,4789,2377/tcp
Open port
3000for the initial dashboard setup. This port is closed after HTTPS is configured.console$ sudo ufw allow 3000/tcp
Open the Docker Swarm and HTTP/3 UDP ports.
console$ sudo ufw allow 7946,4789,2377,443/udp
Enable the firewall.
console$ sudo ufw enable
Verify the firewall rules.
console$ sudo ufw status
The ports serve the following purposes:
80/tcpand443/tcp+udp: HTTP and HTTPS web traffic for all deployed applications and the CapRover dashboard. The UDP rule for port443supports HTTP/3 connections.3000/tcp: Initial CapRover dashboard access before domain and HTTPS configuration. This port is closed after HTTPS is configured.996/tcp: Built-in Docker registry that stores application images during the build and deployment process.7946/tcp+udp: Docker Swarm container network discovery and health checks between nodes.4789/tcp+udp: Docker Swarm overlay network data traffic using Virtual Extensible LAN (VXLAN) encapsulation.2377/tcp+udp: Docker Swarm cluster management and node join operations.
Start the CapRover Service
Launch the CapRover installer container, which sets up Docker Swarm and deploys the platform as Swarm services that run independently.
Start CapRover in detached mode.
console$ docker compose up -d
On first startup, CapRover initializes a Docker Swarm cluster, then starts the
captain-captain,captain-nginx, andcaptain-certbotservices. The process may take a few minutes depending on your server and network speed.Wait for CapRover to finish initializing, then verify that the Swarm services are active.
RunningNotedocker service lsbefore Docker Swarm finishes initializing returns a "This node is not a swarm manager" error. If you see this error, wait a few more seconds and run the command again.console$ docker service ls
The output lists the
captain-captain,captain-certbot, andcaptain-nginxservices with at least one replica each.Confirm that CapRover has finished initializing by checking the service logs.
console$ docker service logs captain-captain --tail 20
During startup, the log may show Docker API version errors and a message about halting to apply a configuration secret. These are expected and do not indicate a failure. CapRover restarts itself automatically as part of the initialization process. Wait for the output to display a line containing
Captain is initialized and ready to serve youbefore proceeding.Docker Swarm manages the
captain-captain,captain-certbot, andcaptain-nginxservices independently from the installer container and restarts them automatically if the server reboots.
Access and Configure CapRover
The CapRover dashboard is accessible over HTTP on port 3000 immediately after deployment. From here, configure the root domain, enable HTTPS through Let's Encrypt, and update the dashboard password to complete the setup.
Log In to the Dashboard
Access the CapRover web interface through port 3000 using the password configured in the .env file.
Open a web browser and navigate to the CapRover login page. Replace
YOUR_SERVER_IPwith your server's public IP address.http://YOUR_SERVER_IP:3000The CapRover login page loads and displays a password field.
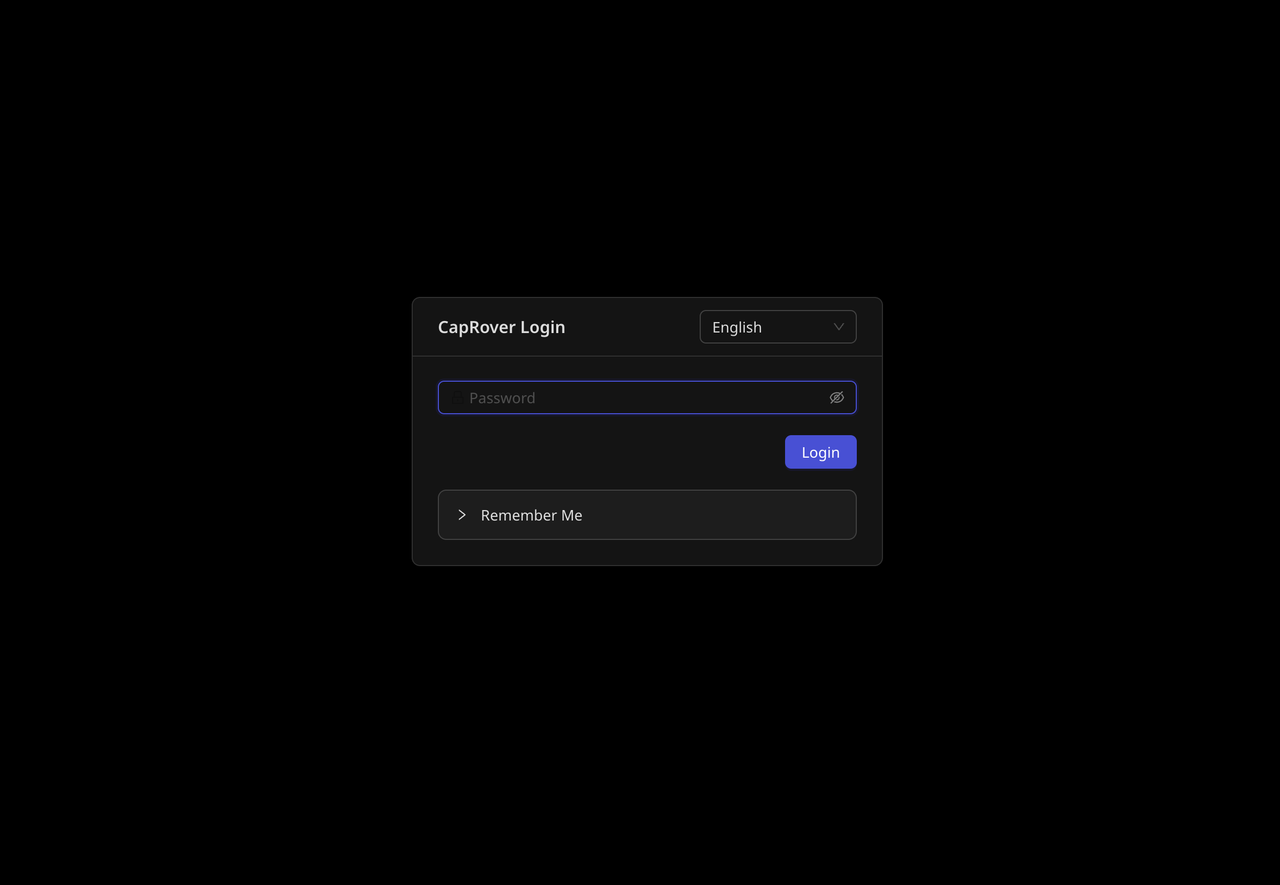
Enter the password you defined in the
DEFAULT_PASSWORDenvironment variable.Click Login to access the dashboard.
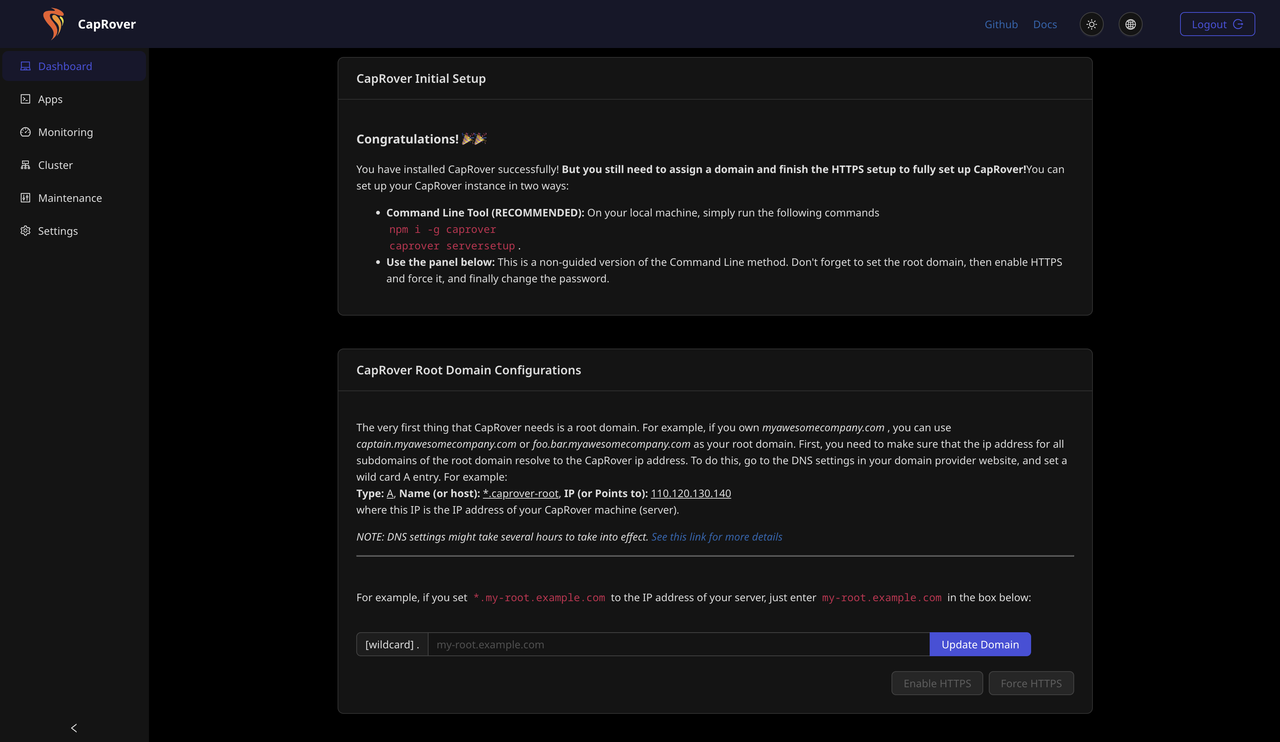
After a successful login, the dashboard displays the CapRover Initial Setup page. The page shows two setup methods: the command line tool and the web panel. The CapRover Root Domain Configurations section appears below the setup options, with the Enable HTTPS and Force HTTPS buttons visible but inactive until the domain is set.
Use the web panel to configure CapRover. Scroll down to the CapRover Root Domain Configurations section.
Set the Root Domain
Configure the root domain so CapRover can route traffic to deployed applications through subdomain-based URLs.
Enter your root domain in the input field next to the
[wildcard] .label. For example, enterapps.example.comif you configured*.apps.example.comas your wildcard DNS record.Click Update Domain to save the configuration.
CapRover verifies that the wildcard DNS record resolves to your server's IP address. After successful validation, a confirmation dialog appears. Click OK to dismiss it. The browser then redirects to the captain subdomain, which is not yet accessible without HTTPS configured.
Navigate back to
http://YOUR_SERVER_IP:3000and log in again to continue.
Enable HTTPS
The CapRover dashboard runs on HTTP until HTTPS is configured. Enabling HTTPS provisions a Let's Encrypt SSL certificate for the root domain and secures all dashboard traffic.
Click the Enable HTTPS button below the domain configuration field.
A dialog box appears requesting your email address. Let's Encrypt uses the email for SSL certificate validation and expiry notifications. The dialog also warns that once HTTPS is enabled, the root domain cannot be changed. Confirm the domain is correct before proceeding.
Enter a valid email address in the input field.
Click OK to submit the request.
CapRover requests an SSL certificate from Let's Encrypt for the root domain. After a few seconds, a confirmation dialog displays Root Domain HTTPS activated! and shows the root domain HTTPS URL. The dialog prompts you to Force HTTPS as the next step.
Click OK to close the confirmation dialog.
Force HTTPS
Redirect all HTTP traffic to HTTPS so that every connection to the CapRover dashboard uses encryption.
Click the Force HTTPS button, which is now active on the dashboard page.
A warning dialog appears, notifying you that forcing HTTPS is a one-way action with no option to revert. The dialog recommends testing the HTTPS URL before proceeding.
Click OK to confirm.
A confirmation dialog displays Force HTTPS activated and confirms that all HTTP traffic now redirects to HTTPS. The dashboard prompts you to log in again at the HTTPS URL.
Click OK to close the dialog. The browser redirects to
https://captain.apps.example.com.Enter your dashboard password on the HTTPS login page to continue.
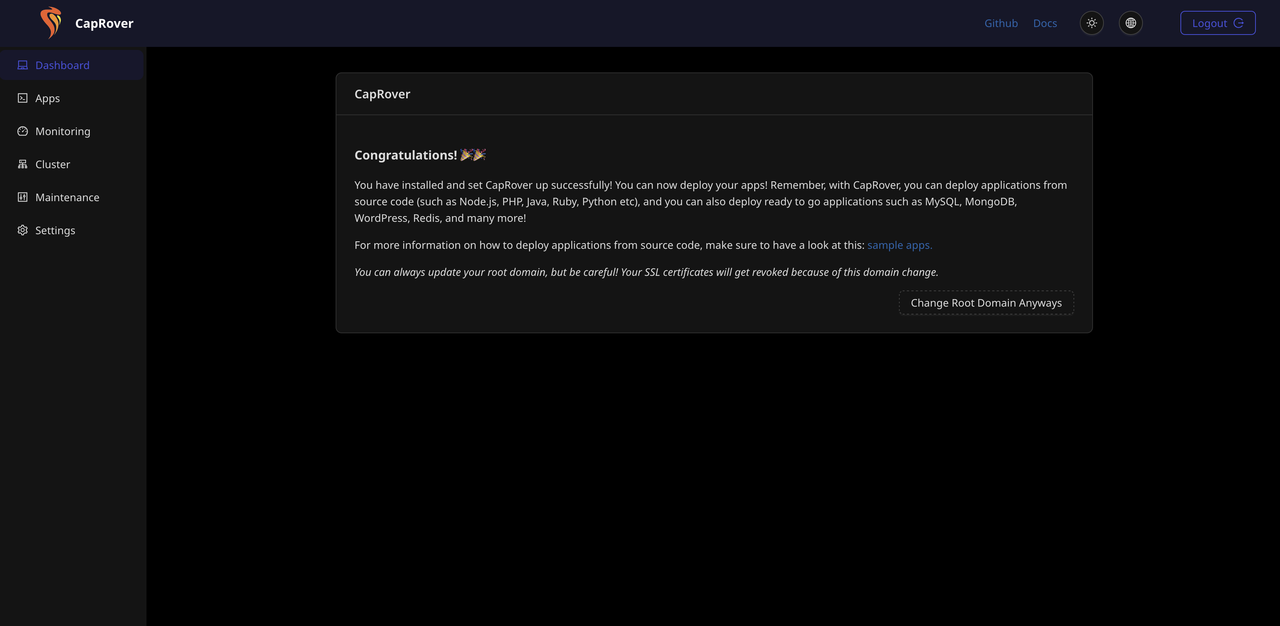
After a successful login, the dashboard displays a Congratulations message confirming that CapRover is fully installed and configured.
Close port
3000on the firewall.console$ sudo ufw delete allow 3000/tcp
Change the Dashboard Password
All dashboard traffic is now encrypted. Changing the password at this point ensures the new credential is transmitted over HTTPS rather than plain HTTP.
Click Settings in the left sidebar menu.
The Settings page loads and displays the Change Password panel.
Enter your current password in the Old Password field.
Enter a new password in the New Password field.
Re-enter the new password in the Confirm New Password field.
Click Change Password to apply the update. CapRover invalidates the session and redirects to the login page.
Log in with the new password to continue.
Deploy a Sample Web Application
Uptime Kuma is a self-hosted monitoring tool that tracks the availability and response time of websites, APIs, and network services through a web-based dashboard. The steps below deploy it through the CapRover one-click app marketplace, including Let's Encrypt certificate provisioning and WebSocket configuration.
Install Uptime Kuma from the Marketplace
The CapRover one-click app marketplace provides pre-configured application templates that handle service creation, volume binding, and port configuration automatically.
Click Apps in the left sidebar of the CapRover dashboard.
Click One-Click Apps/Databases to open the marketplace.
The marketplace displays a searchable list of available applications and databases.
Type
Uptime Kumain the search field.Select Uptime Kuma from the results.
The setup page loads and displays the Uptime Kuma features, an App Name field, and an Uptime Kuma Version field.
Enter
uptime-kumain the App Name field.Locate the Uptime Kuma Version field and replace the default value with
latest. The default version in the one-click app template may reference an outdated tag that no longer exists on Docker Hub, which causes the deployment to fail with a500error. Check the Uptime Kuma Docker Hub tags page to verify the latest available tag before deploying.Click Deploy to begin the installation.
CapRover displays a deployment progress page with four stages: parsing the template, registering the application, configuring volumes and ports, and deploying the Docker image. Do not refresh or navigate away from the page during deployment. After all four stages complete with green checkmarks, a success message displays the application URL.
Click Finish to return to the dashboard.
If the deployment fails with aNoteRequest failed with status code 500error, check the CapRover service logs for the specific cause.Aconsole$ docker service logs captain-captain --tail 50
failed to resolve referencemessage often means the specified Docker image tag does not exist on Docker Hub. Navigate to Apps, delete the failed application, and redeploy with a valid image tag.
Enable HTTPS and WebSocket Support
Uptime Kuma requires both HTTPS and WebSocket support to function correctly. WebSocket support is enabled by default in the one-click app template, but confirm the setting before enabling HTTPS. Without WebSocket support active, the Uptime Kuma dashboard fails to establish a persistent connection and displays a connection error.
Click Apps in the left sidebar.
Click uptime-kuma in the application list.
The application settings page loads with the HTTP Settings tab selected by default. The page displays the application's public URL, container port, and configuration options including Enable HTTPS, Force HTTPS by redirecting all HTTP traffic to HTTPS, and Websocket Support.
Confirm that the Websocket Support checkbox is enabled. If it is not checked, enable it.
Click Enable HTTPS to request a Let's Encrypt certificate for
uptime-kuma.apps.example.com.After the certificate provisions, the Enable HTTPS button becomes inactive.
Check the Force HTTPS by redirecting all HTTP traffic to HTTPS checkbox.
Click Save & Restart to apply all configuration changes.
CapRover updates the Nginx reverse proxy configuration for the application to enforce HTTPS and support WebSocket upgrade headers.
Open a browser and navigate to the Uptime Kuma subdomain to confirm the deployment.
https://uptime-kuma.apps.example.comThe Uptime Kuma setup page loads and the application is ready to use.
Conclusion
You have successfully deployed CapRover on a Linux server using Docker Compose and configured HTTPS through Let's Encrypt. The deployment provides a self-hosted PaaS with automatic subdomain routing, SSL provisioning, and one-click application deployment. For multi-server scaling, custom Nginx configuration, and persistent volume management, visit the official CapRover documentation.