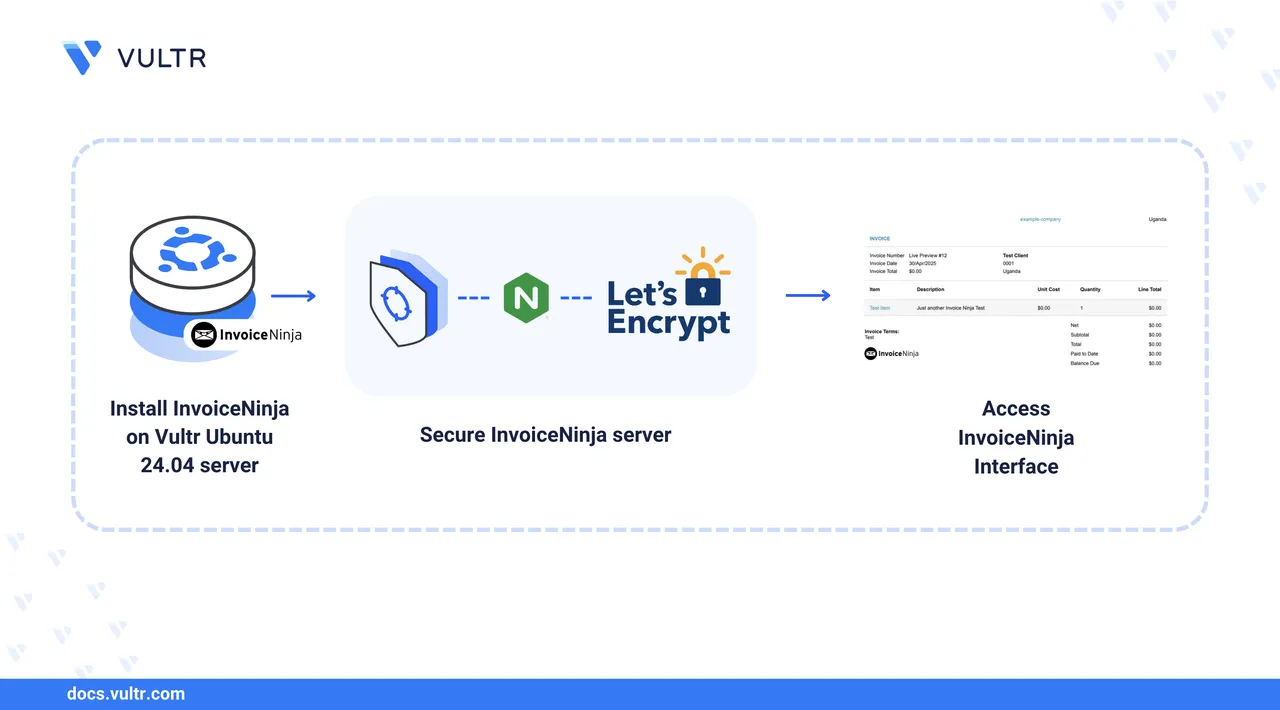
Invoice Ninja is an open-source invoicing application built on top of Laravel for sending invoices and tracking payments. It's a free and open-source alternative to accounting applications like Freshbooks and QuickBooks. You can use Invoice Ninja to perform financial management tasks, including income, expenses, payments, and time tracking.
In this article, you will deploy Invoice Ninja on an Ubuntu 24.04 based server. You will install Invoice Ninja and use the application to perform financial management tasks on the server.
Prerequisites
Before you begin:
- Have access to an Ubuntu 24.04 instance as a non-root sudo user.
- Create a domain A record pointing to the instance's IP address. For example,
invoiceninja.example.com
Install Invoice Ninja
Invoice Ninja is based on Laravel, and you can install it using the latest release file or with Docker. Installing Invoice Ninja with a release file enables you to access the latest application features, while Docker allows you to run Invoice Ninja without any manual package installations. Use the following steps to install Invoice Ninja on your server.
Update your package repository.
console$ sudo apt update
Allow HTTP and HTTPS traffic through your firewall.
console$ sudo ufw allow http && sudo ufw allow https
Installing Invoice Ninja using the latest release file enables access to the latest application features and compatibility with other applications, such as web servers. Invoice Ninja requires PHP 8.3 with an active LAMP or LEMP stack to run with all required PHP extensions on your server. Use the following steps to install the LEMP stack and all the necessary dependencies to install Invoice Ninja.
Install Required Dependencies for Invoice Ninja
Install Nginx, MySQL, and PHP.
console$ sudo apt install nginx mysql-server php -y
Verify the installed PHP version and confirm it's PHP 8.3 or higher.
console$ php -v
Install PHP-FPM and all required PHP extensions for Invoice Ninja.
console$ sudo apt install php8.3-bcmath php8.3-gmp php8.3-fileinfo \ php8.3-gd php8.3-mbstring php8.3-pdo php8.3-xml php8.3-cli \ php8.3-curl php8.3-zip php8.3-gmp php8.3-mysql php8.3-fpm -y
Enable Nginx to start at boot.
console$ sudo systemctl enable nginx
Start the Nginx system service.
console$ sudo systemctl start nginx
Check the Nginx service status and verify that it's running.
console$ sudo systemctl status nginx
Output:
● nginx.service - A high performance web server and a reverse proxy server
    Loaded: loaded (/usr/lib/systemd/system/nginx.service; enabled; preset: enabled)
    Active: active (running) since Fri 2025-05-02 00:34:30 UTC; 1s ago
...
Create a MySQL Database for Invoice Ninja
Invoice Ninja requires a MySQL database to run correctly on your server. Use the following steps to create a new MySQL database for Invoice Ninja.
Log in to MySQL as the
rootdatabase user.console$ sudo mysql -u root
Create a new
invoiceninjadbdatabase.sqlmysql> CREATE DATABASE invoiceninjadb;
Create a new
invoiceninja-adminuser with a strong password. Replacesecure-passwordwith your actual password.sqlmysql> CREATE USER 'invoiceninja-admin'@'localhost' IDENTIFIED BY 'secure-password';
Grant the
invoiceninja-adminuser full privileges to theinvoiceninjadbdatabase.sqlmysql> GRANT ALL PRIVILEGES ON invoiceninjadb.* TO 'invoiceninja-admin'@'localhost';
Flush the MySQL privileges table to apply the user permission changes.
sqlmysql> FLUSH PRIVILEGES;
Exit the MySQL database console.
sqlmysql> EXIT;
Download Invoice Ninja
Use the following steps to download the latest Invoice Ninja release file and install it on your server.
Create a new
invoiceninjadirectory in/var/www/.console$ sudo mkdir -p /var/www/invoiceninja
Switch to the
invoiceninjadirectory.console$ cd /var/www/invoiceninja
Visit the Invoice Ninja releases page and verify the latest version to download. For example, run the following command to download version
5.11.72using Wget.console$ sudo wget https://github.com/invoiceninja/invoiceninja/releases/download/v5.11.72/invoiceninja.tar.gz
Extract all files from the downloaded
invoiceninja.tar.gzarchive.console$ sudo tar -xvf invoiceninja.tar.gz
Remove the archive to save your disk space.
console$ sudo rm invoiceninja.tar.gz
Copy the
.env.examplefile to create a new.envfile.console$ sudo cp .env.example .env
Grant the
www-dataNginx user and group full permissions to theinvoiceninjadirectory.console$ sudo chown -R www-data:www-data /var/www/invoiceninja
Open the system crontab as the
www-datauser.console$ sudo -u www-data crontab -e
Add the following Laravel schedule command to run regular maintenance tasks for Invoice Ninja.
ini* * * * * php8.3 /var/www/invoiceninja/artisan schedule:run >> /dev/null 2>&1
Save and close the Crontab file.
Test the system's Crontab to verify that the Invoice Ninja task is active.
console$ sudo -u www-data crontab -l
Output:
# m h  dom mon dow   command
* * * * * php8.3 /var/www/invoiceninja/artisan schedule:run >> /dev/null 2>&1
Configure Invoice Ninja
Invoice Ninja requires a virtual host configuration to run all files in the /var/www/invoiceninja directory. Use the following steps to create a new Nginx virtual host configuration to serve InvoiceNinja.
Create a new
invoiceninja.confvirtual host configuration in the/etc/nginx/sites-availabledirectory.console$ sudo nano /etc/nginx/sites-available/invoiceninja.conf
Add the following Nginx server block configurations to the
invoiceninja.conffile. Replaceinvoiceninja.example.comwith your domain.iniserver { listen 80; listen [::]:80; server_name invoiceninja.example.com; root /var/www/invoiceninja/public; index index.php index.html index.htm; client_max_body_size 20M; charset utf-8; access_log /var/log/nginx/ininja.access.log; error_log /var/log/nginx/ininja.error.log; gzip on; gzip_types application/javascript application/x-javascript text/javascript text/plain application/xml application/json; gzip_proxied no-cache no-store private expired auth; gzip_min_length 1000; location / { try_files $uri $uri/ /index.php?$query_string; } if (!-e $request_filename) { rewrite ^(.+)$ /index.php?q= last; } location ~ \.php$ { fastcgi_split_path_info ^(.+\.php)(/.+)$; fastcgi_pass unix:/run/php/php8.3-fpm.sock; fastcgi_index index.php; include fastcgi_params; fastcgi_param SCRIPT_FILENAME $document_root$fastcgi_script_name; fastcgi_intercept_errors off; fastcgi_buffer_size 16k; fastcgi_buffers 4 16k; } }
Save and close the
invoiceninja.conffile.The above Nginx virtual host configuration serves Invoice Ninja files from the
/var/www/invoiceninja/publicdirectory using theinvoiceninja.example.comdomain. All PHP requests are forwarded to the installed PHP 8.3 FPM service to process and serve the Invoice Ninja dashboard.Remove the default Nginx virtual host configuration.
console$ sudo rm /etc/nginx/sites-enabled/default
To enable this virtual host, link the
invoiceninja.conffile to the/etc/nginx/sites-enableddirectory.console$ sudo ln -s /etc/nginx/sites-available/invoiceninja.conf /etc/nginx/sites-enabled/invoiceninja.conf
Test the Nginx configuration for syntax errors.
console$ sudo nginx -t
Output:
nginx: the configuration file /etc/nginx/nginx.conf syntax is ok
nginx: configuration file /etc/nginx/nginx.conf test is successful
Restart Nginx to apply the Invoice Ninja virtual host configurations.
console$ sudo systemctl restart nginx
Secure Invoice Ninja with Trusted SSL Certificates
Use the following steps to generate trusted Let's Encrypt SSL certificates to secure all connections to Invoice Ninja.
Install the Certbot Let's Encrypt plugin for Nginx.
console$ sudo apt install python3-certbot-nginx
Request a new TLS certificate using your virtual host domain. Replace
invoiceninja.example.comwith your active domain andadmin@example.comwith your email address.console$ sudo certbot --nginx -d invoiceninja.example.com -m admin@example.com --agree-tos
Restart Nginx to apply the Invoice Ninja configuration changes.
console$ sudo systemctl restart nginx
Set Up Invoice Ninja
Access the
/setuppath using yourinvoiceninja.example.comdomain in a web browser.https://invoiceninja.example.com/setupVerify that the Invoice Ninja configuration page displays correctly.
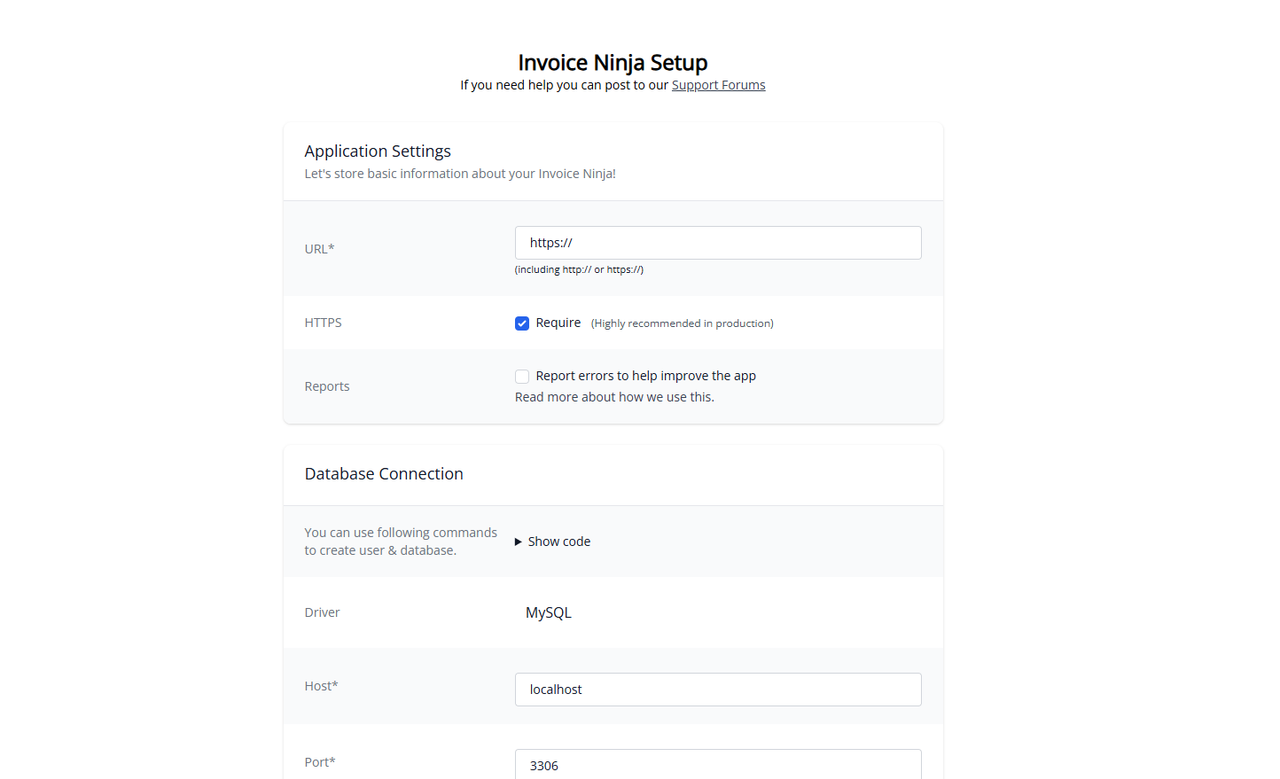
Enter your domain in the URL field and keep the HTTPS
Requireoption enabled.Navigate to Database Connection.
Verify that MySQL is the selected driver.
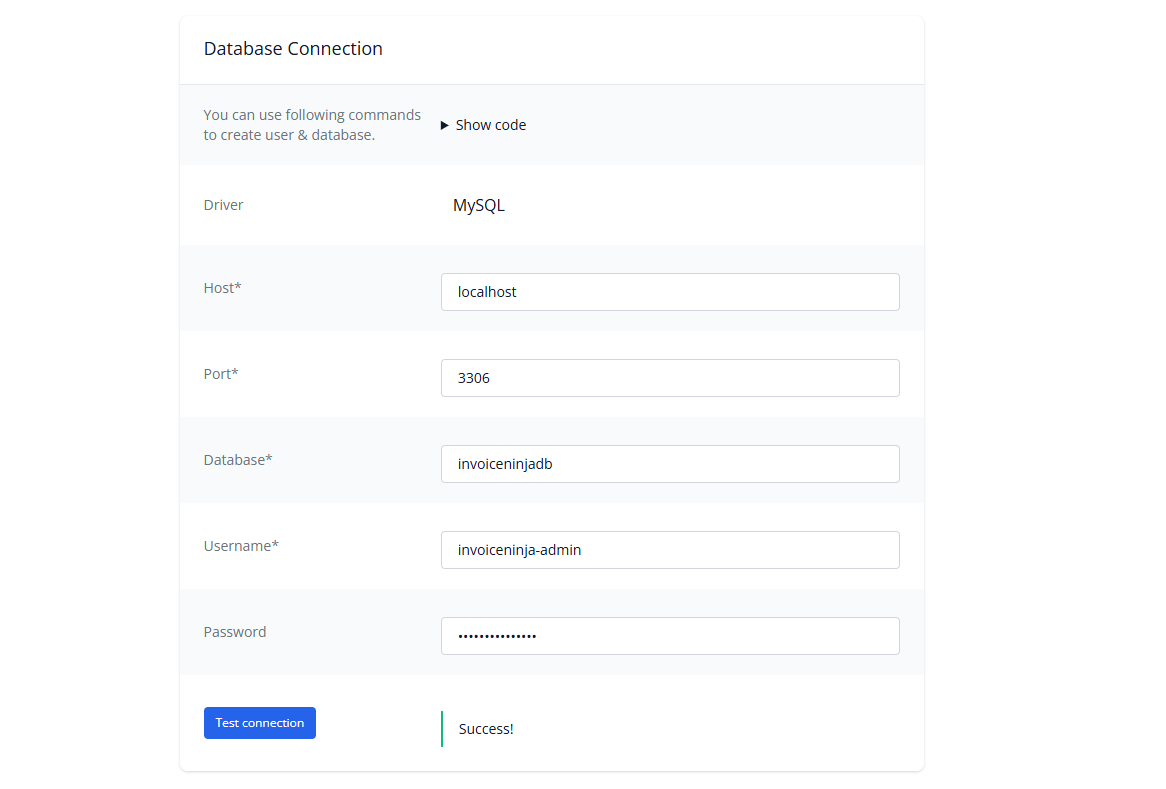
Keep localhost as the MySQL host or specify your MySQL database server address.
Keep
3306as the MySQL port or set it depending on your server port.Enter the Invoice Ninja database, username, and password information you created earlier.
Click Test connection to validate the MySQL connection information and verify that a success prompt displays.
Enter your Invoice Ninja administrator details in the User Details form.
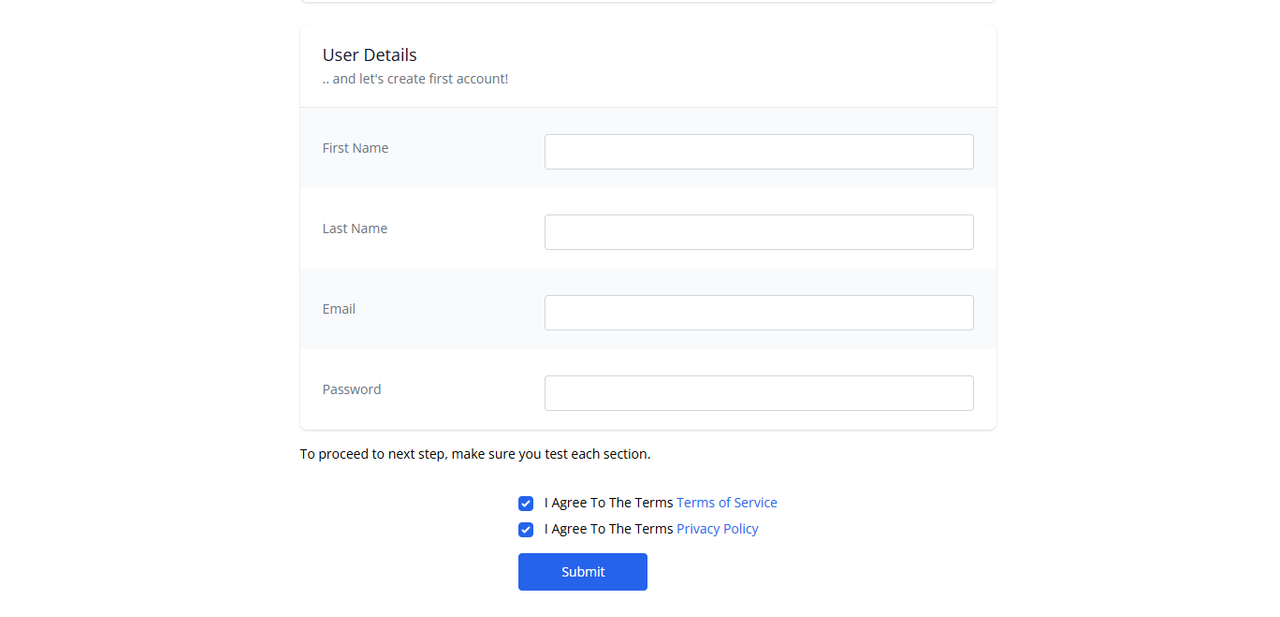
Check the Invoice Ninja terms of service and privacy policy options.
Click Submit to apply the Invoice Ninja configuration.
Follow the steps below to install Invoice Ninja using Docker Compose with all necessary packages.
Install Docker, Docker Compose, certbot, and certbot plugin for Nginx.
console$ sudo apt install docker.io docker-compose certbot python3-certbot-nginx -y
Remove Nginx to free up port 80 of your server.
console$ sudo apt purge nginx -y
Switch to your active user's home directory.
console$ cd
Create a new
invoiceninjaproject directory.console$ mkdir invoiceninja
Switch to the
invoiceninjadirectory.console$ cd invoiceninja
Create new
storage,config, andpublicdirectories.console$ mkdir -p storage config public
Change the default
storageandpublicdirectory permissions to777, enabling the Invoice Ninja container to write configuration files.console$ sudo chmod -R 777 storage public
Generate a new Invoice Ninja API Key.
console$ sudo docker run --rm -it invoiceninja/invoiceninja php artisan key:generate --show
Copy the generated key in your output like the one below.
base64:3OoSrTSLswQyfY/NjMvVaxoODn/NyFzzwwkjfou6JuQ=Create a new
docker-compose.ymlfile.console$ nano docker-compose.yml
Add the following Docker configurations to the
docker-compose.ymlfile.yamlversion: '3.7' services: nginx: image: nginx restart: unless-stopped volumes: - ./config/in-vhost.conf:/etc/nginx/conf.d/in-vhost.conf:ro - ./public:/var/www/app/public:ro - /etc/letsencrypt:/etc/letsencrypt:ro depends_on: - app ports: - "80:80" - "443:443" healthcheck: test: curl -f http://localhost:80/ || exit 1 networks: - invoice_ninja_network db: image: mariadb:10.4 restart: unless-stopped volumes: - ./data:/var/lib/mysql:rw,delegated environment: MARIADB_PASSWORD: ninja MARIADB_ROOT_PASSWORD: ninja MARIADB_DATABASE: ninja MARIADB_USER: ninja PUID: "1026" PGID: "100" networks: - invoice_ninja_network cache: image: redis restart: unless-stopped healthcheck: test: ["CMD-SHELL", "redis-cli ping || exit 1"] networks: - invoice_ninja_network app: image: invoiceninja/invoiceninja:5 restart: unless-stopped volumes: - ./public:/var/www/app/public:rw,delegated - ./storage:/var/www/app/storage:rw,delegated depends_on: db: condition: service_started cache: condition: service_healthy environment: APP_NAME: "Invoice Ninja" APP_ENV: "production" APP_KEY: base64:3OoSrTSLswQyfY/NjMvVaxoODn/NyFzzwwkjfou6JuQ= # Replace with your key APP_DEBUG: "0" APP_URL: "https://invoiceninja.example.com" # Replace with your domain IS_DOCKER: "true" PHANTOMJS_PDF_GENERATION: "0" PDF_GENERATOR: "snappdf" TRUSTED_PROXIES: "*" MULTI_DB_ENABLED: "0" DB_HOST: db DB_DATABASE: ninja DB_USERNAME: ninja DB_PASSWORD: ninja DB_PORT: "3306" PUID: "1026" PGID: "100" CACHE_DRIVER: redis SESSION_DRIVER: redis REDIS_HOST: cache MAIL_MAILER: smtp MAIL_HOST: smtp.ionos.de MAIL_PORT: "465" MAIL_USERNAME: xxx@yyyy MAIL_PASSWORD: XXX MAIL_ENCRYPTION: SSL MAIL_FROM_ADDRESS: "invoiceninja@example.com" MAIL_FROM_NAME: "Max Crisp" REQUIRE_HTTPS: "1" NINJA_ENVIRONMENT: "selfhost" IN_USER_EMAIL: admin@example.com IN_PASSWORD: GEHEIM networks: - invoice_ninja_network networks: invoice_ninja_network: driver: bridge
In the above configuration,
- Replace the
APP_KEYvaluebase64:/TIgzF1RTLm0D1VBUzbgZHTrtyQlJ9cxHPQ03VjDh7A=with your generated API key. - Replace the
APP_URLvalue with your domain name. - In the
dbservice, replace the values of theenvironmentvariables with names starting withMARIADB_with your custom values. - In the
appservice, replace all the:DB_environment variables with the values you set in thedbservice section.MAIL_environment variables with your email server's details if you've set one. Otherwise, you can leave it at its default values.
- The
IN_USER_EMAILvariable is your login email address, and theIN_PASSWORDvariable is your login password. Set your values for these variables.
Save and close the
docker-compose.ymlfile.This Docker Compose configuration creates new containers for Nginx, MariaDB, and Redis, allowing Invoice Ninja to create databases and store data in memory for fast performance. Nginx forwards all connections to the Invoice Ninja port
9000.- Replace the
Generate a TLS certificate for your Invoice Ninja Docker application.
console$ sudo certbot certonly --standalone -d invoiceninja.example.com --email invoiceninja@example.com --agree-tos --non-interactive
To generate the certificate, replace
invoiceninja.example.comwith your domain name and provide your email address. Otherwise, the command will fail.Your TLS certificate and private key are stored at
/etc/letsencrypt/live/invoiceninja.example.com/. In the later steps, use this path in the Nginx virtual host configuration file.Create a new
in-vhost.confvirtual host configuration in the/configdirectory.console$ nano config/in-vhost.conf
Add the following server block configurations ot the
in-vhost.conffile.iniserver { listen 80 default_server; server_name invoiceninja.example.com; # Replace with your domain # Redirect all HTTP traffic to HTTPS return 301 https://$host$request_uri; } server { listen 443 ssl default_server; server_name invoiceninja.example.com; # Replace with your domain server_tokens off; client_max_body_size 100M; # SSL certificate paths ssl_certificate /etc/letsencrypt/live/invoiceninja.example.com/fullchain.pem; # Replace with your domain ssl_certificate_key /etc/letsencrypt/live/invoiceninja.example.com/privkey.pem; # Replace with your domain ssl_protocols TLSv1.2 TLSv1.3; ssl_prefer_server_ciphers on; ssl_ciphers EECDH+AESGCM:EDH+AESGCM:AES256+EECDH:AES256+EDH; root /var/www/app/public/; index index.php; location / { try_files $uri $uri/ /index.php?$query_string; } location = /favicon.ico { access_log off; log_not_found off; } location = /robots.txt { access_log off; log_not_found off; } location ~* /storage/.*\.php$ { return 503; } location ~ \.php$ { fastcgi_split_path_info ^(.+\.php)(/.+)$; fastcgi_pass app:9000; fastcgi_index index.php; include fastcgi_params; fastcgi_param SCRIPT_FILENAME $document_root$fastcgi_script_name; fastcgi_intercept_errors off; fastcgi_buffer_size 16k; fastcgi_buffers 4 16k; } }
In the above configuration, replace all occurrences of
invoiceninja.example.comwith your domain name.Save and close the
in-vhost.conffile.The above Nginx virtual host configuration listens for connection requests using all internal and host IP addresses to run Invoice Ninja on your server.
Start all services in the background using Docker Compose in detached mode.
console$ sudo docker-compose up -d
List all Docker containers and verify that all services are running.
console$ sudo docker container ls
Output:
CONTAINER ID   IMAGE                         COMMAND                  CREATED         STATUS                   PORTS                                                                      NAMES
2aeefe15c99c   nginx                         "/docker-entrypoint.…"   3 minutes ago   Up 2 minutes (healthy)   0.0.0.0:80->80/tcp, :::80->80/tcp, 0.0.0.0:443->443/tcp, :::443->443/tcp   invoiceninja_nginx_1
9fc27c288ac4   invoiceninja/invoiceninja:5   "docker-entrypoint s…"   3 minutes ago   Up 3 minutes             9000/tcp                                                                   invoiceninja_app_1
fa2e661a93ab   redis                         "docker-entrypoint.s…"   4 minutes ago   Up 4 minutes (healthy)   6379/tcp                                                                   invoiceninja_cache_1
0a27ba745af1   mariadb:10.4                  "docker-entrypoint.s…"   4 minutes ago   Up 4 minutes             3306/tcp                                                                   invoiceninja_db_1
To set up Automatic certificate renewal, edit the crontab file.
console$ sudo nano /etc/crontab
Add the following line at the end of the file.
ini0 0 * * * root certbot renew --quietThis command runs the
certbot renew --quietcommand every day through therootuser, which renews the certificate if it expires.
Access and Use Invoice Ninja
Use the following steps to access and use Invoice Ninja on your server.
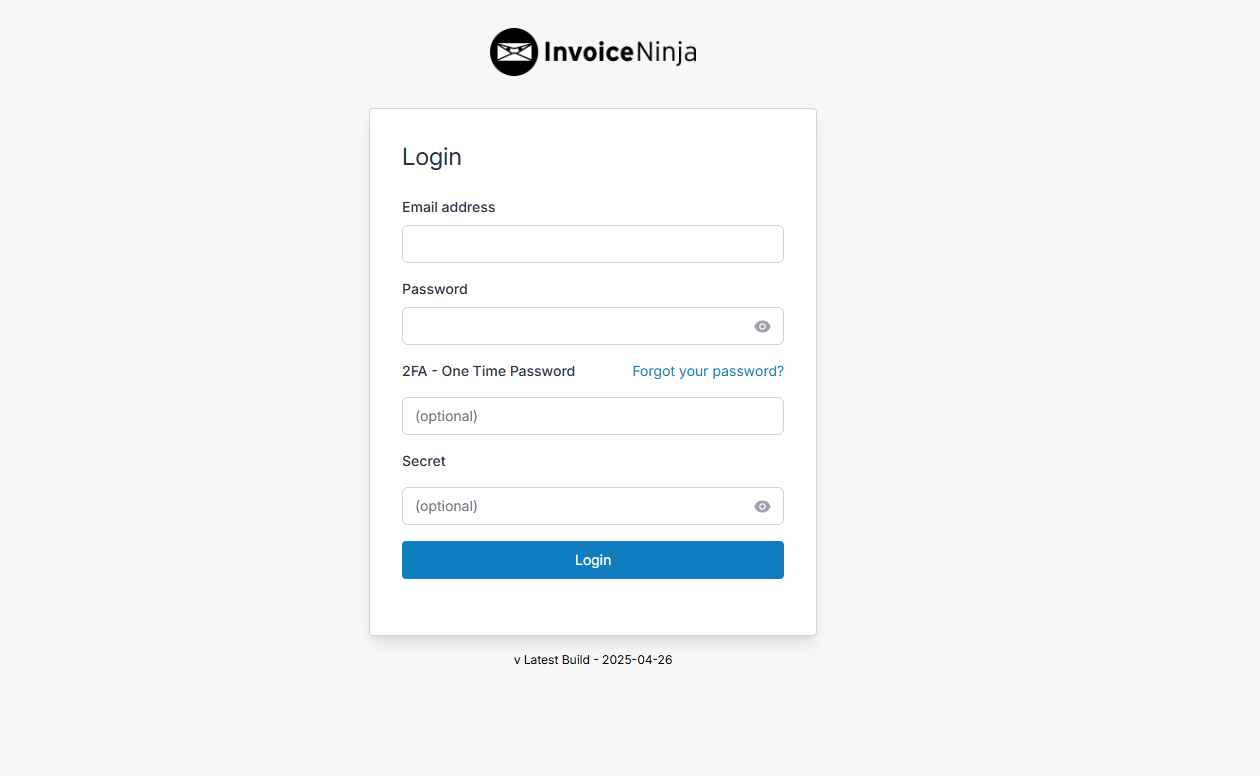
Open the Invoice Ninja login page using your domain in a new web browser tab..
https://invoiceninja.example.com/loginIn the respective fields, enter your administrator email address and password and click Login to access the Invoice Ninja dashboard.
In the open Welcome to Invoice Ninja prompt, enter your company name, such as
example-company,and select the default currency to use in your invoices.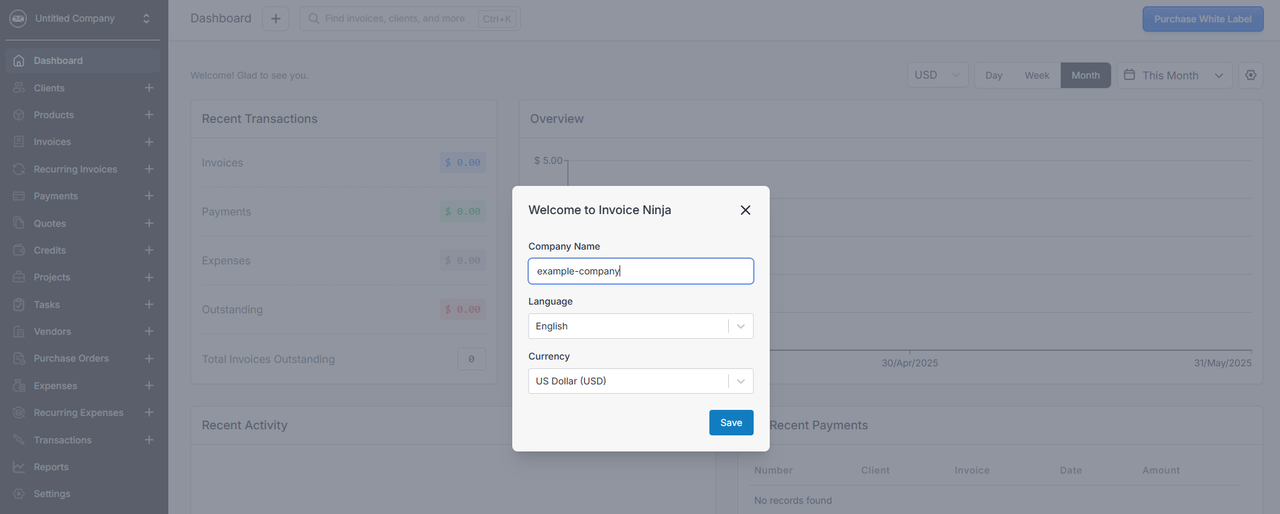
Navigate to Settings to fill-in your additional company information.
Click Invoices on the main navigation menu.

Click New Invoice to create a new invoice.
Click New Client, enter the client's details, and click Save.
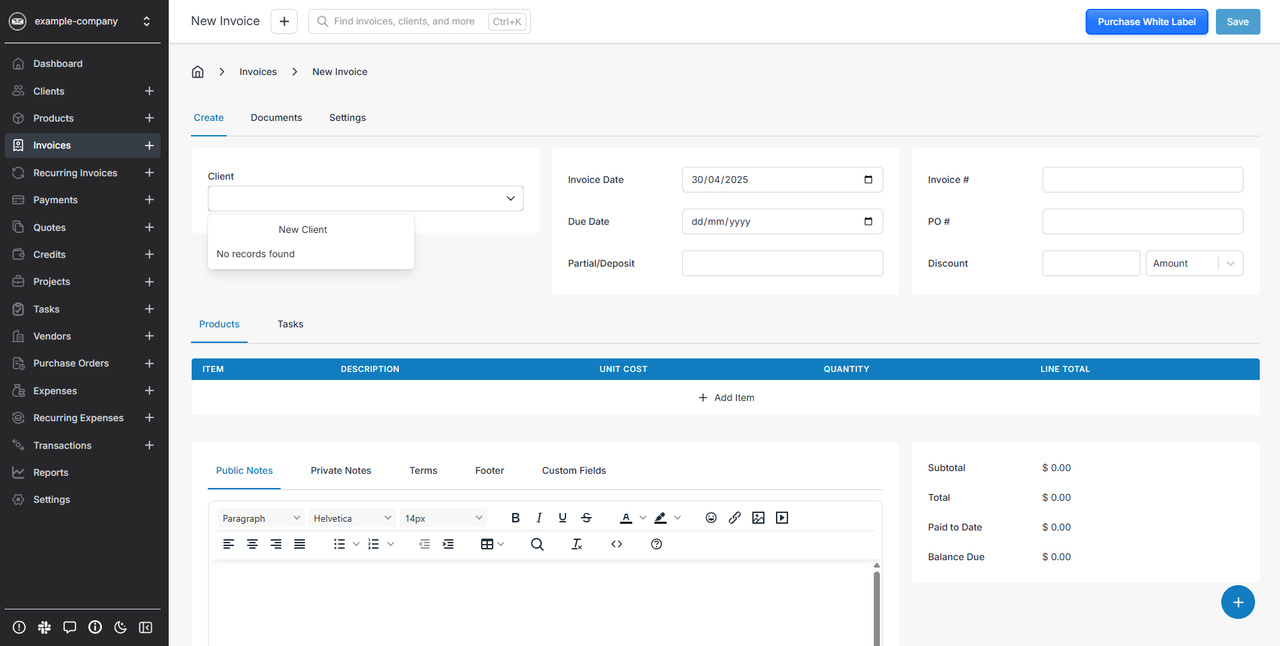
In the respective fields, set the Invoice date, due date, invoice number, PO, and discount information.
Click Add Item within the Products category to add new items to the invoice.
Click New Product, specify the Item details, and click Save.
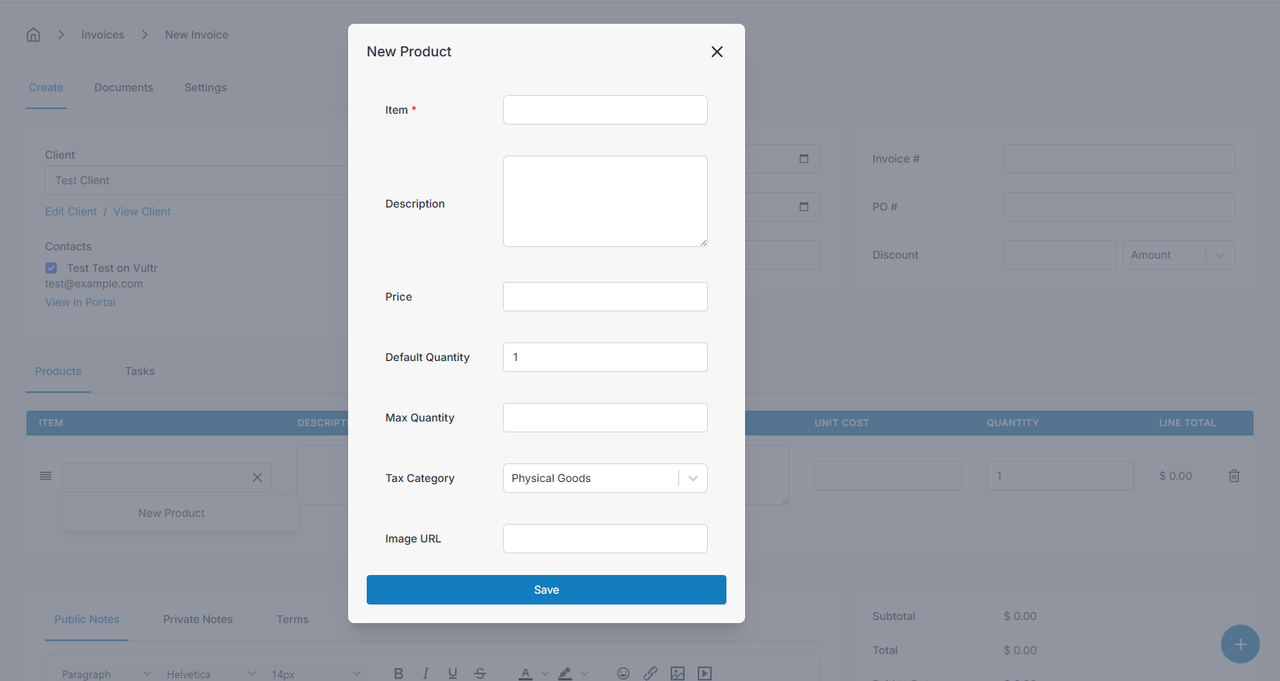
Specify the unit cost and quantity details.
Enter additional information by navigating between the Public Notes, Terms and Footer options.
Scroll and verify the Invoice information on the preview page.
Download or print the Invoice.
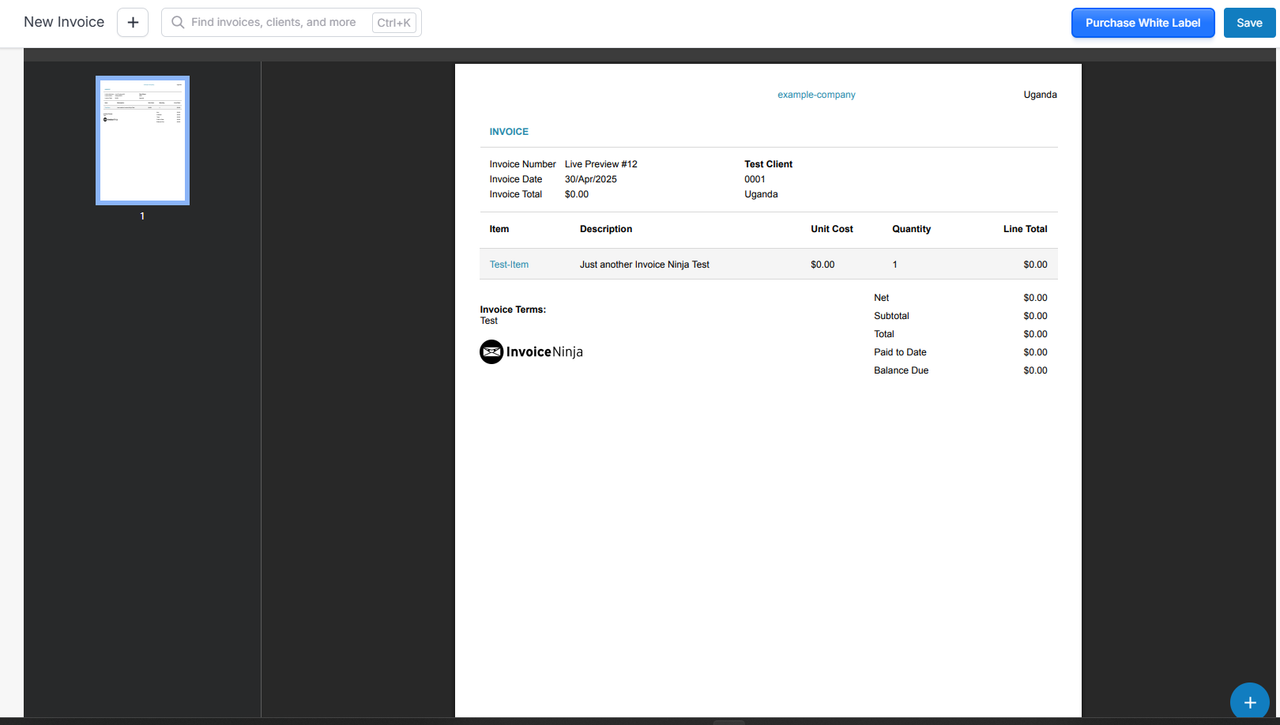
Click Save to export and save the Invoice in your collection.
Conclusion
In this article, you have deployed Invoice Ninja on an Ubuntu 24.04 server using the official package and using Docker. You can create invoices, manage records, and create financial records within the Invoice Ninja dashboard. For more information about Invoice Ninja, visit its documentation page.