
How to Install Nginx, MySQL, PHP (LEMP Stack) on Ubuntu 22.04

LEMP (Linux, Nginx, MySQL, PHP) is an open-source web stack for deploying dynamic web applications. In this setup, Nginx serves static and dynamic content, MySQL handles database management, and PHP processes the dynamic content of web applications on your server.
This article explains how to install the LEMP stack (Linux, Nginx, MySQL, PHP) on Ubuntu 22.04, set up a basic web application, and secure the server with SSL certificates.
Prerequisites
Before you begin:
Have an Ubuntu 22.04 server.
Create a new domain A record pointing to the server IP address. For example,
app.example.com.Access the server using SSH as a non-root user with sudo privileges.
Install Nginx
Update the server package index.
console$ sudo apt update
Install Nginx.
console$ sudo apt install nginx -y
Start Nginx.
console$ sudo systemctl start nginx
Enable Nginx to start at boot time.
console$ sudo systemctl enable nginx
View the Nginx service status and verify that it's active on your server.
console$ sudo systemctl status nginx
Output:
● nginx.service - A high performance web server and a reverse proxy server
     Loaded: loaded (/lib/systemd/system/nginx.service; enabled; vendor preset: enabled)
     Active: active (running) since Sun 2025-04-06 12:24:55 UTC; 24s ago
       Docs: man:nginx(8)
   Main PID: 2604 (nginx)
      Tasks: 5 (limit: 9415)
     Memory: 7.8M
     CGroup: /system.slice/nginx.service
             ├─2604 nginx: master process /usr/sbin/nginx -g daemon on; master_process on;
             ├─2605 nginx: worker process
             ├─2606 nginx: worker process
             ├─2607 nginx: worker process
             └─2608 nginx: worker process
Install MySQL
Install the latest MySQL database server package on your server.
console$ sudo apt install mysql-server -y
Start the MySQL service.
console$ sudo systemctl start mysql
Enable the MySQL service to start at boot time.
console$ sudo systemctl enable mysql
View the MySQL service status and verify that it's active on the server.
console$ sudo systemctl status mysql
Output:
● mysql.service - MySQL Community Server
     Loaded: loaded (/lib/systemd/system/mysql.service; enabled; vendor preset: enabled)
     Active: active (running) since Sun 2025-04-06 12:26:48 UTC; 53s ago
   Main PID: 16247 (mysqld)
     Status: "Server is operational"
      Tasks: 38 (limit: 9385)
     Memory: 364.3M
        CPU: 869ms
     CGroup: /system.slice/mysql.service
             └─16247 /usr/sbin/mysqld
Start the MySQL secure installation script to disable insecure default configurations.
console$ sudo mysql_secure_installation
Enter Y when prompted to enable the VALIDATE PASSWORD component that ensures strict password policies for the database users.
VALIDATE PASSWORD COMPONENT can be used to test passwords
and improve security. It checks the strength of password
and allows the users to set only those passwords which are
secure enough. Would you like to setup VALIDATE PASSWORD component?

Press y|Y for Yes, any other key for No: y
Enter your desired password strength validation policy level. For example, enter 2 to enable strong password usage on the server.
LOW    Length >= 8
MEDIUM Length >= 8, numeric, mixed case, and special characters
STRONG Length >= 8, numeric, mixed case, special characters and dictionary file

Please enter 0 = LOW, 1 = MEDIUM and 2 = STRONG:
Enter Y and press Enter when prompted to remove anonymous users on your database server.
Remove anonymous users? (Press y|Y for Yes, any other key for No) :Enter Y when prompted to Disallow remote login and disable remote access to your database server using the root user account.
Disallow root login remotely? (Press y|Y for Yes, any other key for No) :Enter Y when prompted to remove the test database on your server.
Remove test database and access to it? (Press y|Y for Yes, any other key for No) :Enter Y when prompted to reload privilege tables. Then press and press Enter to refresh the MySQL privilege tables and apply your configuration changes.
Reload privilege tables now? (Press y|Y for Yes, any other key for No) :
Access the MySQL console to set up a new root user password.
console$ sudo mysql
Modify the root user with a strong password and enable
mysql_native_passwordas the default authentication method.sqlmysql> ALTER USER 'root'@'localhost' IDENTIFIED WITH mysql_native_password BY 'secured_password';
Reload the MySQL Privilege tables to apply changes.
sqlmysql> FLUSH PRIVILEGES;
Exit the MySQL console.
sqlmysql> EXIT;
Restart the MySQL database server.
console$ sudo systemctl restart mysql
Install PHP
PHP is available in the default APT repositories on Ubuntu 22.04. PHP-FPM (FastCGI Process Manager) allows PHP to run as a service, enabling interactions with other applications. Follow the steps below to install PHP, PHP-FPM, and essential modules like php-mysql on your server.
Install PHP and PHP-FPM on your server.
console$ sudo apt install php php-fpm -y
Install essential PHP modules required by most dynamic applications.
console$ sudo apt install php-mysql php-cli -y
The above command installs the following PHP modules:
php-mysql: Allows PHP to connect to MySQL and perform database operations.php-cli: The PHP Command Line Interface (CLI) enables running PHP scripts directly from the terminal.
Installing PHP also pulls in the apache2 package as a dependency, uninstall Apache to avoid any service conflicts.
console$ sudo apt remove apache2 -y
View the installed PHP version on your server.
console$ php -v
Your output should be similar to the one below:
PHP 8.1.2-1ubuntu2.21 (cli) (built: Mar 24 2025 19:04:23) (NTS)
Copyright (c) The PHP Group
Zend Engine v4.1.2, Copyright (c) Zend Technologies
    with Zend OPcache v8.1.2-1ubuntu2.21, Copyright (c), by Zend Technologies
Start the PHP-FPM service depending on your installed version such as
PHP 8.1.console$ sudo systemctl start php8.1-fpm
Enable PHP-FPM to start at boot time.
console$ sudo systemctl enable php8.1-fpm
View the PHP-FPM service status and verify that it's running.
console$ sudo systemctl status php8.1-fpm
Output:
● php8.1-fpm.service - The PHP 8.1 FastCGI Process Manager
     Loaded: loaded (/lib/systemd/system/php8.1-fpm.service; enabled; vendor preset: enabled)
     Active: active (running) since Sun 2025-04-06 12:32:31 UTC; 11min ago
       Docs: man:php-fpm8.1(8)
   Main PID: 26515 (php-fpm8.1)
     Status: "Processes active: 0, idle: 2, Requests: 0, slow: 0, Traffic: 0req/sec"
      Tasks: 3 (limit: 9385)
     Memory: 7.4M
        CPU: 96ms
     CGroup: /system.slice/php8.1-fpm.service
             ├─26515 "php-fpm: master process (/etc/php/8.1/fpm/php-fpm.conf)"
             ├─26516 "php-fpm: pool www"
             └─26517 "php-fpm: pool www"
Configure PHP-FPM
PHP-FPM (FastCGI Process Manager) operates as a system service on your server, using pools to manage PHP requests. Each pool is configured with several settings that impact PHP's performance and resource management. By adjusting the PHP-FPM pool configurations, you can optimize how PHP processes are handled on your server for better performance and resource allocation. Follow the steps below to adjust your default PHP-FPM pool settings for optimal server performance.
View the PHP-FPM unix socket path using the
ssutility.console$ ss -pl | grep php
Your output should be similar to the one below.
u_str LISTEN 0 511 /run/php/php8.1-fpm.sock 70675 * 0/run/php/php8.1-fpm.sockis the PHP-FPM sock path based on the above output. PHP-FPM communicates with other applications such as Nginx using the Unix socket file or TCP connections on the localhost port9000.Navigate to the PHP-FPM pool configurations directory.
console$ cd /etc/php/8.1/fpm/pool.d/
Open the default PHP-FPM pool configuration
www.confusing a text editor such as Nano.console$ sudo nano www.conf
Verify the PHP-FPM pool name.
ini[www]Find the following user directives and verify that PHP-FPM runs with the web server user
www-data.iniuser = www-data group = www-data
Save and close the file.
Within the pool configuration:
pm.max_children: Maximum number of child PHP processes to run simultaneously for balanced resource usage.pm.start_servers: Number of PHP processes created at startup to handle initial requests (default:2).pm.min_spare_servers: Minimum idle PHP processes (default:1).pm.max_spare_servers: Maximum idle PHP processes (default:3).pm.max_requests: Limits the number of requests per PHP child process before it is recycled.
You can change the PHP-FPM pool values depending on your server specifications and available resources.
Configure Nginx with PHP-FPM
Nginx uses PHP-FPM via a Unix socket or TCP port 9000 to serve dynamic web pages. By default, it requires PHP-FPM to process web application files. Follow the steps below to configure Nginx with PHP-FPM to serve web application files on the server.
Create a new
index.phpfile in your web root directory/var/www/html.console$ sudo touch /var/www/html/index.php
Run the following command to add new PHP information contents to the file.
console$ echo "<?php phpinfo(); ?>" | sudo tee /var/www/html/index.php
Remove the default Nginx configuration.
console$ sudo rm -rf /etc/nginx/sites-enabled/default && sudo rm -rf /etc/nginx/sites-available/default
Create a new Nginx virtual host configuration file such as
app.example.com.confdepending on your domain or web application name.console$ sudo nano /etc/nginx/sites-available/app.example.com.conf
Add the following configurations to the file. Replace
app.example.comwith your actual domain name.iniserver { listen 80; server_name app.example.com; root /var/www/html; index index.php index.html; location / { try_files $uri $uri/ =404; } location ~ \.php$ { include snippets/fastcgi-php.conf; fastcgi_pass unix:/run/php/php8.1-fpm.sock; } }
Save and close the file.
The above Nginx configuration creates a new virtual host on the server that listens for incoming connections on the HTTP port
80and serves content using the domainapp.example.comfrom the/var/www/htmlweb root directory. Within the configuration:index index.html index.php index.nginx-debian.html;: Specifies the default file to serve using the main request path.location ~ \.php$ {: Sets the configurations to apply when a specific request matches a.phpfile extension.include snippets/fastcgi-php.conf;: Enables the predefined FastCGI configuration snippet for Nginx that contains various directives for handling PHP requests.fastcgi_pass unix:/run/php/php8.1-fpm.sock;: Sets the location of the PHP-FPM socket Nginx should use to communicate with the PHP-FPM service.
Enable the new Nginx virtual host configuration. Replace
app.example.comwith your domain name.console$ sudo ln -s /etc/nginx/sites-available/app.example.com.conf /etc/nginx/sites-enabled/app.example.com.conf
Test the Nginx configuration for errors.
console$ sudo nginx -t
Output:
nginx: the configuration file /etc/nginx/nginx.conf syntax is ok
nginx: configuration file /etc/nginx/nginx.conf test is successful
Restart Nginx to apply your configuration changes.
console$ sudo systemctl restart nginx
Allow the HTTP port
80through the firewall.console$ sudo ufw allow 80/tcp
Access your domain using a web browser such as Chrome and verify that your PHP Information displays.
Secure the Server
Server security is crucial when deploying dynamic web applications with the LEMP stack. To ensure security, all components should only accept internal connections on the loopback IP 127.0.0.1, while the Nginx web server should listen on HTTP port 80 and HTTPS port 443. Follow the steps below to configure the UFW firewall to permit these connections and generate trusted SSL certificates to encrypt server traffic.
Configure Uncomplicated Firewall (UFW)
Uncomplicated Firewall (UFW) is active and enabled on Ubuntu 22.04 Vultr servers by default. Follow the steps below to configure UFW and allow connections to the Nginx web server.
List all available UFW application profiles.
console$ sudo ufw app list
Verify that the default Nginx profile is available similar to the following output.
Nginx Full
Nginx HTTP
Nginx HTTPS
OpenSSH
Allow the
Nginx Fullprofile to enable the HTTP Port80and HTTPS Port443through the firewall.console$ sudo ufw allow 'Nginx Full'
Reload UFW to apply the firewall changes.
console$ sudo ufw reload
View the firewall status to verify that the new rules are available.
console$ sudo ufw status
You should see an output like this:
To                         Action      From
--                         ------      ----
22/tcp                     ALLOW       Anywhere
Nginx Full                 ALLOW       Anywhere
22/tcp (v6)                ALLOW       Anywhere (v6)
Nginx Full (v6)            ALLOW       Anywhere (v6)
Generate Let's Encrypt SSL Certificates
Install the Certbot Let's Encrypt client application plugin for Nginx.
console$ sudo apt install -y certbot python3-certbot-nginx
Request a new Let's Encrypt SSL certificate on your server. Replace
app.example.comwith your domain andhello@example.comwith your actual email address.console$ sudo certbot --nginx --agree-tos --redirect --email hello@example.com -d app.example.com
Verify that Certbot auto-renews the SSL certificate upon expiry.
console$ sudo certbot renew --dry-run
Restart Nginx to apply the configuration changes.
console$ sudo systemctl restart nginx
Test the Installation
Nginx, MySQL, and PHP (LEMP) work together to serve dynamic content for your web applications. Follow the steps below to set up a sample application that retrieves and displays a Greetings from Vultr message from a MySQL database on your server.
Log in to MySQL as the
rootuser.console$ mysql -u root -p
Enter the
rootuser password you set earlier to access the MySQL console.Create a new sample database
vultr_db.sqlmysql> CREATE DATABASE vultr_db;
Switch to the database.
sqlmysql> USE vultr_db;
Create a new database user
db_userwith a strong password.sqlmysql> CREATE USER 'db_user'@'localhost' IDENTIFIED BY 'strong-password';
Grant the user full privileges to the
vultr_dbdatabase.sqlmysql> GRANT ALL PRIVILEGES ON vultr_db.* TO 'db_user'@'localhost';
Reload the MySQL privileges table to apply the new user changes.
sqlmysql> FLUSH PRIVILEGES;
Create a new table
VultrDocswith two columns. Theidcolumn works as the primary key, andmessagecontains VARCHAR strings.sqlmysql> CREATE TABLE IF NOT EXISTS VultrDocs ( id INT AUTO_INCREMENT PRIMARY KEY, message VARCHAR(255) NOT NULL );
Insert new data to the
messagecolumn in theVultrDocstable with the stringGreetings from Vultr.sqlmysql> INSERT INTO VultrDocs (message) VALUES ('Greetings from Vultr');
View the table data to verify that the new string is available.
sqlmysql> SELECT * from VultrDocs;
Output:
+----+----------------------+
| id | message              |
+----+----------------------+
|  1 | Greetings from Vultr |
+----+----------------------+
1 row in set (0.00 sec)
Exit the MySQL console.
sqlmysql> exit;
Create a new
test.phpfile in your/var/www/html/web root directory using a text editor such as Nano.console$ sudo nano /var/www/html/test.php
Add the following contents to the file.
php<?php $servername = "localhost"; $username = "db_user"; $password = "db_password"; $dbname = "vultr_db"; // Create database connection $conn = new mysqli($servername, $username, $password, $dbname); // Check database connection if ($conn->connect_error) { die("Database Connection Failed." . $conn->connect_error); } // Retrieve the record from VultrDocs Table $sql = "SELECT message FROM VultrDocs"; $result = $conn->query($sql); if ($result->num_rows > 0) { $row = $result->fetch_assoc(); echo "<h1>" . $row["message"]. "</h1>"; } else { echo "<h1>No message found.</h1>"; } $conn->close();
Save and close the file.
The above PHP application code connects to your MySQL database and displays the
Greetings from Vultrstring from your samplevultr_dbdatabase when the connection is successful.Access your domain in a new web browser window using the
/test.phppath.https://app.example.com/test.phpVerify that your
Greetings from Vultrstring displays in your browser window.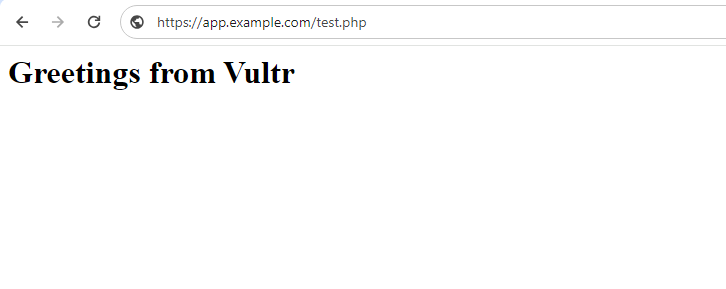
Conclusion
In this article, you deployed and secured the Nginx, MySQL, and PHP (LEMP) stack on your Ubuntu 22.04 server, enabling the creation and secure delivery of multiple web applications based on your server configurations.