
How to Install Nginx, MySQL, PHP (LEMP Stack) on Rocky Linux 9
Introduction
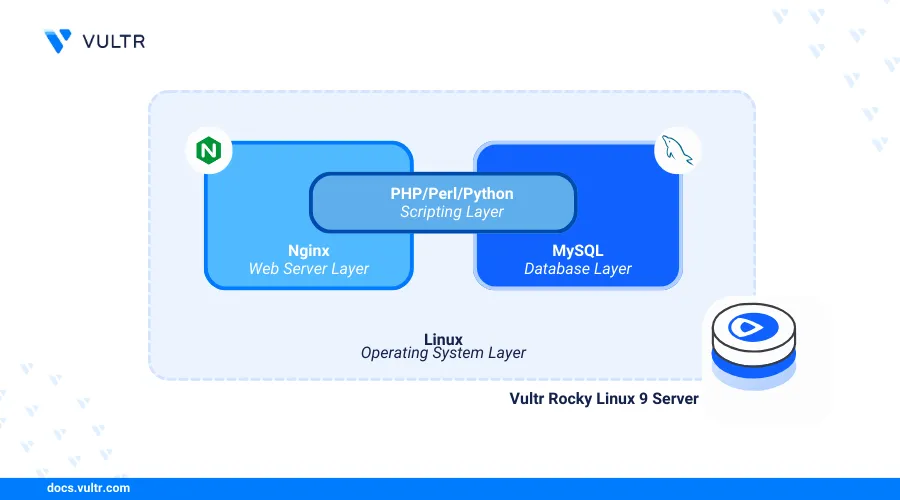
Linux, Nginx, MySQL, and PHP (LEMP stack) is a collection of open-source applications that enable the development and hosting of dynamic web applications on a server. The stack includes Linux as the operating system, Nginx as the web server application, MySQL (or MariaDB) as the database backend, and PHP (or Python/Perl) as the server-side scripting language. The applications connect to each other using server modules to offer a powerful, efficient, and scalable environment for web development that allows developers to create, manage, and deliver high-performance web applications.
This article explains how to install the LEMP stack on Rocky Linux 9 and to deliver dynamic web applications on a server.
Prerequisites
Before you begin:
- Deploy a Rocky Linux 9 instance on Vultr.
- Set up a new domain DNS record pointing to your server IP address. For example,
app.example.com. - Access the server using SSH as a non-root user with sudo privileges.
- Update the server.
Install Nginx
Nginx is available in the default repositories on Rocky Linux 9. Follow the steps below to install the Nginx web server package using the default DNF package manager.
Install Nginx.
console$ sudo dnf install nginx
View the installed Nginx version on your server.
console$ nginx -v
Output:
nginx version: nginx/1.20.1Enable the Nginx service to start at boot time.
console$ sudo systemctl enable nginx
Start the Nginx service on your server.
console$ sudo systemctl start nginx
View the Nginx service status and verify that it's running on your server.
console$ sudo systemctl status nginx
Output:
● nginx.service - The nginx HTTP and reverse proxy server
    Loaded: loaded (/usr/lib/systemd/system/nginx.service; disabled; preset: disabled)
   Drop-In: /usr/lib/systemd/system/nginx.service.d
            └─php-fpm.conf
    Active: active (running) since Sat 2024-06-29 08:31:08 UTC; 3h 7min ago
    Process: 57241 ExecStartPre=/usr/bin/rm -f /run/nginx.pid (code=exited, status=0/SUCCESS)
    Process: 57242 ExecStartPre=/usr/sbin/nginx -t (code=exited, status=0/SUCCESS)
    Process: 57243 ExecStart=/usr/sbin/nginx (code=exited, status=0/SUCCESS)
   Main PID: 57244 (nginx)
      Tasks: 2 (limit: 11073)
     Memory: 2.1M
        CPU: 24ms
     CGroup: /system.slice/nginx.service
             ├─57244 "nginx: master process /usr/sbin/nginx"
             └─57245 "nginx: worker process"
Install MySQL
MySQL is available in the default Rocky Linux 9 repositories with the latest package information. You can switch between the MySQL package and MariaDB to use a database server depending on your development needs. In the following steps, install the MySQL database server package and configure the application to enable secure authentication for all database users.
Install the latest MySQL database server package.
console$ sudo dnf install mysql-server
View the installed MySQL version on your server.
console$ mysql --version
Output:
mysql Ver 8.0.36 for Linux on x86_64 (Source distribution)Enable the MySQL service to automatically start at boot.
console$ sudo systemctl enable mysqld
Output:
Created symlink /etc/systemd/system/multi-user.target.wants/mysqld.service → /usr/lib/systemd/system/mysqld.service.Start the MySQL service.
console$ sudo systemctl start mysqld
View the MySQL service status and verify that it's running on the server.
console$ sudo systemctl status mysqld
Output:
● mysqld.service - Mysql 8.0 database server
     Loaded: loaded (/usr/lib/systemd/system/mysqld.service; disabled; preset: disabled)
     Active: active (running) since Sat 2024-06-29 08:09:41 UTC; 3h 28min ago
   Main PID: 56590 (mysqld)
     Status: "Server is operational"
      Tasks: 38 (limit: 11073)
     Memory: 488.5M
        CPU: 30.329s
     CGroup: /system.slice/mysqld.service
             └─56590 /usr/libexec/mysqld --basedir=/usr
Run the
mysql_secure_installationscript to enable authentication and disable insecure defaults on your MySQL database server.console$ sudo mysql_secure_installation
- Enter Y when prompted to enable the VALIDATE PASSWORD component that ensures strict password policies for all database users.
VALIDATE PASSWORD COMPONENT can be used to test passwords and improve security. It checks the strength of password and allows the users to set only those passwords which are secure enough. Would you like to setup VALIDATE PASSWORD component? Press y|Y for Yes, any other key for No: Y- Enter your desired password strength validation policy level. For example, enter 2 to enforce strong password usage on the server.
LOW Length >= 8 MEDIUM Length >= 8, numeric, mixed case, and special characters STRONG Length >= 8, numeric, mixed case, special characters and dictionary file Please enter 0 = LOW, 1 = MEDIUM and 2 = STRONG: 2- Enter Y and press Enter when prompted to remove anonymous users from the database server.
Remove anonymous users? (Press y|Y for Yes, any other key for No) :- Enter Y when prompted to disallow remote login access to the root database user.
Disallow root login remotely? (Press y|Y for Yes, any other key for No) :- Enter Y when prompted to remove the test database on your server.
`Remove test database and access to it? (Press y|Y for Yes, any other key for No) :- Enter Y and press Enter when prompted to reload and refresh the MySQL privilege tables to apply your configuration changes.
Reload privilege tables now? (Press y|Y for Yes, any other key for No) :Output:
Success.

All done!
Log in to the MySQL database server as the
rootuser. Enter the root database user password you set earlier when prompted to access the MySQL console.console$ mysql -u root -p
View all available databases on the server.
sqlmysql> show databases;
Output:
+--------------------+
| Database           |
+--------------------+
| information_schema |
| mysql              |
| performance_schema |
| sys                |
+--------------------+
4 rows in set (0.00 sec)
Exit the MySQL console..
sqlmysql> exit;
Install PHP and Configure PHP-FPM
PHP processes the dynamic web content in your applications while PHP-FPM (FastCGI Process Manager) enables access to PHP with specific performance configurations on your server. Follow the steps below to install PHP and configure PHP-FPM to connect with the Nginx web server.
Install PHP and PHP-FPM on your server.
console$ sudo dnf install php php-fpm
Install common PHP extensions required by most web applications.
console$ sudo dnf install php-mysqlnd php-gd php-mbstring php-xml
The above command installs the following extensions:
php-mysqlnd: Enables PHP to connect to the MySQL database server and perform SQL operations.php-mbstring: Enables multi-byte string functions in PHP applications.php-xml: Enables XML functionalities.php-gd: Enables image manipulation functions in PHP applications.
View the installed PHP version on your server.
console$ php -v
Output:
PHP 8.0.30 (cli) (built: Aug  3 2023 17:13:08) ( NTS gcc x86_64 )
Copyright (c) The PHP Group
Zend Engine v4.0.30, Copyright (c) Zend Technologies
    with Zend OPcache v8.0.30, Copyright (c), by Zend Technologies
Enable the PHP-FPM service to start at boot time.
console$ sudo systemctl enable php-fpm
Output:
Created symlink /etc/systemd/system/multi-user.target.wants/php-fpm.service → /usr/lib/systemd/system/php-fpm.service.Start the PHP-FPM service.
console$ sudo systemctl start php-fpm
Open the default PHP-FPM pool
www.confto enable connections to the Nginx web server.console$ sudo nano /etc/php-fpm.d/www.conf
Find the following
userandgroupdirectives. Then, change the default values fromapachetonginx.iniuser = nginx group = nginx
Save and close the file.
Restart the PHP-FPM service to apply your configuration changes.
console$ sudo systemctl restart php-fpm
Configure Nginx with PHP-FPM
Nginx connects to the PHP-FPM service using the socket path or the default TCP port 9000 on your server. In addition, Nginx must use the same user and group with PHP-FPM to allow PHP connections on the server. Follow the steps below to configure Nginx with PHP-FPM and enable the processing of PHP scripts on your server.
Create a new
info.phpfile in your default web root directory/var/www/html.console$ sudo nano /var/www/html/info.php
Add the following contents to the file.
php<?php phpinfo(); ?>
Save and close the file.
The above PHP application code outputs information about the active PHP version information and modules available on your server.
Create a new Nginx virtual host configuration file such as
app.example.com.confin the/etc/nginx/conf.ddirectory.console$ sudo nano /etc/nginx/conf.d/app.example.com.conf
Add the following configurations to the file. Replace
app.example.comwith your actual domain name.nginxserver { listen 80; server_name app.example.com; root /var/www/html; index info.php; location / { try_files $uri $uri/ =404; } location ~ \.php$ { include fastcgi_params; fastcgi_pass unix:/run/php-fpm/www.sock; fastcgi_index index.php; fastcgi_param SCRIPT_FILENAME $document_root$fastcgi_script_name; } # Deny access to the .htaccess file location ~ /\.ht { deny all; } }
Save and close the file.
The above Nginx server block configuration creates a new virtual host that listens for incoming connections on the HTTP port
80using your domainapp.example.com. Then, the web server delivers files using the indexinfo.phpfrom the default web root directory/var/www/html. Thelocation ~ \.phpblock includes proxy directives that connect to the PHP-FPM Unix socket/run/php-fpm/www.sockto process all PHP file requests on your server.Test the Nginx configuration for errors.
console$ sudo nginx -t
Output.
nginx: the configuration file /etc/nginx/nginx.conf syntax is ok
nginx: configuration file /etc/nginx/nginx.conf test is successful
Restart Nginx to apply your new configuration.
console$ sudo systemctl restart nginx
Grant the Nginx user and group
nginxownership privileges to the web root directory.console$ sudo chown -R nginx:nginx /var/www/html/
Set the
info.phpfile permissions to755to grant thenginxuser full privileges. Then, assign read, and execute permissions to other users.console$ sudo chmod 755 /var/www/html/info.php
Set the web root directory SELinux (Security-Enhanced Linux) context to
httpd_sys_content_tto allow the Nginx web server to deliver files from the directory.console$ sudo semanage fcontext -a -t httpd_sys_content_t "/var/www/html(/.*)?"
Restore the SELinux security context based on the
httpd_sys_content_tpolicy rules to apply changes.console$ sudo restorecon -Rv /var/www/html
View the web root directory context and verify that the web server policy
httpd_sys_content_tis available.console$ ls -Z /var/www/html
Output:
unconfined_u:object_r:httpd_sys_content_t:s0 info.phpAllow HTTP connections through the default firewall.
console$ sudo firewall-cmd --zone=public --permanent --add-service=http
Reload the firewall to apply the configuration changes.
console$ sudo firewall-cmd --reload
Access your domain using a web browser such as Chrome and verify that your PHP application information displays.
http://app.example.com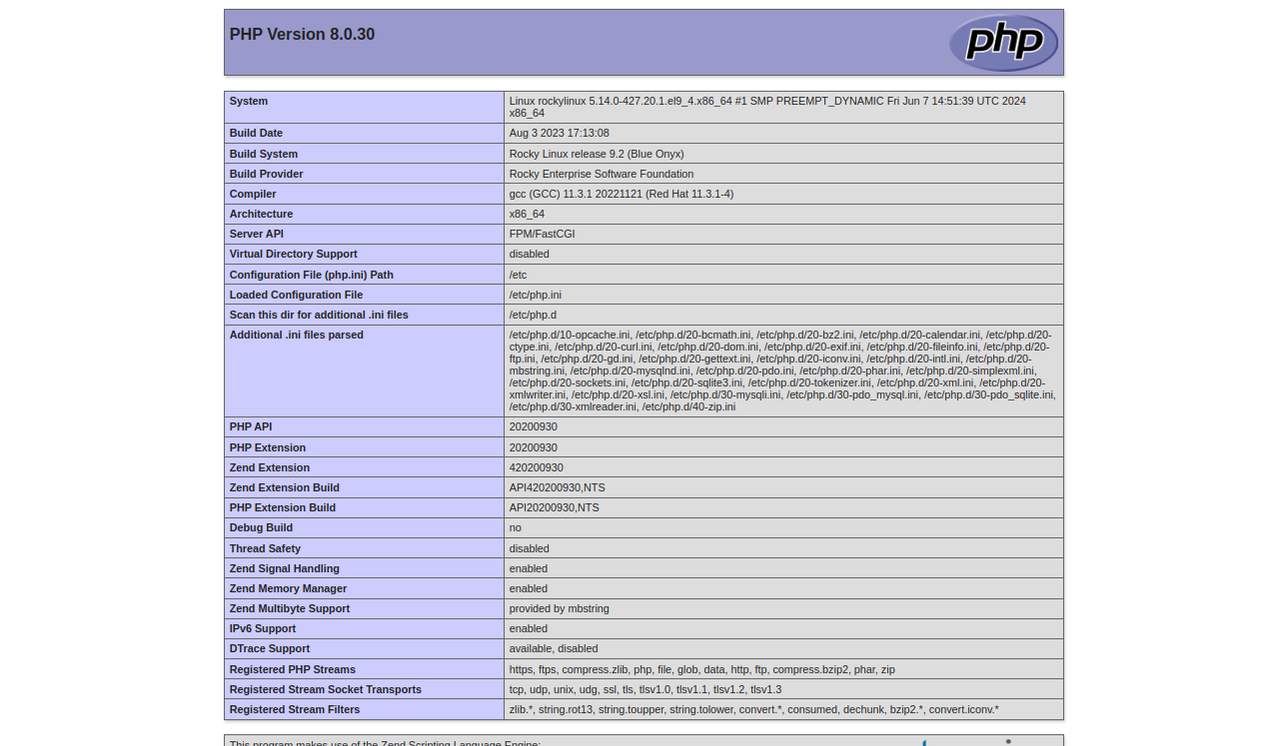
Test the Installation
Nginx handles HTTP requests and forwards them to PHP-FPM for processing. In addition, the php-mysqlnd module interacts with the MySQL database to retrieve or store data on the server. Then, PHP-FPM processes the dynamic content and to response to the Nginx user request. Follow the steps below to create a new sample PHP application that displays a Greetings from Vultr message from a MySQL database on your server.
Log in to the MySQL database server as the
rootuser.console$ mysql -u root -p
Create a new sample database
test_db.sqlmysql> CREATE DATABASE test_db;
Switch to the
test_dbdatabase.sqlmysql> USE test_db;
Create a new database user. For example,
test_userwith a strong password. ReplaceStrong)P@ssword123with your desired password.sqlmysql> CREATE USER 'test_user'@'localhost' IDENTIFIED BY 'Strong)P@ssword123';
Grant the new
test_userfull privileges to thetest_dbdatabase.sqlmysql> GRANT ALL PRIVILEGES ON test_db.* TO 'test_user'@'localhost';
Reload the MySQL privileges table to apply changes.
sqlmysql> FLUSH PRIVILEGES;
Switch to the
test_dbdatabase.sqlmysql> USE test_db;
Create a new sample table
greetingswith two columns:idto store numeric data andmessagefor mixed-characters.sqlmysql> CREATE TABLE greetings (id INT AUTO_INCREMENT PRIMARY KEY, message VARCHAR(255) NOT NULL);
Insert a new
Greetings from Vultrstring to themessagetable column.sqlmysql> INSERT INTO greetings (message) VALUES ('Greetings from Vultr');
Query all available table data to verify that the new
Greetings from Vultrstring is available.sqlmysql> SELECT * FROM greetings;
Output:
+----+----------------------+
| id | message              |
+----+----------------------+
|  1 | Greetings from Vultr |
+----+----------------------+
Exit the MySQL console.
sqlmysql> exit;
Create a new PHP application file
webapp.phpin your/var/www/html/web root directory.console$ sudo nano /var/www/html/webapp.php
Add the following contents to the file.
php<?php $servername = "localhost"; $username = "test_user"; $password = "Strong)P@ssword123"; $dbname = "test_db"; // Create database connection $conn = new mysqli($servername, $username, $password, $dbname); // Check database connection if ($conn->connect_error) { die("Database Connection Failed." . $conn->connect_error); } echo "<h4 align='center'> Below is the message retrieved from the test_db Mysql database on your server</h4>"; // Retrieve the record from greetings Table $sql = "SELECT message FROM greetings"; $result = $conn->query($sql); if ($result->num_rows > 0) { $row = $result->fetch_assoc(); echo "<h1 align='center'>" . $row["message"]. "</h1>"; } else { echo "<h1 align='center'>No message found.</h1>"; } $conn->close(); ?>
Save and close the file.
The above PHP application code connects to the MySQL database server and retrieves the message
Greetings from Vultrfrom thegreetingstable. Then, it displays the result in your web browser. The application displays aNo message foundprompt in your browser when the database table is empty.Enable the
httpd_sys_content_tSELinux context on the new PHP application file.console$ sudo restorecon -v /var/www/html/webapp.php
Access your domain and load the
/webapp.phpURL path in your web browser to test the PHP application.http://app.example.com/webapp.php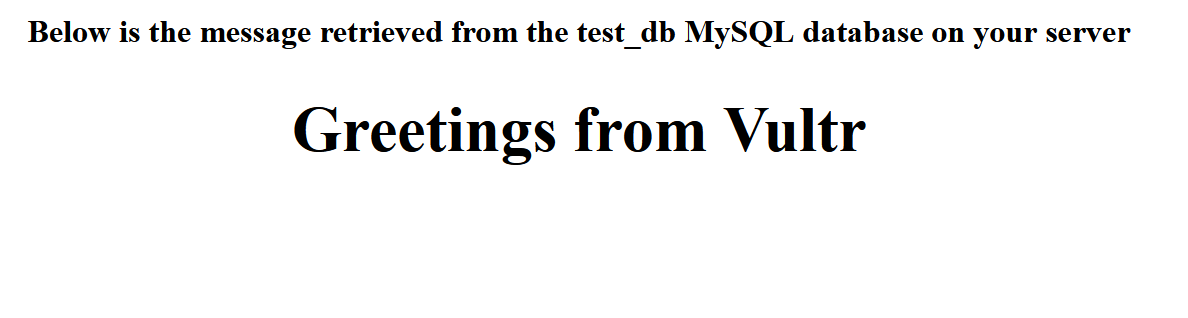
Conclusion
You have installed Nginx, MySQL, and PHP (LEMP stack) on your Rocky Linux 9 server. You can use the LEMP stack to develop, host, and securely deliver dynamic web applications on your server. For more information and configuration options, visit the following official documentation resources: