
How to Deploy Laravel with Nginx on Ubuntu 24.04
Laravel is a popular PHP framework for building modern web applications with support for dynamic syntax and robust features like routing, authentication, and database management. Laravel works with multiple PHP versions and supports integration with other backend applications like database servers. Deploying Laravel with Nginx lets you deliver high-performance and scalable applications in production environments, allowing you to build modern web applications.
This article explains how to deploy Laravel with Nginx on Ubuntu 24.04. You will install Laravel, and create a new project to deploy with Nginx using a custom domain such as app.example.com.
Prerequisites
Before you begin, you need to:
- Have access to an Ubuntu 24.04 instance as a non-root sudo user.
- Install Nginx Web Server.
- Install MySQL to use as the database backend.
- Create a domain A record pointing to the instance's public IP address, such as
app.example.com.
Create a MySQL Database for Laravel
Laravel uses a relational database to store the application data. Follow the steps below to set up a new MySQL database, add sample application data for testing, and create a dedicated database user for Laravel.
Log in to the MySQL console as the
rootdatabase user.console$ sudo mysql
Run the following command to update the APT package index, install MySQL if it's not installed, and log in to the database console.
console$ sudo apt update && sudo apt install mysql-server -y && sudo mysql
Create a new
vultr_demodatabase to use with Laravel.sqlmysql> CREATE DATABASE vultr_demo;
Create a new
vultr_userMySQL user with a strong password. Replacesecure_passwordwith your desired password.sqlmysql> CREATE USER 'vultr_user'@'localhost' IDENTIFIED WITH mysql_native_password BY 'secure_password';
Grant the
vultr_useruser full privileges to thevultr_demodatabase.sqlmysql> GRANT ALL ON vultr_demo.* TO 'vultr_user'@'localhost';
Flush the MySQL privileges table to apply the database user changes.
sqlmysql> FLUSH PRIVILEGES;
Exit the MySQL console.
sqlmysql> EXIT;
Log in to MySQL as
vultr_userand enter the user password when prompted.console$ mysql -u vultr_user -p
List all databases and verify that the
vultr_demodatabase is available.sqlmysql> SHOW DATABASES;
Output:
+--------------------+
| Database           |
+--------------------+
| information_schema |
| performance_schema |
| vultr_demo         |
+--------------------+
3 rows in set (0.00 sec)
Use the
vultr_demodatabase.sqlmysql> USE vultr_demo;
Create a
server_statswith active columns to track server metrics.sqlmysql> CREATE TABLE server_stats ( id INT AUTO_INCREMENT, server_name VARCHAR(255), region VARCHAR(255), cpu_usage DECIMAL(5,2), memory_usage DECIMAL(5,2), status ENUM('active', 'maintenance', 'offline'), last_updated TIMESTAMP DEFAULT CURRENT_TIMESTAMP, PRIMARY KEY(id) );
Insert the demo data into the
server_statstable.sqlmysql> INSERT INTO server_stats ( server_name, region, cpu_usage, memory_usage, status ) VALUES ('VULTR-APP-01', 'New York', 24.50, 45.30, 'active'), ('VULTR-DB-01', 'London', 12.75, 78.20, 'active'), ('VULTR-WEB-01', 'Tokyo', 65.80, 89.50, 'active');
Exit the MySQL console.
sqlmysql> EXIT;
Install Composer and PHP Extensions
Laravel requires Composer and specific PHP extensions to run on a server. Follow the steps below to install PHP, Composer, and all required PHP extensions for Laravel.
Update the APT package index.
console$ sudo apt update
Install Composer and the required PHP extensions for Laravel.
console$ sudo apt install composer php php-curl php-fpm php-bcmath php-json php-mysql php-mbstring php-xml php-tokenizer php-zip -y
The above command installs Composer, PHP, and the necessary extensions for Laravel. The installed packages include:
composer: A dependency manager for PHP.php-fpm: The PHP FastCGI Process Manager that enables PHP to run as a service and accept connections from web servers like Nginx.php-mysql: Connects PHP to MySQL databases.php-mbstring: Enables multibyte string support required by Laravel.php-curl: Enables PHP to make HTTP requests to external URLs.php-bcmath: Enables arbitrary precision math functions in PHP applications.php-json: Encodes and decodes JSON data necessary for APIs, Javascript and structured data.php-xml: Enables passing and generation of XML documents in applications.php-tokenizer: Includes tools for tokenizing PHP code.php-zip: Enables Laravel to read and write compressed.ziparchives.
Verify the installed Composer version.
console$ composer --version
Output:
Composer version 2.7.1 2024-02-09 15:26:28
.................
Verify the installed PHP version.
console$ php --version
Output:
PHP 8.3.6 (cli) (built: Mar 19 2025 10:08:38) (NTS)
  Copyright (c) The PHP Group
...
Restart PHP-FPM depending on the installed version such as
php8.3-fpm.console$ sudo systemctl restart php8.3-fpm
Create a Laravel Application
Follow the steps below to create a Laravel application and configure it to use the MySQL database you created earlier.
Switch to your user's home directory.
console$ cd ~
Create a new Laravel project such as
vultr-demo.console$ composer create-project --prefer-dist laravel/laravel vultr-demo
The above command downloads Laravel with all dependencies and creates a
vultr-demoproject directory.Navigate to the
vultr-demoproject directory.console$ cd vultr-demo
Generate a unique application key required for secure encryption.
console$ php artisan key:generate
Output:
INFO Application key set successfully.Open the
.envfile using a text editor such asnanoto set up the Laravel database connection information and session driver.console$ nano .env
Update the first section to include your project name like
vultr-demo, change the environment fromlocaltodevelopment, and change the application URL fromhttp://localhostto your domain URL. Replaceapp.example.comwith your actual domain.iniAPP_NAME=vultr-demo APP_ENV=development APP_KEY=base64:APPLICATION_UNIQUE_KEY APP_DEBUG=true APP_URL=http://app.example.com
Update the database connection section to include your database information. Change the default
sqliteconnection value tomysql, uncomment the host, port, database, and user field, replacing the default with your actual MySQL database details to use with Laravel.iniDB_CONNECTION=mysql DB_HOST=127.0.0.1 DB_PORT=3306 DB_DATABASE=vultr_demo DB_USERNAME=vultr_user DB_PASSWORD=secure_password SESSION_DRIVER=file
Save and close the file.
Move your
vultr-demoproject directory to a standard web root path like/var/www.console$ sudo mv ~/vultr-demo /var/www/vultr-demo
Grant the
www-dataNginx user and group ownership privileges to the/var/www/vultr-demoLaravel project directory.console$ sudo chown -R www-data:www-data /var/www/vultr-demo
Change the
/var/www/vultr-demopermissions mode to755to grant thewww-datauser full privileges to the directory.console$ sudo chmod -R 755 /var/www/vultr-demo/storage
Change the
/var/www/vultr-demo/bootstrap/cachepermissions mode to755to grant thewww-datauser full privileges to create cache files.console$ sudo chmod -R 755 /var/www/vultr-demo/bootstrap/cache
Navigate to the
/var/www/vultr-demoproject directory.console$ cd /var/www/vultr-demo
Migrate the Laravel data to your database to test the connection.
console$ php artisan migrate
Your output should be similar to the one below when successful.
.................
INFO  Running migrations.

0001_01_01_000000_create_users_table .......... 15ms DONE
0001_01_01_000001_create_cache_table ........... 5ms DONE
.................
Configure Laravel with Nginx
Nginx uses server block configurations to serve Laravel files from your project directory. Follow the steps below to configure Laravel with Nginx using a new virtual host configuration with the required server block and PHP connection details.
View the Nginx service status and verify that it's running.
console$ sudo systemctl status nginx
Output:
● nginx.service - A high performance web server and a reverse proxy server
     Loaded: loaded (/usr/lib/systemd/system/nginx.service; enabled; preset: enabled)
     Active: active (running) since Mon 2025-04-21 13:08:27 UTC; 18s ago
       Docs: man:nginx(8)
    Process: 19294 ExecStartPre=/usr/sbin/nginx -t -q -g daemon on; master_process on; (code=exited, status=0/SUCCESS)
    Process: 19296 ExecStart=/usr/sbin/nginx -g daemon on; master_process on; (code=exited, status=0/SUCCESS)
...
Run the following command to install Nginx if it's not installed, stop Apache if it's active, and start the Nginx service.
console$ sudo apt install nginx -y && sudo systemctl stop apache2 && sudo systemctl start nginx
Create a new
vultr-demo.confNginx configuration file in the/etc/nginx/sites-availabledirectory.console$ sudo nano /etc/nginx/sites-available/vultr-demo.conf
Add the following configurations to the
vultr-demo.conffile. Replaceapp.example.comwith your actual domain.iniserver { listen 80; server_name app.example.com; root /var/www/vultr-demo/public; add_header X-Frame-Options "SAMEORIGIN"; add_header X-XSS-Protection "1; mode=block"; add_header X-Content-Type-Options "nosniff"; index index.php; charset utf-8; location / { try_files $uri $uri/ /index.php?$query_string; } location = /favicon.ico { access_log off; log_not_found off; } location = /robots.txt { access_log off; log_not_found off; } location ~ \.php$ { fastcgi_pass unix:/var/run/php/php8.3-fpm.sock; fastcgi_param SCRIPT_FILENAME $realpath_root$fastcgi_script_name; include fastcgi_params; } location ~ /\.(?!well-known).* { deny all; } }
Save and close the file.
The above configuration enables Nginx to serve the Laravel application files on the HTTP port
80using yourapp.example.comdomain. Thelocation ~ \.phpblock forwards all PHP requests to the PHP-FPM socket, enabling Nginx to serve all Laravel application files.Link the
vultr-demo.conffile to the/etc/nginx/sites-enableddirectory to enable the configuration.console$ sudo ln -s /etc/nginx/sites-available/vultr-demo.conf /etc/nginx/sites-enabled/
Test the Nginx configuration for errors.
console$ sudo nginx -t
Output:
nginx: the configuration file /etc/nginx/nginx.conf syntax is ok
nginx: configuration file /etc/nginx/nginx.conf test is successful
Restart Nginx to apply the configuration changes.
console$ sudo systemctl restart nginx
Allow the HTTP port
80through the firewall.console$ sudo ufw allow 80/tcp
Reload UFW to apply the firewall changes.
console$ sudo ufw reload
Access your
app.example.comdomain using a web browser such as Chrome and verify the default Laravel page displays.http://app.example.com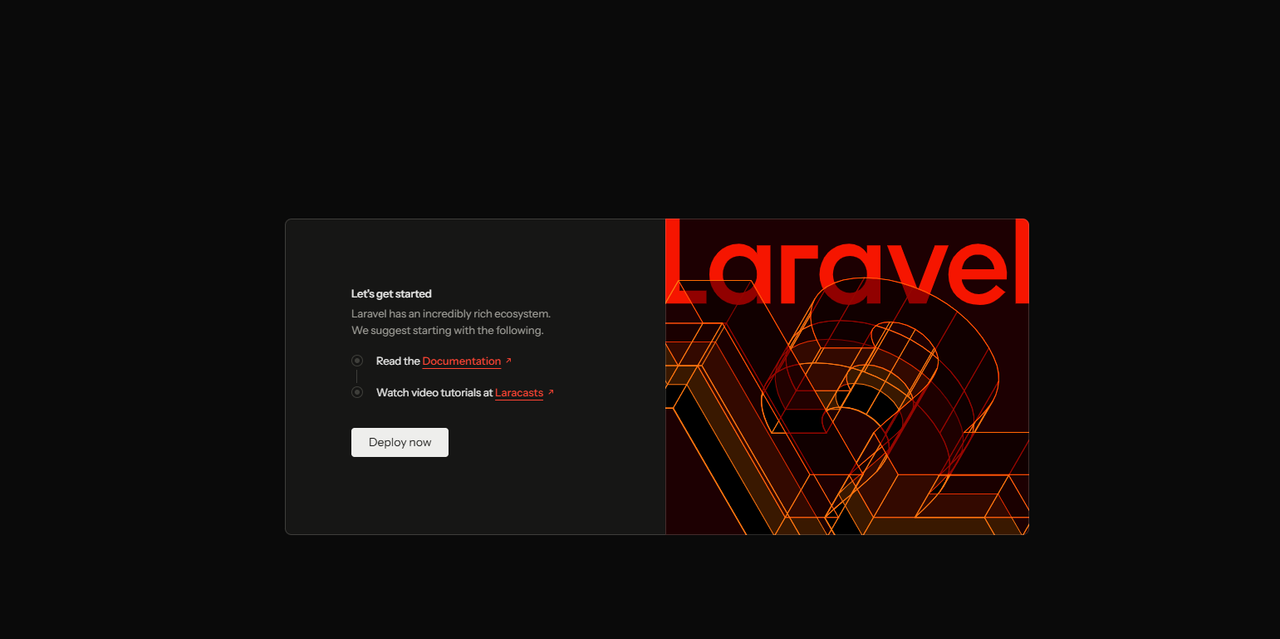
Secure Laravel with Trusted Let's Encrypt SSL Certificates
Nginx serves all Laravel application files using HTTP which is insecure by default. Generating SSL certificates enables HTTPS connections and encrypts the connection to your web server. Follow the steps below to generate trusted Let's Encrypt SSL certificates and secure Laravel.
Install the Certbot Let's Encrypt client and its plugin for Nginx.
console$ sudo apt install certbot python3-certbot-nginx -y
Generate a new SSL certificate using the Nginx Plugin and your virtual host domain. Replace
app.example.comwith your actual domain andadmin@app.example.comwith your active email address.console$ sudo certbot --nginx --redirect -d app.example.com -m admin@app.example.com --agree-tos
Your output should be similar to the one below when the SSL certificate request is successful.
Requesting a certificate for app.example.com

Successfully received certificate.
Certificate is saved at: /etc/letsencrypt/live/app.example.com/fullchain.pem
Key is saved at:         /etc/letsencrypt/live/app.example.com/privkey.pem
This certificate expires on 2025-07-06.
These files will be updated when the certificate renews.
Certbot has set up a scheduled task to automatically renew this certificate in the background.

Deploying certificate
Successfully deployed certificate for app.example.com to /etc/nginx/sites-enabled/vultr-demo.conf
Congratulations! You have successfully enabled HTTPS on https://app.example.com
...
Verify that Certbot auto-renews the SSL certificate before expiry.
console$ sudo certbot renew --dry-run
Restart Nginx to apply the SSL configuration changes.
console$ sudo systemctl restart nginx
Allow the HTTPS port
443through the firewall.console$ sudo ufw allow 443/tcp
Reload UFW to apply the firewall changes.
console$ sudo ufw reload
Build a Demo Laravel Application
Laravel includes a demo application with a Let's get started page you can replace with your custom code. Follow the steps below to replace the default project files, and build a demo Laravel application with a practical dashboard to display server metrics from your MySQL database.
Open and modify the Laravel's route file.
Back up the default
web.phpfile in your Laravel project directory/console$ sudo mv /var/www/vultr-demo/routes/web.php /var/www/vultr-demo/routes/web.php.ORIG
Create the
web.phpfile again.console$ sudo nano /var/www/vultr-demo/routes/web.php
Add the following default route configuration to the
web.phpfile to query the server metrics data in your MySQL database.php<?php use Illuminate\Support\Facades\DB; use Illuminate\Support\Facades\Route; Route::get('/', function () { $servers = DB::table('server_stats') ->orderBy('status') ->orderBy('cpu_usage', 'desc') ->get(); return view('dashboard', ['servers' => $servers]); });
Save and close the file.
The above application code uses Laravel's query builder to fetch all records from the
server_statstable in the MySQL database. Then, it orders servers by status, by CPU usage, and passes the results to a dashboard view.Create a new
dashboard.blade.phpBlade template to use with the dashboard view.console$ sudo nano /var/www/vultr-demo/resources/views/dashboard.blade.php
Add the following HTML application code to the
dashboard.blade.phpfile to display the server metrics.html<!DOCTYPE html> <html> <head> <title>Server Dashboard | Vultr Demo</title> <style> body { font-family: 'Segoe UI', sans-serif; margin: 2rem; } .server-card { padding: 1rem; margin-bottom: 1rem; border-radius: 8px; box-shadow: 0 2px 4px rgba(0,0,0,0.1); } .active { border-left: 4px solid #10B981; background: #F0FDF4; } .maintenance { border-left: 4px solid #F59E0B; background: #FFFBEB; } .offline { border-left: 4px solid #EF4444; background: #FEF2F2; } .metric { font-weight: 600; color: #1F2937; } </style> </head> <body> <h1>Server Status Dashboard</h1> <p>Real-time metrics from your infrastructure</p> @foreach($servers as $server) <div class="server-card {{ $server->status }}"> <h3>{{ $server->server_name }} <small>({{ $server->region }})</small></h3> <p class="metric">Status: {{ ucfirst($server->status) }}</p> @if($server->status != 'offline') <p class="metric">CPU: {{ $server->cpu_usage }}%</p> <p class="metric">Memory: {{ $server->memory_usage }}%</p> @endif <p>Last updated: {{ $server->last_updated }}</p> </div> @endforeach </body> </html>
Save and close the file.
The above application code displays the server metrics received from the
web.phpfile in a single web page.Restart Nginx to apply the changes.
console$ sudo systemctl restart nginx
Access your domain using HTTPS in a new web browser window and verify that the Laravel application displays correctly with data from the MySQL database.
https://app.example.com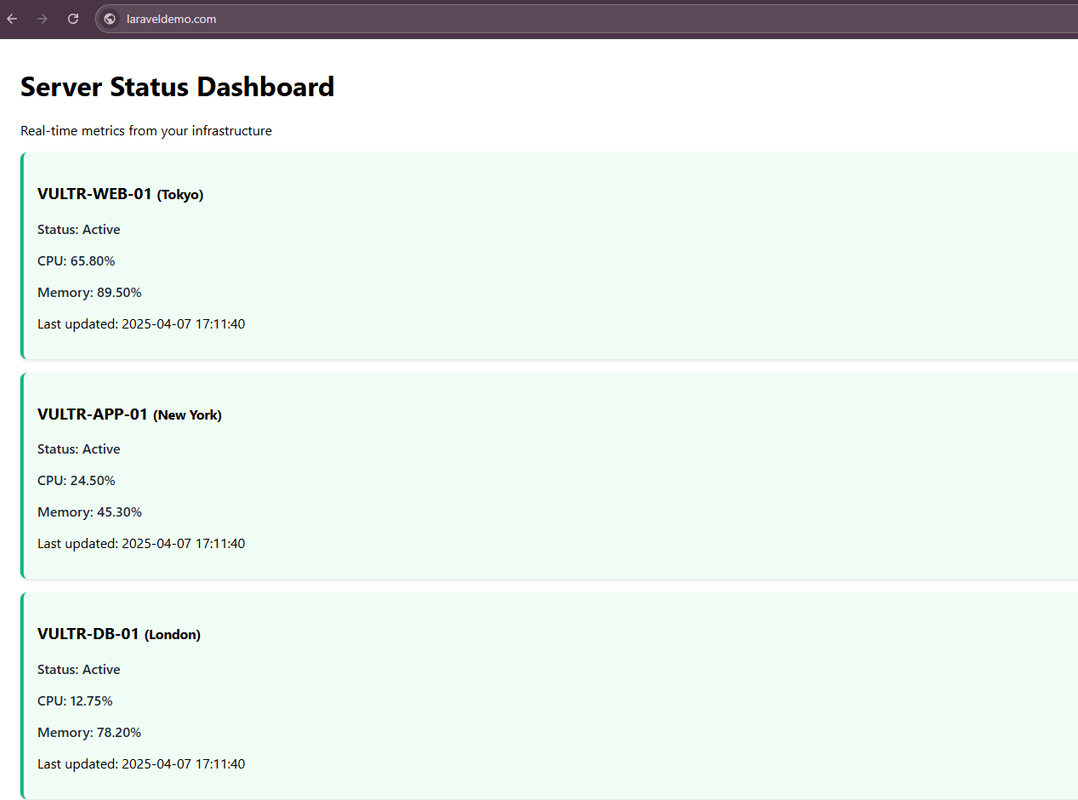
Conclusion
You have deployed Laravel with Nginx on Ubuntu 24.04 and created a sample application that queries the MySQL database to display live data. You can modify your Laravel project with new models, views, and controllers to deliver your applications with Nginx. For more information and configuration options, visit the official Laravel documentation.