
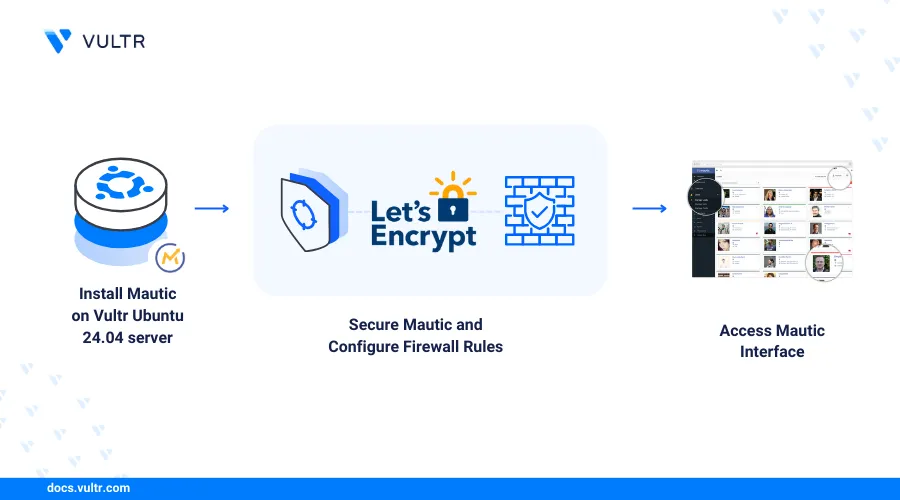
How to Deploy Mautic – An Opensource Marketing Automation Platform
Mautic is a robust open-source marketing automation platform designed to help businesses manage customer engagement through email campaigns, contact tracking, lead nurturing, and detailed analytics. As a self-hosted alternative to commercial platforms like HubSpot or Marketo, Mautic provides full control over your data and marketing workflows.
This article explains how to install and deploy Mautic on an Ubuntu 24.04 server using the LEMP stack (Linux, Nginx, MySQL, PHP). You’ll configure each component for production use and prepare the environment to serve Mautic over the web.
Prerequisites
Before you begin, you need to:
- Have access to an Ubuntu 24.04 instance as a non-root user with sudo privileges.
- Create a domain A record pointing to the instance's IP address such as
mautic.example.com.
Install LEMP
The LEMP stack consists of Linux, Nginx, MySQL, and PHP is a lightweight and efficient platform for hosting dynamic PHP applications. It provides strong performance, scalability, and reliability, making it well-suited for running tools like Mautic. Follow the steps below to install and configure the LEMP stack.
Refer to the LEMP Stack Installation article to install Nginx, MySQL, and PHP before proceeding with the steps below.
View the installed Nginx version.
console$ nginx -v
Your output should be similar to the one below:
nginx version: nginx/1.24.0 (Ubuntu)View the installed MySQL version.
console$ mysql --version
Your output should be similar to the one below:
mysql Ver 8.0.41-0ubuntu0.24.04.1 for Linux on x86_64 ((Ubuntu))View the installed PHP version.
console$ php -v
Your output should be similar to the one below:
PHP 8.3.6 (cli) (built: Mar 19 2025 10:08:38) (NTS)
Copyright (c) The PHP Group
Zend Engine v4.3.6, Copyright (c) Zend Technologies
    with Zend OPcache v8.3.6, Copyright (c), by Zend Technologies
Install all the required PHP extensions for Mautic.
console$ sudo apt install php-fpm php-mysql php-imap php-curl php-json php-gd php-xml php-mbstring php-zip php-intl php-bcmath php-opcache php-cli unzip -y
When PHP is installed as a dependency, it may also install Apache. Remove it to prevent conflicts with Nginx.
console$ sudo apt remove apache2 -y
Edit the PHP-FPM configuration file to optimize performance. Replace
8.3with your installed PHP version.console$ sudo nano /etc/php/8.3/fpm/php.ini
Update the following values:
ini... memory_limit = 512M upload_max_filesize = 50M post_max_size = 50M date.timezone = UTC cgi.fix_pathinfo=0 ...
Restart the PHP-FPM service.
console$ sudo systemctl restart php8.3-fpm
Create the Mautic Database
Mautic requires a database to ensures that it stores and organizes contact data, email logs, campaign activities, and configuration settings efficiently and securely. In this section, you’ll create a database and a user with the necessary privileges to interact with it.
Access the MySQL console as root user.
console$ mysql -u root -p
Create a new Mautic database named
mauticdb.sqlmysql> CREATE DATABASE mauticdb;
Create a new MySQL user with a secure password to use with the Mautic database. Replace
securepasswordwith a strong password.sqlmysql> CREATE USER 'mauticuser'@'localhost' IDENTIFIED BY 'securepassword';
Grant the new user full privileges to the Mautic database
sqlmysql> GRANT ALL PRIVILEGES ON mauticdb.* TO 'mauticuser'@'localhost';
Refresh the MySQL privileges table to apply changes.
sqlmysql> FLUSH PRIVILEGES;
Exit the MySQL database console.
sqlmysql> EXIT;
Install Mautic
To install Mautic, download the latest stable release from the Mautic GitHub Releases page. The release is available as a ZIP archive that contains all necessary files to run Mautic. Follow the steps below to download the archive, extract it to your web root directory, and configure the application on your server.
Download the latest stable release of Mautic from the official release page.
console$ wget https://github.com/mautic/mautic/archive/refs/tags/6.0.0.zip
Extract the Mautic archive.
console$ unzip 6.0.0.zip
Move the extracted directory to the Nginx web root.
console$ sudo mv mautic-6.0.0 /var/www/html/mautic
Grant ownership of the Mautic directory to the Nginx
www-datauser.console$ sudo chown -R www-data:www-data /var/www/html/mautic
Grant ownership of the
/var/wwwdirectory to the Nginxwww-datauser so it can create the.npmdirectory for storing logs.console$ sudo chown www-data:www-data /var/www
Install Composer and NPM.
console$ sudo apt install composer npm -y
View the installed Composer version.
console$ composer --version
Your output should be similar to the one below:
Composer version 2.7.1 2024-02-09 15:26:28View the installed NPM version.
console$ npm --version
Your output should be similar to the one below:
9.2.0Navigate to the Mautic installation directory.
console$ cd /var/www/html/mautic
Install necessary dependencies using Composer.
console$ sudo -u www-data composer install
Set the Mautic directory permissions for execution and file access.
console$ sudo chmod -R 755 /var/www/html/mautic
Configure Mautic
To ensure Mautic functions as expected, you need to configure your Nginx web server and set up required cron jobs for background tasks. Follow the steps below to configure Nginx and Cron for Mautic.
Create a new Nginx virtual host configuration file for Mautic.
console$ sudo nano /etc/nginx/conf.d/mautic.conf
Add the following configuration to the file. Replace
mautic.example.comwith your actual domain name.iniserver { listen 80; server_name mautic.example.com; root /var/www/html/mautic; index index.php; access_log /var/log/nginx/example.com.access.log; error_log /var/log/nginx/example.com.error.log; location / { try_files $uri /index.php$is_args$args; } location ~ .php$ { include snippets/fastcgi-php.conf; fastcgi_pass unix:/var/run/php/php8.3-fpm.sock; fastcgi_param SCRIPT_FILENAME $document_root$fastcgi_script_name; include fastcgi_params; } location ~ \.(js|css|png|jpg|jpeg|gif|ico|svg|woff2)$ { expires 1y; access_log off; add_header Cache-Control "public"; } }
Test the Nginx configuration.
console$ sudo nginx -t
Reload Nginx to apply changes.
console$ sudo systemctl reload nginx
Allow HTTP traffic through the firewall.
console$ sudo ufw allow 80/tcp
Allow HTTPS traffic.
console$ sudo ufw allow 443/tcp
Reload the firewall to apply new rules.
console$ sudo ufw reload
Install Certbot for SSL certificate management.
console$ sudo snap install certbot --classic
Generate a free SSL certificate using Certbot. Replace
mautic.example.comandhello@example.comwith your actual domain and email address.console$ sudo certbot --nginx --redirect -d mautic.example.com -m hello@example.com --agree-tos
When successful, your output should look like the one below:
Deploying certificate
Successfully deployed certificate for mautic.example.com to /etc/nginx/conf.d/mautic.conf
Congratulations! You have successfully enabled HTTPS on https://mautic.example.com

If you like Certbot, please consider supporting our work by:
 * Donating to ISRG / Let's Encrypt:   https://letsencrypt.org/donate
 * Donating to EFF:                    https://eff.org/donate-le
Verify that automatic certificate renewal is working.
console$ sudo certbot renew --dry-run
Your output should be similar to the one below:
......
- - - - - - - - - - - - - - - - - - - - - - - - - - - - - - - - - - - - - - - -
Processing /etc/letsencrypt/renewal/mautic.example.com.conf
- - - - - - - - - - - - - - - - - - - - - - - - - - - - - - - - - - - - - - - -
Simulating renewal of an existing certificate for mautic.example.com

- - - - - - - - - - - - - - - - - - - - - - - - - - - - - - - - - - - - - - - -
Congratulations, all simulated renewals succeeded:
  /etc/letsencrypt/live/mautic.example.com/fullchain.pem (success)
- - - - - - - - - - - - - - - - - - - - - - - - - - - - - - - - - - - - - - - -
Output should confirm that simulated renewals succeeded.
Set up cron jobs to update mailing list segments, email marketing campaigns, campaign events and process email queues. Open the crontab editor for the web server user.
console$ sudo -u www-data crontab -e
Add the following cron jobs to automate Mautic tasks.
ini# update segments every minutes * * * * * php8.3 /var/www/html/mautic/bin/console mautic:segments:update > /dev/null # update campaigns every 15 minutes starting with an offset of 5 minutes at the beginning of each hour 5-59/15 * * * * php8.3 /var/www/html/mautic/bin/console mautic:campaigns:update > /dev/null # execute campaigns events every 15 minutes with an offset of 10 minutes 10-59/15 * * * * php8.3 /var/www/html/mautic/bin/console mautic:campaigns:trigger > /dev/null # process email queue 2-59/15 * * * * php8.3 /var/www/html/mautic/bin/console mautic:emails:send > /dev/null # import list in the background * * * * * php8.3 /var/www/html/mautic/bin/console mautic:import > /dev/null # Fetch bounce messages @hourly php8.3 /var/www/html/mautic/bin/console mautic:email:fetch
Use the Web-Based Mautic Installer
After setting up the LEMP stack and configuring your domain, complete the Mautic installation using its graphical web installer.
Visit your domain in a browser such as Chrome. You will get the Ready to install message as below.
https://mautic.example.com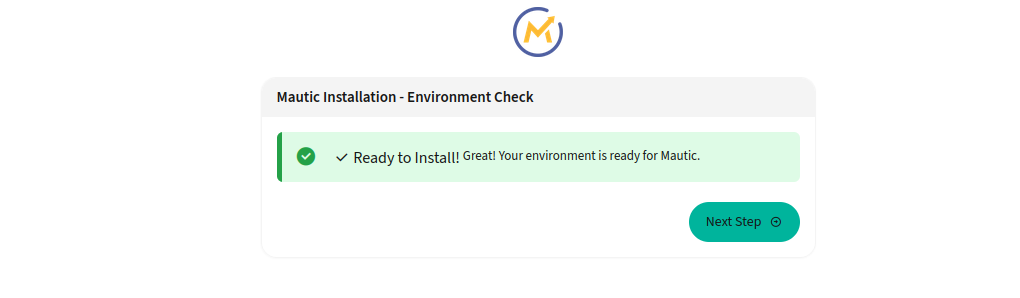
Click Next Step to continue the installation.
On the Database Setup page, fill in your MySQL connection details.
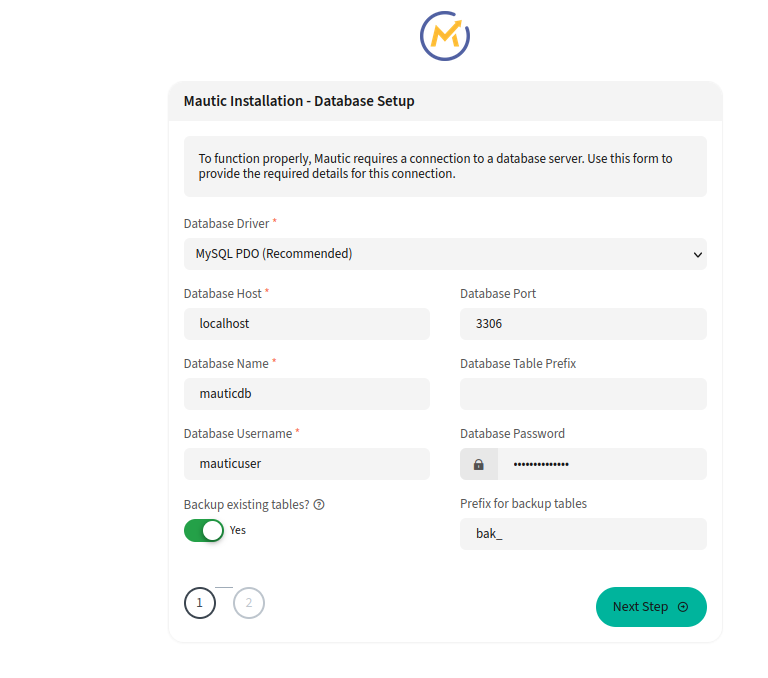
Enter the values for following fields:
- Database Driver: MySQL PDO.
- Database Host: localhost (or your MySQL server IP).
- Database Name: The database you created for Mautic.
- Database Table Prefix: Leave blank unless needed.
- Database User: The MySQL user for Mautic.
- Database Password: The Mautic user database password.
Enter the admin user details to manage your Mautic instance:
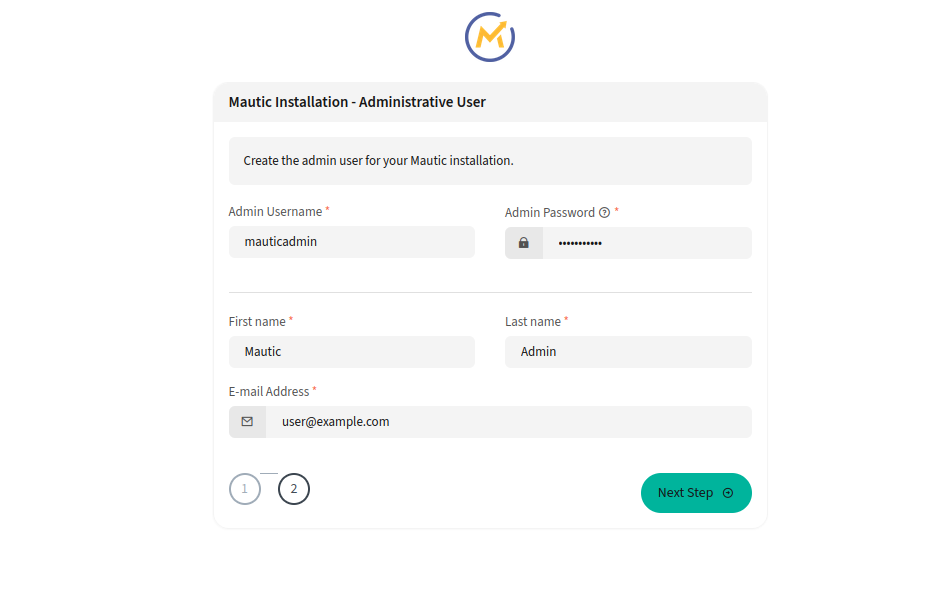
Enter the following details:
- Admin Username: Your preferred login name.
- Admin Password: A strong, secure password.
- Email Address: Valid email for recovery and notifications.
Enter your admin user and password, then click the Login.
Access and Use Mautic
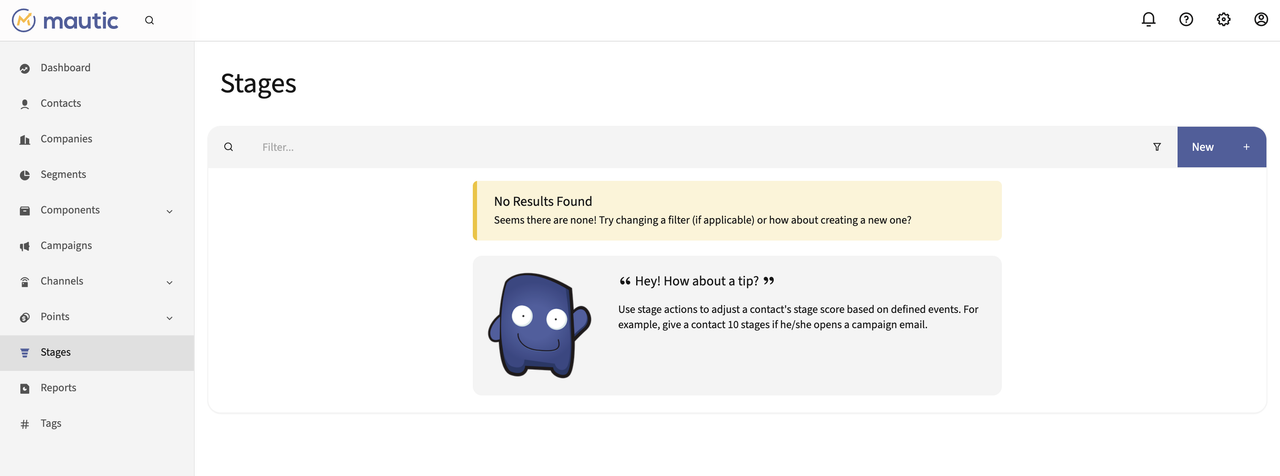
After logging in, the Mautic dashboard serves as your central interface for managing marketing automation workflows. From the dashboard, you can access contacts, emails, campaigns, forms, and other tools to monitor engagement and automate tasks. It includes several core components to help you organize and manage user behavior effectively. One of the key features is Stages, which allows you to segment contacts based on their journey or interactions.
Create and Manage Stages
Stages allows you to define and manage a contact's position within your marketing funnel. You can assign stages based on user behavior, campaigns, or external events.
From the left navigation menu click Stages and click New to create a new stage.
On the New Stage Action page, fill out the following details.
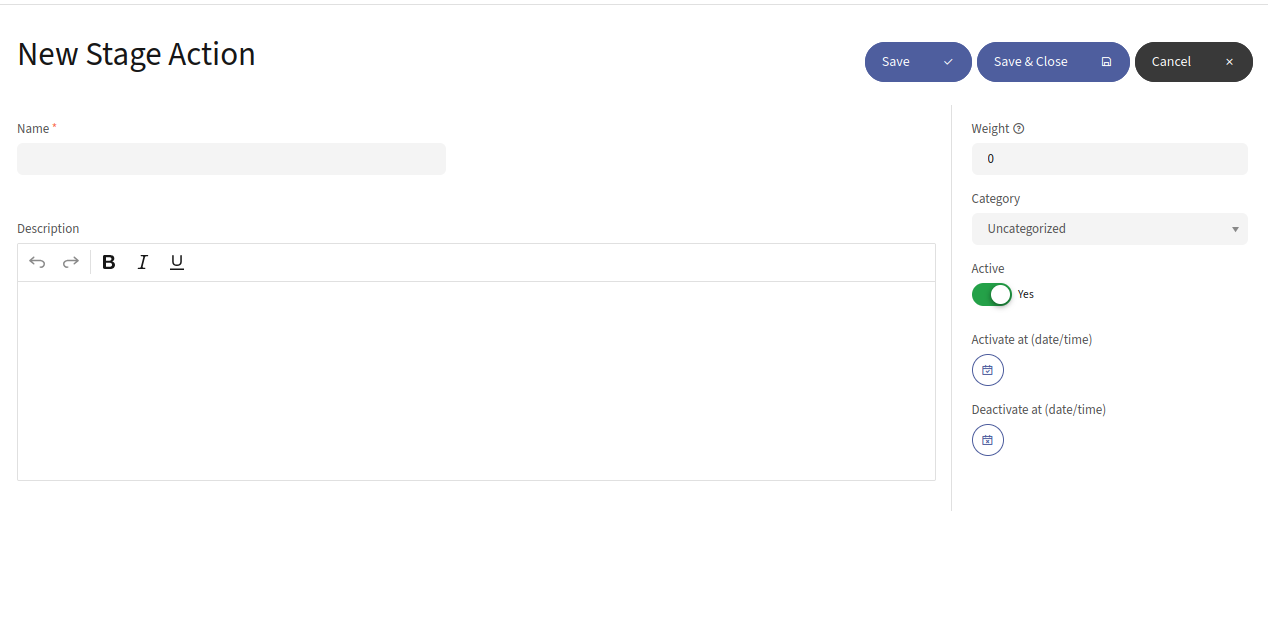
Enter the following details:
- Name: Enter a descriptive name for the stage action.
- Description: A detailed description of what the stage action does or when it should be triggered.
- Weight: This is an optional field that can be used to define the priority or the order of execution relative to other actions.
- Category: Select a category from the dropdown to help organize your stage actions into manageable groups.
- Active: Toggle this to Yes to activate the stage action right after saving, or to No if you wish to activate it later.
- Activate at (date/time): Set a specific date and time for the action to become active.
- Deactivate at (date/time): Set a specific date and time for the action to be deactivated.
Click Save & Close to save the changes and return back to the main list of stage actions.
Create and Manage Companies
The Companies feature in Mautic allows you to associate individual contacts with a broader organization or business entity. This is useful for B2B marketing, where you want to group contacts under company profiles for segmentation, reporting, or ownership assignment.
Navigate to Companies section in the sidebar and click New to create a new company profile.

On the New Company page fill out the following details.
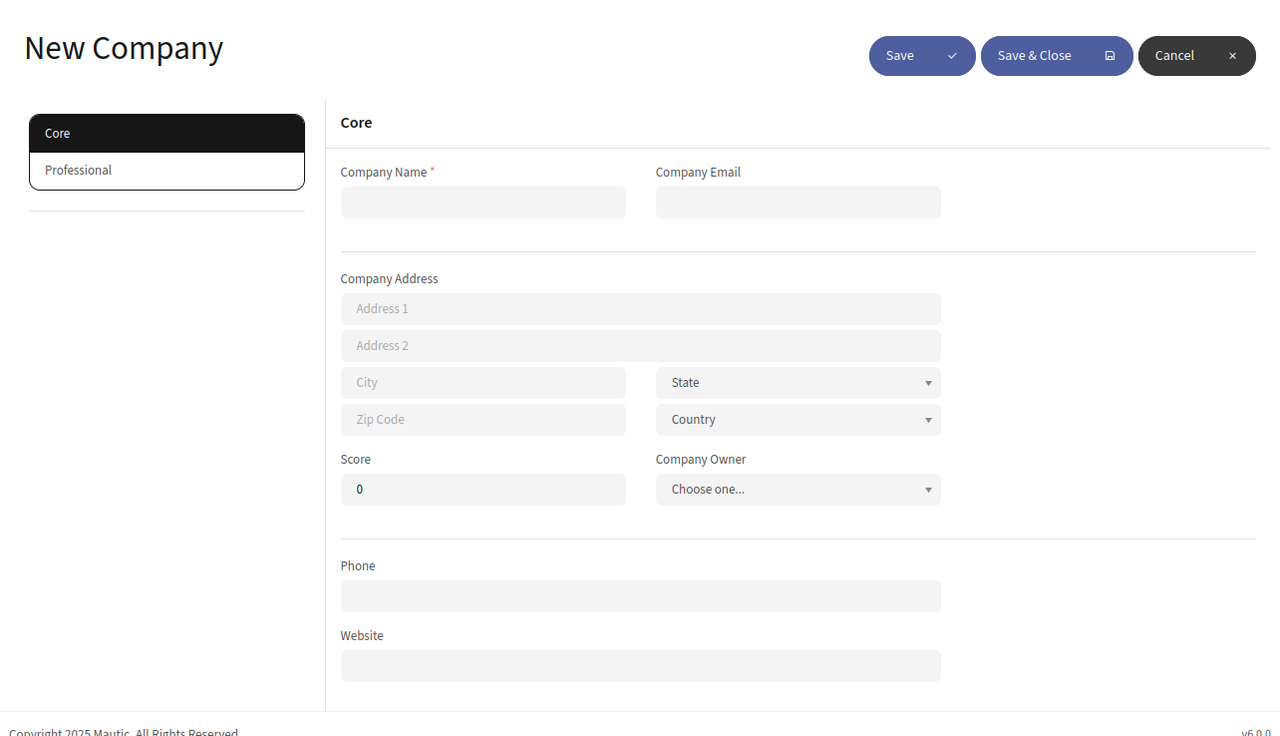
Enter the following details:
- Company Name: Enter the name of the company.
- Company Email: Primary contact email address for the company.
- Company Address: Fill out the all address fields.
- Score: You can assign a score to the company which can be used in lead scoring and segmentation.
- Phone: Enter a contact phone number for the company.
- Website: The URL to the company’s website.
- Company Owner: Use the dropdown to assign an owner to the company.
Click Save & Close to save the company information.
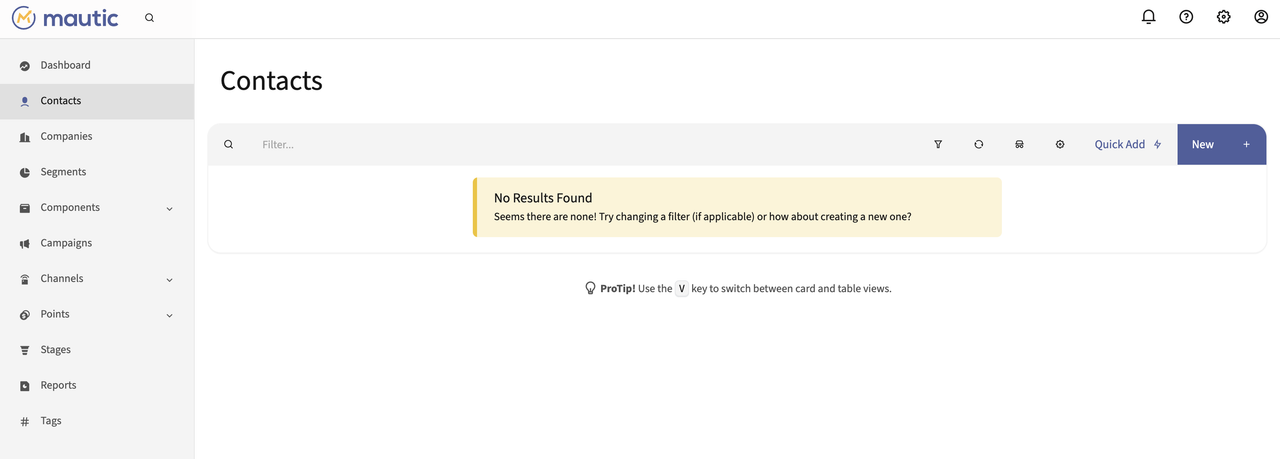
Create and Manage Contacts
Contacts in Mautic represent individual leads or customers. You can capture, tag, and segment these contacts based on behavior, engagement, or company affiliation.
Click Contacts from the sidebar and click the Quick Add in the top right.
On the New Contact page enter the following details to create a contact.
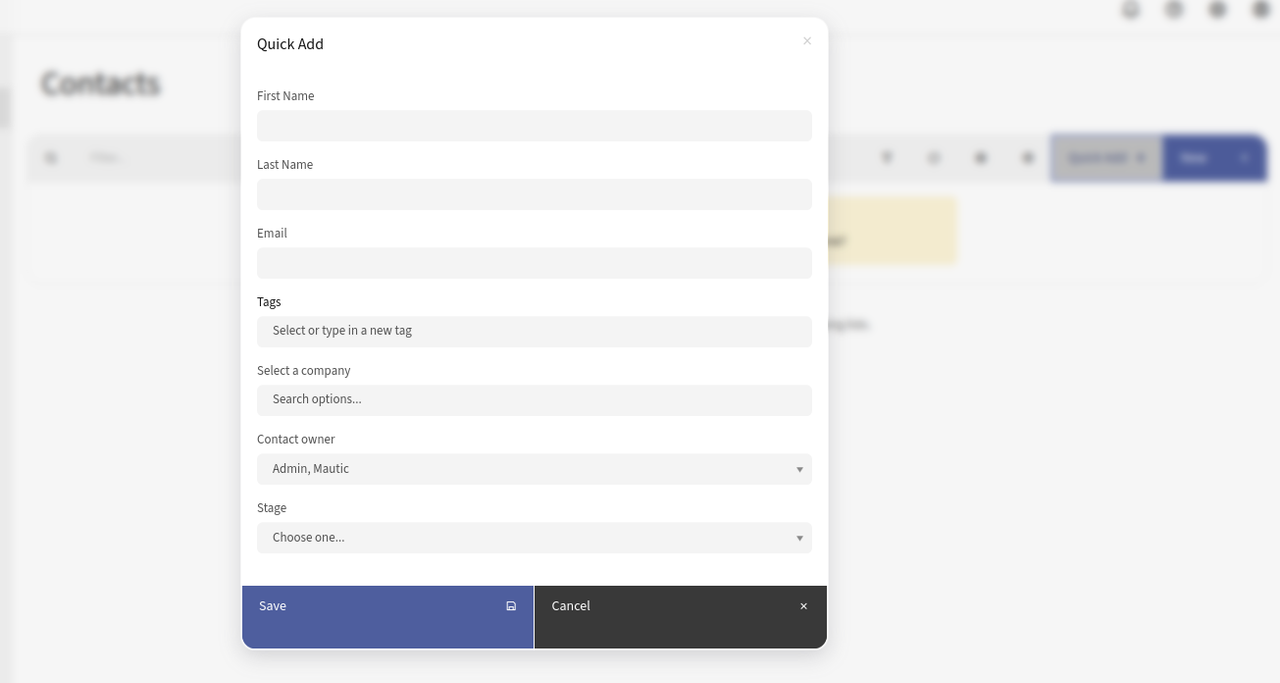
Enter the following details:
- First Name: Enter the first name of the contact.
- Last Name: Enter the last name of the contact.
- Email: Contact's email address.
- Tags: Add any relevant tags to the contact.
- Select a Company: If the contact is associated with a company that you have already added to Mautic, you can link them here.
- Contact Owner: Assign an owner to this contact.
- Stage: Set the stage of the contact within your marketing or sales funnel.
Click Save to add the new contact to your Mautic database.
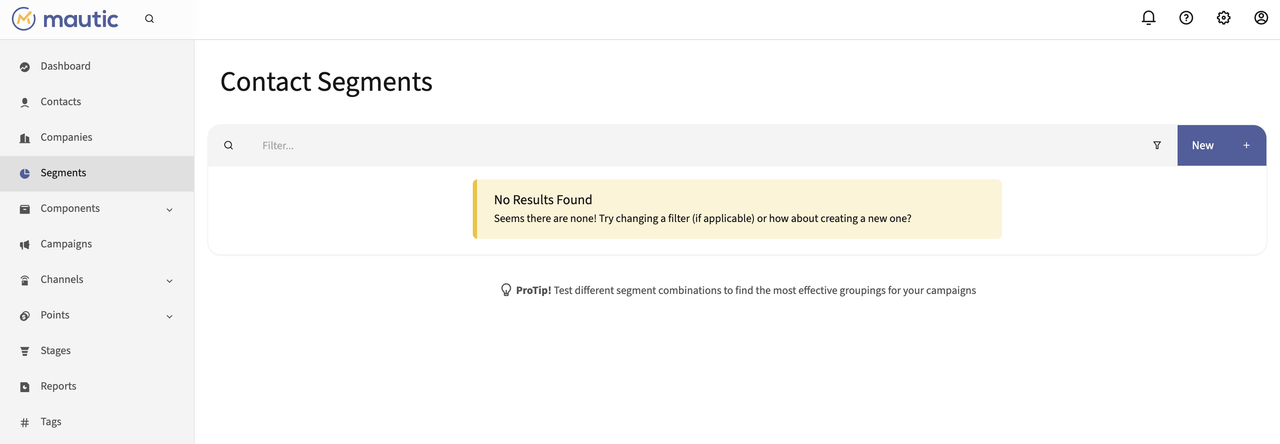
Contact Segments
Segments are filtered groups of contacts used for targeting in campaigns. Segments are dynamic and auto-update when contacts meet the criteria.
Click Segments from the sidebar and click New to create a new segment.
On the New Segment page enter the general information for your contact segment.
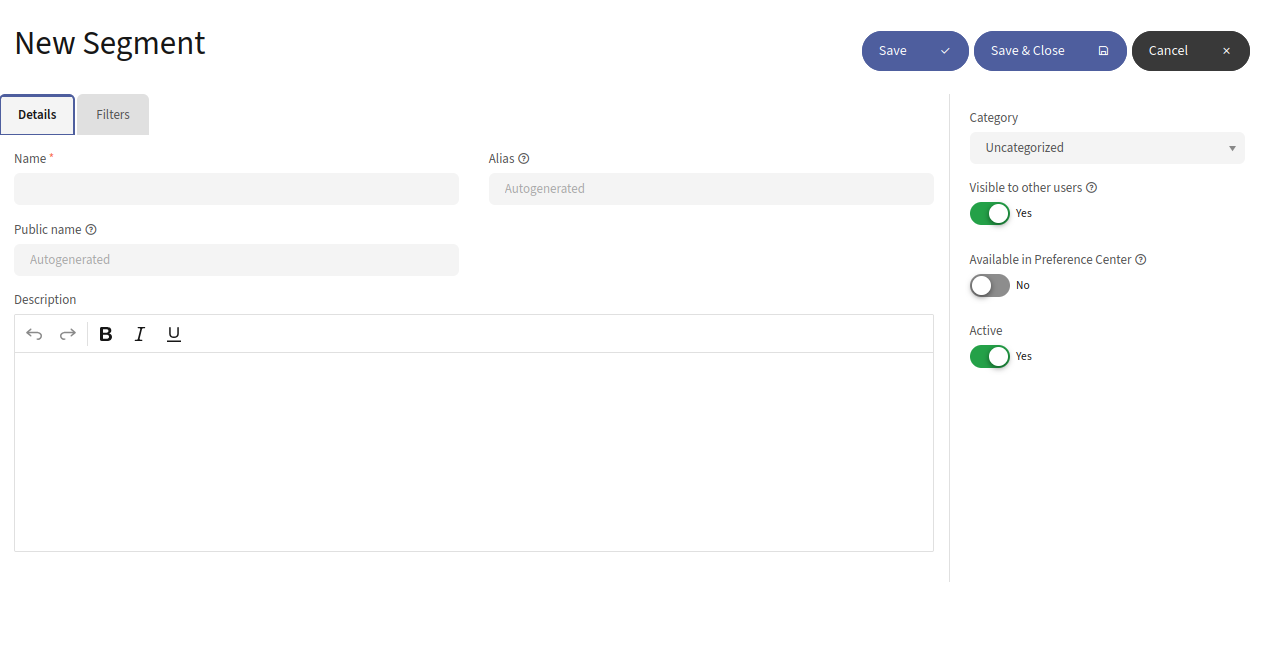
Enter the following details:
- Name: Enter a meaningful name for the segment.
- Public Name: You can enter a public name that might be shown in places like subscription forms or preference centers.
- Description: Add a description for the segment.
- Alias: This is auto-generated based on the segment name but can be customized.
- Category: You can categorize the segment for better organization.
- Visible to Other Users: Toggle this option based on whether you want other users in your Mautic installation to view this segment.
- Available in Preference Center: Decide whether this segment should be visible for contacts to select or deselect themselves in the preference center.
- Active: Set to Yes if you want the segment to be active and start including contacts based on the criteria set.
Under Filters tab, specify the criteria for including contacts in this segment.
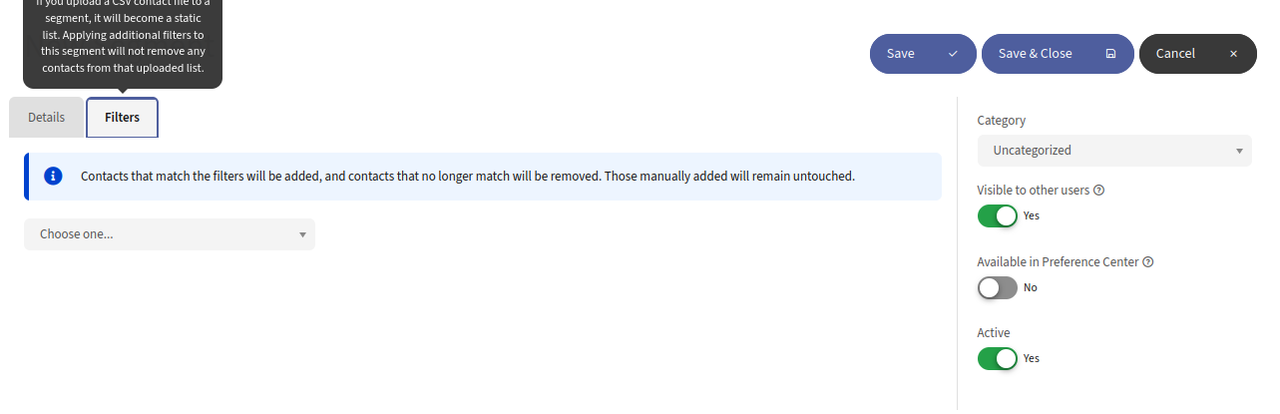
Click Save & Close to save the changes.
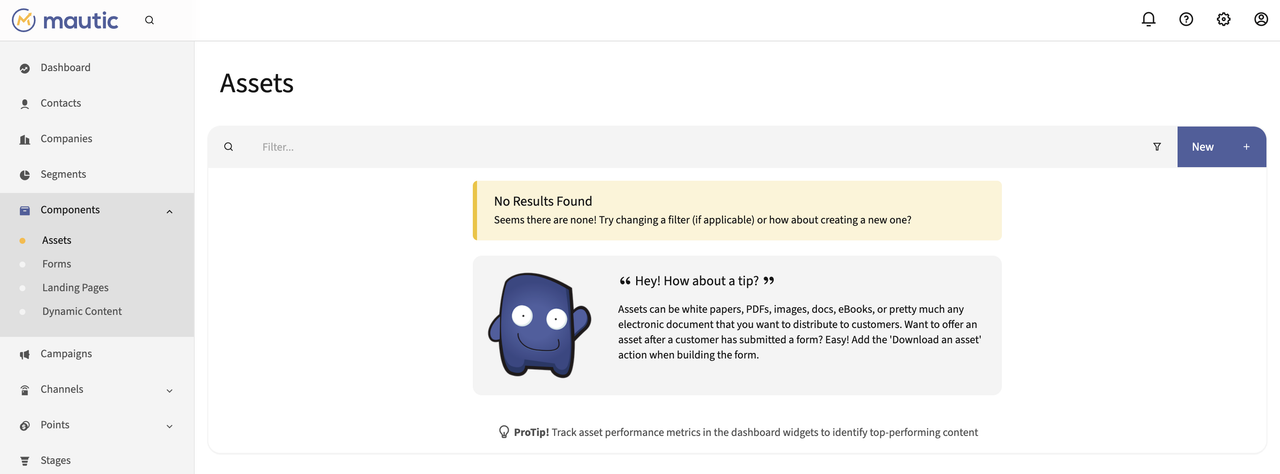
Upload and Manage Assets in Mautic
Assets in Mautic refer to digital documents such as white papers, PDFs, images, eBooks, or any content that you want to share with your contacts. These assets can be stored locally or linked from external sources.
In the sidebar, navigate to Components > Assets and click New to upload a new asset.
Choose the storage location.
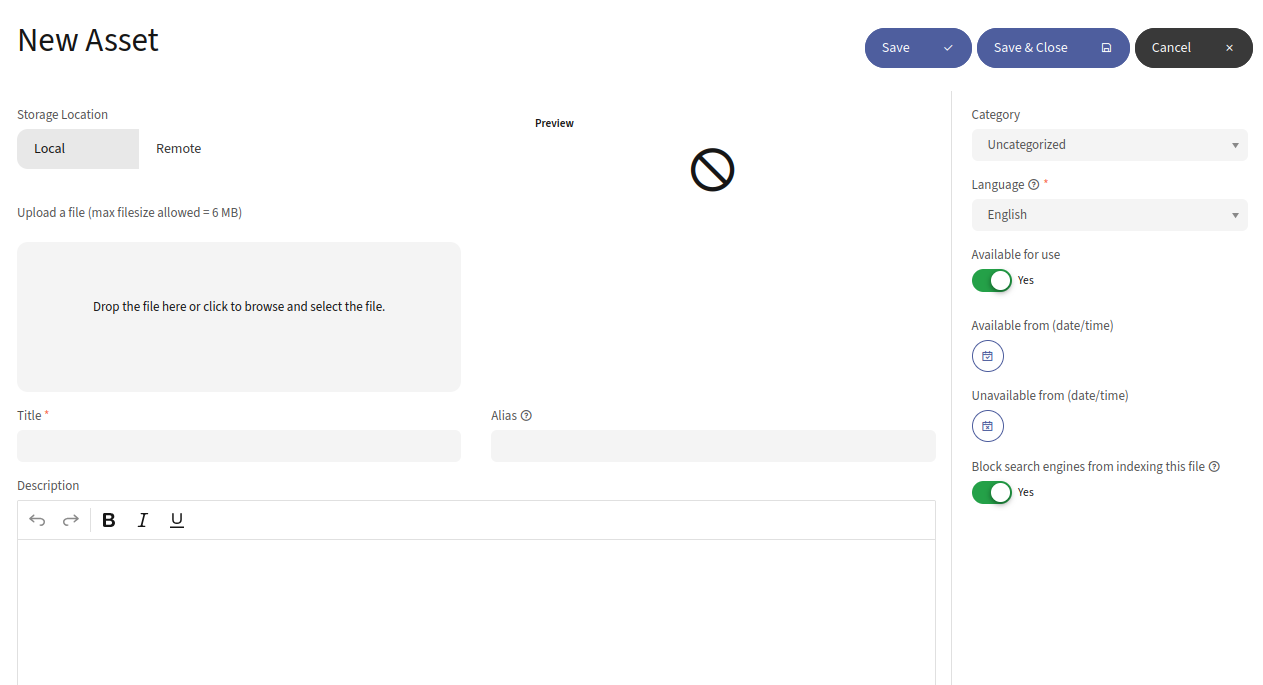
- Local Storage: Select this option if you want to upload the file directly from your computer to Mautic.
- Remote Storage: Choose this if you want to link to an externally hosted file.
Upload the file from your local computer.
Configure Additional Settings:
- Category: Choose a category from the dropdown to organize your assets, if you have created categories.
- Language: Select the language of the asset content, if applicable.
- Available for Use: Toggle this to Yes to make the asset available for use upon creation.
- Available From/Unavailable From: Set the dates for when the asset will become available and when it will stop being available.
- Block Search Engines from Indexing this File: If toggled to Yes, this prevents search engines from indexing the asset.
After all settings are configured, click Save & Close to save the asset and return to the asset list.
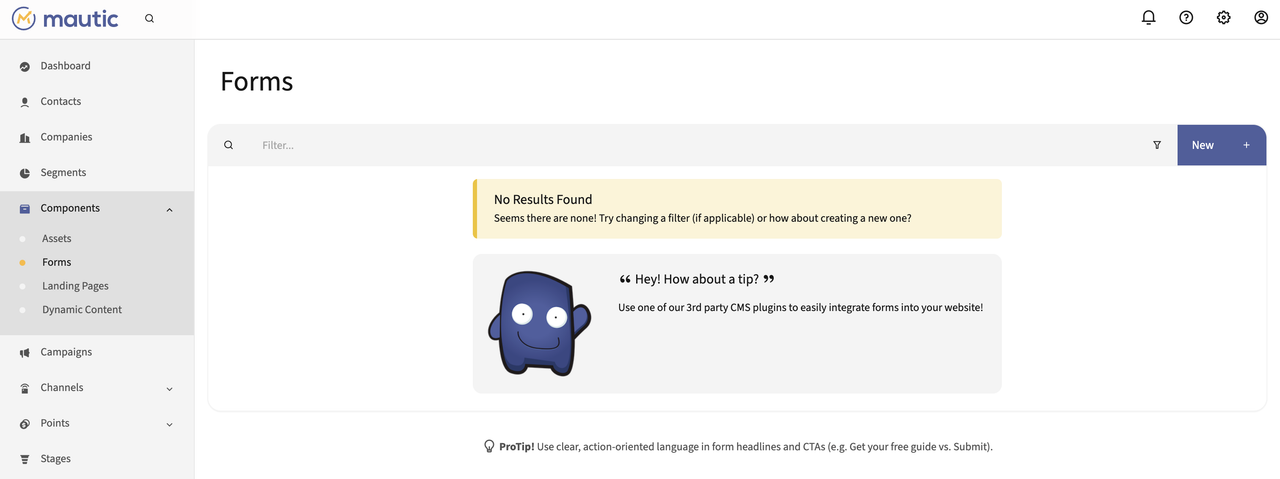
Create and Manage Forms in Mautic
Forms in Mautic allow you to collect contact information, engage with users, and trigger automated actions such as email responses, tagging, or campaign enrollment. You can create two types of forms: Campaign Forms (used in campaigns) and Standalone Forms (used independently).
Navigate to Components > Forms in the sidebar and click New to begin form creation.
Choose the form type.
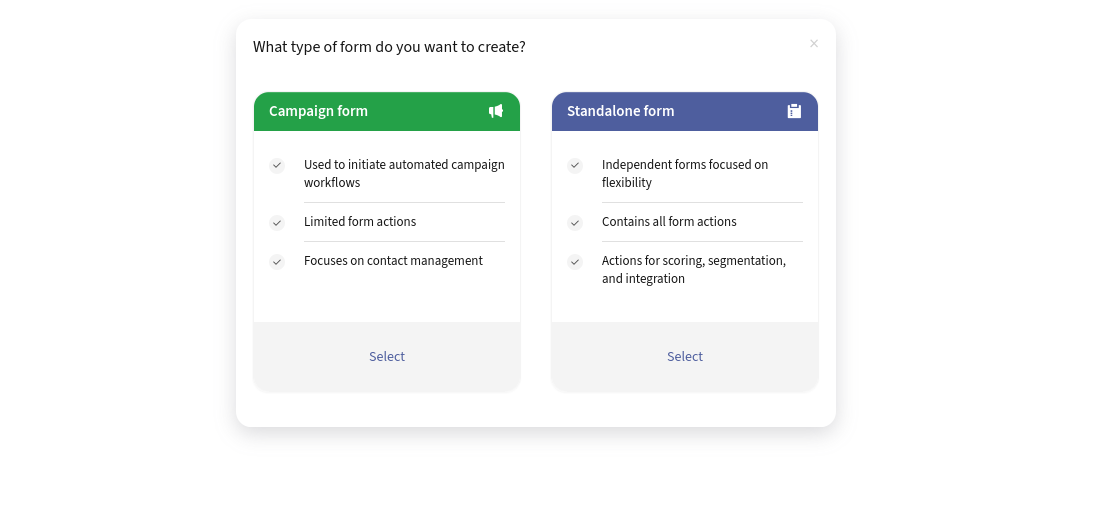
- Campaign Form: Used inside Mautic campaigns.
- Standalone Form: Used independently or embedded in websites.
On the New Form page enter the required details.
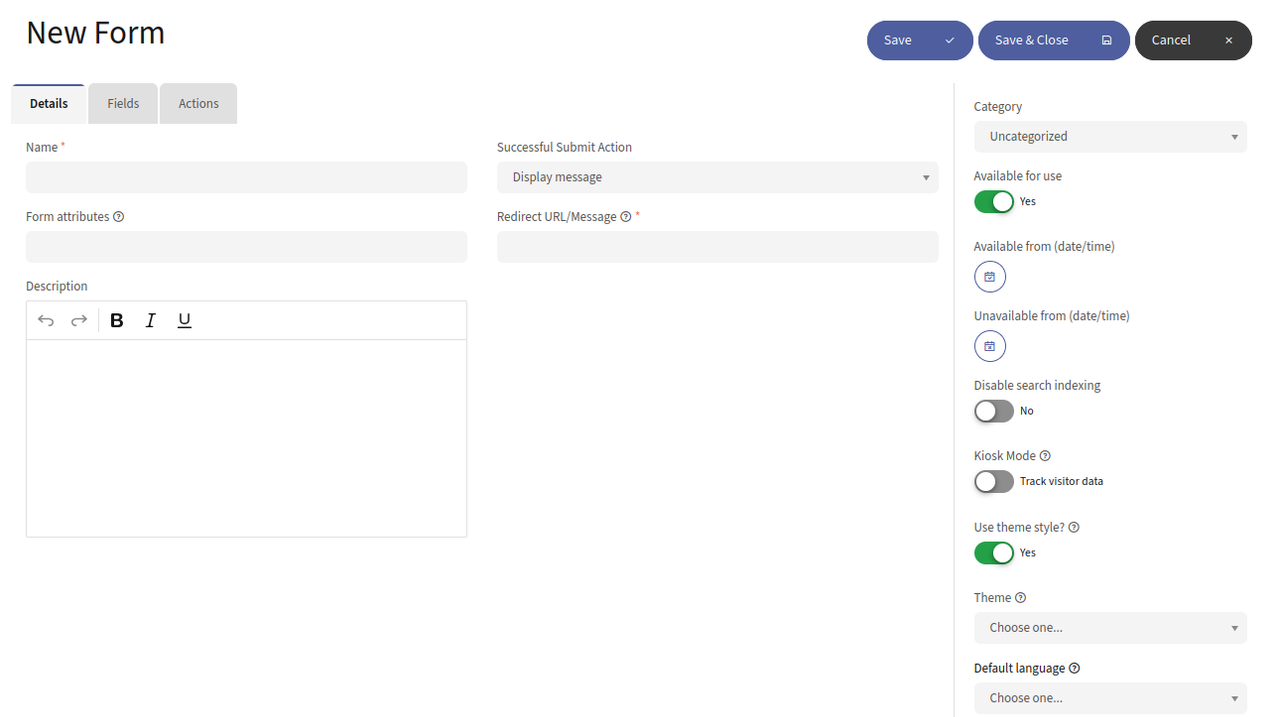
Enter the following details:
- Name: Enter a name for your form.
- Form Attributes: You can add additional HTML attributes that will be applied to the form tag.
- Description: A brief description of the form's purpose.
Set up "successful submit action"
- Display Message: Show a custom message to the user upon submission.
- Redirect URL/Message: Redirect the user to a specific URL or display a custom message.
Configure Additional Settings:
- Category: Organize forms into categories for better management.
- Available for Use: Toggle whether the form is active and available for use.
- Available From/Unavailable From: Schedule when the form becomes available and when it stops being available.
- Disable Search Indexing: Prevent search engines from indexing the form.
- Kiosk Mode: Enable this to track visitor data anonymously, useful for public access forms.
- Use Theme Style: Apply a specific theme to the form for consistent styling.
- Default Language: Set the language the form should be displayed in.
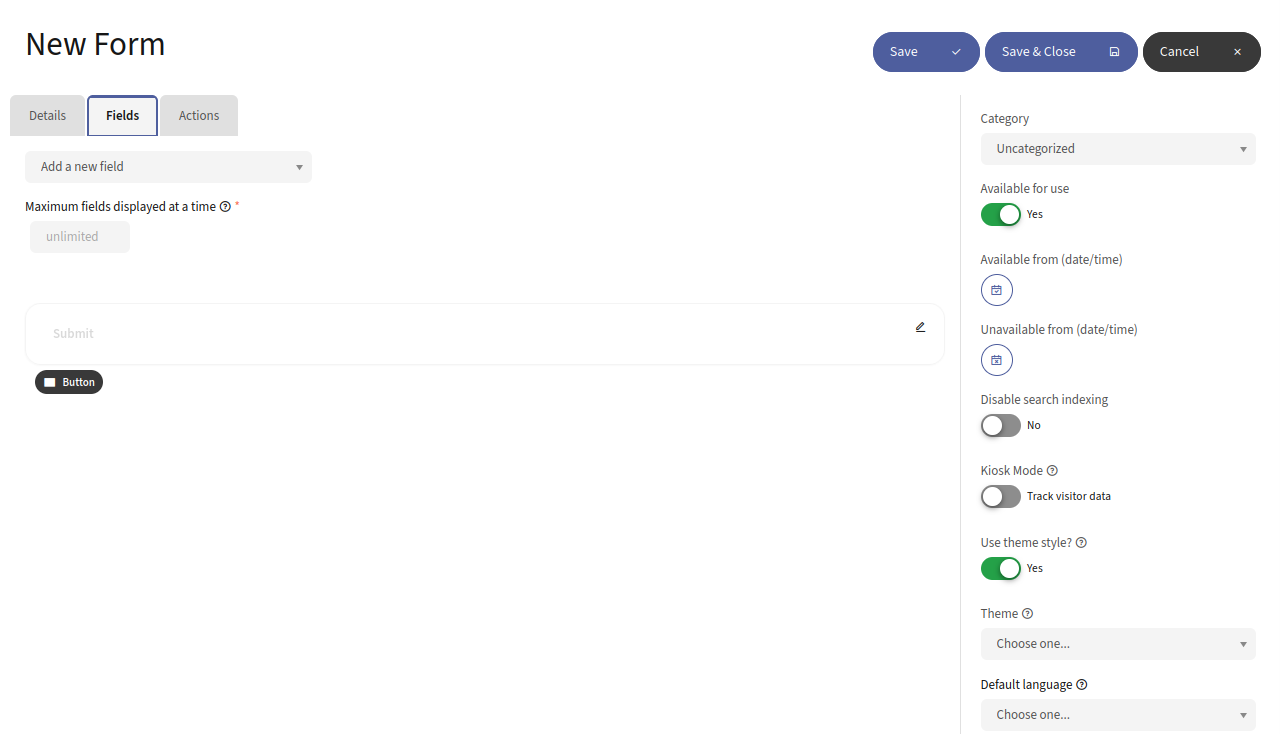
Under the Fields tab, add input fields, checkboxes, radio buttons, and other elements that collect data from users.
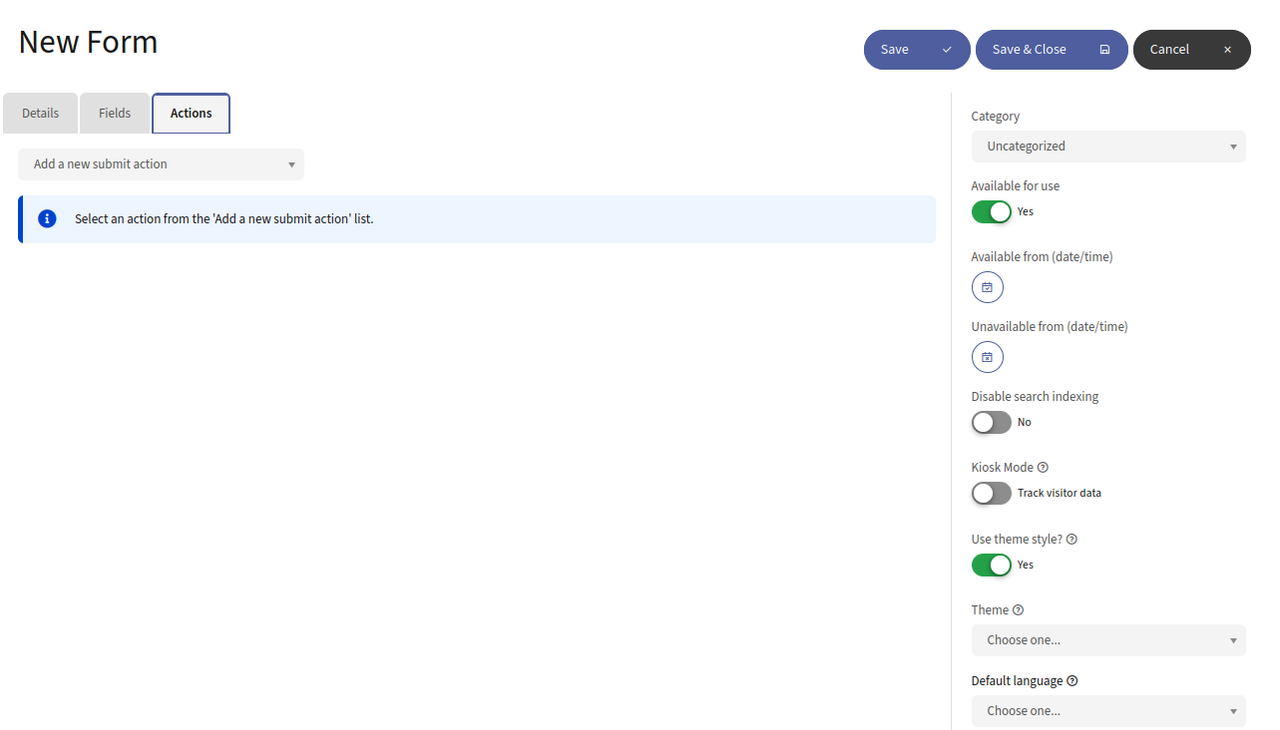
Under the Actions tab, set up actions based on form submissions, like sending an email, adjusting contact points, or adding tags.
Click Save & Close to activate the form and return to the form list.
Create and Manage Landing Pages
Landing pages are standalone web pages used for specific marketing purposes such as promoting webinars, offering white-papers, or collecting opt-ins through forms. Mautic allows you to create and customize landing pages using themes or a visual page builder.
Navigate to Components > Landing Pages in the sidebar.
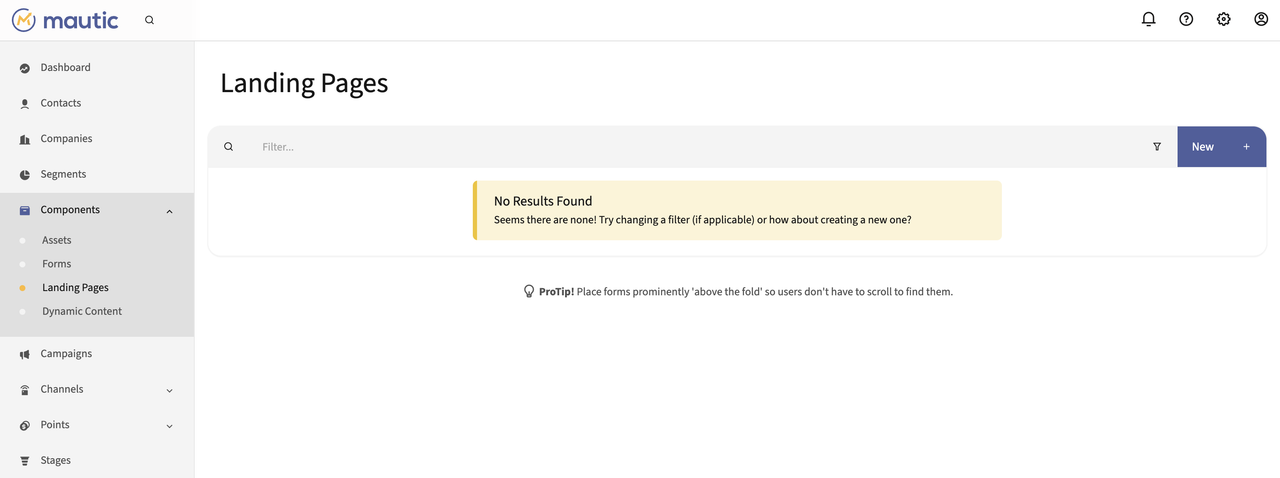
Select a Theme template or use the Visual Page Builder to design the page from scratch.
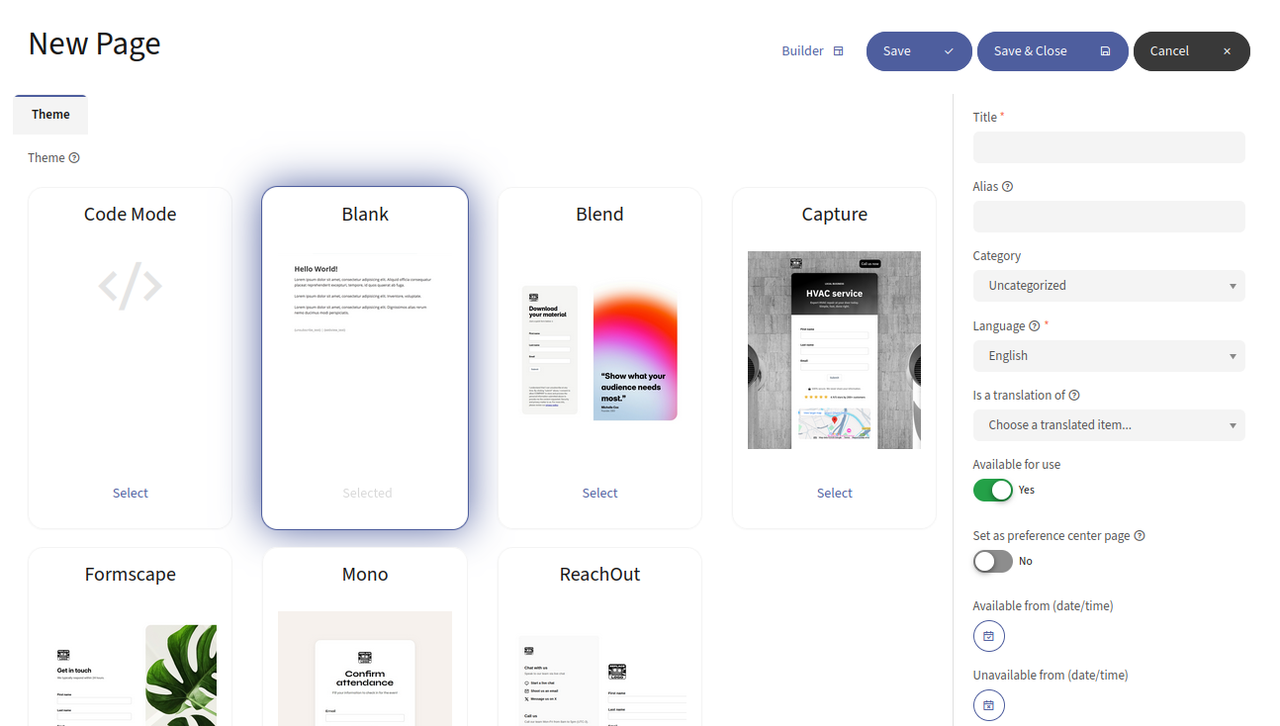
Configure basic page details:
- Title: Enter a title for the landing page.
- Alias: This is auto-generated based on the title but can be customized.
- Category: You can categorize the landing page for better organization.
- Language: Select the language of the landing page content.
Configure advanced settings:
- Is a Translation Of: If your landing page is a translation of another page, select the original from this dropdown.
- Available for Use: Toggle this to Yes to make the landing page available upon creation.
- Set as Preference Center Page: Decide if this landing page should act as a preference center, where contacts can manage their subscription settings.
- Available From/Unavailable From: Set the dates when the landing page becomes available and when it should no longer be available.
Design the landing page:
Click Builder to launch the visual editor.
Use drag-and-drop elements to build your layout.
- Text blocks
- Images
- Forms
- Custom HTML blocks
Adjust elements and styles to fit your branding and campaign goals.
Click Save & Close to publish and return to the landing page list.
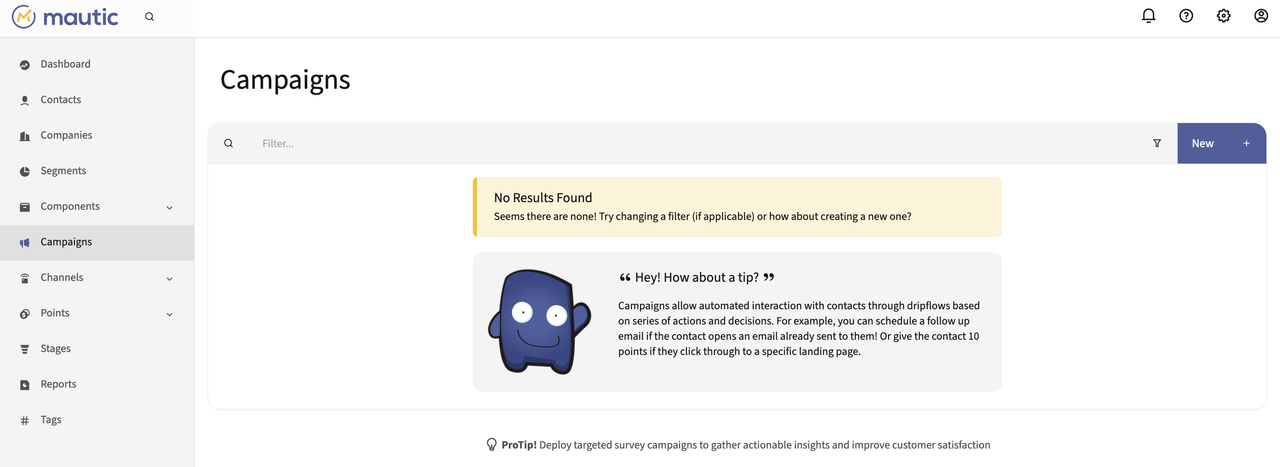
Create and Manage Campaigns
Campaigns enable you to automate interactions with contacts through drip workflows based on actions, decisions, and conditions. You can use campaigns to nurture leads, follow up on form submissions, or deliver personalized content over time.
Navigate to Campaigns and click New to begin creating a campaign.
Enter a name, and description for your campaign.
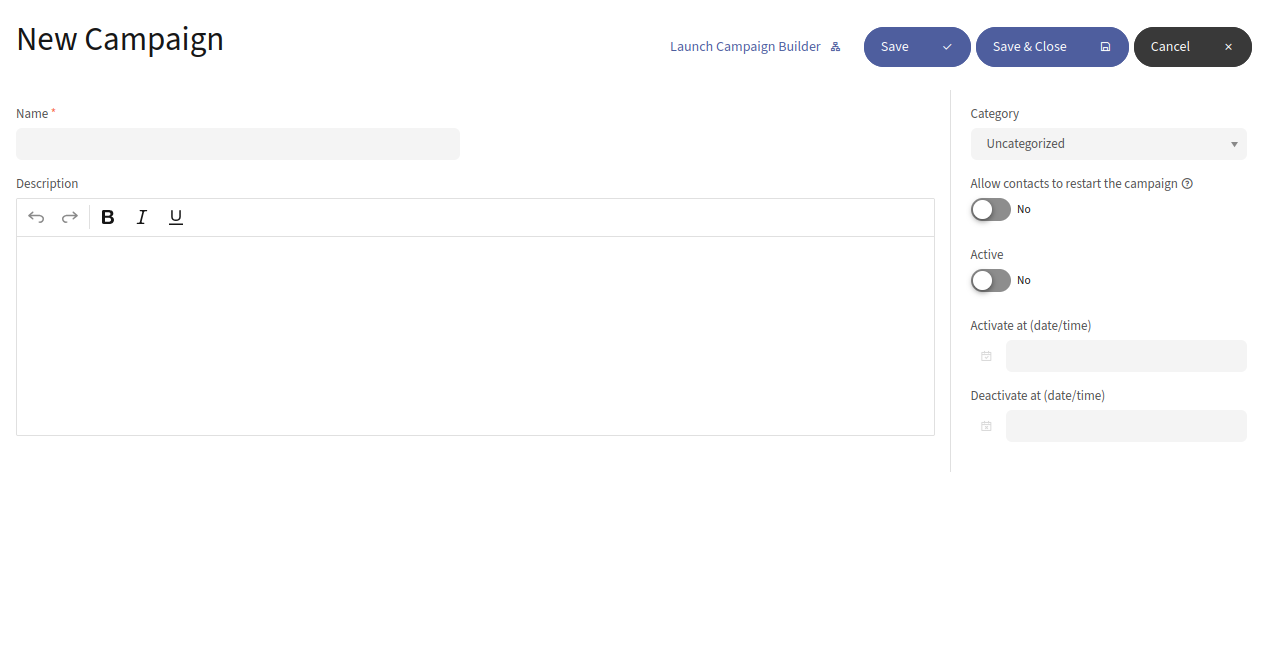
Configure Campaign Settings:
- Category: You can organize your campaigns into categories. Choose an existing category or create a new one to keep your campaigns organized.
- Allow Contacts to Restart the Campaign: Toggle this setting depending on whether you want contacts to be able to enter the campaign again after they've completed it.
- Active: Set this to Yes if you want the campaign to be active right upon creation, or leave it as No if you are still working on the campaign setup and plan to activate it later.
- Activate at (date/time): Set a date and time for the campaign to activate.
- Deactivate at (date/time): Set a date and time for the campaign to deactivate.
Build the campaign workflow.
Click Launch Campaign Builder to open the visual builder interface.
Use the drag-and-drop builder to create your workflow.
- Sources: Segment membership or form submission.
- Actions: Send email, modify contact points.
- Decisions: Opens email, visits URL.
- Conditions: Contact fields match.
After designing the campaign, click Save & Close to apply changes and return to the campaign list.
Create and Manage Emails
Emails in Mautic are used to deliver newsletters, drip campaigns, transactional messages, and campaign-specific content to your contacts.
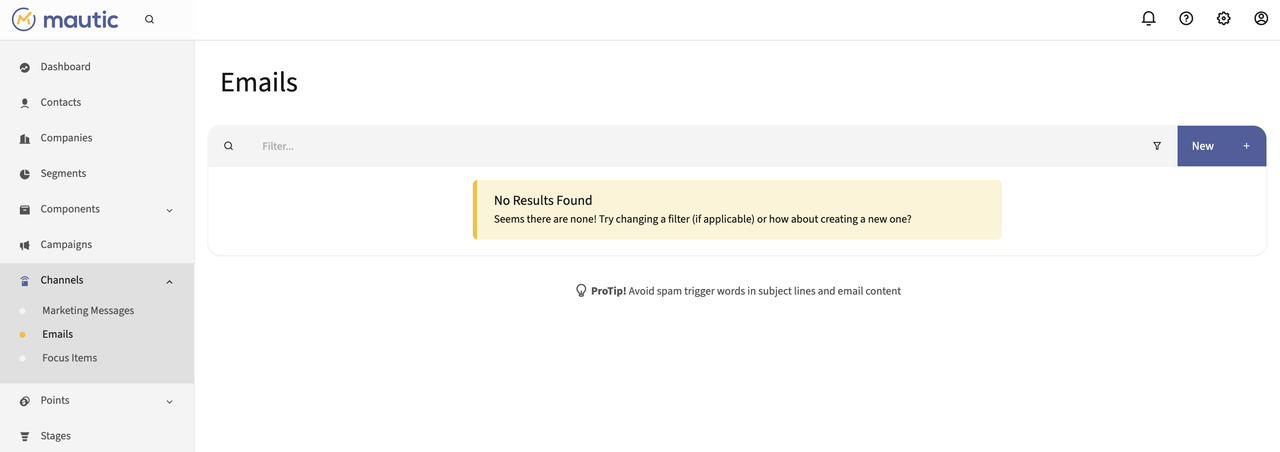
Navigate to Channels > Emails and click New.
Choose email type.
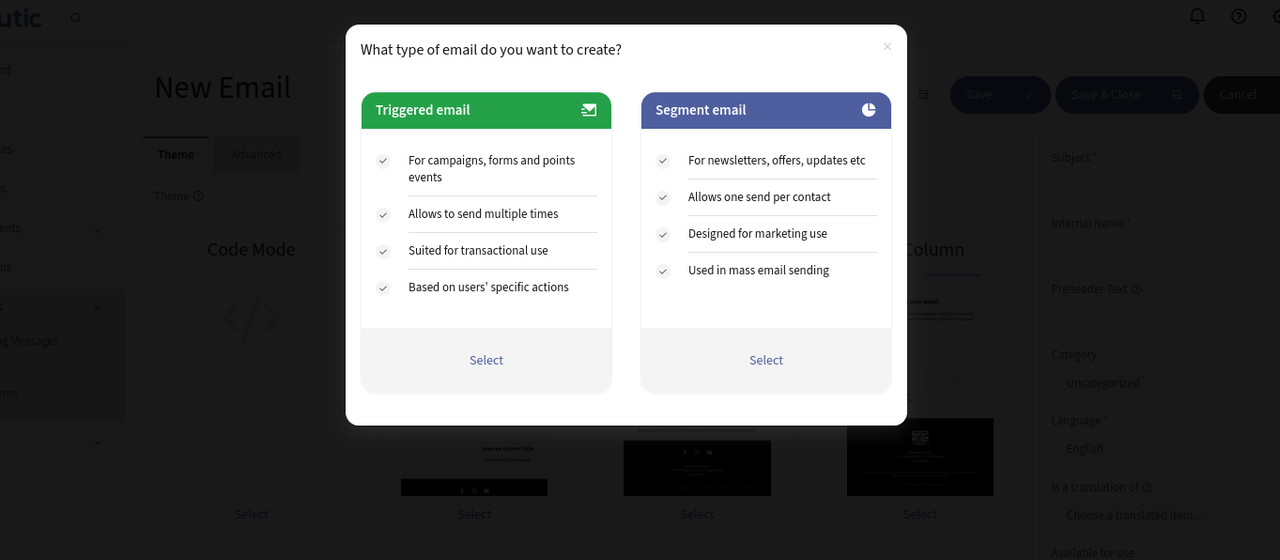
- Triggered Email: This type is used for campaigns, forms, and points events. It allows the email to be sent multiple times and is suited for transactional use, responding to users' specific actions.
- Segment Email: This type is ideal for newsletters, announcements, or one-time messages to a specific segment.
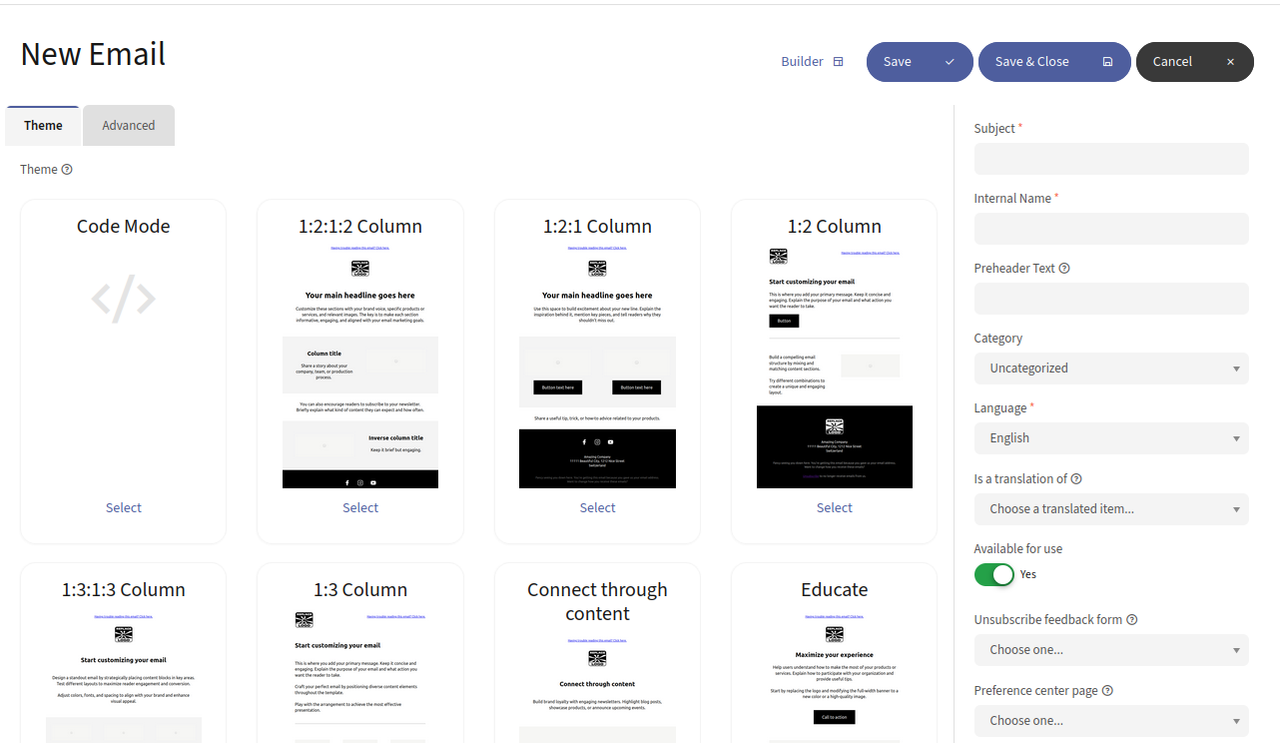
Choose a theme that suits your message style and click Builder to open the visual builder for designing the layout and content.
Configure email settings under the Advanced tab:
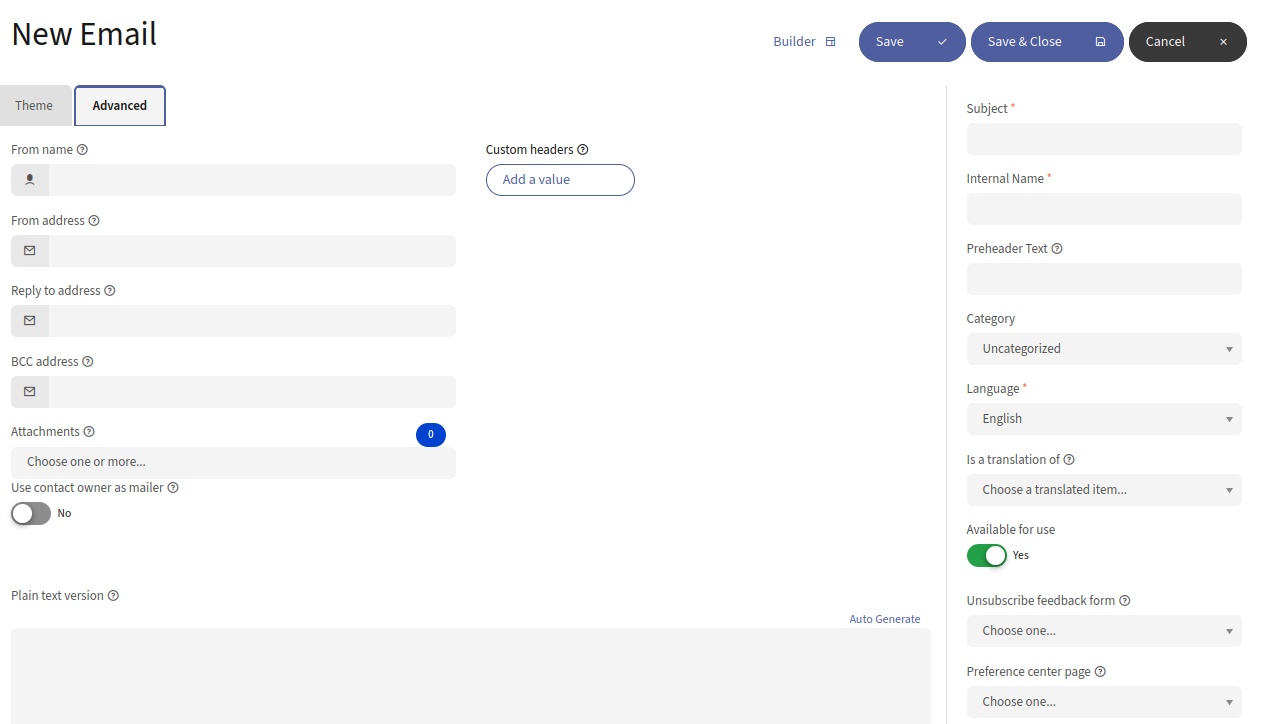
- From Name: Specify the name that will appear as the sender.
- From Address: Enter the email address from which the email will be sent.
- Reply to Address: If different from the From Address, specify where responses should be sent.
- BCC Address: Add a BCC address to receive a copy of the email without recipients knowing.
- Attachments: Attach any files that should be included in the email.
- Custom Headers: Add any custom headers needed for your email, which can help with managing email delivery and tracking.
Fill out the below details in the right pane:
- Subject: The subject line of the email.
- Internal Name: A name used to identify the email in Mautic.
- Preheader Text: Text that appears as a preview in many email clients right after the subject line.
- Category: Organize your emails into categories.
- Language: Set the language of the email content.
- Is a Translation of: If this email is a translation of another, select the original.
- Available for Use: Toggle whether the email should be active.
- Unsubscribe Feedback Form: Link an unsubscribe feedback form if available.
Click Save & Close to save your changes.
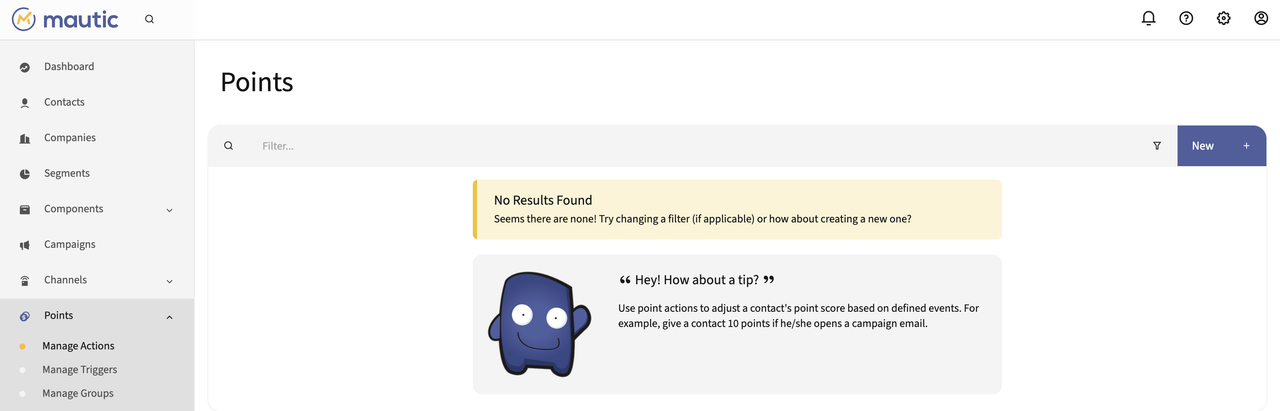
Create and Manage Point Action
Point Actions allow you to assign or subtract points when contacts perform specific interactions, helping you score and rank leads based on engagement.
Navigate to Points > Manage Actions and click New.
Fill out the point action details:
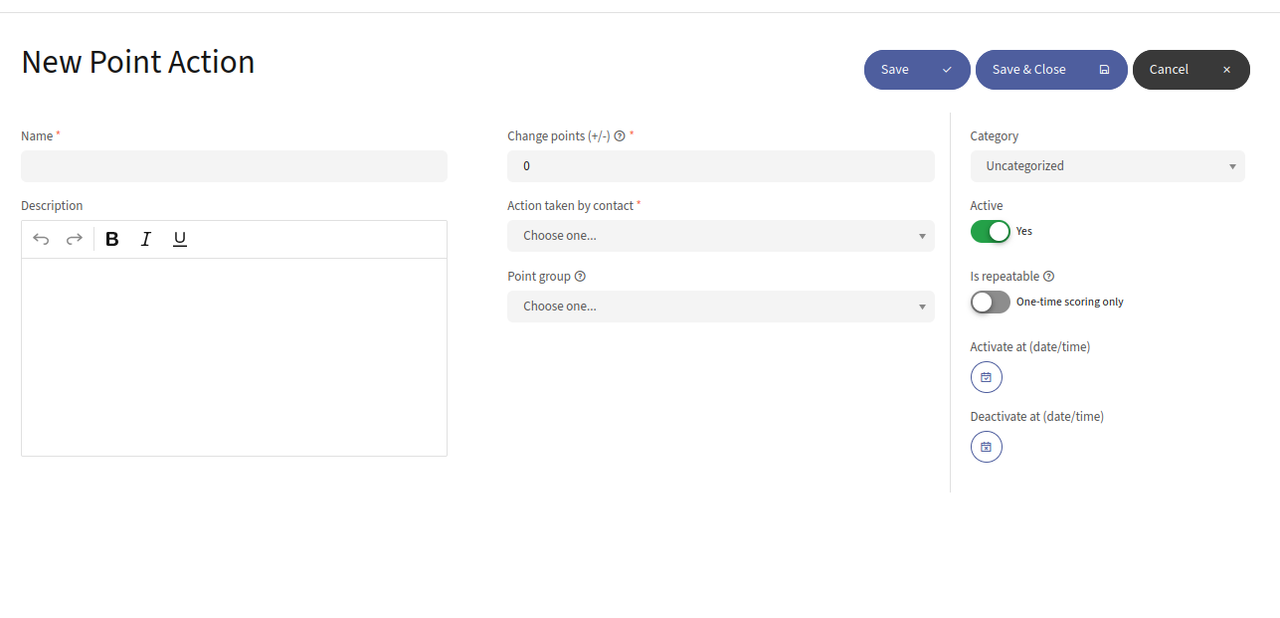
- Name: Enter a name for the point action, such as "Download eBook" or "Visit Page".
- Description: A brief description of the action for internal use.
- Change points (+/-): Specify how many points to add or subtract when this action is triggered. For example, +10 for downloading an eBook.
- Action taken by contact: Select the type of interaction by the contact that triggers this action. Options might include page visits, and form submissions.
Configure activation settings:
- Category: You can categorize the action for easier management.
- Active: Toggle whether the action is active.
- Is repeatable: Decide if this action can be triggered multiple times by the same contact.
- Activate at (date/time) and Deactivate at (date/time): Set activation and deactivation dates for the action.
Click Save & Close to save your settings.
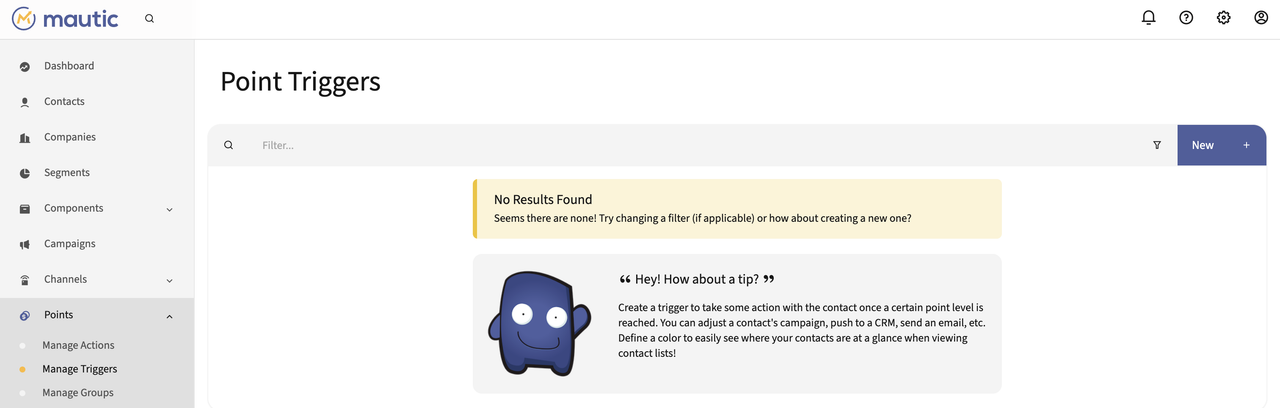
Create and Manage Point Trigger
Point Triggers automate responses based on a contact’s point total, such as sending an alert, assigning to a segment, or updating contact details.
Navigate to Points > Manage Triggers and click New.
On the New Trigger page enter the following details.
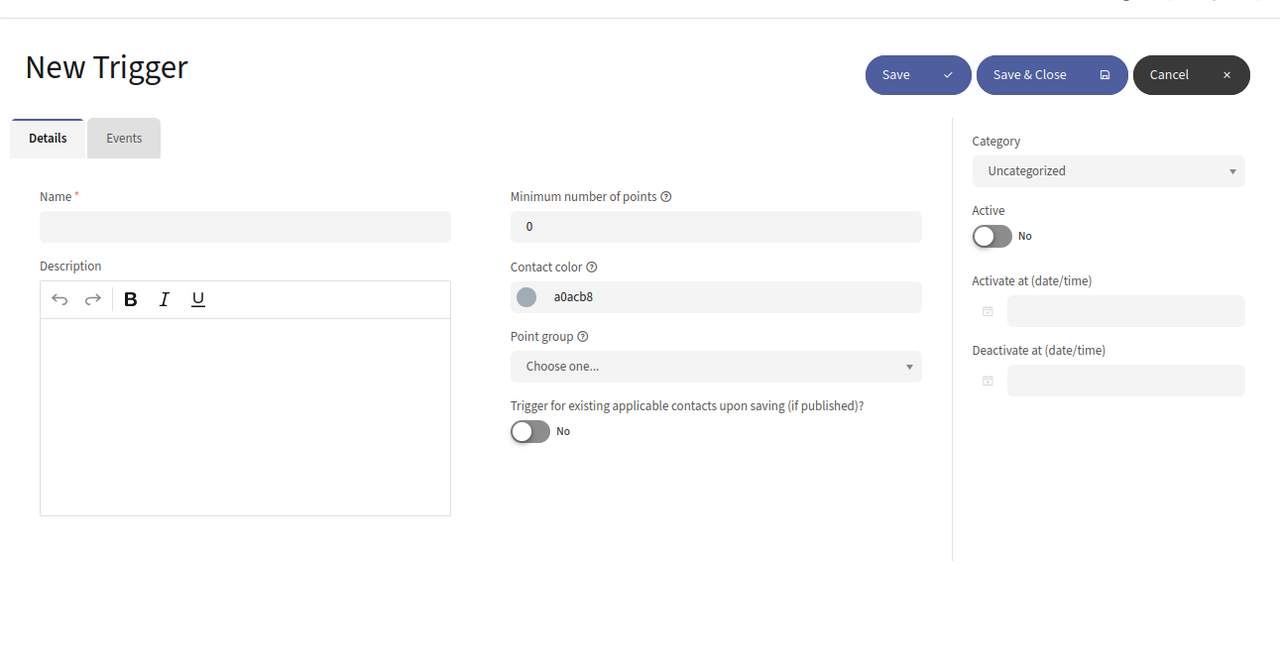
Configure the trigger:
- Name: Give the trigger a name that specifies what it does.
- Description: Enter details about what the trigger does.
- Minimum number of points: Set the threshold of points a contact must reach to activate this trigger.
- Contact color: You can assign a color to contacts who meet this trigger; this is useful for visual segmentation in the dashboard.
Define trigger behavior:
- Trigger for existing applicable contacts upon saving (if published): Choose whether this trigger should apply to existing contacts who already meet the points threshold when the trigger is activated.
- Active: Enable or disable the trigger.
- Activate at (date/time) and Deactivate at (date/time): Set specific times for the trigger to become active or inactive.
Click Save & Close to store your settings.
Conclusion
You have installed and configured Mautic on an Ubuntu 24.04 server using the LEMP stack, and explored core features like Contacts, Emails, Landing Pages, Campaigns, and Points. Mautic is a reliable, open-source marketing automation tool that give you full control over your campaigns and customer engagement workflows. With consistent updates and a strong user community, it’s an excellent choice for scalable, privacy conscious marketing.