
How to Deploy NextCloud - An Opensource File Manager and Alternative to Google Drive
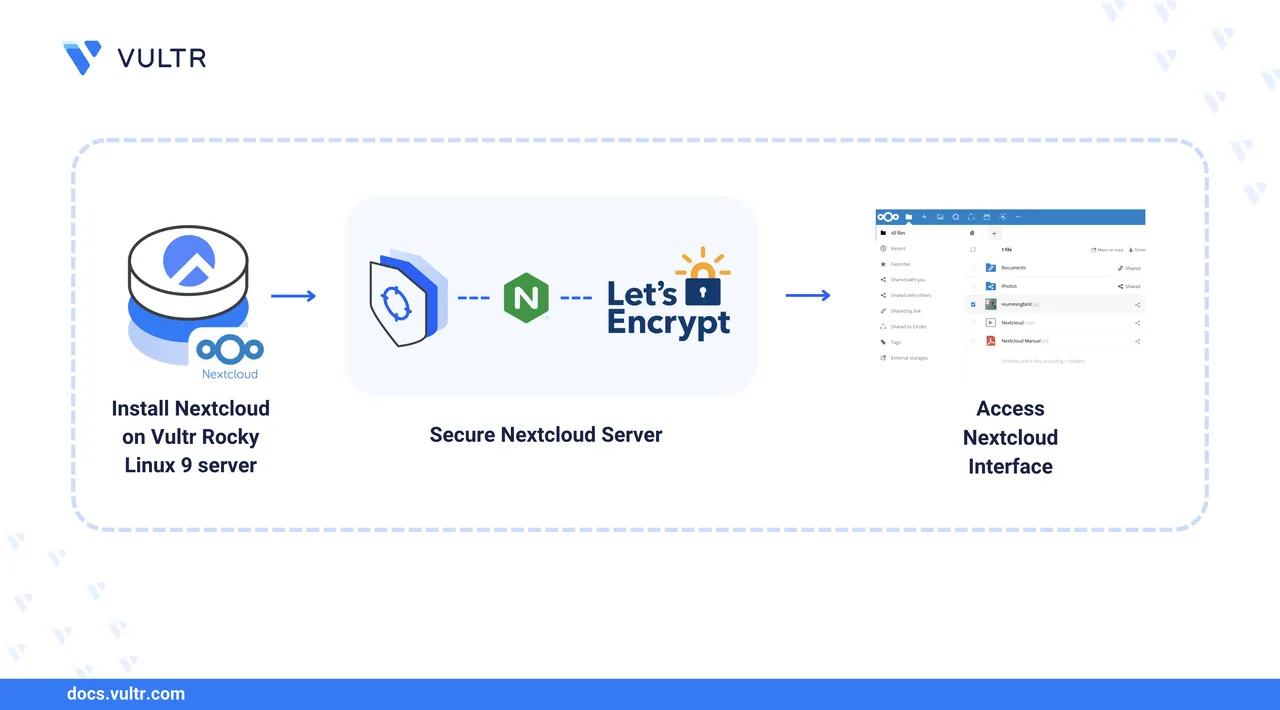
Nextcloud is a free and open-source platform for hosting and managing file storage services. It offers similar functionality to Google Drive, such as file sharing and collaboration, but runs entirely on infrastructure you control. Its source code is publicly available on GitHub for review and contributions.
In this article, you will deploy Nextcloud on Rocky Linux 9 using either a manual installation with Nginx, PHP, and MariaDB, or a containerized installation with Docker and Docker Compose. Both methods include secure web server configuration, database setup, and optional HTTPS support for encrypted access.
Prerequisites
Before you begin, ensure you:
- Have access to a Rocky Linux 9 server as a non-root user with
sudoprivileges. - Create a DNS A record pointing to your server's IP address, such as
nextcloud.example.com.
This section sets up the system to install Nextcloud. You'll update your packages, install required tools, and prepare the environment for web, database, and PHP services.
Update the system packages.
console$ sudo dnf update
When prompted, press
Yto confirm and install available updates.Install system utilities and dependencies.
console$ sudo dnf install epel-release unzip curl wget policycoreutils-python-utils dnf-plugins-core -y
These packages provide essential tools for web application setup and SELinux management.
Download the Nextcloud Web Application Files
Download the latest Nextcloud release.
console$ wget https://download.nextcloud.com/server/releases/latest.zip
This command downloads the latest stable version of Nextcloud to your current working directory.
Extract the archive.
console$ unzip latest.zip
This creates a
nextcloud/directory containing the web application files.Ensure the target web root directory exists.
console$ sudo mkdir -p /var/www/
Move the extracted files to
/var/www.console$ sudo mv nextcloud/ /var/www/
The Nextcloud files are now ready to be served from
/var/www/nextcloud.
Install MariaDB Database Server
Nextcloud stores its configuration and user data in a relational database. It supports MySQL, PostgreSQL, SQLite, and Oracle, but SQLite is recommended only for testing or small-scale environments. In this section, install and configure MariaDB as the production database backend.
Create a custom repository file for MariaDB.
console$ sudo tee /etc/yum.repos.d/MariaDB.repo > /dev/null <<EOF [mariadb] name = MariaDB baseurl = https://rpm.mariadb.org/11.4/rhel/\$releasever/\$basearch gpgkey = https://rpm.mariadb.org/RPM-GPG-KEY-MariaDB gpgcheck = 1 EOF
Install the MariaDB server and client.
console$ sudo dnf install MariaDB-server MariaDB-client
Start and enable MariaDB at boot.
console$ sudo systemctl enable --now mariadb
Secure your MariaDB installation.
console$ sudo mariadb-secure-installation
The script guides you through setting the root password and adjusting basic security options. When prompted, enter a strong root password, then answer
Yto the remaining prompts to apply the recommended defaults.
Configure the MariaDB Database for Nextcloud
Log in to the MariaDB root account.
console$ mariadb -u root -p
Enter the root password you set during
mariadb-secure-installation.Create the Nextcloud database.
sqlMariaDB [(none)]> CREATE DATABASE nextcloud;
Create a dedicated database user for Nextcloud.
sqlMariaDB [(none)]> CREATE USER 'nextcloud'@'127.0.0.1' IDENTIFIED BY 'StrongPass';
Replace
StrongPasswith an alphanumeric, secure password.Grant the user full privileges on the Nextcloud database.
sqlMariaDB [(none)]> GRANT ALL PRIVILEGES ON nextcloud.* TO 'nextcloud'@'127.0.0.1';
Reload the privileges.
sqlMariaDB [(none)]> FLUSH PRIVILEGES;
Exit the MariaDB console.
sqlMariaDB [(none)]> exit
Test the new database user login.
console$ mariadb -u nextcloud -p -h 127.0.0.1
Enter the password you set earlier.
Verify that the
nextclouddatabase exists.sqlMariaDB [(none)]> SHOW DATABASES;
Output:
+--------------------+
| Database           |
+--------------------+
| information_schema |
| nextcloud          |
+--------------------+
Exit the session by typing
exit.
Tune MariaDB for Nextcloud
Nextcloud requires specific MariaDB settings for compatibility and performance. Modify the MariaDB configuration to meet these requirements.
Edit the MariaDB configuration file.
console$ sudo nano /etc/my.cnf.d/server.cnf
Under the
[mysqld]section, add the following lines:inibind-address = 127.0.0.1 character_set_server = utf8mb4 collation_server = utf8mb4_general_ci transaction_isolation = READ-COMMITTED binlog_format = ROW innodb_large_prefix = 1 innodb_file_format = barracuda innodb_file_per_table = 1
bind-address = 127.0.0.1: Restricts connections to localhost.character_set_serverandcollation_server: Configureutf8mb4for full Unicode support.transaction_isolation = READ-COMMITTED: Prevents uncommitted read inconsistencies.binlog_format = ROW: Improves replication accuracy and recovery.- InnoDB options: Enable larger index prefixes, Barracuda file format, and per-table tablespaces.
In the
[server]section of the same file, add the following:iniskip_name_resolve = 1 innodb_buffer_pool_size = 128M innodb_buffer_pool_instances = 1 innodb_flush_log_at_trx_commit = 2 innodb_log_buffer_size = 32M innodb_max_dirty_pages_pct = 90 query_cache_type = 1 query_cache_limit = 2M query_cache_min_res_unit = 2K query_cache_size = 64M tmp_table_size = 64M max_heap_table_size = 64M slow_query_log = 1 slow_query_log_file = /var/log/mysql/slow.log long_query_time = 1
skip_name_resolve: Disables DNS lookups to improve connection speed.innodb_*parameters: Configure buffer pools, flushing, and log buffers for balanced performance.query_cache_*parameters: Manage the query cache (note: deprecated in MariaDB 11.4 and may be ignored).tmp_table_sizeandmax_heap_table_size: Define limits for temporary and in-memory tables.slow_query_logoptions: Enable and configure slow query logging for performance analysis.
Restart MariaDB to apply the changes.
console$ sudo systemctl restart mariadb
Verify that MariaDB is running.
console$ sudo systemctl status mariadb
Install PHP 8 for Nextcloud
Nextcloud requires PHP to run. Version 8.3 or higher is recommended for better performance, memory management, and compatibility. In this section, install PHP 8.3, enable necessary modules, and configure PHP-FPM to work with Nginx.
Check available PHP streams.
console$ sudo dnf module list php
PHP 8.3 is available by default in Rocky Linux 9, but some packages may not be included. To ensure all required modules are accessible, you need to add and enable the Remi repository for PHP 8.3.
Add the Remi repository.
console$ sudo dnf install https://rpms.remirepo.net/enterprise/remi-release-9.rpm
The Remi repository is a trusted third-party repo that maintains up-to-date PHP builds for Enterprise Linux distributions.
Enable the Remi repository and PHP 8.3 module.
console$ sudo dnf config-manager --set-enabled remi $ sudo dnf module enable php:remi-8.3
Install PHP 8.3, PHP-FPM, and required extensions.
console$ sudo dnf install php php-fpm php-intl php-sodium php-ctype \ php-curl php-dom php-gd php-mbstring php-posix php-session \ php-xml php-zip php-zlib php83-php-pecl-redis php-mysqlnd -y
Edit the PHP-FPM configuration to use the
nginxuser.console$ sudo nano /etc/php-fpm.d/www.conf
Change the following lines:
iniuser = nginx group = nginx
Increase the PHP memory limit.
console$ sudo nano /etc/php.ini
Change the following line:
inimemory_limit = 512M
Enable and start PHP-FPM.
console$ sudo systemctl enable --now php-fpm
Update SELinux to allow PHP-FPM access to the MariaDB socket.
console$ sudo semanage fcontext -a -t mysqld_var_run_t "/var/lib/mysql/mysql.sock"
Restart all services to apply the changes.
console$ sudo systemctl restart php-fpm nginx mariadb
Install and Configure Nginx Web Server
Nextcloud requires a web server to serve its frontend and handle PHP requests. Nginx is a lightweight and high-performance web server well-suited for this task. Follow these steps to install and configure it.
Install Nginx.
console$ sudo dnf install nginx -y
DNF automatically accepts the GPG key and installs the stable version from the configured repository.
Enable and start the Nginx service.
console$ sudo systemctl enable --now nginx
Verify that Nginx is active.
console$ sudo systemctl status nginx
The output should indicate that the service is active (running).
Allow HTTP and HTTPS traffic through the firewall.
console$ sudo firewall-cmd --zone=public --permanent --add-port=80/tcp $ sudo firewall-cmd --zone=public --permanent --add-port=443/tcp
Reload the firewall to apply the changes.
console$ sudo firewall-cmd --reload
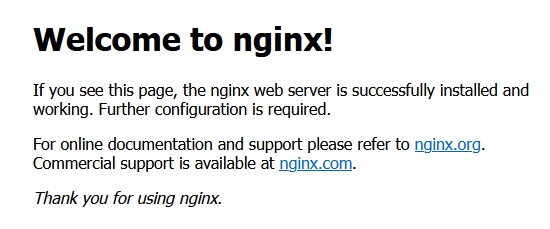
Visit your server’s IP address in a browser. If Nginx is installed correctly, the default welcome page appears:
Change file ownership for the Nextcloud directory to allow Nginx to read and execute the files.
console$ sudo chown -R nginx:nginx /var/www/nextcloud
Set directory permissions to give the owner read, write, and execute access.
console$ sudo chmod -R 750 /var/www/nextcloud
Create a new configuration file for Nextcloud.
console$ sudo nano /etc/nginx/conf.d/nextcloud.conf
Add the following content. Replace
nextcloud.example.comwith your actual domain.ini# PHP-FPM socket upstream php-handler { server unix:/run/php-fpm/www.sock; } # Cache control for assets map $arg_v $asset_immutable { "" ""; default ", immutable"; } server { listen 80; listen [::]:80; server_name nextcloud.example.com; root /var/www/nextcloud; server_tokens off; client_max_body_size 512M; client_body_timeout 300s; fastcgi_buffers 64 4K; gzip on; gzip_vary on; gzip_comp_level 4; gzip_min_length 256; gzip_proxied expired no-cache no-store private no_last_modified no_etag auth; gzip_types application/atom+xml text/javascript application/javascript application/json application/ld+json application/manifest+json application/rss+xml application/vnd.geo+json application/vnd.ms-fontobject application/wasm application/x-font-ttf application/x-web-app-manifest+json application/xhtml+xml application/xml font/opentype image/bmp image/svg+xml image/x-icon text/cache-manifest text/css text/plain text/vcard text/vnd.rim.location.xloc text/vtt text/x-component text/x-cross-domain-policy; client_body_buffer_size 512k; add_header Referrer-Policy "no-referrer" always; add_header X-Content-Type-Options "nosniff" always; add_header X-Frame-Options "SAMEORIGIN" always; add_header X-Permitted-Cross-Domain-Policies "none" always; add_header X-Robots-Tag "noindex, nofollow" always; add_header X-XSS-Protection "1; mode=block" always; fastcgi_hide_header X-Powered-By; include mime.types; types { text/javascript mjs; } index index.php index.html /index.php$request_uri; location = / { if ($http_user_agent ~ ^DavClnt) { return 302 /remote.php/webdav/$is_args$args; } } location = /robots.txt { allow all; log_not_found off; access_log off; } location ^~ /.well-known { location = /.well-known/carddav { return 301 /remote.php/dav/; } location = /.well-known/caldav { return 301 /remote.php/dav/; } location /.well-known/acme-challenge { try_files $uri $uri/ =404; } location /.well-known/pki-validation { try_files $uri $uri/ =404; } return 301 /index.php$request_uri; } location ~ ^/(?:build|tests|config|lib|3rdparty|templates|data)(?:$|/) { return 404; } location ~ ^/(?:\.|autotest|occ|issue|indie|db_|console) { return 404; } location ~ \.php(?:$|/) { rewrite ^/(?!index|remote|public|cron|core/ajax/update|status|ocs/v[12]|updater/.+|ocs-provider/.+|.+/richdocumentscode(_arm64)?/proxy) /index.php$request_uri; fastcgi_split_path_info ^(.+?\.php)(/.*)$; set $path_info $fastcgi_path_info; try_files $fastcgi_script_name =404; include fastcgi_params; fastcgi_param SCRIPT_FILENAME $document_root$fastcgi_script_name; fastcgi_param PATH_INFO $path_info; fastcgi_param HTTPS on; fastcgi_param modHeadersAvailable true; fastcgi_param front_controller_active true; fastcgi_pass php-handler; fastcgi_intercept_errors on; fastcgi_request_buffering off; fastcgi_max_temp_file_size 0; } location ~ \.(?:css|js|mjs|svg|gif|ico|jpg|png|webp|wasm|tflite|map|ogg|flac)$ { try_files $uri /index.php$request_uri; add_header Cache-Control "public, max-age=15778463$asset_immutable"; add_header Referrer-Policy "no-referrer" always; add_header X-Content-Type-Options "nosniff" always; add_header X-Frame-Options "SAMEORIGIN" always; add_header X-Permitted-Cross-Domain-Policies "none" always; add_header X-Robots-Tag "noindex, nofollow" always; add_header X-XSS-Protection "1; mode=block" always; access_log off; } location ~ \.(?:otf|woff2?)$ { try_files $uri /index.php$request_uri; expires 7d; access_log off; } location /remote { return 301 /remote.php$request_uri; } location / { try_files $uri $uri/ /index.php$request_uri; } }
Test the Nginx configuration.
console$ sudo nginx -t
Output:
nginx: the configuration file /etc/nginx/nginx.conf syntax is ok
nginx: configuration file /etc/nginx/nginx.conf test is successful
Allow Nginx access to Nextcloud files using SELinux.
console$ sudo chcon -R -t httpd_sys_content_t /var/www/nextcloud
Restart Nginx web server.
console$ sudo systemctl restart nginx
Verify that the Nginx web server is running and active.
console$ sudo systemctl status nginx
Ensure the output shows
active (running)to confirm Nginx is operational
Secure Nextcloud with HTTPS
Use Certbot to automatically request and install a TLS certificate from Let’s Encrypt. Certbot integrates with Nginx to configure HTTPS and redirect HTTP traffic securely.
Install Certbot and the Nginx plugin.
console$ sudo dnf install certbot python3-certbot-nginx -y
Generate and install the TLS certificate.
console$ sudo certbot --nginx -d nextcloud.example.com
--nginx: Uses the Nginx plugin to automatically configure HTTPS.-d nextcloud.example.com: Replace with your actual domain name.
When prompted:
- Enter your email address for renewal notifications.
- Accept the terms of service.
- Choose the option to redirect all HTTP traffic to HTTPS.
Ensure that port 80 (HTTP) and 443 (HTTPS) are open in the firewall before running Certbot.
Docker provides isolated environments for deploying applications like Nextcloud. This section walks you through installing Docker on Rocky Linux 9 and setting up the required directory structure for a containerized Nextcloud deployment.
Install Docker
Update the package index.
console$ sudo dnf makecache
Add the official Docker repository.
console$ sudo dnf config-manager --add-repo https://download.docker.com/linux/rhel/docker-ce.repo
Install Docker packages.
console$ sudo dnf install docker-ce docker-ce-cli containerd.io \ docker-buildx-plugin docker-compose-plugin -y
Enable and start the Docker service.
console$ sudo systemctl enable --now docker
Verify Docker is running.
console$ sudo systemctl status docker
Ensure the output shows
active (running)to confirm Docker is operational.Add your user to the
dockergroup to avoid usingsudo.console$ sudo usermod -aG docker $(whoami)
Log out and back in for group changes to take effect. Alternatively, restart your shell session.
Prepare Docker Directory for Nextcloud
Create the Nextcloud Docker configuration directory.
console$ sudo mkdir -p /opt/nextcloud-docker
Create an environment file for Docker Compose.
console$ sudo nano /opt/nextcloud-docker/.env
Add the following content (replace credentials and domain as needed).
iniMYSQL_DATABASE=nextcloud MYSQL_USER=nextcloud MYSQL_PASSWORD=SecurePassword123# MYSQL_ROOT_PASSWORD=SecurePassword# NEXTCLOUD_ADMIN_USER=admin NEXTCLOUD_ADMIN_PASSWORD=Passw0rd123$ DOMAIN=nextcloud.example.com EMAIL=admin@example.com
Variable Breakdown:
MYSQL_DATABASE: Name of the MariaDB database for Nextcloud.MYSQL_USER: Nextcloud’s database user.MYSQL_PASSWORD: Password for the Nextcloud DB user.MYSQL_ROOT_PASSWORD: Root password for MariaDB.NEXTCLOUD_ADMIN_USER: Initial Nextcloud admin username.NEXTCLOUD_ADMIN_PASSWORD: Password for the admin user.DOMAIN: Fully qualified domain for accessing Nextcloud.EMAIL: Email address used for TLS provisioning and admin alerts.
Save and close the file with
CTRL+O,Enter, thenCTRL+X.
Set Up Nextcloud Docker Services
Create the data directory on the host to store user uploads outside the container.
console$ sudo mkdir /opt/nextcloud-data
Set ownership to UID/GID
1000, the default Nextcloud user in Docker.console$ sudo chown -R 1000:1000 /opt/nextcloud-data
Set restrictive permissions.
console$ sudo chmod -R 750 /opt/nextcloud-data
Create Docker Compose Configuration
Create the Docker Compose file.
console$ sudo nano /opt/nextcloud-docker/docker-compose.yml
Add the following configuration:
yamlservices: nextcloud: image: nextcloud:stable container_name: nextcloud restart: always depends_on: - db - redis env_file: - .env environment: - MYSQL_HOST=db - REDIS_HOST=redis - VIRTUAL_HOST=${DOMAIN} volumes: - nextcloud_app:/var/www/html - /opt/nextcloud-data:/var/www/html/data ports: - "8080:80" networks: - internal db: image: mariadb:11.4.7 container_name: nextcloud-db restart: always env_file: - .env volumes: - db_data:/var/lib/mysql networks: - internal redis: image: redis:alpine container_name: nextcloud-redis restart: always networks: - internal volumes: nextcloud_app: db_data: networks: internal: driver: bridge
Adjust the domain names, passwords, and other values in the
.envfile to match your setup.
Launch the Nextcloud Stack
Navigate to the
nextcloud-dockerdirectory.console$ cd /opt/nextcloud-docker/
Validate the configuration.
console$ docker compose config
Start the containers in detached mode.
console$ docker compose --env-file .env up -d
Verify that the Nextcloud container is responding on port 8080.
console$ curl -I http://localhost:8080
You should see a
302 Foundredirect to/login.List running containers.
console$ docker container ls
Output:
CONTAINER ID   IMAGE              COMMAND                  PORTS               NAMES
abc123...      nextcloud:stable   ...                      8080->80/tcp        nextcloud
def456...      mariadb:11.4.7     ...                      3306/tcp            nextcloud-db
ghi789...      redis:alpine       ...                      6379/tcp            nextcloud-redis
Set the trusted domain for web access.
console$ docker container exec -u www-data nextcloud php occ config:system:set trusted_domains 1 --value=nextcloud.example.com
Replace
nextcloud.example.comwith your actual domain.
Configure Nextcloud
After deploying Nextcloud with Docker Compose, configure Nginx as a reverse proxy and secure the setup with HTTPS using Let's Encrypt certificates.
Install Nginx
Install the Nginx web server.
console$ sudo dnf install nginx -y
Enable and start Nginx.
console$ sudo systemctl enable --now nginx
Configure Nginx as a Reverse Proxy
Create a new Nginx configuration file.
console$ sudo nano /etc/nginx/sites-available/nextcloud
Paste the following content, replacing
nextcloud.example.comwith your domain.iniserver { listen 80; server_name nextcloud.example.com; location / { proxy_pass http://localhost:8080/; proxy_set_header Host $host; proxy_set_header X-Real-IP $remote_addr; proxy_set_header X-Forwarded-For $proxy_add_x_forwarded_for; proxy_set_header X-Forwarded-Proto $scheme; } }
Enable the configuration.
console$ sudo ln -s /etc/nginx/sites-available/nextcloud /etc/nginx/sites-enabled/
Test the Nginx configuration file.
console$ sudo nginx -t
Reload the Nginx service to apply the new configuration.
console$ sudo systemctl reload nginx
Verify that Nginx is running.
console$ sudo systemctl status nginx
Ensure the output shows
active (running).
Allow Nginx Through the Firewall
Allow HTTP and HTTPS traffic.
console$ sudo ufw allow 'Nginx Full'
Reload the firewall to apply changes.
console$ sudo ufw reload
Secure Nextcloud with Trusted SSL
Install Certbot and the Nginx plugin.
console$ sudo apt install certbot python3-certbot-nginx -y
Generate and install the TLS certificate.
console$ sudo certbot --nginx -d nextcloud.example.com
Certbot will automatically configure Nginx to redirect HTTP to HTTPS.
Enable Automatic Renewal
Enable the Certbot renewal timer.
console$ sudo systemctl enable certbot.timer
Test automatic renewal.
console$ sudo certbot renew --dry-run
Set Trusted Domain and Force HTTPS
Copy the config file from the Nextcloud container.
console$ docker container cp nextcloud:/var/www/html/config/config.php ~/config.php
The command above copies
config.phpfrom the running container to your home directory.Edit
config.phpand update the following lines:php'trusted_domains' => ['nextcloud.example.com'], 'overwrite.cli.url' => 'https://nextcloud.example.com', 'overwriteprotocol' => 'https',
Copy the updated
config.phpfile back into the Nextcloud container.console$ docker container cp ~/config.php nextcloud:/var/www/html/config/config.php
Open an interactive shell inside the Nextcloud container.
console$ docker container exec -it nextcloud bash
Change the ownership of the config file to
www-data.console# chown www-data:www-data /var/www/html/config/config.phpSet the correct permissions on the config file.
console# chmod 640 /var/www/html/config/config.phpExit the container.
console# exitRestart the container to apply changes.
console$ docker container restart nextcloud
Access and Set Up Nextcloud
Once the setup is complete and the containers are running, access your instance by visiting:
https://nextcloud.example.comFrom the setup wizard:
- Create an admin username and secure password
- Set the data folder path (leave default unless changed)
- Choose MySQL/MariaDB as the database type
- Enter:
- Database user:
nextcloud - Password: the one you configured
- Database name:
nextcloud - Host:
db(if using Docker) or127.0.0.1(if using local MariaDB)
- Database user:
After completing the setup, you can extend Nextcloud with additional apps, organize and share files, and sync data across devices using the web interface or mobile and desktop clients. This gives you a centralized platform to manage your private cloud storage through an intuitive dashboard.
Conclusion
In this article, you deployed Nextcloud on Rocky Linux 9 using either a manual installation or a Docker-based setup. You secured the deployment with Nginx and HTTPS, configured the database and Redis, and ensured that user data persists on the host system for easier backups.
The containerized deployment offers isolation, efficient resource use, and flexibility, while the manual method provides granular control over the environment. For advanced features such as external storage and groupware tools, see the Nextcloud documentation.