
How to Install NextCloud on Ubuntu 22.04 with Snap
Introduction
NextCloud is an open-source, self-hosted file management platform that allows you to create, edit, host, and share files without restrictions. It's a powerful and secure solution for anyone looking to maintain full control over their data, whether for personal use or team collaboration. Installing NextCloud on Ubuntu 22.04 using Snap simplifies the process by bundling all necessary dependencies into a single package, enabling quick setup with minimal configuration. Snap also offers automatic updates and enhanced security, making it an efficient and reliable way to deploy and maintain your NextCloud instance.
In this article, we’ll walk you through the steps to install NextCloud on Ubuntu 22.04 using Snap, a quick and efficient way to get up and running with minimal configuration. If you're using an earlier version of Ubuntu or a different distribution, check out our guides on installing NextCloud on Ubuntu 20.04 and installing NextCloud on Debian 10.
Snaps are Linux packages that are easy, quick, and dependency-free to install on a server, making them an ideal way to install NextCloud with Snap. The NextCloud Snap package consists of the following components:
- PHP
- MySQL
- Redis®
- Apache2.4
- mDNS
- NextCloud 24
Prerequisites
- Deploy a fresh Ubuntu server on Vultr.
- Set up a subdomain A record pointing to the server.
- Use SSH to access the server console as a non-root user with sudo privileges.
- Update the Server.
Install NextCloud on Ubuntu 22.04 with Snap
By default, the Snap daemon is active on most Ubuntu server distributions, which allows you to easily install applications like NextCloud with Snap. If it's not already installed or active, you can enable it using the following command.
$ sudo apt install snapdVerify the installed snap version.
$ sudo snap versionOutput:
 snap    2.57.1
 snapd   2.57.1
 series  16
 ubuntu  22.04
 kernel  5.15.0-41-generic
Install NextCloud.
$ sudo snap install nextcloudVerify that NextCloud is successfully installed
$ sudo snap list
Configure NextCloud
NextCloud files are all stored in the /snap/nextcloud/current/htdocs/ directory, and the configuration file in the /var/snap/nextcloud/current directory. To enable NextCloud access on your domain name, include it in the trusted domains array of the configuration file.
First, configure Uncomplicated Firewall (UFW) to allow HTTP network traffic on the server port
80.$ sudo ufw allow 80/tcpAllow HTTPS on port
443.$ sudo ufw allow 443/tcpRestart the Firewall.
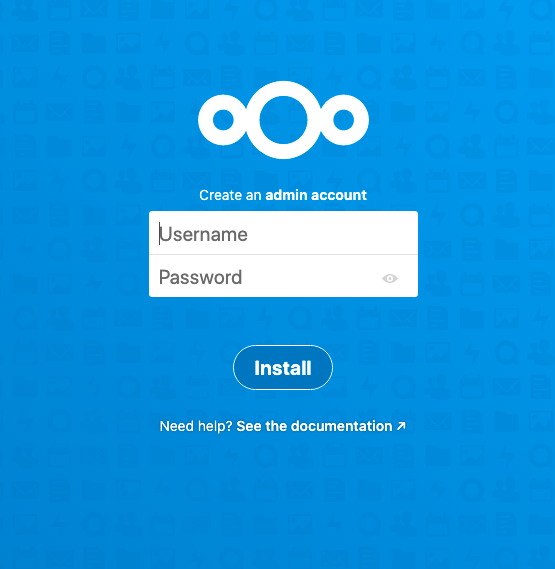
$ sudo ufw reloadTo activate the NextCloud database and configuration file values, visit your Server IP using a web browser.
http://192.0.2.1Enter a username and strong password to create the first administrator account, and click Install.
Close the web browser and switch to your server console.
Using a text editor of your choice, edit the main NextCloud configuration file.
$ sudo nano /var/snap/nextcloud/current/nextcloud/config/config.phpFind the "trusted_domains' =>` section, and replace the Server IP with your domain name as below.
 'trusted_domains' =>
    array (
       0 => 'nextcloud.example.com',
     ),
Save and close the file.
Install a Let's Encrypt SSL certificate to secure your NextCloud server with HTTPS by running the following command.
$ sudo nextcloud.enable-https lets-encryptYour output should look like the one below.
  In order for Let's Encrypt to verify that you actually own the
  domain(s) for which you're requesting a certificate, there are a
  number of requirements of which you need to be aware:

  1. In order to register with the Let's Encrypt ACME server, you must
     agree to the currently-in-effect Subscriber Agreement located
     here:

       https://letsencrypt.org/repository/

  By continuing to use this tool you agree to these terms. Please
  cancel now if otherwise.

  2. You must have the domain name(s) for which you want certificates
     pointing at the external IP address of this machine.

  3. Both ports 80 and 443 on the external IP address of this machine
     must point to this machine (e.g. port forwarding might need to be
     setup on your router).

  Have you met these requirements? (y/n)
Enter `y' to accept all SSL certificate requirements, enter your email address, then enter your domain name.
Restart NextCloud to load changes.
Using a web browser of your choice, visit your server domain name.
https://nextcloud.example.comLogin using the administrator username and password you created earlier to access the NextCloud dashboard.
Next Steps
You have installed NextCloud on Ubuntu 22.04 server using Snap. Please refer to the following articles to power up your NextCloud server with more features.
- NextCloud-Snap GitHub Repository.
- NextCloud documentation.
- How to use NextCloud with Vultr Block Storage and Object Storage.
- How to Integrate the Collabora Online office with NextCloud on a Vultr Cloud Server.