
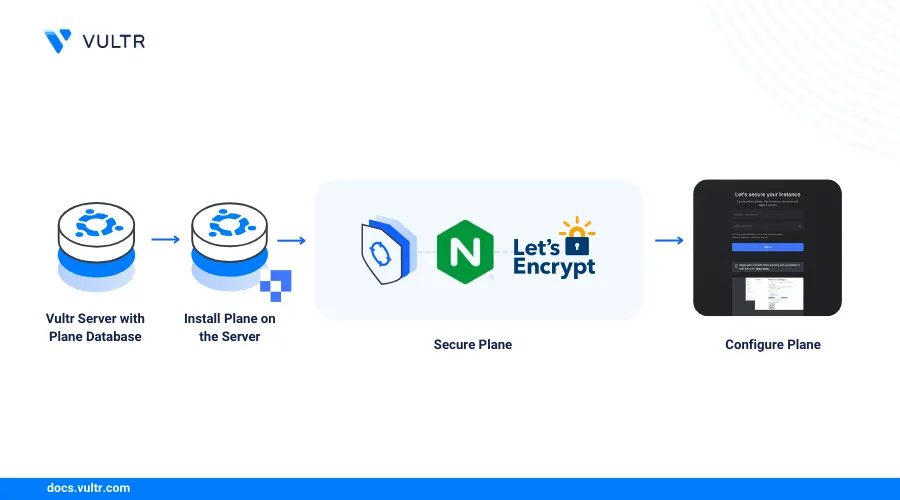
How to Deploy Plane – An Opensource Jira Alternative
Introduction
Plane is a highly extensible open-source project management tool that supports several types of frameworks such as Agile, Kanban, waterfall, and timelines. It’s an alternative to platforms such as Jira, Asana, and Linear that lets you self-host all application resources in a containerized environment using tools such as Docker or Kubernetes.
This guide explains how to deploy Plane on a Vultr cloud server and set up an issue-tracking environment with trusted SSL certificates, email notifications, and authentication methods to secure your application.
Prerequisites
Deploy a One-Click Docker Server using the Vultr marketplace application with at least
4 GBRAM.Deploy a Vultr Managed Database for PostgreSQL to use with Plane.
Deploy Vultr Object Storage to use as the default Plane storage.
Create a non-root user with sudo privileges.
Add the user to the Docker group. For example,
linuxuser.console# usermod -aG docker linuxuserSwitch to the non-root user account.
console# su linuxuser
Create the Plane Database
The default Plane PostgreSQL database installed within the application's Docker environment does not offer the best performance in production environments. Offload the Plane database privileges to a Vultr Managed Database for PostgreSQL to improve the application's availability and performance in addition to offsite data storage. Follow the steps below to create a new Plane database using your Vultr Managed Database for PostgreSQL.
Log in to your Vultr Managed Database for PostgreSQL using a connection string. Replace
abcd.vultrdb.comwith your actual database host URL.console$ psql postgres://vultradmin:password@abcd.vultrdb.com:16751/defaultdb
When prompted, enter your Vultr Managed Database for PostgreSQL user password to access the cluster.
Create a new database to use with Plane. For example,
planedb.postgresqldefaultdb=> CREATE DATABASE planedb;
Switch to the database.
postgresqldefaultdb=> \c planedb;
Create a new sample table to verify that your PostgreSQL user has
CREATEpermissions on the database.postgresqlplanedb=> CREATE TABLE people ( country VARCHAR(255), continent VARCHAR(255), age INT);
Exit the PostgreSQL console.
postgresqlplanedb=> \q
Plane requires a super user PostgreSQL account such as
vultradminto successfully migrate data and create all necessary resources in the database. Non-super user accounts are not compatible with Plane when using external databases due to required root-level permissions.
Install Plane on the Server
Create a new Plane project directory.
console$ mkdir plane
Switch to the directory.
console$ cd plane
Download the latest Plane installation script using Curl.
console$ curl -fsSL -o setup.sh https://raw.githubusercontent.com/makeplane/plane/master/deploy/selfhost/install.sh
Grant execute privileges on the script.
console$ chmod +x setup.sh
Run the Plane installation script.
console$ ./setup.shOutput:
---------------------------------------
____  _
|  _ \| | __ _ _ __   ___
| |_) | |/ _` | '_ \ / _ \
|  __/| | (_| | | | |  __/
|_|   |_|\__,_|_| |_|\___|

---------------------------------------
Project management tool from the future
---------------------------------------

Select a Action you want to perform:
 1) Install (x86_64)
 2) Start
 3) Stop
 4) Restart
 5) Upgrade
 6) View Logs
 7) Exit

Action []:
Enter
1as the action value and press Enter to install the initial Plane configuration on your server.Verify that the process is successful similar to the output below:
Installing Plane..........
WARN[0000] /root/plane/plane-app/docker-compose.yaml: `version` is obsolete
[+] Pulling 10/10
✔ plane-redis Skipped - Image is already present locally                                                0.0s
✔ worker Skipped - Image is already being pulled by beat-worker                                         0.0s
✔ api Skipped - Image is already being pulled by beat-worker                                            0.0s
✔ migrator Skipped - Image is already being pulled by beat-worker                                       0.0s
✔ plane-db Skipped - Image is already present locally                                                   0.0s
✔ proxy Pulled                                                                                          2.5s
✔ plane-minio Pulled                                                                                    2.7s
✔ space Pulled                                                                                          2.5s
✔ beat-worker Pulled                                                                                    2.5s
✔ web Pulled                                                                                            2.5s

Latest version is now available for you to use
Enter
7as the action value and press Enter to exit the installation script.List the project directory files and verify that a new
plane-appdirectory is available.console$ lsSwitch to the directory.
console$ cd plane-app
List all directory files to verify that new
docker-compose.yamland.envfiles are available.console$ ls -a
Output:
. .. archive docker-compose.yaml .envOpen the
.envenvironment variables file to modify the Plane installation values.console$ nano .env
Find the
NGINX_PORTfield and replace the default port80with another port such as8080.NGINX_PORT=8080Save the file.
Find
WEB_URLand replacehttp://localhostwith your domain URL. For example,https://plane.example.com.WEB_URL=https://plane.example.comSave the file.
Find the NEXT_PUBLIC_DEPLOY_URL field and change
http://localhost/spacesto your domain URL while maintaining the/spacespath.NEXT_PUBLIC_DEPLOY_URL=https://plane.example.com/spacesSave the file.
Scroll to the CORS_ALLOWED_ORIGINS field and change
http://localhostto your domain URL.CORS_ALLOWED_ORIGINS=https://plane.example.comSave the file.
Find the DB Settings section and replace all default variable values with your Vultr Managed Database for PostgreSQL details. In particular, replace the DATABASE_URL variable value with your full Vultr Managed Database for PostgreSQL connection string similar to the configuration below.
#DB SETTINGS
PGHOST=abcd.vultrdb.com
PGDATABASE=planedb
POSTGRES_USER=vultradmin
POSTGRES_PASSWORD=password
POSTGRES_DB=planedb
PGDATA=/var/lib/postgresql/data
DATABASE_URL=postgres://vultradmin:password@abcd.vultrdb.com:16751/planedb
Save and close the file.
Replace the above Vultr Managed Database for PostgreSQL connection details with your matching values depending on the variable field:
- PGHOST: Your Vultr Managed Database for PostgreSQL URL.
- PGDATABASE: The target PostgreSQL database to use with Plane.
- POSTGRES_USER: Your PostgreSQL Database Username.
- POSTGRES_PASSWORD: Your PostgreSQL database user password
- POSTGRES_DB: The PostgreSQL Database to use with Plane.
- PGDATA: The host directory path to store your PostgreSQL data files.
- DATABASE_URL: The Vultr Managed Database for PostgreSQL connection string to use when connecting to the database.
Scroll to the DATA STORE SETTINGS section to set up the Plane connection to Vultr Object Storage.
Modify the default variable values with your Vultr Object Storage details to use with Plane.
# DATA STORE SETTINGS
USE_MINIO=0
AWS_REGION=ewr
AWS_ACCESS_KEY_ID=example-access-key
AWS_SECRET_ACCESS_KEY=example-secret
AWS_S3_ENDPOINT_URL=https://ewr1.vultrobjects.com
AWS_S3_BUCKET_NAME=plane
MINIO_ROOT_USER=access-key
MINIO_ROOT_PASSWORD=secret-key
BUCKET_NAME=uploads
FILE_SIZE_LIMIT=5242880
Save and close the file.
Replace the above Vultr Object Storage example connection details with your actual values. Below is what each variable represents:
- USE_MINIO: The value
0disables the default MinIO object storage and enables external access variables. - AWS_REGION: Sets your Vultr Object Storage location. Replace
ewrwith your object storage location ID depending on the deployment region. - AWS_ACCESS_KEY_ID: Sets the Vultr Object Storage access key to use when connecting with Plane. Replace
example-access-keywith your actual object storage access key string. - AWS_SECRET_ACCESS_KEY: Sets the Vultr Object Storage secret key to authenticate with your access key. Replace
example-secretwith your actual secret key. - AWS_S3_ENDPOINT_URL: Sets the Vultr Object Storage host URL to store your Plane data files. Replace
ewr1.vultrobjects.comwith your actual object storage URL. - AWS_S3_BUCKET_NAME: Defines your Vultr Object Storage bucket to use with Plane. If the bucket does not exist, it’s auto-created upon installation. Replace the
planevalue with your desired bucket name.
- USE_MINIO: The value
Switch back to your main Plane project directory.
console$ cd ../
Run the Plane installation script again.
console$ ./setup.shEnter the action value
2(start) and press Enter to start the Plane installation.During installation, all database objects migrate to your Vultr Managed Database for PostgreSQL, and Vultr Object Storage is enabled as the default storage medium. When the installation is successful, your output should look like the one below:
✔ web Pulled            2.7s
✔ api Pulled            2.6s
✔ migrator Pulled       2.7s
✔ beat-worker Pulled    2.7s
✔ proxy Pulled          2.7s
✔ worker Pulled         2.8s
✔ space Pulled          2.6s
⠏ Network plane-app_default     Created  2.9s
⠇ Volume "plane-app_redisdata"  Created  2.8s
⠇ Volume "plane-app_uploads"    Created  2.8s
⠇ Volume "plane-app_pgdata"     Created  2.8s
✔ Container plane-app-plane-db-1 Started  0.6s
✔ Container plane-app-plane-redis-1 Started  0.6s
✔ Container plane-app-plane-minio-1 Started  0.5s
✔ Container plane-app-api-1     Started  0.9s
✔ Container plane-app-migrator-1 Started  1.1s
✔ Container plane-app-worker-1  Started  1.3s
✔ Container plane-app-beat-worker-1 Started  1.4s
✔ Container plane-app-web-1     Started  1.7s
✔ Container plane-app-space-1   Started  2.1s
✔ Container plane-app-proxy-1   Started  2.7s


1) Install (x86_64)
2) Start
3) Stop
4) Restart
5) Upgrade
6) View Logs
7) Exit
Enter the action value
7and press Enter to close the Plane installation script and verify the installation.View the list of running Docker containers and verify all active Plane instances.
console$ docker ps
Output:
CONTAINER ID   IMAGE                             COMMAND                  CREATED         STATUS              PORTS                                   NAMES
3709c99e7f33   makeplane/plane-proxy:latest      "/docker-entrypoint.…"   2 minutes ago   Up About a minute   0.0.0.0:8080->80/tcp, :::8080->80/tcp   plane-app-proxy-1
747480ec5bd6   makeplane/plane-space:latest      "docker-entrypoint.s…"   2 minutes ago   Up About a minute   3000/tcp                                plane-app-space-1
9ed0792056e5   makeplane/plane-frontend:latest   "docker-entrypoint.s…"   2 minutes ago   Up 2 minutes        3000/tcp                                plane-app-web-1
da03e3631f32   makeplane/plane-backend:latest    "./bin/beat"             2 minutes ago   Up 2 minutes        8000/tcp                                plane-app-beat-worker-1
46eeef24aad2   makeplane/plane-backend:latest    "./bin/worker"           2 minutes ago   Up 2 minutes        8000/tcp                                plane-app-worker-1
a64a2737f813   makeplane/plane-backend:latest    "./bin/takeoff"          2 minutes ago   Up 2 minutes        8000/tcp                                plane-app-api-1
eac0ca80f5d6   minio/minio                       "/usr/bin/docker-ent…"   2 minutes ago   Up 2 minutes        9000/tcp                                plane-app-plane-minio-1
12c94f7b2291   redis:6.2.7-alpine                "docker-entrypoint.s…"   2 minutes ago   Up 2 minutes        6379/tcp                                plane-app-plane-redis-1
662eea3ef147   postgres:15.2-alpine              "docker-entrypoint.s…"   2 minutes ago   Up 2 minutes        5432/tcp                                plane-app-plane-db-1
Send an HTTP request to the Plane host port
8080and test access to the application interface.console$ curl 127.0.0.1:8080
Your output should look like the one below:
<!DOCTYPE html><html><head><meta charSet="utf-8"/><meta name="viewport" content="width=device-width"/><title>Plane | Simple, extensible, open-source project management tool.</title><meta name="next-head-count" content="3"/><meta property="og:site_name" content="Plane | Simple, extensible, open-source project management tool."/><meta property="og:title" content="Plane | Simple, extensible, open-source project management tool."/><meta property="og:url" content="https://app.plane.so/"/><meta name="description" content="Open-source project management tool to manage issues, sprints, and product roadmaps with peace of mind."/><meta property="og:description" content="Open-source project management tool to manage issues, sprints, and product roadmaps with peace of mind."/><meta name="keywords" content="software development, plan, ship, software, accelerate, code management, release management, project management, issue tracking, agile, scrum, kanban, collaboration"/><meta name="twitter:site" content="@Plane | Simple, extensible, open-source project management tool."/><meta name="theme-color" content="#fff"/><link rel="apple-touch-icon" sizes="180x180" href="/favicon/apple-touch-icon.png"/><link rel="icon" type="image/png" sizes="32x32" href="/favicon/favicon-32x32.png"/><link rel="icon" type="image/png" sizes="16x16" href="/favicon/favicon-16x16.png"/><link rel="manifest" href="/site.webmanifest.json"/><link rel="shortcut icon" href="/favicon/favicon.ico"/><link rel="preload" href="/_next/static/css/54a545252dd6995d.css" as="style" crossorigin=""/><link rel="stylesheet" href="/_next/static/css/54a545252dd6995d.css" crossorigin="" data-n-g=""/><noscript data-n-css=""></noscript><script defer="" crossorigin="" nomodule="" src="/_next/static/chunks/polyfills-c67a75d1b6f99dc8.js"></script><script src="/_next/static/chunks/webpack-1b4c5bc8f318bd96.js" defer="" crossorigin="">Based on your Plane configuration, the application runs on the host port
8080defined by yourNGINX_PORTvalue in the.envfile. When the connection is successful, the request outputs HTML raw data that represents a successful connection to the Plane application.
Secure Plane
Plane is a project tracking platform normally used with specific teams, departments, or organizations. Secure Plane with production environment practices including secure firewall rules and trusted SSL certificates to expose the application using your domain name. Follow the sections below to generate valid SSL certificates using the Let’s Encrypt Certificate authority (CA) and allow connection-only ports through the default server firewall application.
Configure the Server Firewall
By default, Uncomplicated Firewall (UFW) is available and active as the default firewall package on Vultr Debian servers. Configure UFW to allow connection-only ports through the firewall to enable secure access to the Plane application resources.
Confirm the firewall status.
console$ sudo ufw status
Output:
Status: active

To                         Action      From
--                         ------      ----
22/tcp                     ALLOW       Anywhere
22/tcp (v6)                ALLOW       Anywhere (v6)
If disabled, allow the SSH port
22and enable the firewall using the following commands.console$ sudo ufw allow 22/tcp $ sudo ufw enable
Allow the HTTP connection port
80through the firewall.console$ sudo ufw allow 80/tcp
Allow the HTTPS connection port
443to enable secure TLS/SSL connections.console$ sudo ufw allow 443/tcp
Reload the firewall table to apply the new port changes.
console$ sudo ufw reload
View the firewall table to verify all available ports.
console$ sudo ufw status
Output:
Status: active

To                         Action      From
--                         ------      ----
22/tcp                     ALLOW       Anywhere
80/tcp                     ALLOW       Anywhere
443/tcp                    ALLOW       Anywhere
22/tcp (v6)                ALLOW       Anywhere (v6)
80/tcp (v6)                ALLOW       Anywhere (v6)
443/tcp (v6)               ALLOW       Anywhere (v6)
Install the Nginx Proxy Manager to Expose Plane using a Domain Name
Nginx Proxy Manager is a reverse proxy application that securely exposes Docker applications for external access on a server. In the following steps, install the Nginx Proxy Manager and attach it to the internal Plane Docker network. In addition, enable access to Plane using the domain name URL plane.example.com you defined in your .env configuration.
Print your working directory and verify that you are actively using the Plane project directory.
console$ pwd
Output:
/home/user/planeCreate a new data directory to store your Docker files. For example,
nginx-proxy-man.console$ mkdir nginx-proxy-man
Switch to the new data directory.
console$ cd nginx-proxy-man
Create a new Docker Compose file.
console$ touch docker-compose.yaml
Open the file using a text editor of your choice such as Nano.
console$ nano docker-compose.yaml
Add the following contents to the file.
yamlversion: '3.8' services: app: image: 'jc21/nginx-proxy-manager:latest' container_name: nginx-proxy-manager restart: unless-stopped ports: - '80:80' - '81:81' - '443:443' volumes: - ./data:/data - ./letsencrypt:/etc/letsencrypt
Save and close the file.
The above Docker configuration creates a new Nginx Proxy Manager container and exposes the application for access on the following host ports:
- 80: The default HTTP port used by the Nginx Proxy Manager to expose applications.
- 81: Enables access to the Nginx Proxy Manager control panel
- 443: Enables secure HTTPS access for exposed applications with valid SSL certificates generated by the Nginx Proxy Manager.
Test access to the HTTP and HTTPS host ports to verify that no existing conflicts are active on your server.
console$ sudo lsof -i :80,443
If no application actively uses the ports, your output appears empty similar to the one below:
COMMAND PID USER FD TYPE DEVICE SIZE/OFF NODE NAMEIf any application is using the ports, stop the application using the
Killcommand to avoid port conflicts with the Nginx Proxy Manager. For example, stop the process ID1234.console$ kill 1234
Install the Nginx Proxy Manager using your Docker Compose file.
console$ docker compose up -d
Monitor the installation and verify that it’s successful similar to the output below:
0ce5af7edd8a: Pull complete
0745a37aa26c: Pull complete
5460cddfb366: Pull complete
Digest: sha256:7f67eed835ed95108623183b35471f953630a7be480d6a2009bd79c68667ac77
Status: Downloaded newer image for jc21/nginx-proxy-manager:latest
Creating nginx-proxy-manager ... done
View all running Docker containers and verify that the Nginx Proxy Manager container is active.
console$ docker ps
Output:
CONTAINER ID   IMAGE                             COMMAND                  CREATED          STATUS          PORTS                                                                                  NAMES
6b5cccf3a26a   jc21/nginx-proxy-manager:latest   "/init"                  19 seconds ago   Up 18 seconds   0.0.0.0:80-81->80-81/tcp, :::80-81->80-81/tcp, 0.0.0.0:443->443/tcp, :::443->443/tcp   nginx-proxy-manager
3709c99e7f33   makeplane/plane-proxy:latest      "/docker-entrypoint.…"   5 minutes ago    Up 5 minutes    0.0.0.0:8080->80/tcp, :::8080->80/tcp                                                  plane-app-proxy-1
747480ec5bd6   makeplane/plane-space:latest      "docker-entrypoint.s…"   5 minutes ago    Up 5 minutes    3000/tcp                                                                               plane-app-space-1
9ed0792056e5   makeplane/plane-frontend:latest   "docker-entrypoint.s…"   5 minutes ago    Up 5 minutes    3000/tcp                                                                               plane-app-web-1
da03e3631f32   makeplane/plane-backend:latest    "./bin/beat"             5 minutes ago    Up 5 minutes    8000/tcp                                                                               plane-app-beat-worker-1
46eeef24aad2   makeplane/plane-backend:latest    "./bin/worker"           5 minutes ago    Up 5 minutes    8000/tcp                                                                               plane-app-worker-1
a64a2737f813   makeplane/plane-backend:latest    "./bin/takeoff"          5 minutes ago    Up 5 minutes    8000/tcp                                                                               plane-app-api-1
eac0ca80f5d6   minio/minio                       "/usr/bin/docker-ent…"   5 minutes ago    Up 5 minutes    9000/tcp                                                                               plane-app-plane-minio-1
12c94f7b2291   redis:6.2.7-alpine                "docker-entrypoint.s…"   5 minutes ago    Up 5 minutes    6379/tcp                                                                               plane-app-plane-redis-1
662eea3ef147   postgres:15.2-alpine              "docker-entrypoint.s…"   5 minutes ago    Up 5 minutes    5432/tcp                                                                               plane-app-plane-db-1
Verify the available Docker networks and keep note of the Plane network name.
console$ docker network ls
Output:
NETWORK ID     NAME                      DRIVER    SCOPE
7ec823c55c9d   bridge                    bridge    local
fa2aca31dd03   host                      host      local
2254ef893bb3   nginx-proxy-man_default   bridge    local
2ed043be89df   none                      null      local
ce8716e47741   plane-app_default         bridge    local
Attach Nginx Proxy Manager to the Plane network to enable internal access to the application.
console$ docker network connect plane-app_default nginx-proxy-manager
Access your server IP address on port
81to open the Nginx Proxy Manager control panel using a web browser such as Firefox. Replace172.16.0.2with your actual server IP address.http://172.16.0.2:81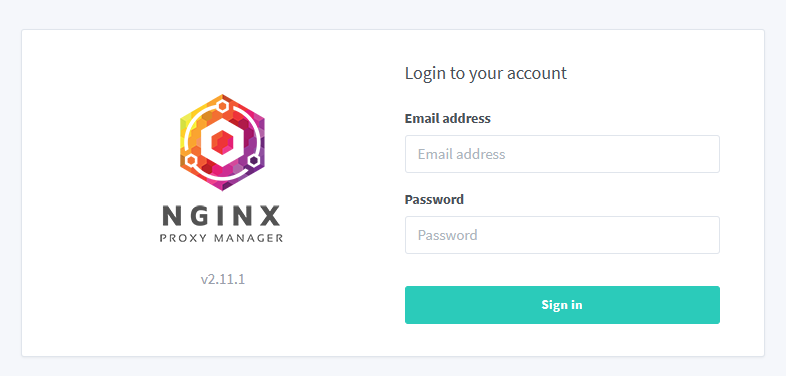
Enter the following default administrator information to log in to the application:
- USER:
admin@example.com - PASSWORD:
changeme
Change the administrative user details or close the Edit User dialog to access the application control panel.
- USER:
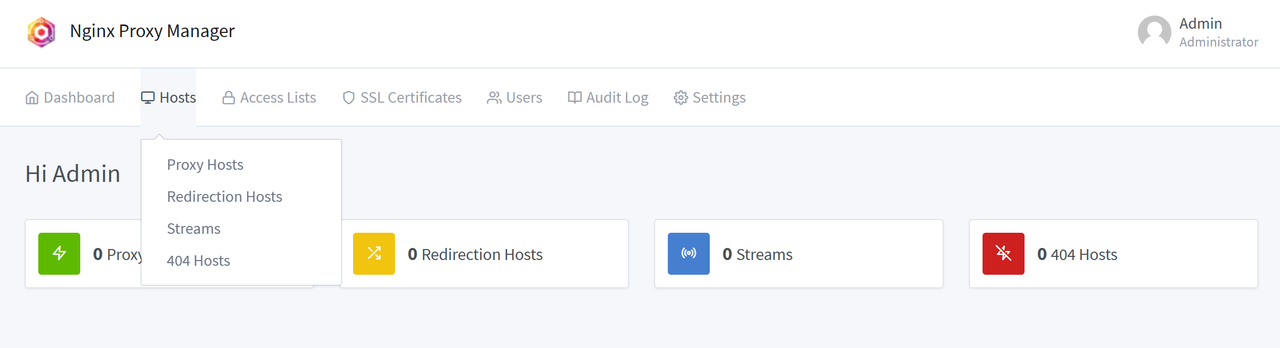
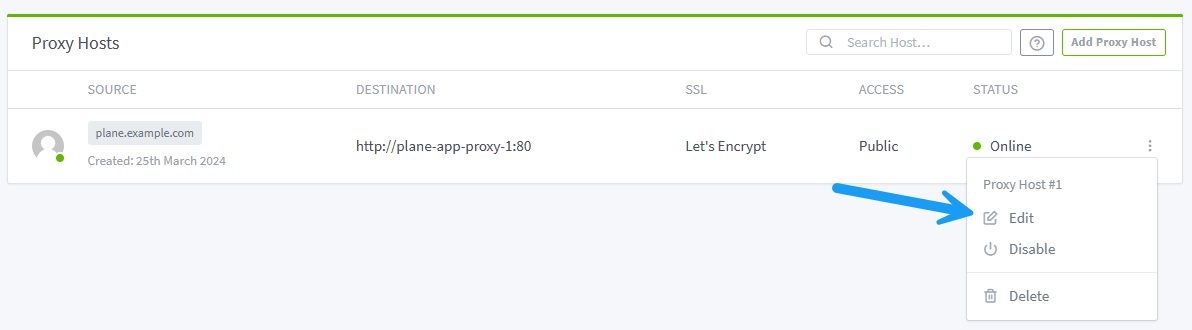
Click Hosts on the application navigation menu and select Proxy Hosts to create a new host configuration.
Click Add Proxy Host to open the host configuration page.
Enter your domain name in the Domain Names field and click the Add overlay to save your host domain.
Click the Scheme field and keep http as the connection type to access the internal Plane network.
Enter your main Plane container name
plane-app-proxy-1in the Forward Hostname/IP field.Enter the internal Plane proxy container port
80in the Forward Port field.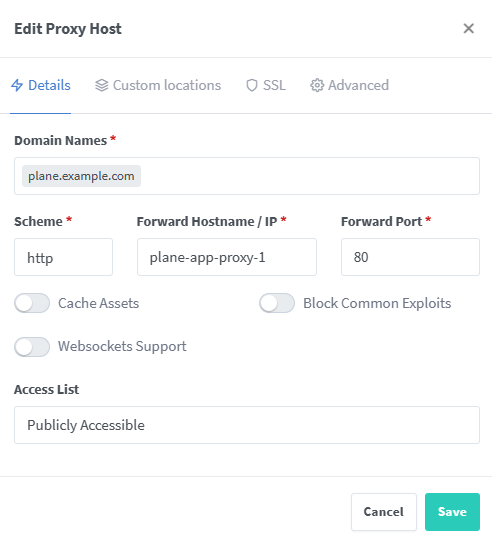
Keep Publicly Accessible as the access list value and click Save to apply the new host changes.
Open a new web browser tab and visit your domain to verify access to the Plane application interface.
http://plane.example.com
Generate Trusted SSL Certificates to use with Plane
Nginx Proxy Manager uses Let’s Encrypt as the default SSL certificate authority. In the following steps, modify the Plane host configuration and generate trusted SSL certificates to use with your domain name.
Login to the Nginx Proxy Manager control panel.
Click Hosts to access your host configurations.
Click the options : symbol next to Status and select Edit from the list to modify the host configuration.
Click the SSL tab in the Edit Host pop-up dialog.
Click the SSL Certificate field and select
Request a new SSL certificate with Let's Encryptfrom the list.Toggle Force SSL to enable automatic redirections from HTTP to HTTPS.
Enter your email address to associate with the Let’s Encrypt certificate request.
Toggle I Agree to the Let’s Encrypt Terms of Service option to agree to the SSL certificate authority terms.
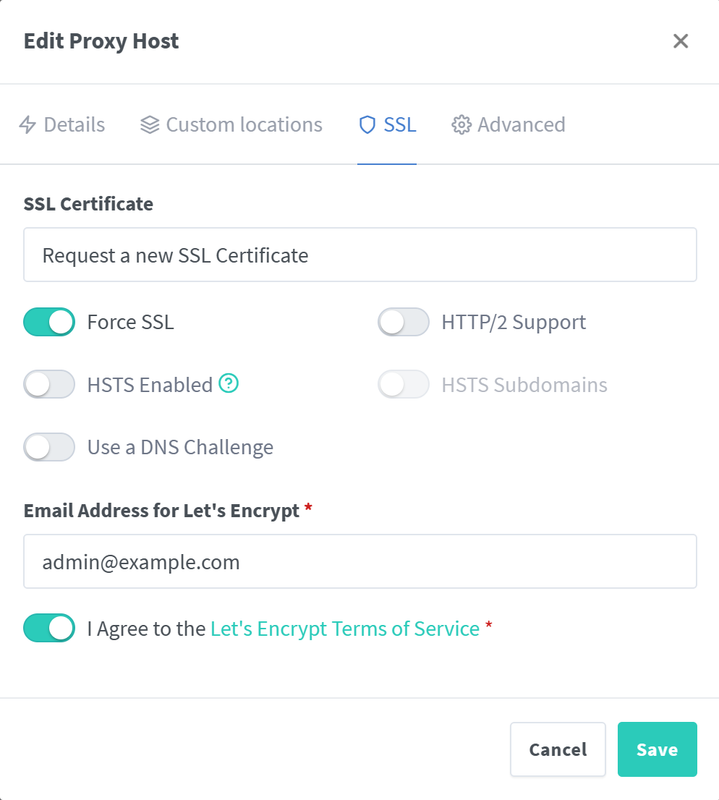
Click Save to apply the host configuration changes.
Open a new web browser tab and visit your domain over HTTPS to verify access to the Plane application using a secure connection.
https://plane.example.com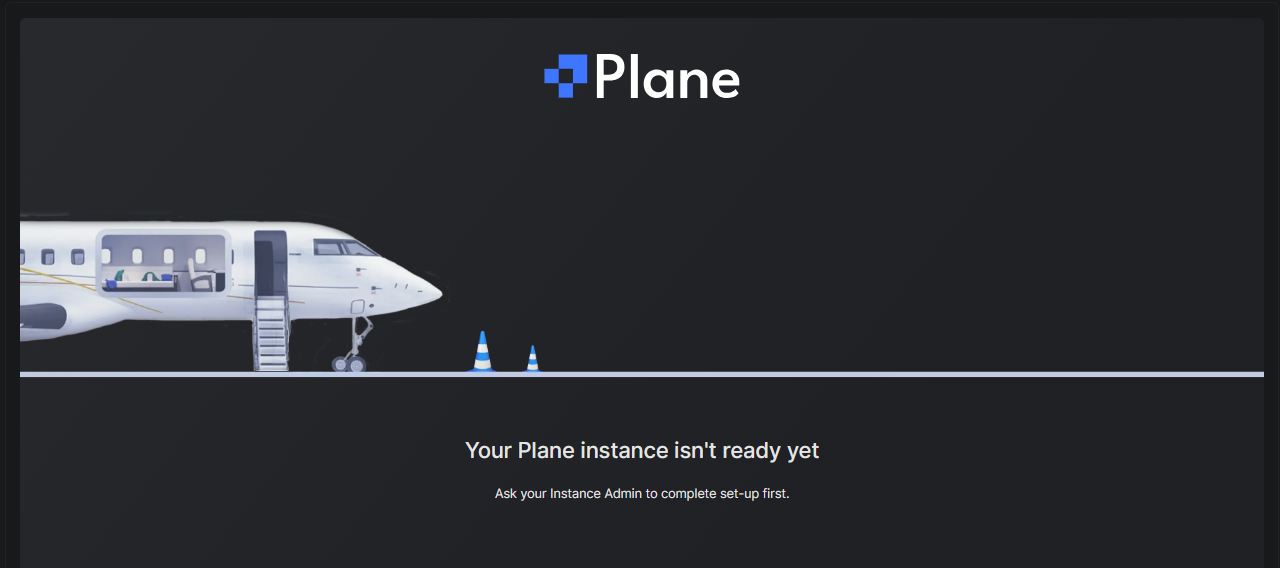
Configure Plane
Plane requires additional configurations when installed on your server to set up your application structure and invite additional users. In the following steps, configure the Plane interface and enable global options to activate with additional users for access on your server.
Open a new web browser window and access your Plane domain using the
/god-modepath to access the application configuration screen.https://plane.example.com/god-modeEnter your email address in the
name@company.comfield.Enter a strong password in the
Enter passwordfield to associate with the administrator email.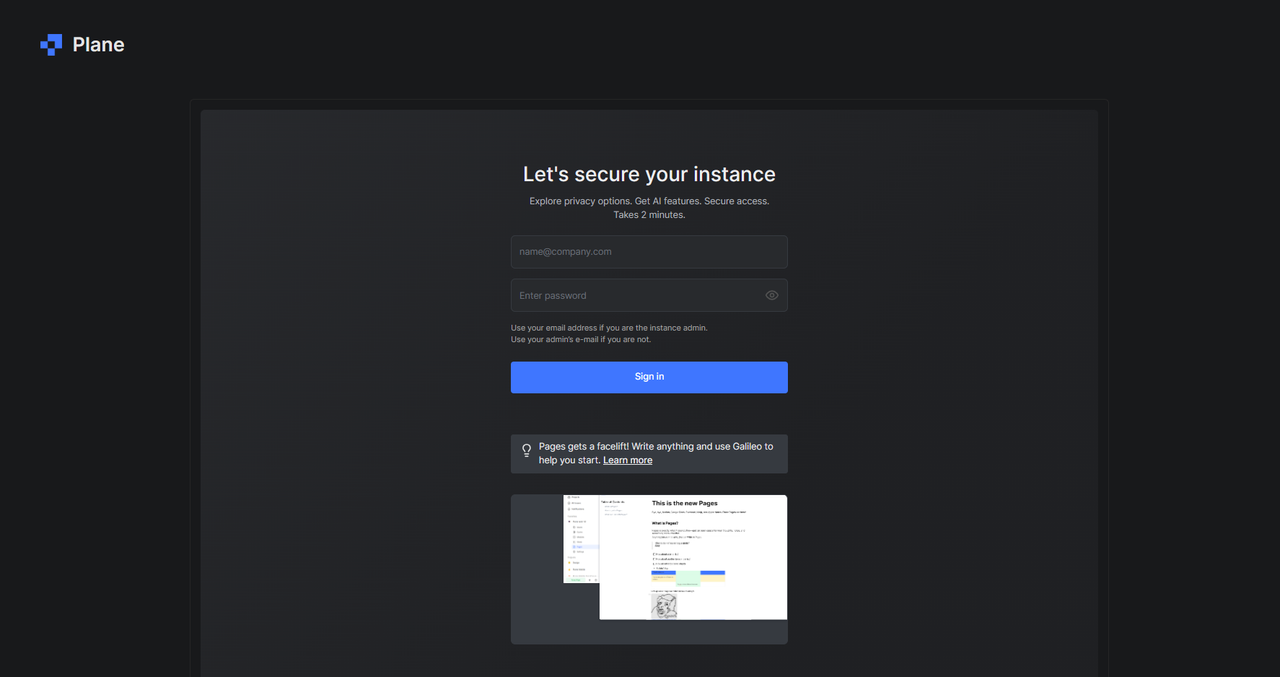
Click Sign in to create your Plane administrator account.
Click Go to God Mode to access the Plane instance configuration page.
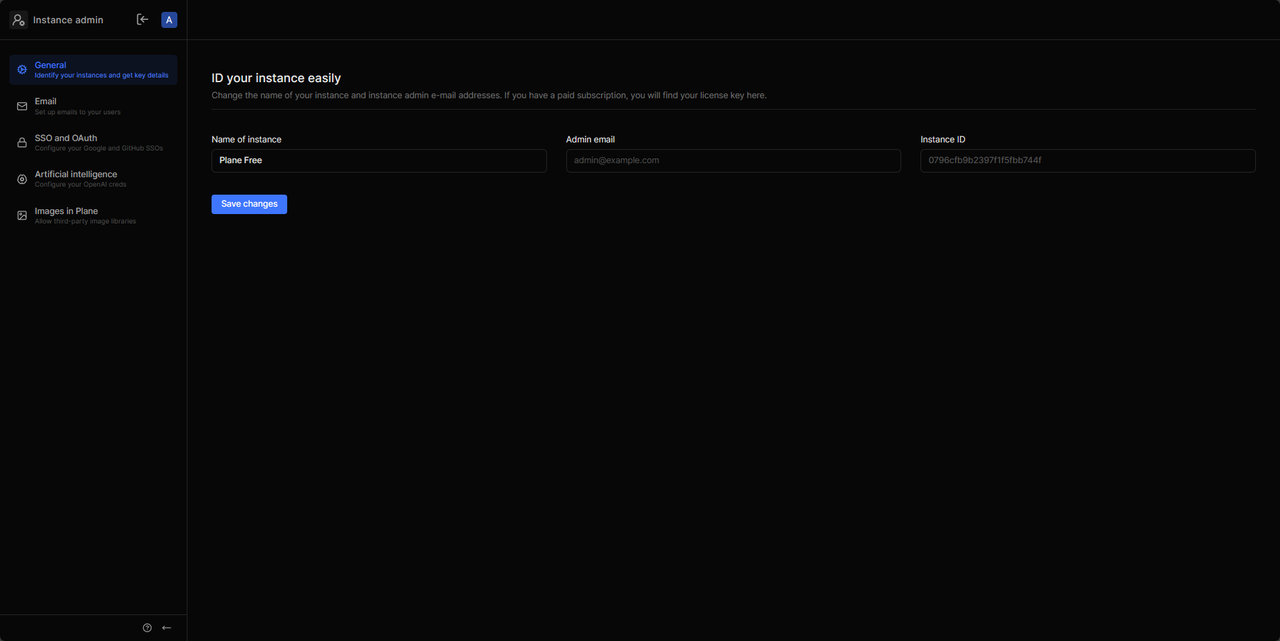
Enter your desired Plane application name in the Name of instance field and click Save Changes to save your instance details.
Click Email on the navigation bar to modify your Plane email notification settings and assign the application an SMTP host and a from address to send user emails.
Click Save Changes to apply your Plane application settings.
Click the Exit symbol on the top bar to exit God Mode and access your Plane instance.
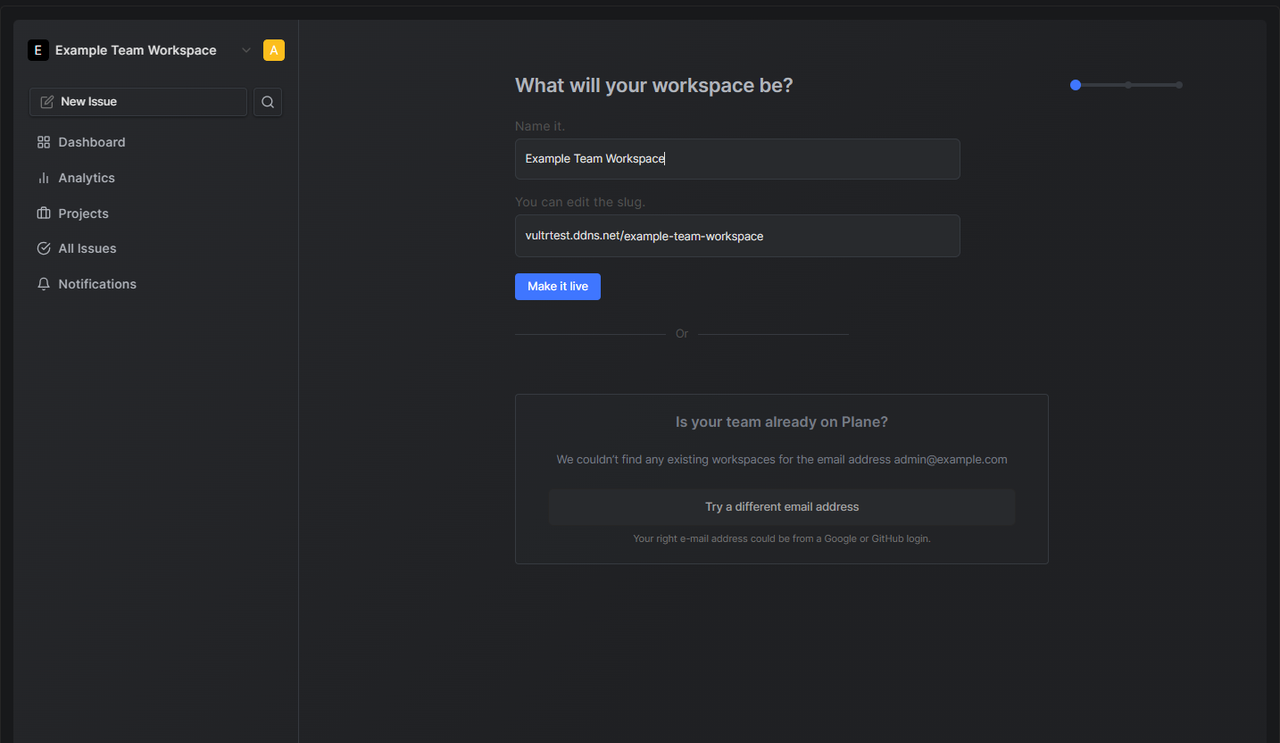
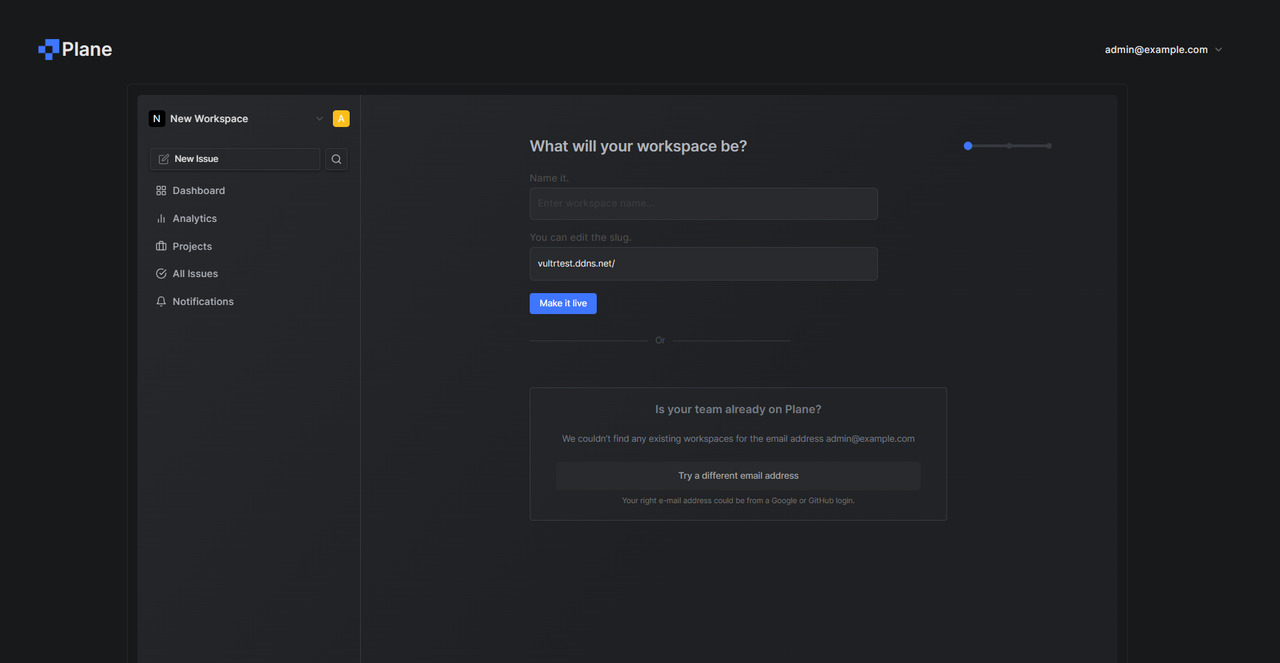
Enter your new workspace name in the Name it field, verify your domain URL, and click Make it live to create the workspace.
Enter your first user name in the
Enter your full namefield, select your plane usage category to personalize the workspace, and click Continue to apply the new changes.Enter your team email addresses and select the appropriate permissions to assign the new workspace users.
Click Invite members to send email notifications to the user email addresses or click Do this later to skip the invitation process depending on your email server settings.
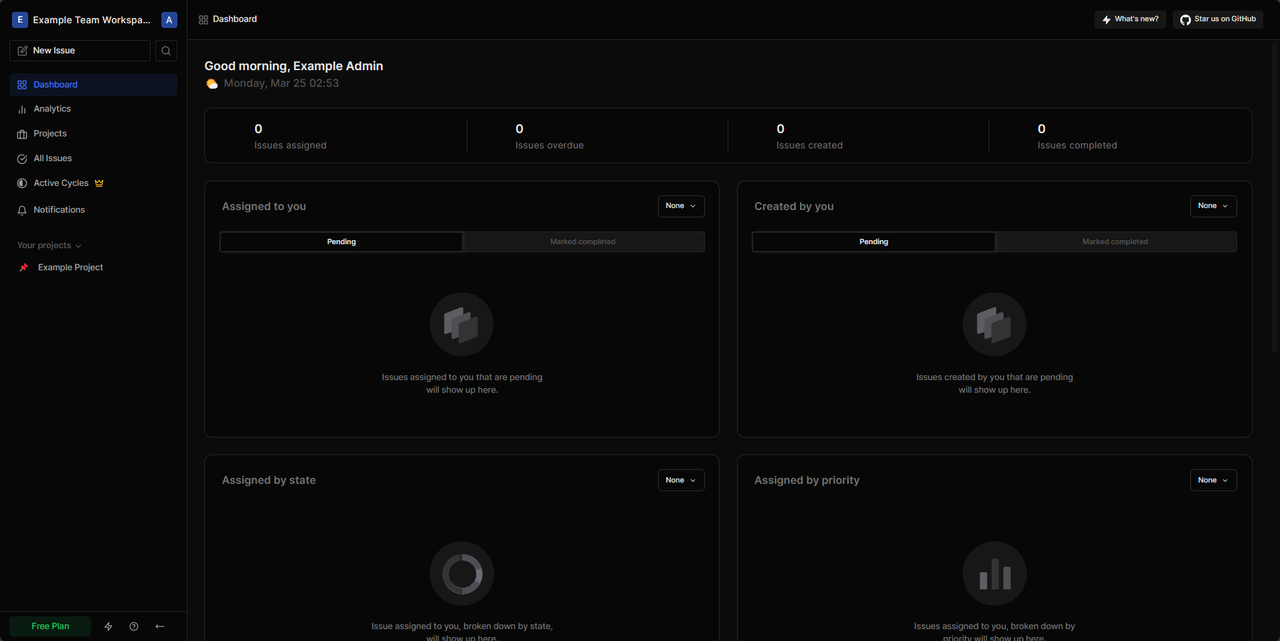
Confirm your new Plane instance workspace and click Take a Product Tour to explore all application features such as cycles, views, modules, analytics, and issues.
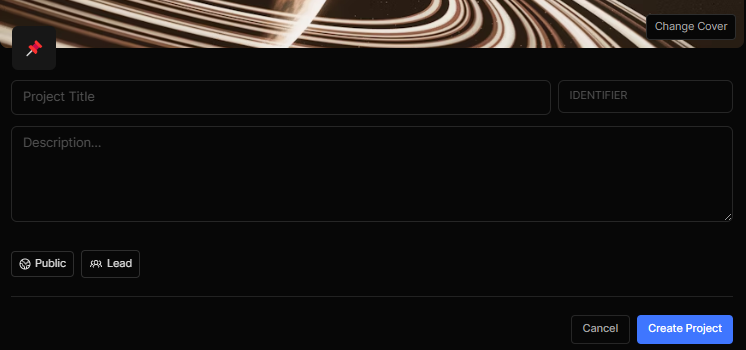
Click Create my first project to set up the first workspace project and access the main application interface.
To invite additional team members to the Plane application, click the Workspace name and select Settings to access the project Members list.
To modify your application settings, click your username icon on the top left bar and select Enter God Mode to access the instance configuration page.
Conclusion
In this guide, you have successfully deployed Plane on a Vultr cloud server and configured the application with production environment settings. The Vultr Managed Database for PostgreSQL works as the main database while Vultr Object Storage stores all Plane application assets. This improves the instance availability and performance similar to closed-source applications such as Jira and Linear. For more information, visit the official Plane documentation.