
How to Deploy Domino Nexus Data Plane on Vultr Kubernetes Engine (VKE)
Introduction
Vultr and Domino Data Labs have established a strategic alliance, combining Domino's state-of-the-art MLOps platform with Vultr's high-performance cloud services.
Domino Nexus is a comprehensive platform that allows you to execute Data Science and Machine Learning workloads across any compute cluster - whether in the cloud, a specific region, or on-premises. By unifying data science silos across the enterprise, Domino Nexus provides a centralized hub for building, deploying, and monitoring models.
This article demonstates the steps to deploy a Nexus Data Plane on the Vultr Kubernetes Engine (VKE). It also covers establishing a connection to a Nexus Control Plane managed by Domino and running a sample workload on a node pool of virtual A100 GPU machines.
Prerequisites
Before you begin, you should:
Deploy a Kubernetes cluster at Vultr with atleast 2 node pools. Select Kubernetes v1.24 for Domino compatibility.
- platform: Vultr Optimized Compute nodes running Domino Nexus Data services.
- default: Vultr Cloud GPU nodes for executing workloads. You can opt for either GPU or Non-GPU servers.
Install
kubectlandhelmon your local machine or Kubernetes workspace.
Add Node Labels
To make a node groups available to Domino, Kubernetes worker nodes require distinct dominodatalab.com/node-pool label.
Fetch the available nodes.
$ kubectl get nodesOutput.
NAME                    STATUS   ROLES    AGE     VERSION
default-488904950846    Ready    <none>   3d21h   v1.24.11
default-7e4fcc3c7604    Ready    <none>   3d21h   v1.24.11
default-dc036fca3fc5    Ready    <none>   3d21h   v1.24.11
platform-3ba268b6eea7   Ready    <none>   3d21h   v1.24.11
platform-51347cd0966f   Ready    <none>   3d21h   v1.24.11
platform-9ff48b3b6af1   Ready    <none>   3d21h   v1.24.11
Add the dominodatalab.com/node-pool label to the platform nodes.
$ kubectl label nodes platform-3ba268b6eea7 dominodatalab.com/node-pool=platform
$ kubectl label nodes platform-51347cd0966f dominodatalab.com/node-pool=platform
$ kubectl label nodes platform-9ff48b3b6af1 dominodatalab.com/node-pool=platform
Output.
node/platform-3ba268b6eea7 labeled
node/platform-51347cd0966f labeled
node/platform-9ff48b3b6af1 labeled
Add the dominodatalab.com/node-pool label to the default nodes.
$ kubectl label nodes default-488904950846 dominodatalab.com/node-pool=default-gpu
$ kubectl label nodes default-7e4fcc3c7604 dominodatalab.com/node-pool=default-gpu
$ kubectl label nodes default-dc036fca3fc5 dominodatalab.com/node-pool=default-gpu
You can use any other value for the dominodatalab.com/node-pool label. However, the value must be unique for each node group.
Output.
node/default-488904950846 labeled
node/default-7e4fcc3c7604 labeled
node/default-dc036fca3fc5 labeled
Register a Data Plane via the Domino Admin UI
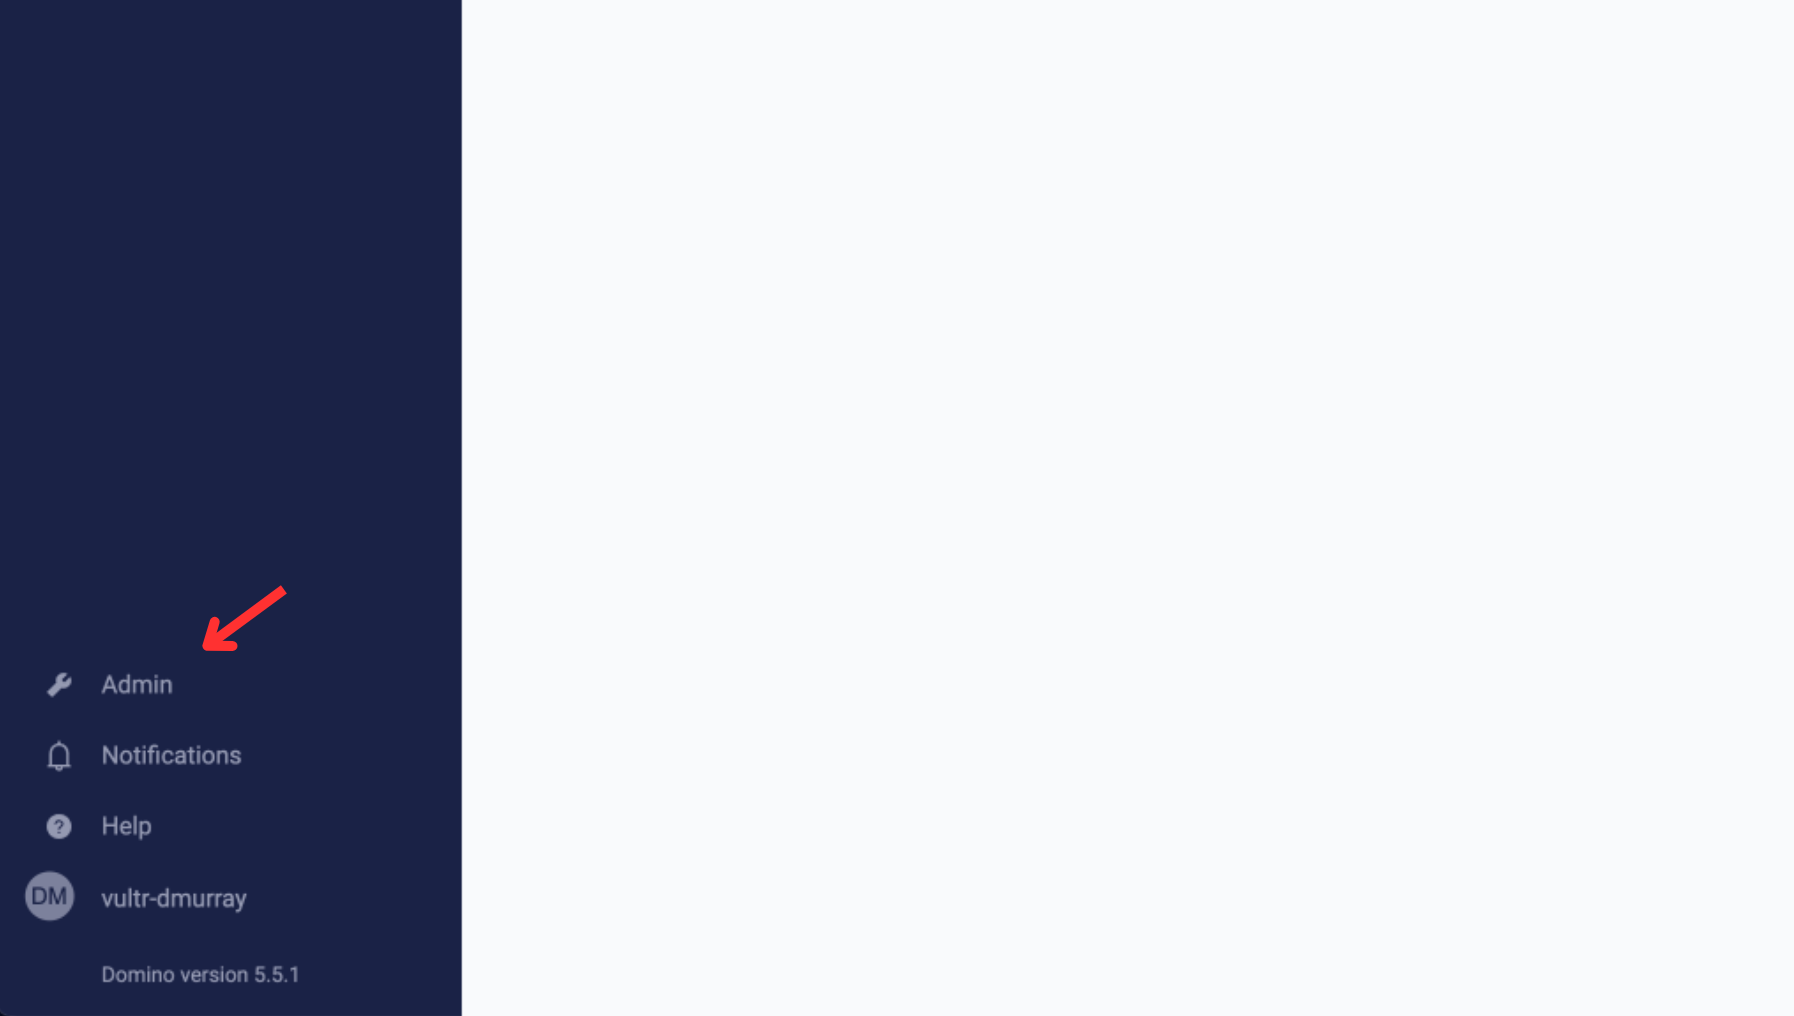
Access the admin section by clicking the wrench icon in the bottom-left corner.
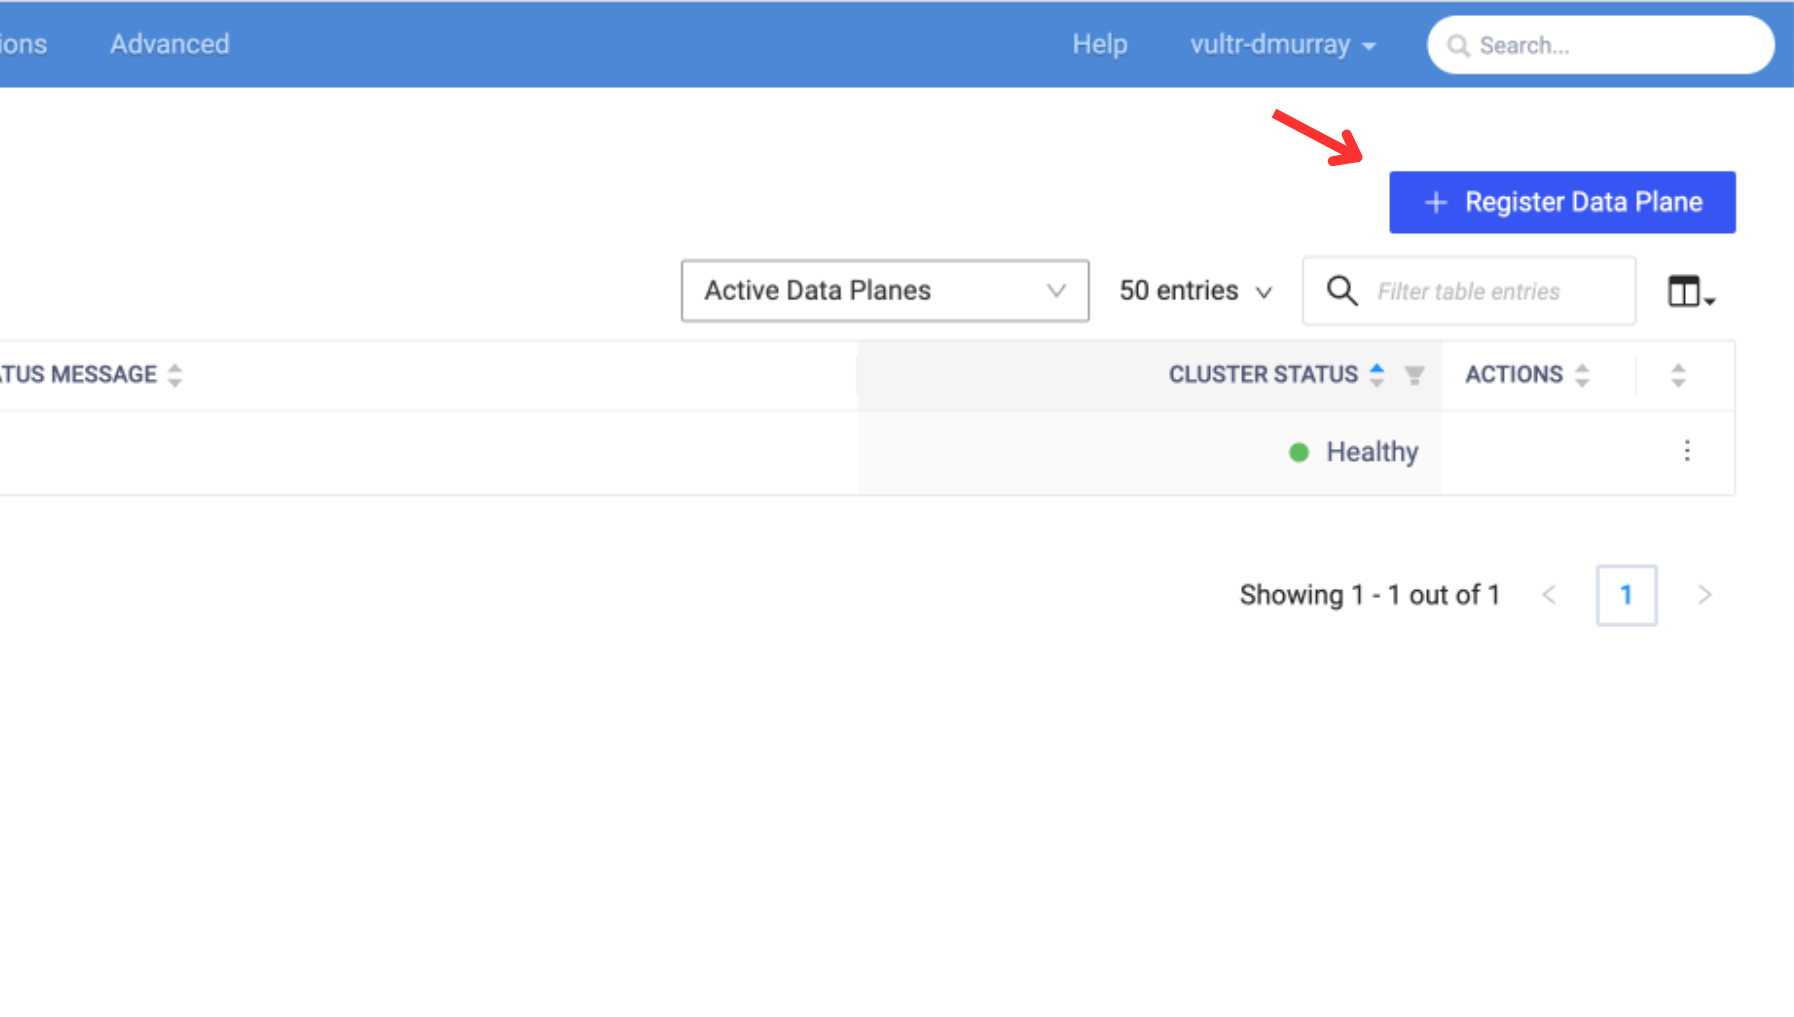
Click the "Register Data Plane" button
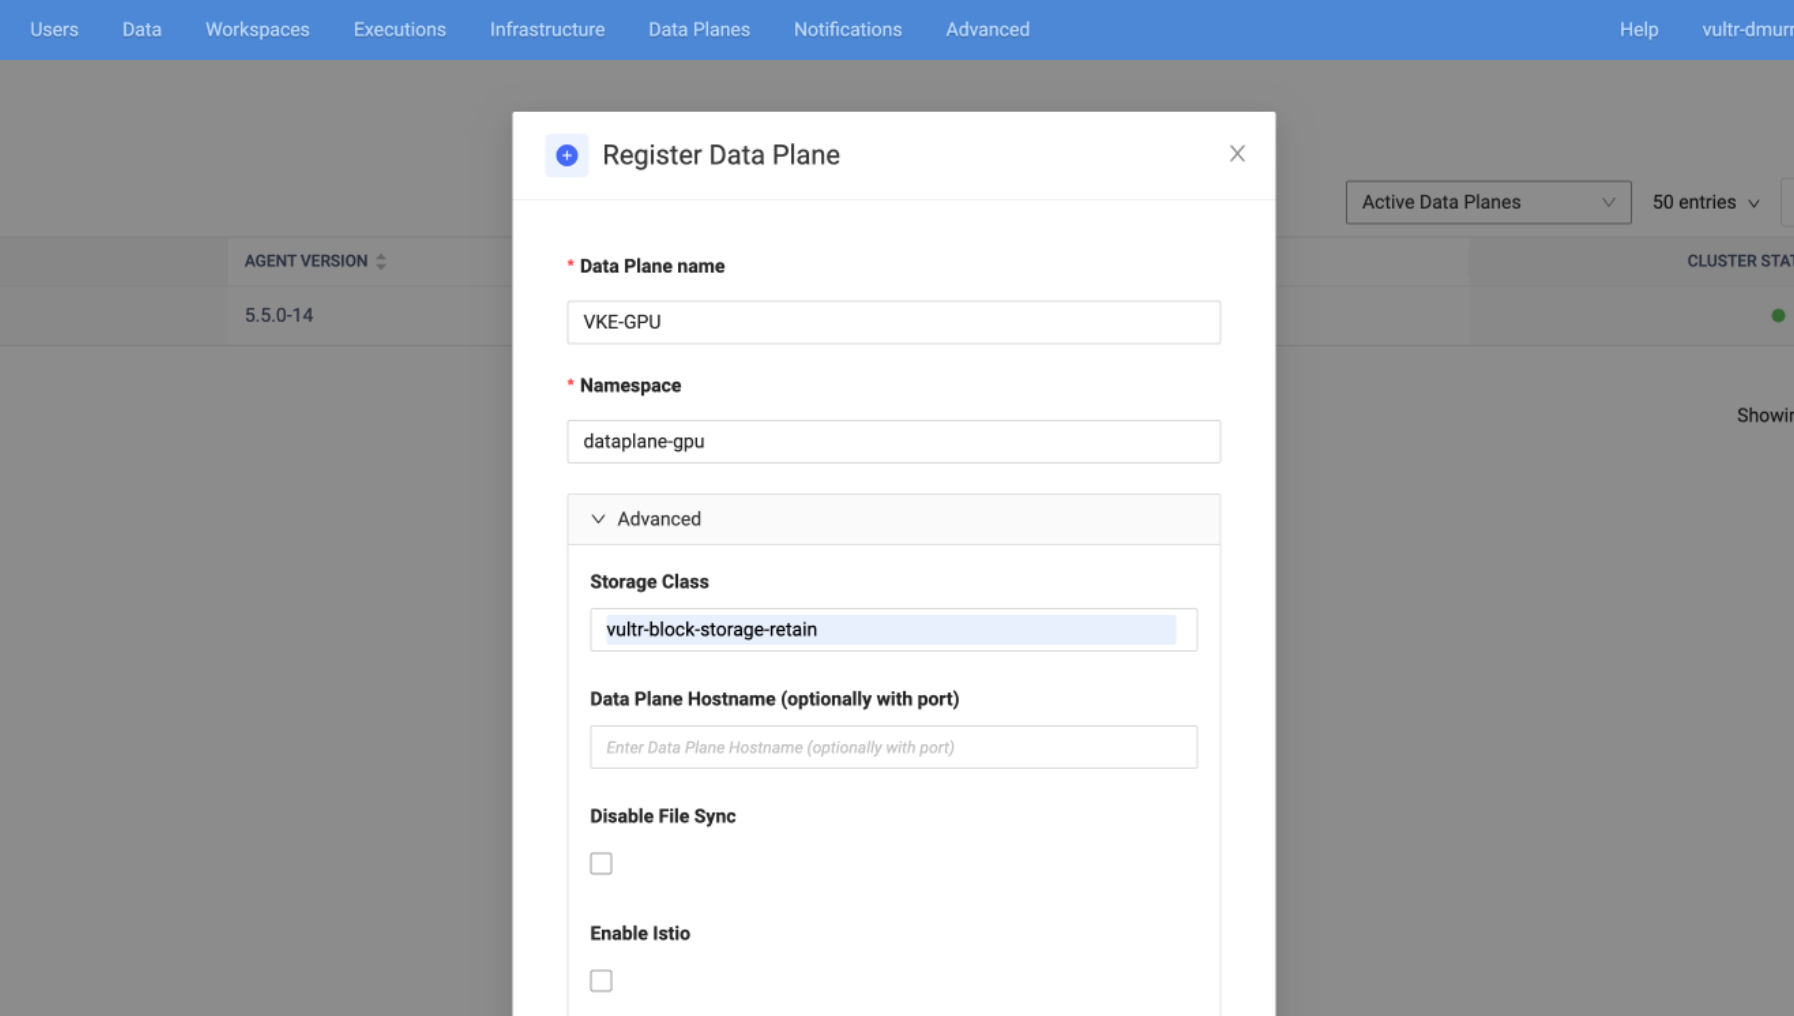
Provide a name and namespace for your data plane. If the namespace does not exist on the cluster, it will be created automatically.
In the Storage Class field, enter vultr-block-storage-retain. Domino created and manages this Storage Class. Refer to the Domino documentation for more information on registering a data plane.
Click the "Copy Command" button to copy the Helm command to your clipboard and then execute it on your cluster.
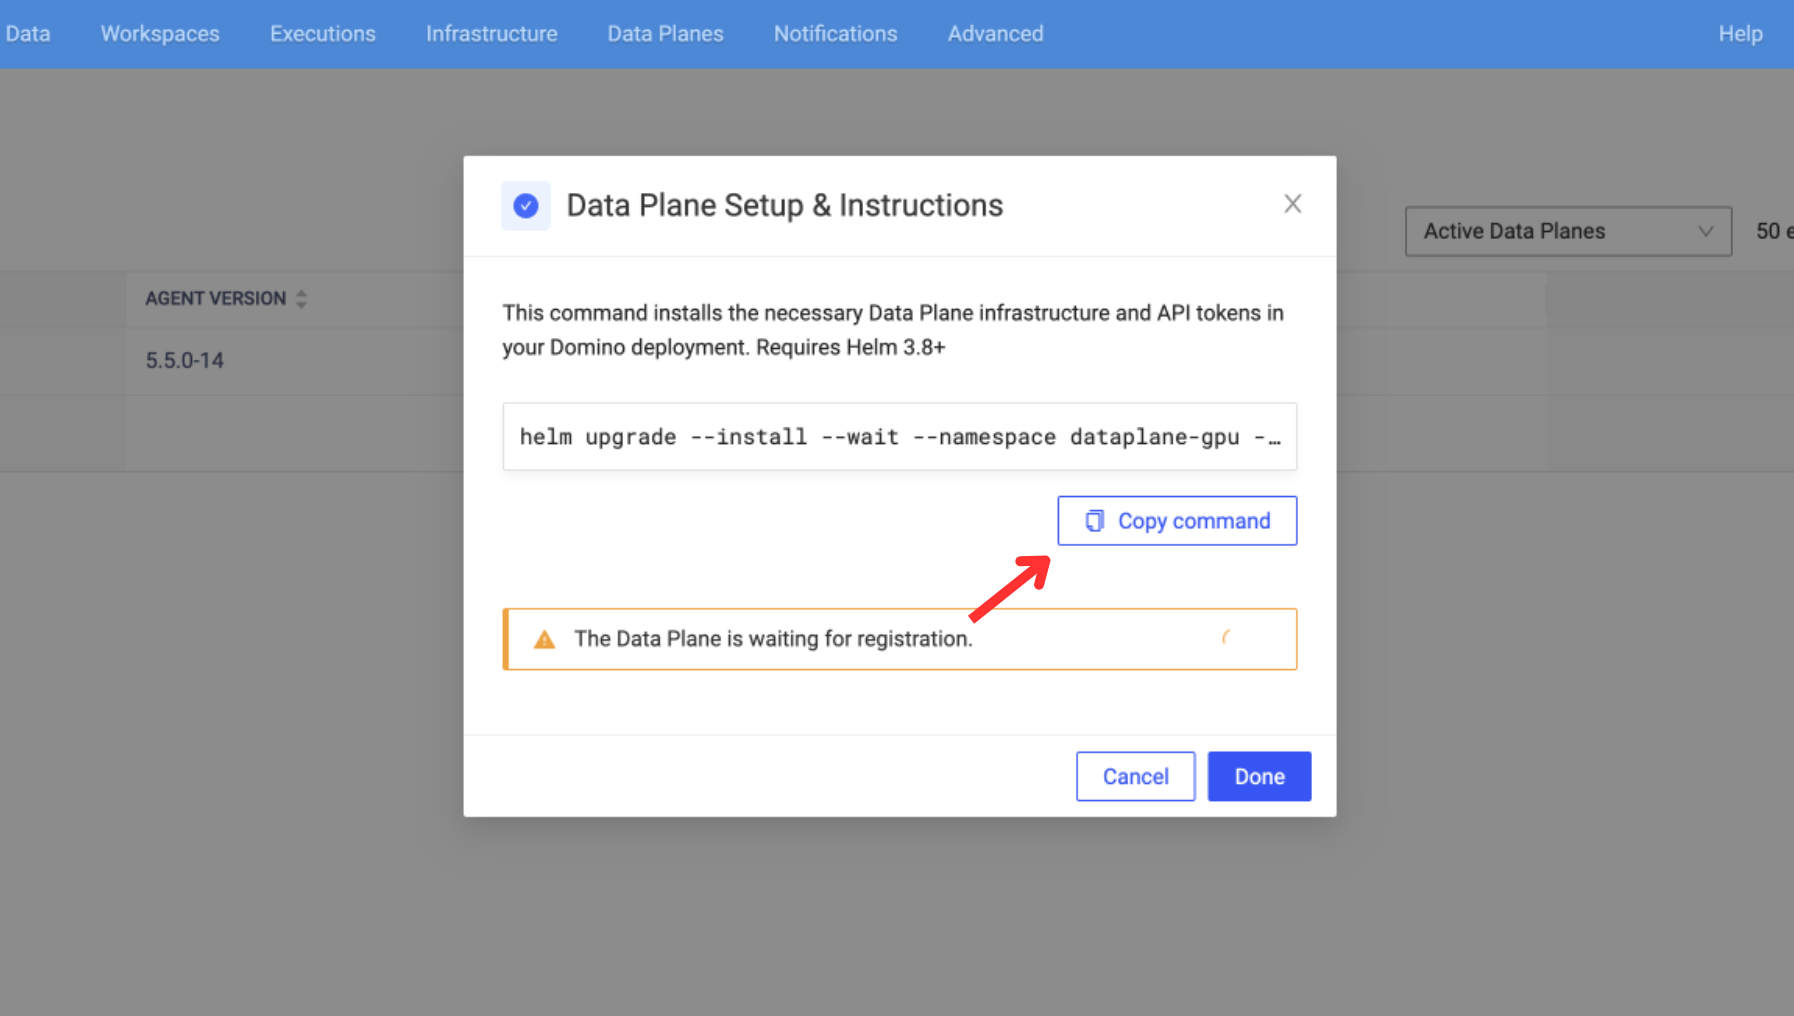
The process may take 5-10 minutes. Upon successful completion, you should see the output in your terminal.
NAME: data-plane
LAST DEPLOYED: Fri May 12 17:22:17 2023
NAMESPACE: dataplane-gpu
STATUS: deployed
REVISION: 0
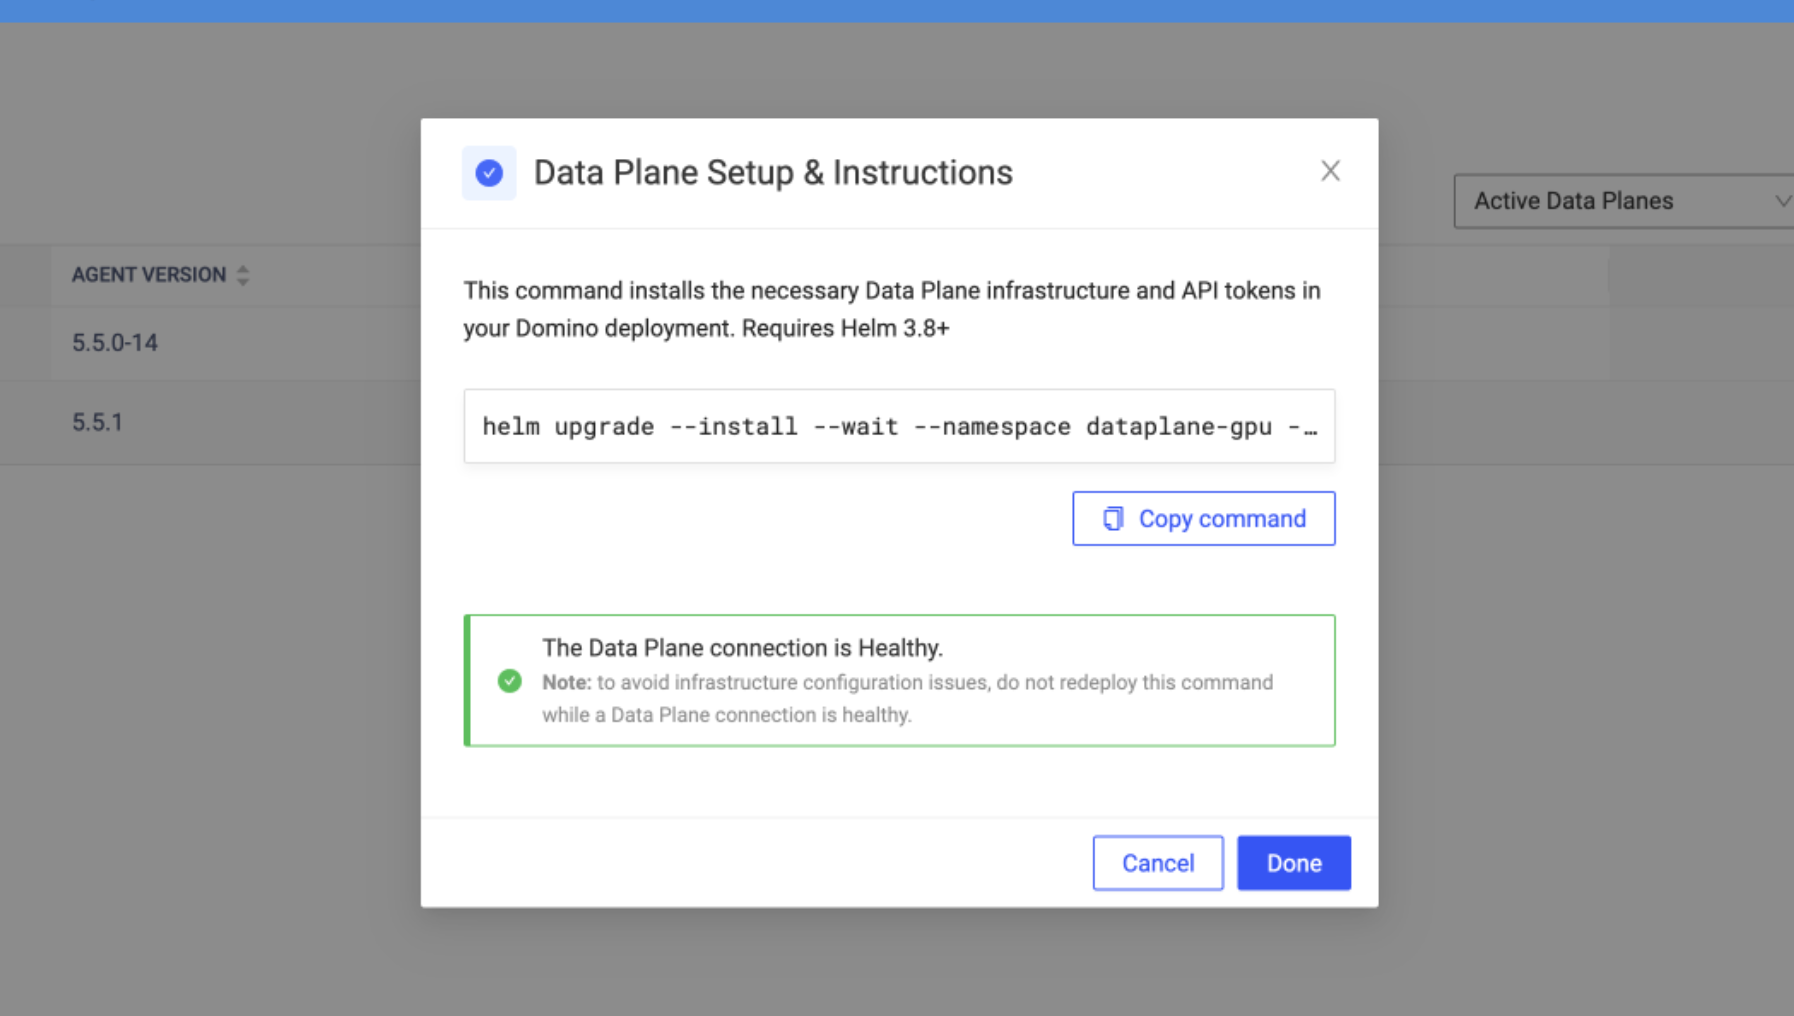
TEST SUITE: NoneThe Domino GUI should also indicate that the Data Plane connection is healthy.
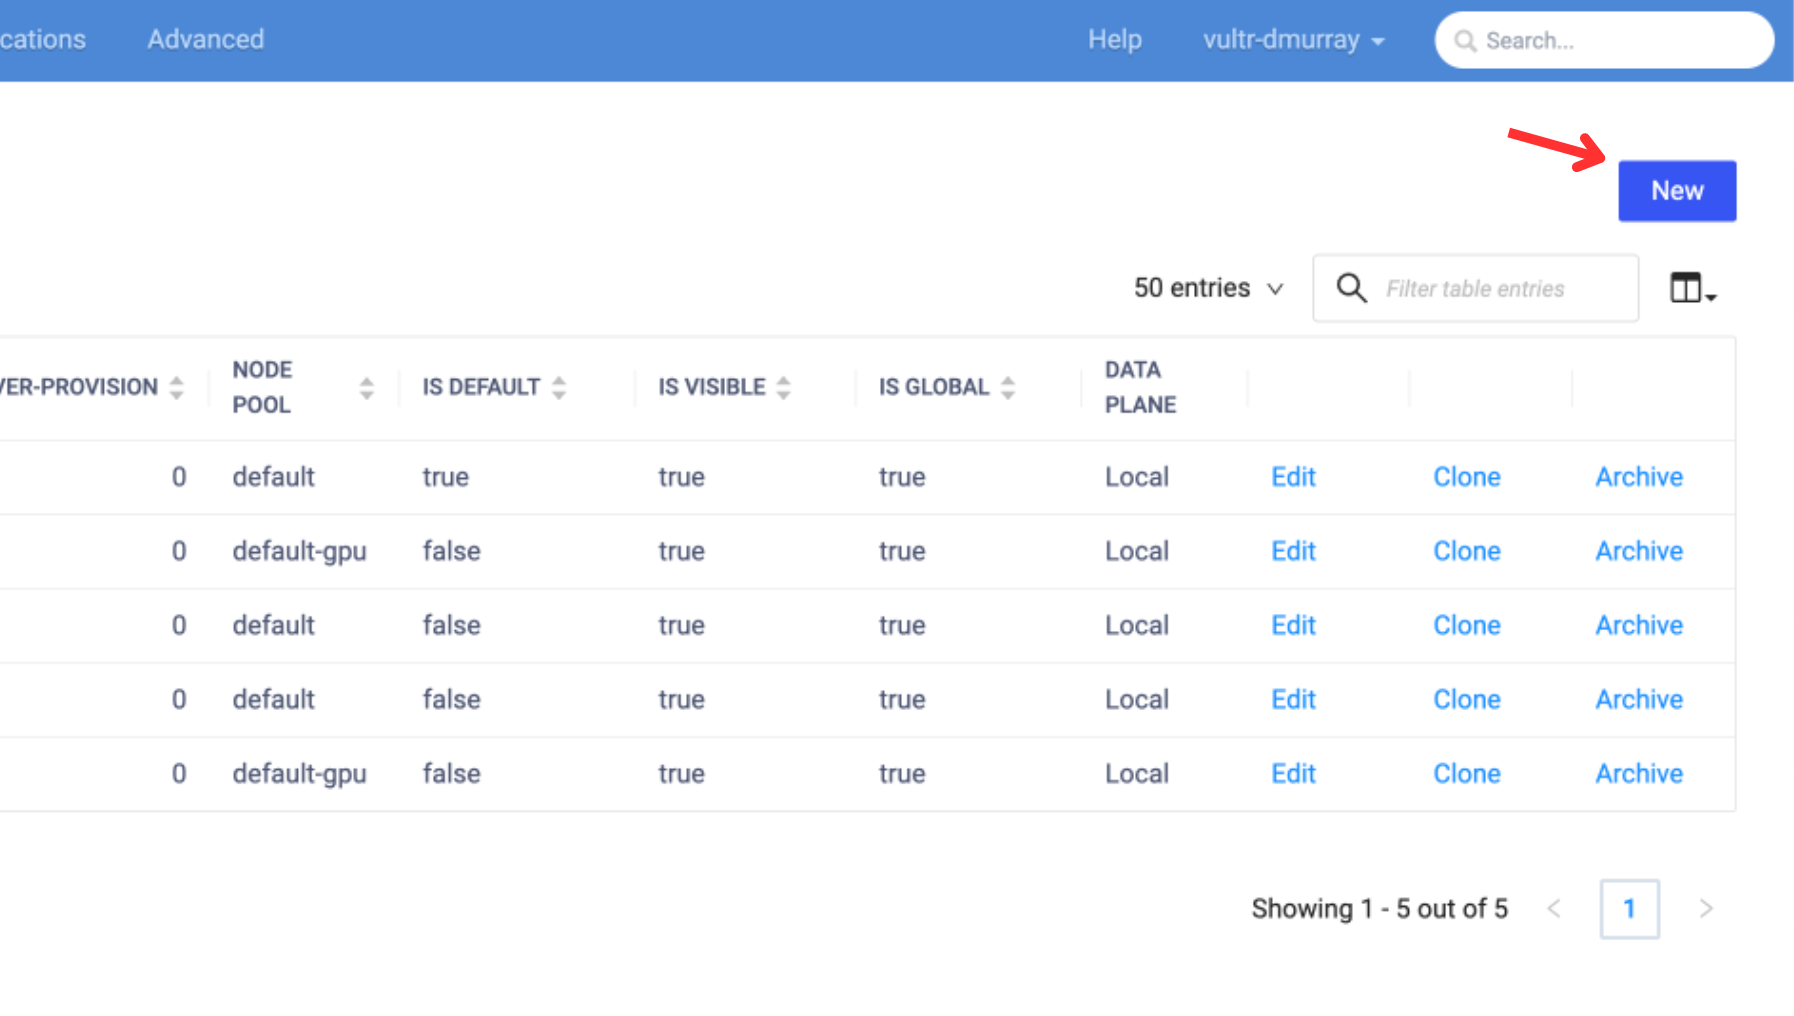
Create a Hardware Tier in Domino for the Data Plane
In the Domino Admin portal, hover over the "Advanced" tab and select "Hardware Tiers". Then, create a new Hardware Tier.
Fill in the fields for Cluster, ID, Name, and Data Plane.
$ kubectl describe node [insert-node-name]Cores, memory, and GPU should reflect the available resources on an individual worker node.
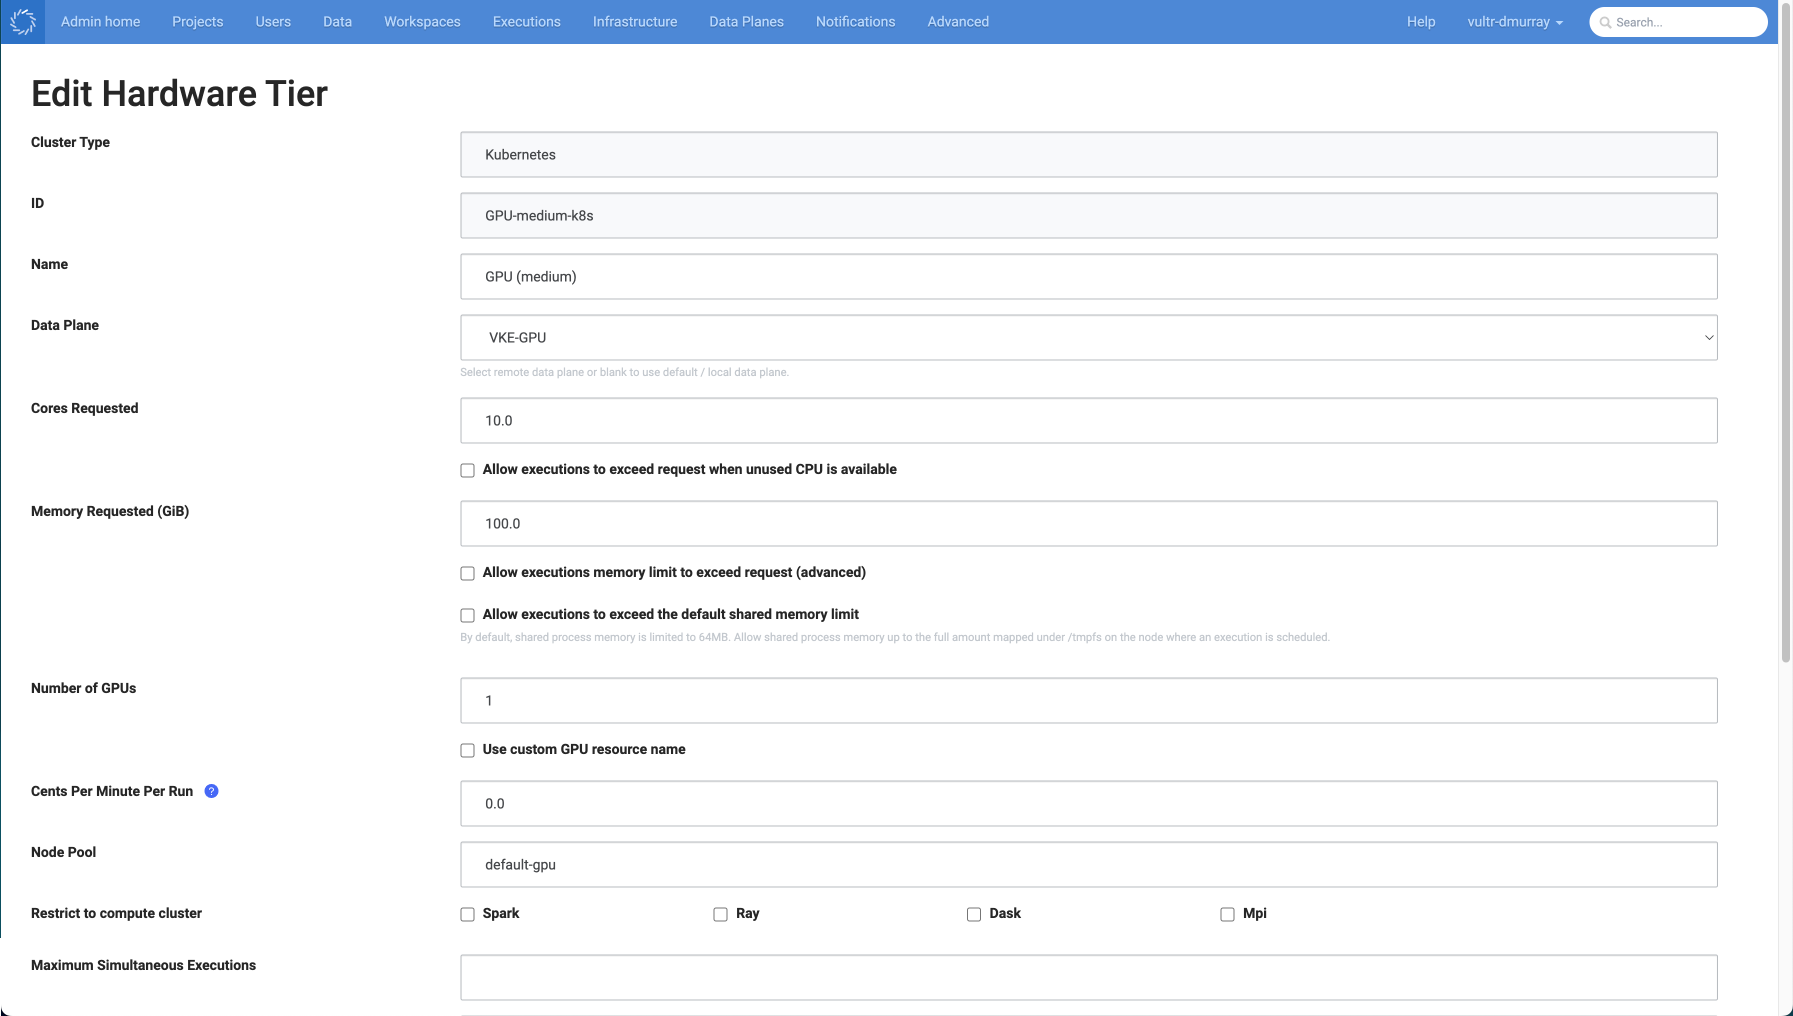
Ensure that the Node Pool name matches the label applied to the nodes running your workloads. Leave the "Number of GPUs" field at 0 if running a Non-GPU workload.
Test the Data Plane
Click the Domino logo in the top corner to exit the Admin section.
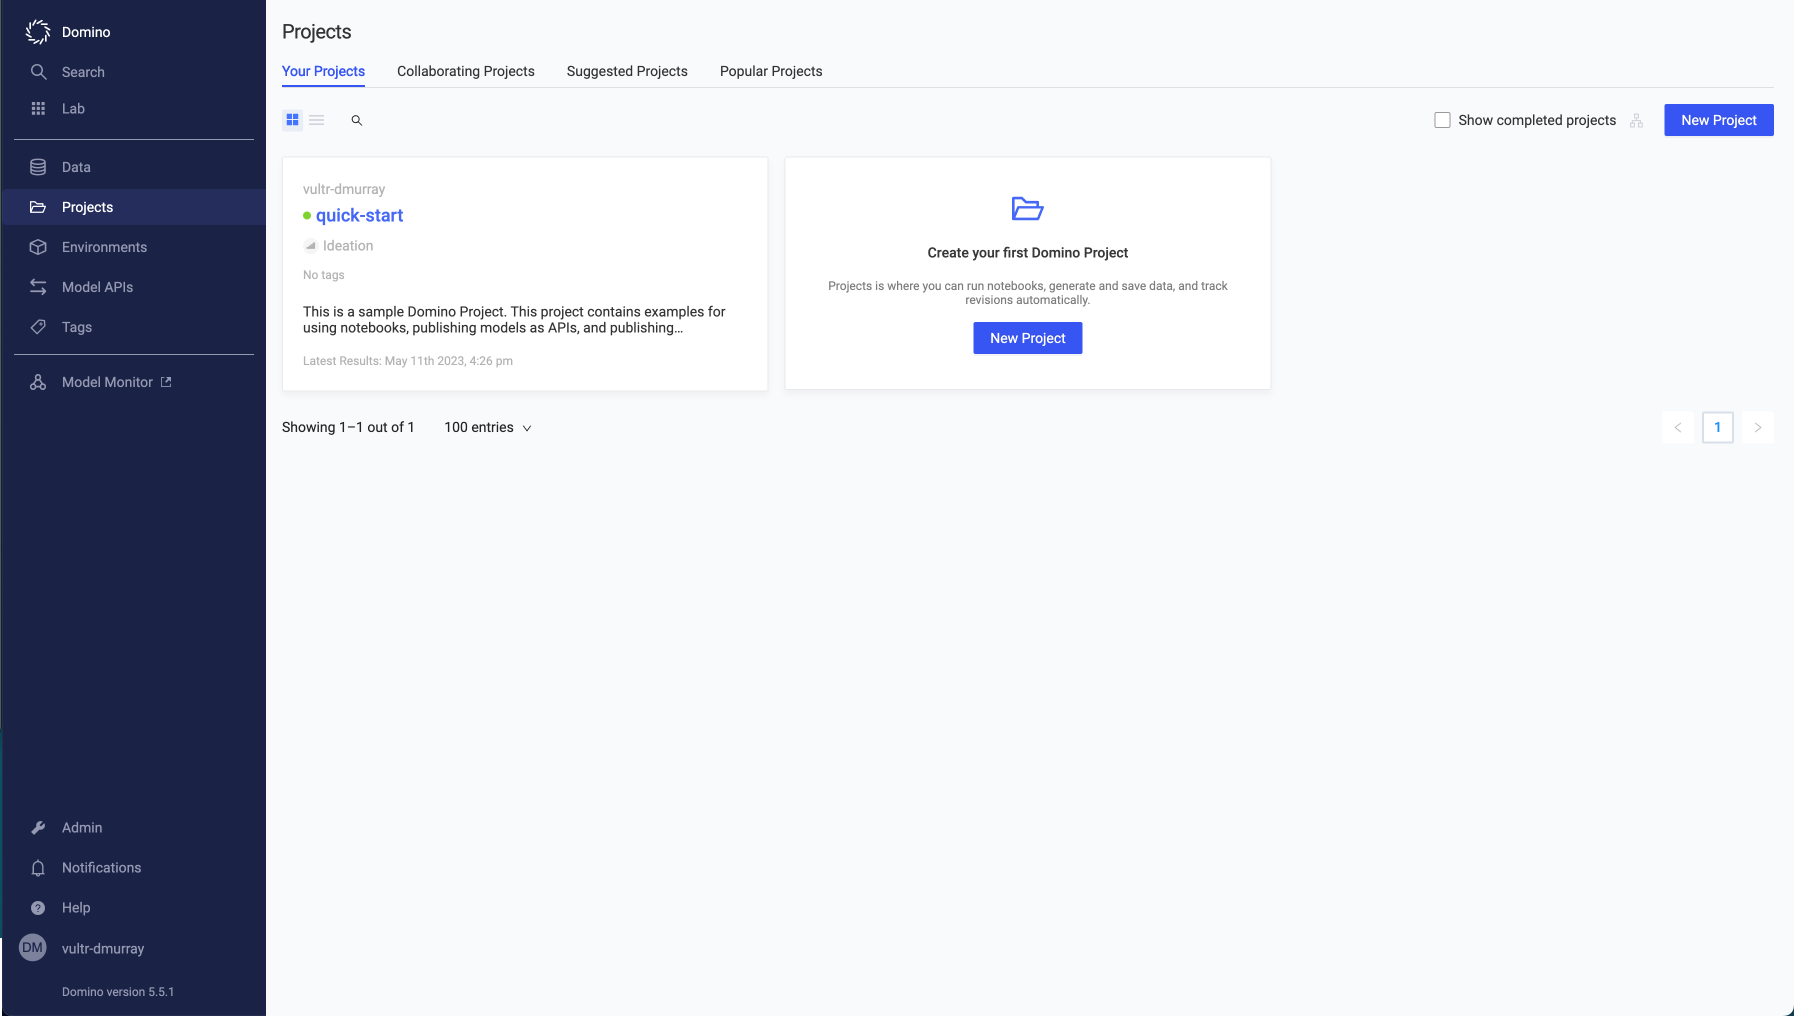
Navigate to Projects > quick-start > Jobs > Run.
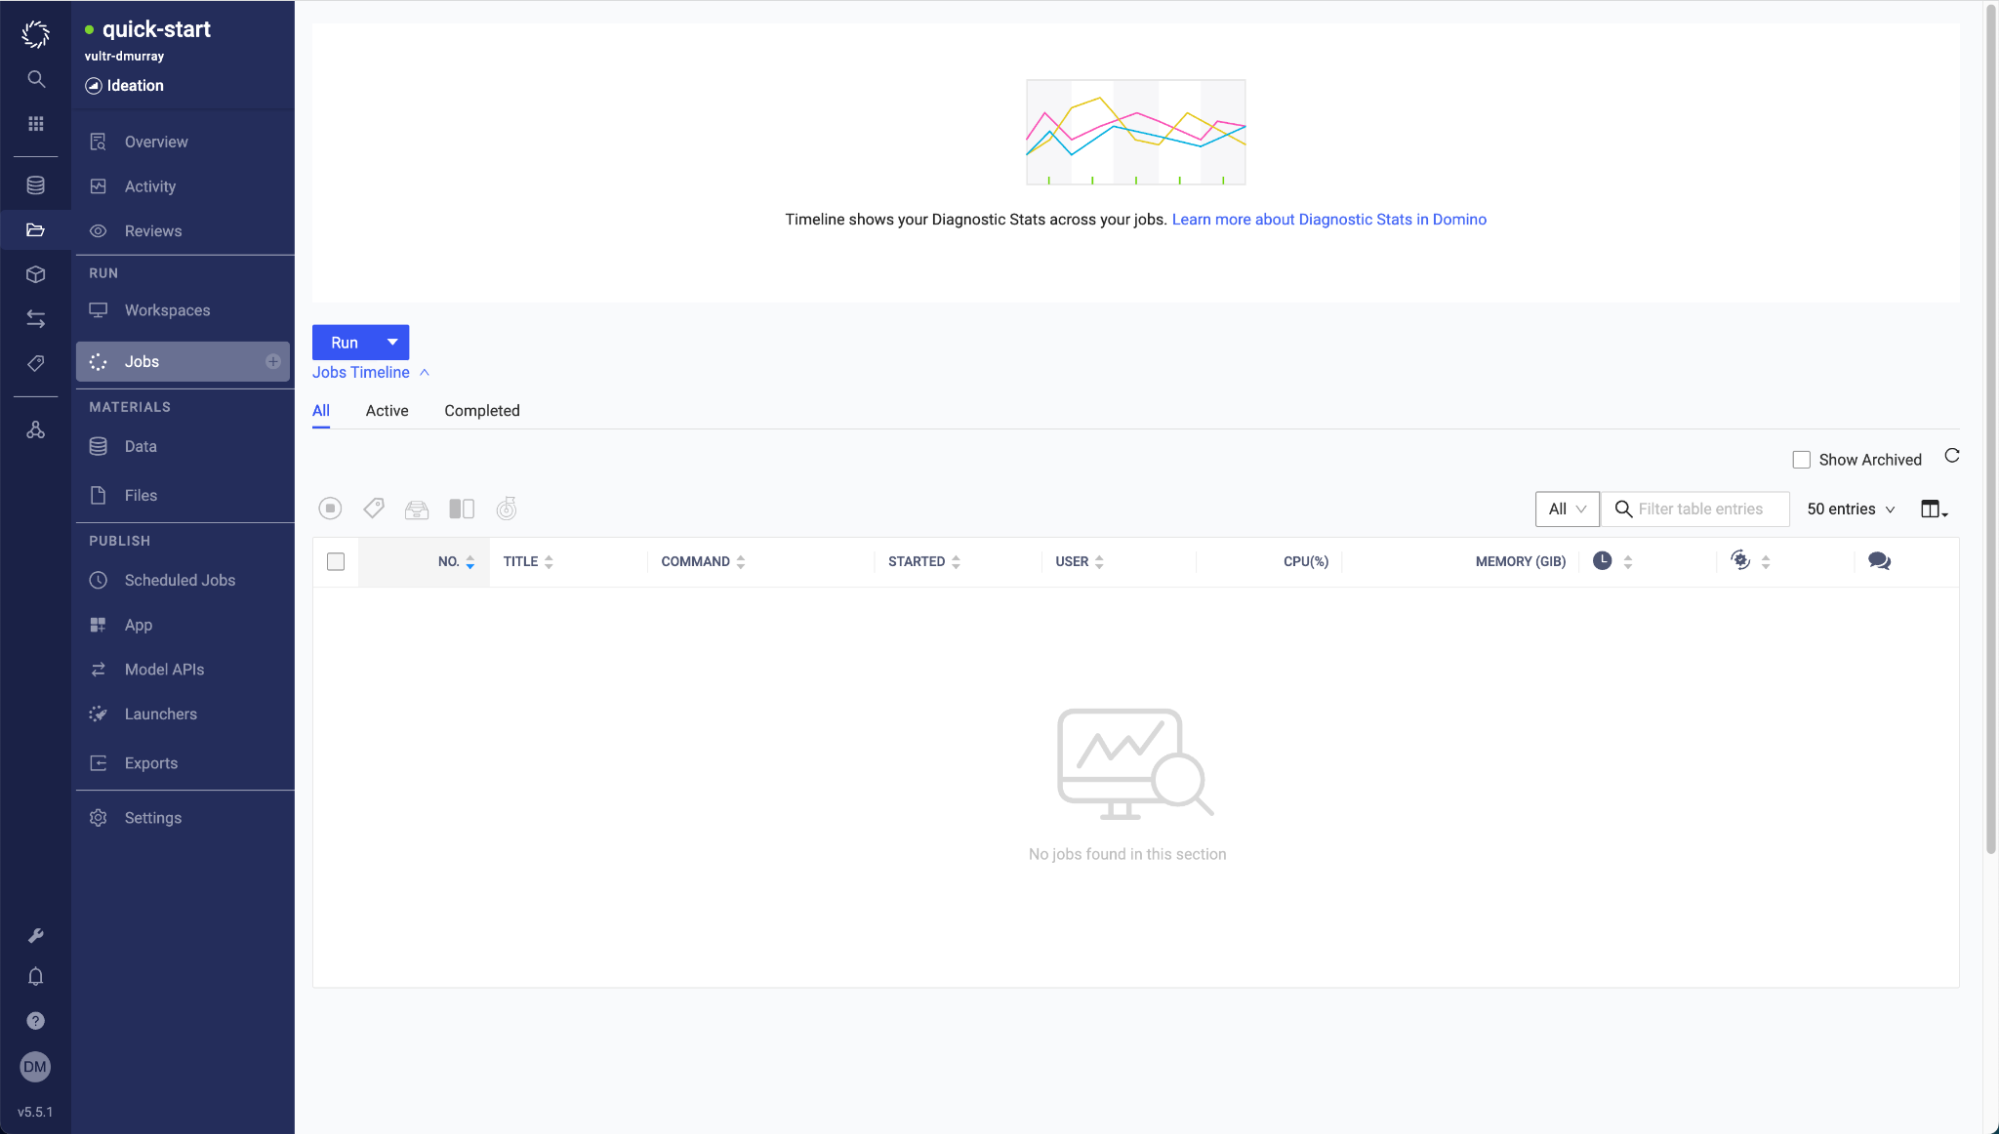
Run a job using the file name main.py, the standard Compute Environment (Docker image), and the Hardware Tier you created from the dropdown. No other options are needed; Start the job from this page.
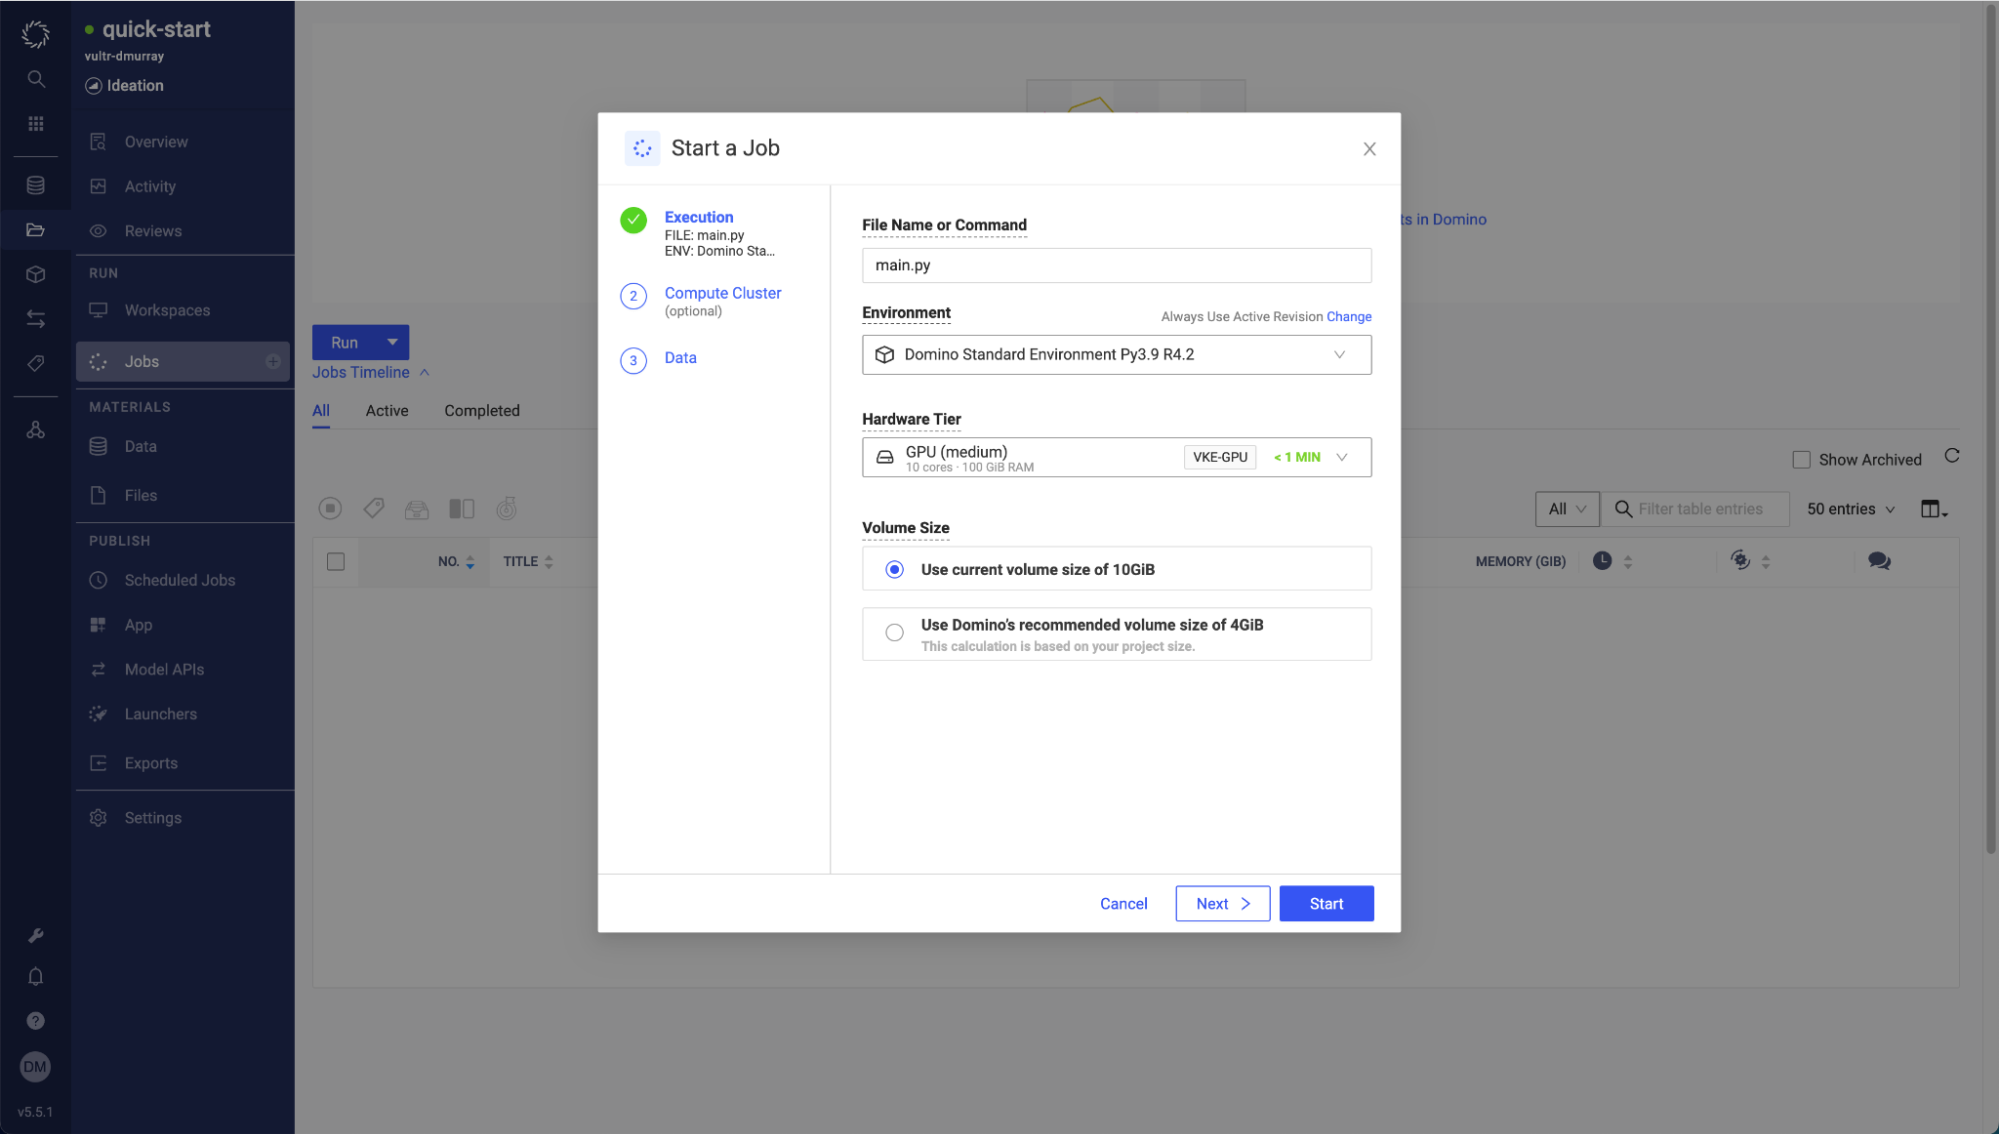
Note: The first time you run a job in the Data Plane, the Compute Environment Docker image must be pulled from the Control Plane. It will be cached for subsequent runs. If you feel the process is taking too long, you can describe the run pod in the VKE cluster to check its progress.
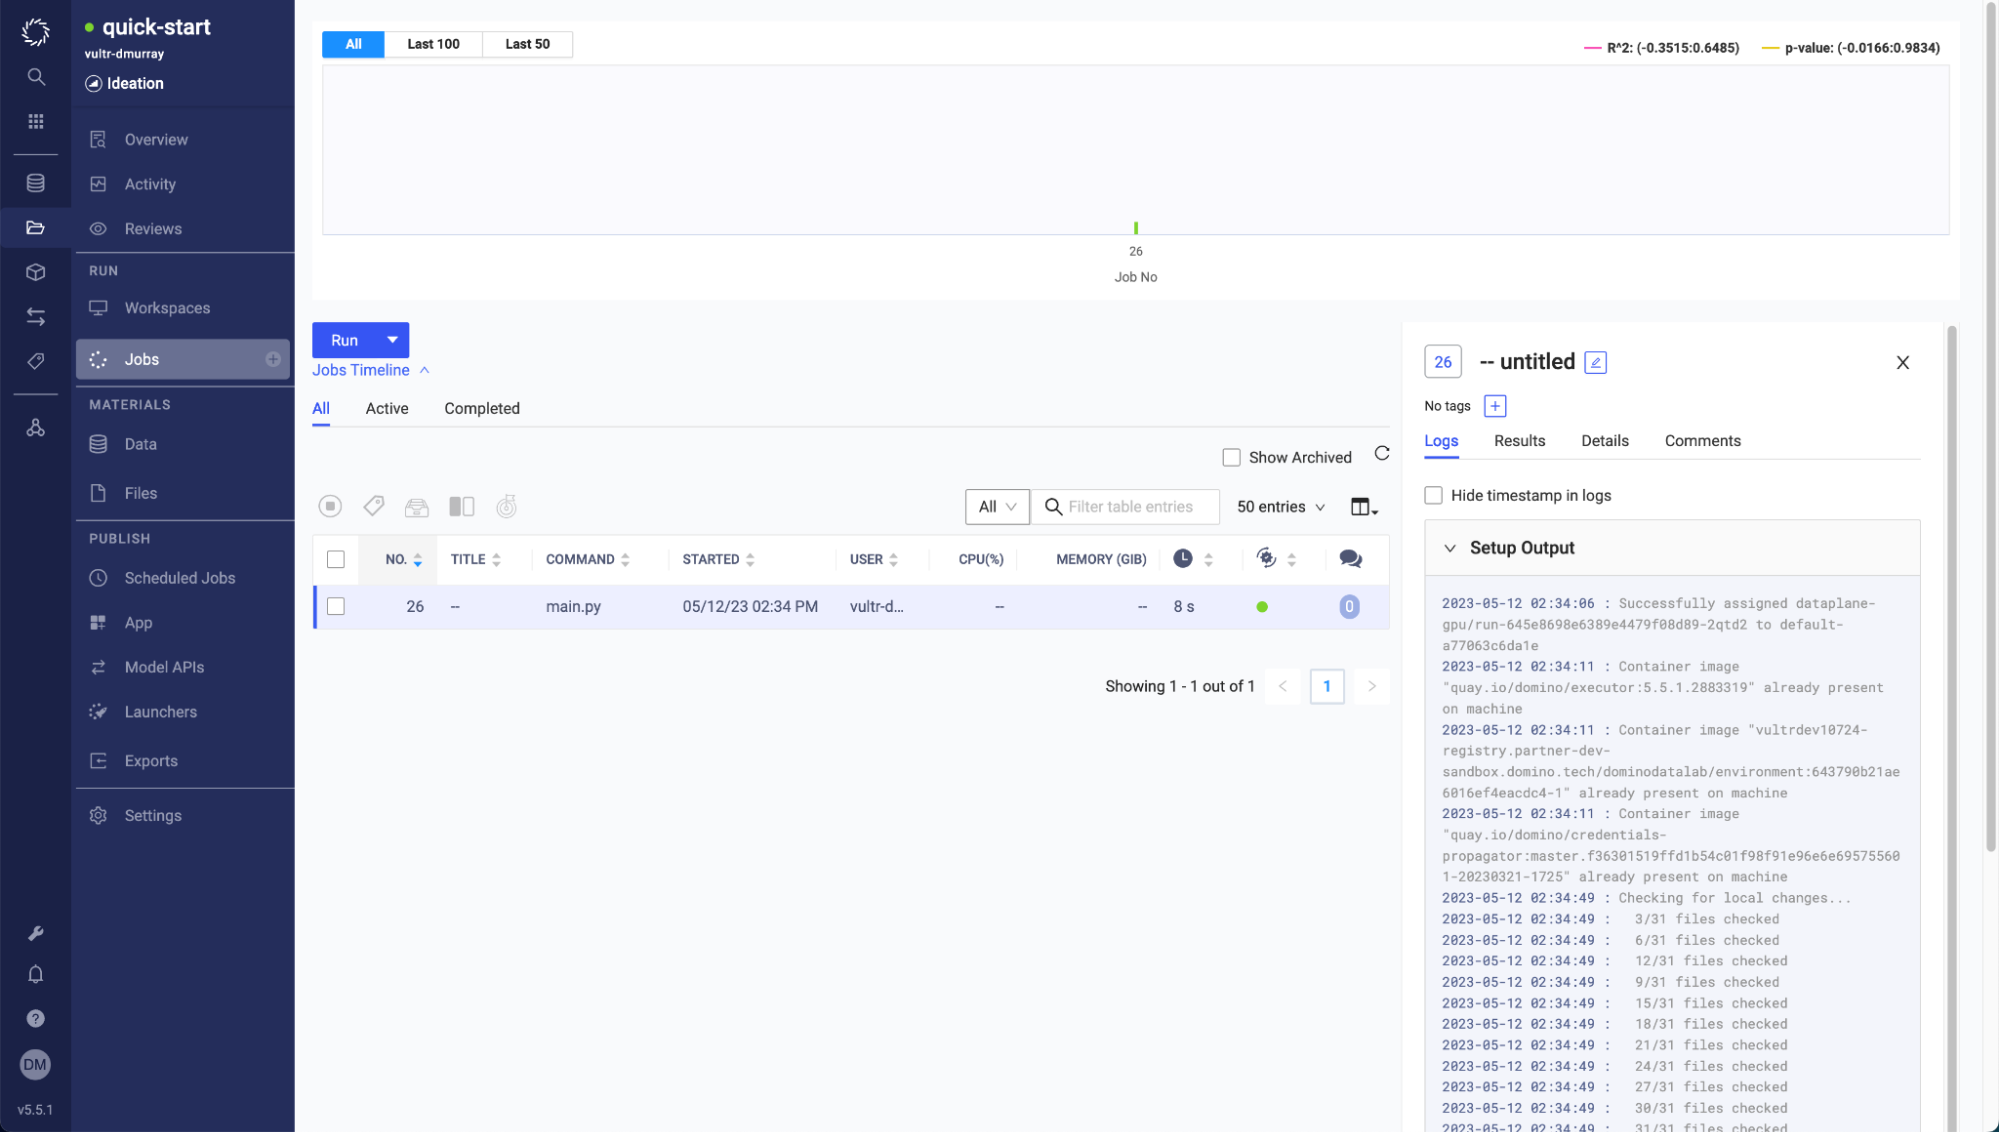
A green dot indicates a successful test.
Conclusion
This article demonstrated the steps to install Domino Nexus Data Plane on the Vultr Kubernetes Engine (VKE). It also covered establishing a connection to a Nexus Control Plane managed by Domino and running a sample workload on a node pool of virtual A100 GPU machines.