
How to Install Node.js and NPM on FreeBSD 14.0
Introduction
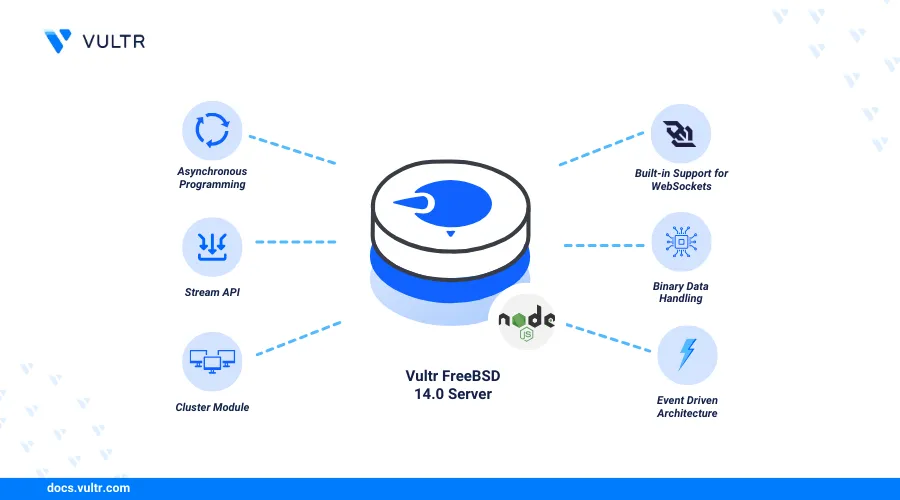
Node.js is an open-source JavaScript runtime built on Chrome's V8 JavaScript engine that enables developers to build scalable network applications. NPM (Node Package Manager) is bundled with Node.js and manages project dependencies on a server. This article explains how to install Node.js and NPM on a FreeBSD 14.0 server. In addition, you will install and manage multiple versions using the Node Version Manager (NVM) on your server.
Prerequisites
Before you begin:
- Deploy a FreeBSD 14.0 server on Vultr.
- Access the server using SSH as a non-root user with sudo privileges.
Choosing a Node.js Version
Choosing the right Node.js version for your project is necessary. Node.js comes in various versions, including the latest, LTS (Long-Term Support), and previous versions that cater to different needs. Below are the supported distributions to consider when choosing a Node.js version.
- Latest: Includes the latest features and improvements.
- LTS: Stable and recommended for most users.
- Previous: Useful when you require compatibility with older projects.
Install Node.js
Node.js is available on FreeBSD 14.0 with two installation procedures using the default pkg package manage or ports collections. FreeBSD ports include the latest Node.js versions while the pkg package manager contains specific stable versions. Follow the sections below to install Node.js on your server depending on your target version.
Install Node.js using Ports
FreeBSD ports collections allow you to build and install applications from source code. A collection offers a standardized framework and a variety of ports that contain all necessary files and instructions to download, compile, and install specific applications on your server. In the following steps, update your FreeBSD ports collection and install Node.js on your server.
Update the
pkgrepository catalog.console$ sudo pkg update
Install the
portsnappackage to fetch and update the default FreeBSD ports collection.console$ sudo pkg install portsnap
Create the
/var/db/portsnapdirectory to store snapshots of the ports tree.console$ sudo mkdir -p /var/db/portsnap
Update the ports tree to get all available Node.js versions.
console$ sudo portsnap fetch extract
List all Node.js port versions available in the
/usr/ports/wwwdirectory.console$ sudo ls -l /usr/ports/www/ | grep node
Output.
drwxr-xr-x  2 root wheel   512 Jun 15 09:53 node
drwxr-xr-x  3 root wheel   512 Jun 15 09:53 node18
drwxr-xr-x  3 root wheel   512 Jun 15 09:53 node20
drwxr-xr-x  3 root wheel   512 Jun 15 09:53 node21
drwxr-xr-x  3 root wheel   512 Jun 15 09:53 node22
drwxr-xr-x  2 root wheel   512 Jun 15 09:53 npm-node18
drwxr-xr-x  2 root wheel   512 Jun 15 09:53 npm-node20
drwxr-xr-x  2 root wheel   512 Jun 15 09:53 npm-node21
drwxr-xr-x  2 root wheel   512 Jun 15 09:53 npm-node22
drwxr-xr-x  2 root wheel   512 Jun 15 09:53 p5-WebService-Linode
drwxr-xr-x  2 root wheel   512 Jun 15 09:53 yarn-node18
drwxr-xr-x  3 root wheel   512 Jun 15 09:53 yarn-node20
drwxr-xr-x  2 root wheel   512 Jun 15 09:53 yarn-node21
drwxr-xr-x  2 root wheel   512 Jun 15 09:53 yarn-node22
Switch to your desired Node.js version directory. For example, version 18.
console$ sudo cd /usr/ports/www/node18
Build and install Node.js from the ports collection.
console$ sudo make install clean BATCH=yes MAKE_JOBS_UNSAFE=yes
During the installation, the
BATCH=yesoption accepts all installation prompts whileMAKE_JOBS_UNSAFE=yesenables the use of multiple jobs even if the port is marked as unsafe for parallel builds. When successful, your output should look like the one below.installing /usr/ports/www/node18/work/stage/usr/local/include/node/v8-forward.h installing /usr/ports/www/node18/work/stage/usr/local/include/node/v8-wasm.h installing /usr/ports/www/node18/work/stage/usr/local/include/node/v8-maybe.h installing /usr/ports/www/node18/work/stage/usr/local/include/node/v8-external.h installing /usr/ports/www/node18/work/stage/usr/local/include/node/v8-persistent-handle.h installing /usr/ports/www/node18/work/stage/usr/local/include/node/v8-primitive.h installing /usr/ports/www/node18/work/stage/usr/local/include/node/v8.h installing /usr/ports/www/node18/work/stage/usr/local/include/node/v8-data.h installing /usr/ports/www/node18/work/stage/usr/local/include/node/v8-version.h installing /usr/ports/www/node18/work/stage/usr/local/include/node/v8-value-serializer.h installing /usr/ports/www/node18/work/stage/usr/local/include/node/cppgc/common.h installing /usr/ports/www/node18/work/stage/usr/local/include/node/libplatform/v8-tracing.h installing /usr/ports/www/node18/work/stage/usr/local/include/node/libplatform/libplatform-export.h installing /usr/ports/www/node18/work/stage/usr/local/include/node/libplatform/libplatform.h /usr/bin/strip /usr/ports/www/node18/work/stage/usr/local/bin/node ====> Compressing man pages (compress-man) ===> Installing for node18-18.20.3 ===> Checking if node18 is already installed ===> Registering installation for node18-18.20.3 Installing node18-18.20.3...View the installed Node.js version.
console$ node --version
Output:
v18.20.3Compiling the Node.js version in your ports collection takes between 2 to 3 hours to complete depending on your system's resources.Note
Install Node.js using the pkg Package Manager
Node.js is available in the default pkg repositories on your FreeBSD server. However, the available versions may not be the latest. Follow the steps below to verify all available versions and install Node.js on your server.
Update the
pkgrepository catalog.console$ sudo pkg update
Search all the available Node.js versions.
console$ sudo pkg search ^node
Your output should look like the one below.
node-20.12.2_1                 V8 JavaScript for client and server (meta port)
node-thrift-0.16.0_3           Node.js bindings for the Apache Thrift RPC system
node18-18.20.2                 V8 JavaScript for client and server
node20-20.12.2                 V8 JavaScript for client and server
node21-21.7.3                  V8 JavaScript for client and server
node_exporter-1.6.1_6          Prometheus exporter for machine metrics
Install your desired Node.js version. For example, Node.js version
21.console$ sudo pkg install node21
View the installed Node.js version on your server.
console$ node --version
Output:
v21.7.3
Install the Node Package Manager (NPM)
NPM is the default Node.js package manager that allows you to manage and install backend packages on your server. It's bundled and installed with the Node.js package when using the pkg package manager. When using FreeBSD ports, install NPM as described in the following steps.
Verify if NPM is available on your server.
console$ sudo npm --version
Output:
-sh: npm: not foundNavigate to the NPM port directory to install a specific version on your server. For example, switch to the NPM directory for Node.js version
18console$ sudo cd /usr/ports/www/npm-node18
Build and install NPM on your server.
console$ sudo make install clean BATCH=yes MAKE_JOBS_UNSAFE=yes
- When using the
pkgpackage manager. Run the following command to view all available versions.
console$ sudo pkg search ^npm
Output:
npm-10.5.1 Node package manager (meta port) npm-node18-10.5.1 Node package manager npm-node20-10.5.1 Node package manager npm-node21-10.5.1 Node package manager npmount-0.1.1.3_1 Command line tool for non-privileged [un]mount- Install a specific NPM version based on the available packages. For example, run the following command to install the latest available version.
console$ sudo pkg install npm
- When using the
Test Node.js
Create a new test application file
app.jsto output aHello World! Greetings from Vultrprompt when loaded.console$ echo 'console.log("Hello World! Greetings from Vultr");' > app.js
Run the
app.jsfile using Node.js.console$ node app.js
Output:
Hello World! Greetings from Vultr
Install Multiple Versions
NVM (Node Version Manager) is a Node.js management utility that simplifies the process of switching between Node.js versions for various projects. Follow the steps below to install NVM, install, and switch between multiple Node.js versions on your server.
Install all required dependencies on your server.
console$ sudo pkg install curl bash gcc
Download the latest installation script from the official NVM repository on your server.
console$ curl -o- https://raw.githubusercontent.com/nvm-sh/nvm/v0.39.1/install.sh
Run the installation script to install NVM on your server.
$ sudo bash install.shRun the following commands to add NVM to your shell profile and automatically load it in every terminal session. Replace
userwith your actual system user.console$ echo 'export NVM_DIR="$HOME/.nvm"' >> /home/user/.bashrc $ echo '[ -s "$NVM_DIR/nvm.sh" ] && \. "$NVM_DIR/nvm.sh"' >> /home/user/.bashrc
Reload your shell profile to apply changes.
console$ source ~/.bashrc
View the installed NVM version on your server.
console$ nvm --version
Output:
0.39.1Create a new
MAKE_JOBS environmentvariable depending on the number of CPU cores available on your system to speed up the compilation process while running multiple jobs in parallel.console$ export MAKE_JOBS=$(sysctl -n hw.ncpu)
Install a specific Node.js version on your server using NVM. For example, Node.js version
21.0.0.console$ nvm install 21.0.0
View the installed Node.js version.
console$ node --version
Output:
v21.0.0View the installed NPM version.
console$ npm --version
Output:
10.2.0Install another Node.js version such as
17.0.0.console$ nvm install 17.0.0
Install the latest LTS Node.js version.
console$ nvm install --lts
Install the latest stable Node.js version.
console$ nvm install node
List all available Node.js versions on your server.
console$ nvm ls
Output:
->      v21.0.0
->      v17.0.0
default -> 17.0.0 (-> v17.0.0)
iojs -> N/A (default)
unstable -> N/A (default)
node -> stable (-> v21.0.0) (default)
stable -> 21.0 (-> v21.0.0) (default)
lts/* -> lts/iron (-> N/A)
lts/argon -> v4.9.1 (-> N/A)
lts/boron -> v6.17.1 (-> N/A)
lts/carbon -> v8.17.0 (-> N/A)
lts/dubnium -> v10.24.1 (-> N/A)
lts/erbium -> v12.22.12 (-> N/A)
lts/fermium -> v14.21.3 (-> N/A)
lts/gallium -> v16.20.2 (-> N/A)
lts/hydrogen -> v18.20.3 (-> N/A)
lts/iron -> v20.14.0 (-> N/A)
Run the following command to enable a specific Node.js version on your server. For example, Node.js version
21.0.0.console$ nvm use 21.0.0
Set the default Node.js version to use on your server.
console$ nvm alias default 21.0.0
Run the following command to remove a specific version. For example, Node.js version
17.0.0.console$ nvm uninstall 17.0.0
Conclusion
You have installed Node.js and NPM on a FreeBSD 14.0 server and managed multiple versions using NVM to ensure flexibility between projects. You can use Node.js to build flexible and powerful applications on your server depending on your development needs. For more configurations and additional modules such as Express, visit the Node.js documentation.