
Implement a CI/CD Pipeline with Jenkins and Vultr Kubernetes Engine
Introduction
Rapid and reliable delivery of applications is an important aspect of software development that ensures the timely execution of solutions in production environments. Jenkins is a popular open-source automation service that enables Continuous Integration (CI) and Continuous Deployment (CD) in software development. It plays a crucial role in automating the application building, testing, and deployment processes to streamline the software development lifecycle.
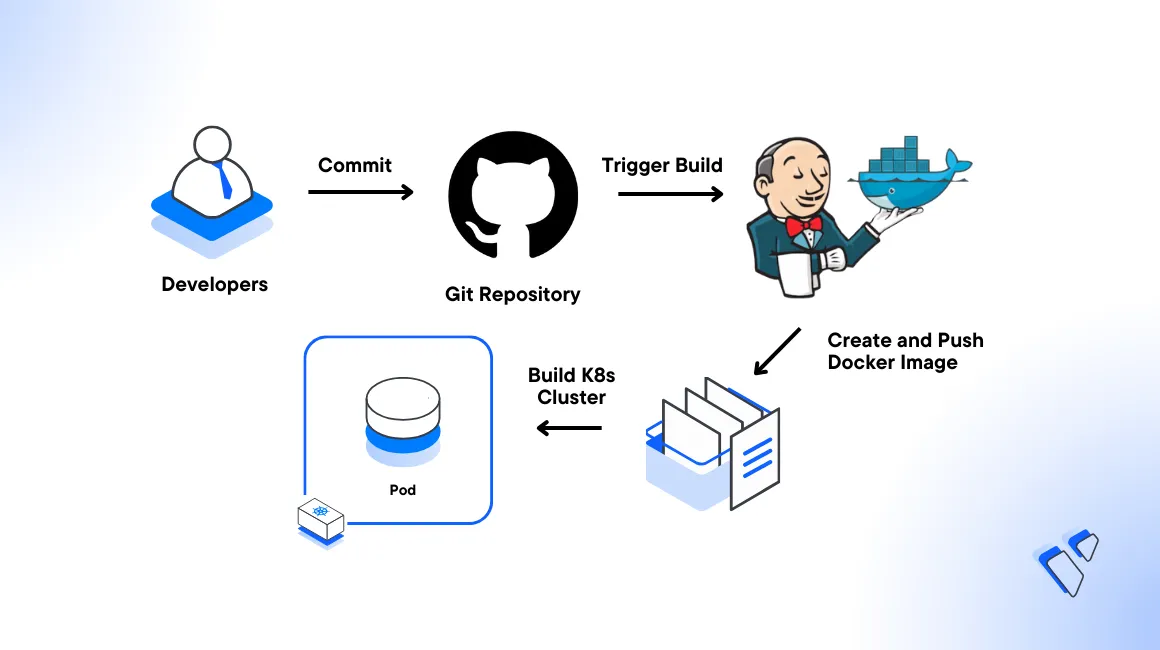
Implementing a CI/CD pipeline with Jenkins and Kubernetes offers many software development and delivery advantages. These include streamlining development processes, enhancing collaboration, and speed up the delivery of high-quality applications. In this guide, you will deploy a Node.js containerized application to a Vultr Kubernetes Engine (VKE) cluster using the Jenkins CI/CD Pipeline.
Prerequisites
Before you start, you need to:
- Deploy a Vultr Kubernetes Engine (VKE) cluster with at least
3nodes. - Create a Vultr Container Registry to store Docker images.
- Deploy a One-Click Docker instance with at least
4GB RAM and2vCPUs to use as the management server. - Access the server using SSH as a non-root user with sudo privileges.
- Install and Configure Kubectl to access the VKE cluster.
- Log in to your GitHub account and generate a personal access token to access your repositories using Git.
Secret resource from the registry control panel and deploy it to your cluster.
Install Jenkins
Install the Java OpenJDK 11 dependecy package.
console$ sudo apt install openjdk-11-jdk -y
Download the Jenkins repository key to your server.
console$ curl -fsSL https://pkg.jenkins.io/debian-stable/jenkins.io-2023.key | sudo tee /usr/share/keyrings/jenkins-keyring.asc > /dev/null
Add Jenkins repository to APT repository sources.
console$ echo deb [signed-by=/usr/share/keyrings/jenkins-keyring.asc] https://pkg.jenkins.io/debian-stable binary/ | sudo tee /etc/apt/sources.list.d/jenkins.list > /dev/null
Update the server repository index.
console$ sudo apt update -y
Install Jenkins on the server.
console$ sudo apt install jenkins -y
View the Jenkins status to verify that it's successfully installed and running.
console$ sudo systemctl status jenkins
Output:
● jenkins.service - Jenkins Continuous Integration Server
     Loaded: loaded (/lib/systemd/system/jenkins.service; enabled; vendor preset: enabled)
     Active: active (running) since Wed 2023-11-15 06:23:57 UTC; 5min ago
   Main PID: 5491 (java)
      Tasks: 36 (limit: 1006)
     Memory: 313.3M
        CPU: 1min 12.574s
     CGroup: /system.slice/jenkins.service
             └─5491 /usr/bin/java -Djava.awt.headless=true -jar /usr/share/java/jenkins.war --webroot=/var/cache/jenkins/war --httpPort=8080

Nov 15 06:22:50 ubuntu jenkins[5491]: ff1f768ed659416695b3decdff0e9473
Nov 15 06:22:50 ubuntu jenkins[5491]: This may also be found at: /var/lib/jenkins/secrets/initialAdminPassword
Add the Jenkins user to the Docker users group to enable communications with the Docker daemon.
console$ sudo usermod -aG docker jenkins
Allow the default Jenkins port
8080through the default UFW firewall to enable access to the web interface.console$ sudo ufw allow 8080
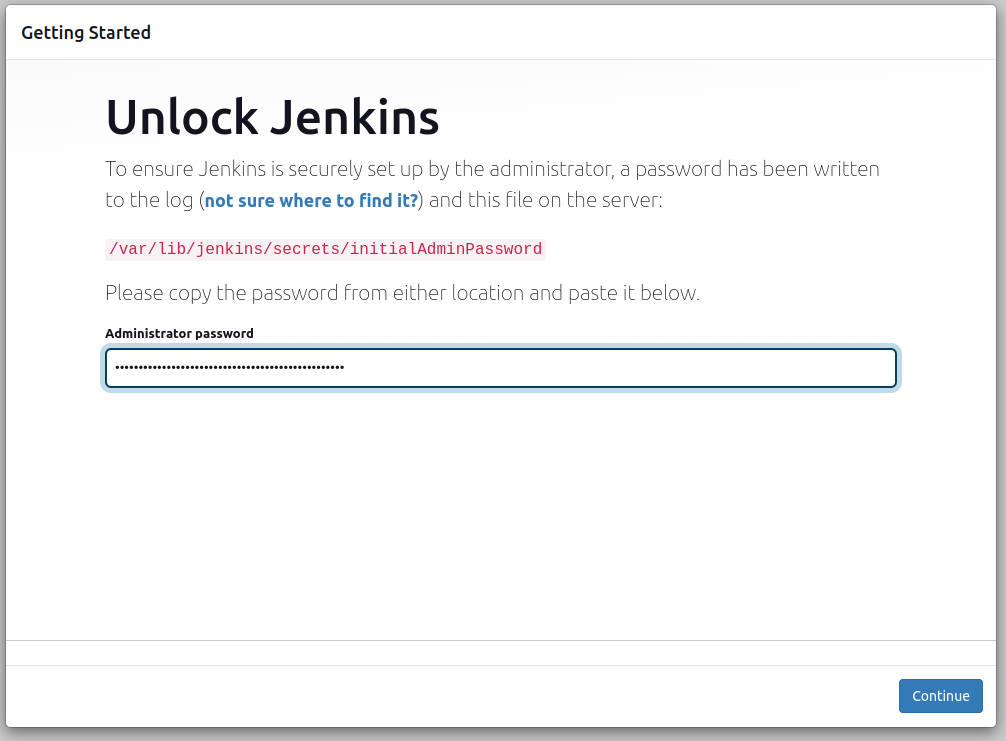
View the default Jenkins administrator password.
console$ sudo cat /var/lib/jenkins/secrets/initialAdminPassword
Copy the generated password similar to the output below:
243e47a2921746db9f14c95e264b3eb1Access the Jenkins port
8080using your Server IP Address to access the Jenkins dashboard in a web browser such as Google Chrome.http://SERVER-IP:8080Enter the default password you copied earlier and click Continue to start the Jenkins Set Up process.
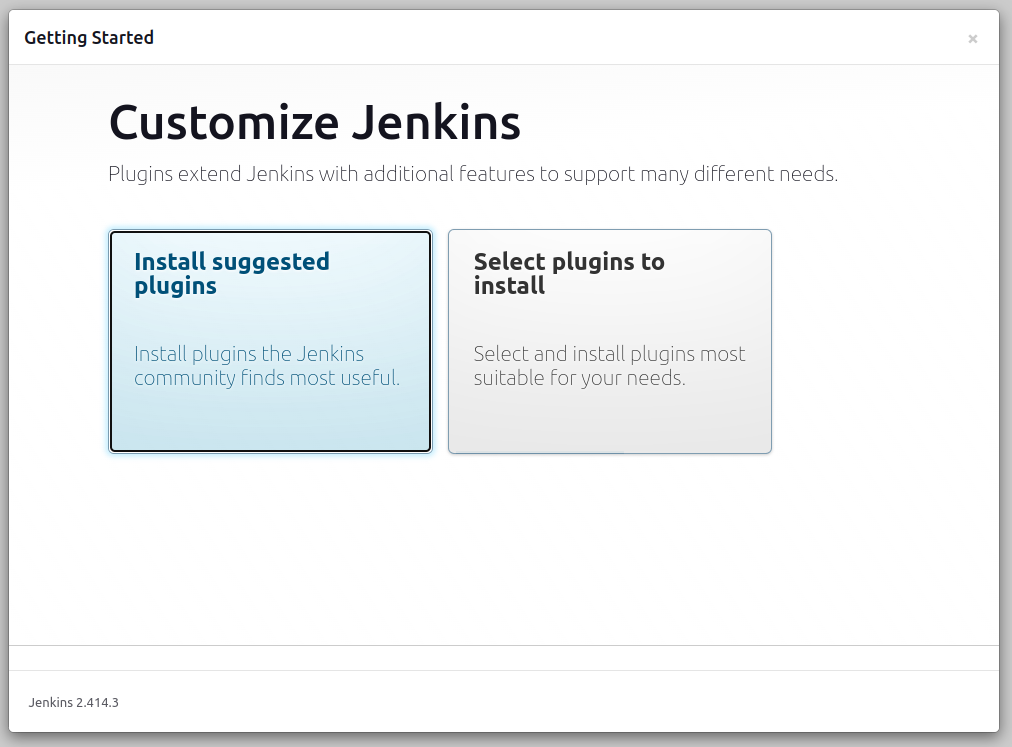
Click Install suggested plugins to start installing all necessary Jenkins packages on your server.
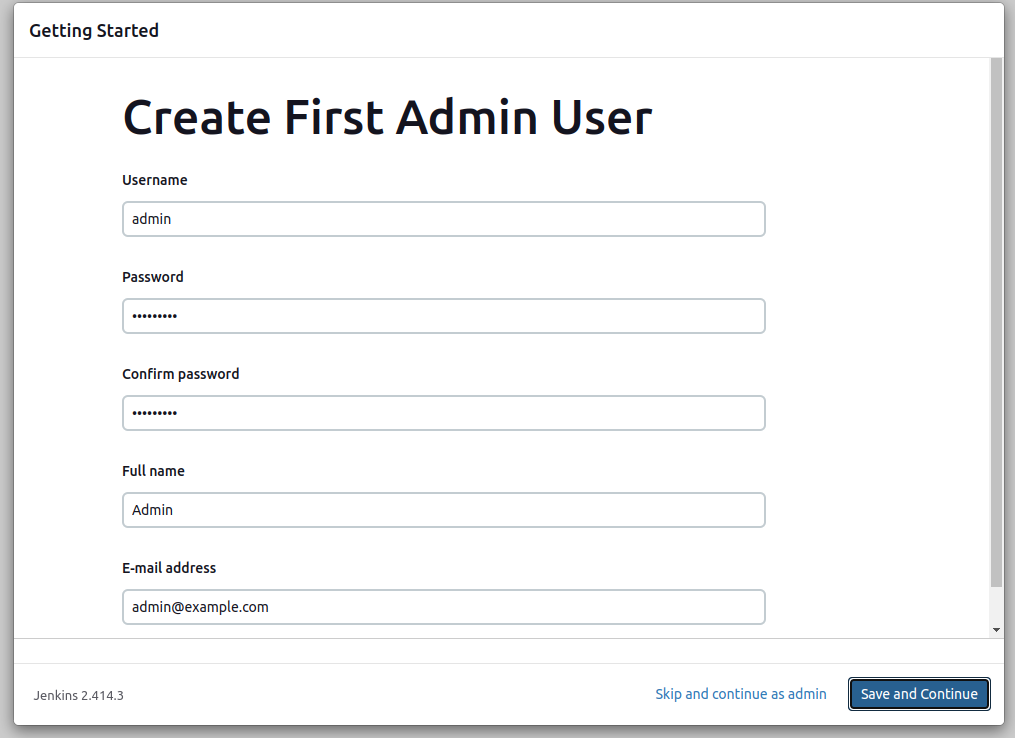
Enter a new Jenkins administrator username and password. Then, click Save and Continue to access the instance configuration page.
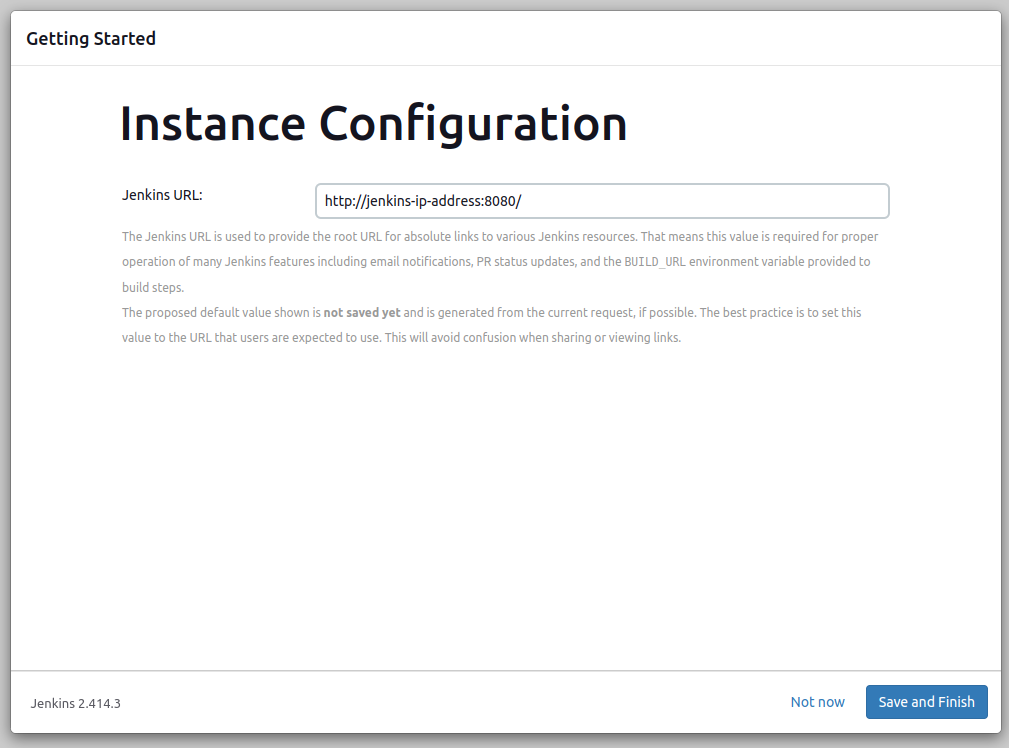
Keep your Server IP address structure in the Jenkins URL field, and click Save and Finish to save the access URL structure.
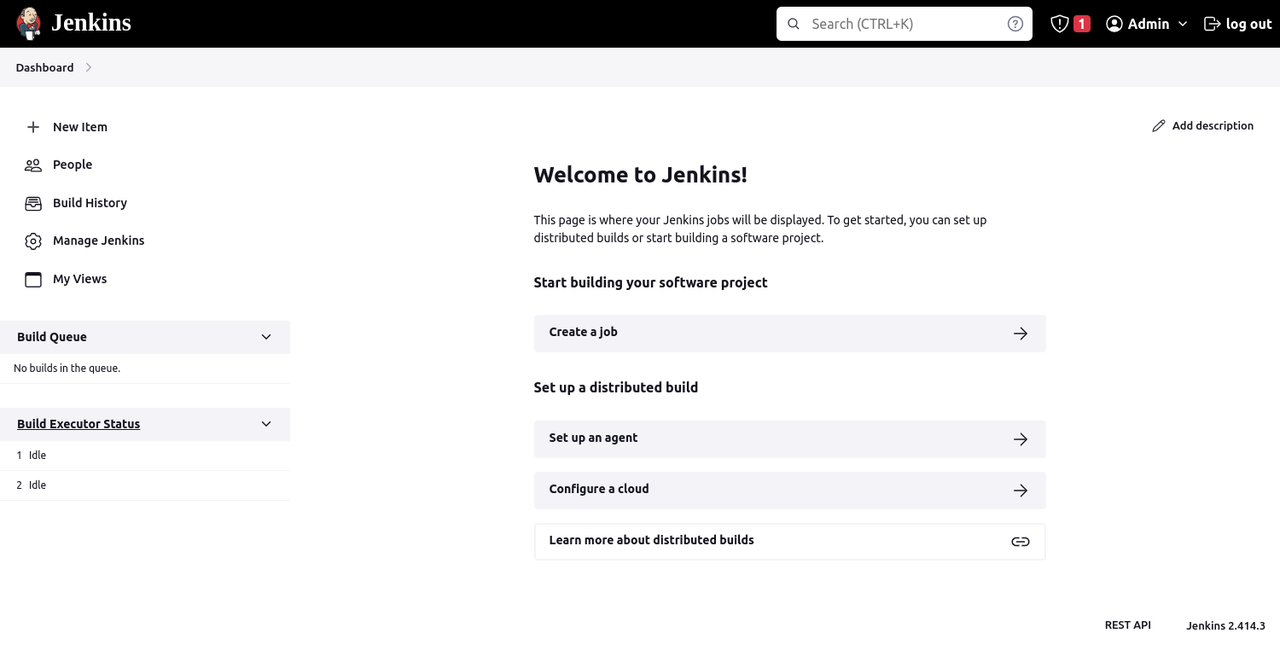
Click Start using Jenkins to finish the configuration process and access the Jenkins dashboard.
Install Jenkins Plugins
To integrate Jenkins with your VKE cluster, GitHub, and the Vultr container registry, install all necessary plugins to enable all pipeline resources. Follow the below steps to install all required Docker, GitHub, and Kubernetes plugins within your Jenkins dashboard.
Access your Jenkins dashboard.
Navigate to Manage Jenkins on the main navigation menu.
Click Manage Plugins to access the plugins page.
Click Available Plugins, and enter the keyword
Dockerin the search field.Select
Docker,Docker Pipeline, anddocker-build-stepfrom the plugin search results.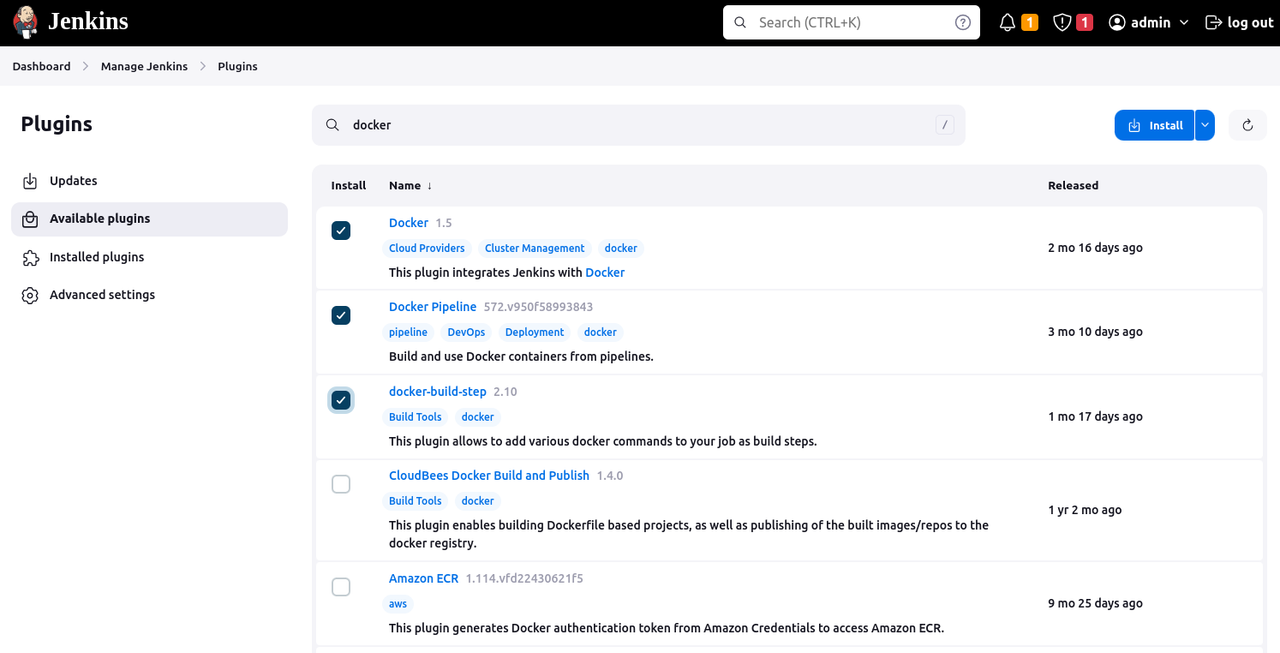
Enter
Kubernetesin the search field, and selectKubernetes,Kubernetes Credentials,Kubernetes CLI, andKubernetes Pipelinefrom the plugin results.Click Install to start the installation process.
Scroll and check the
Restart Jenkins when installation is complete and no jobs are runningoption on the installation progress page to automatically restart Jenkins.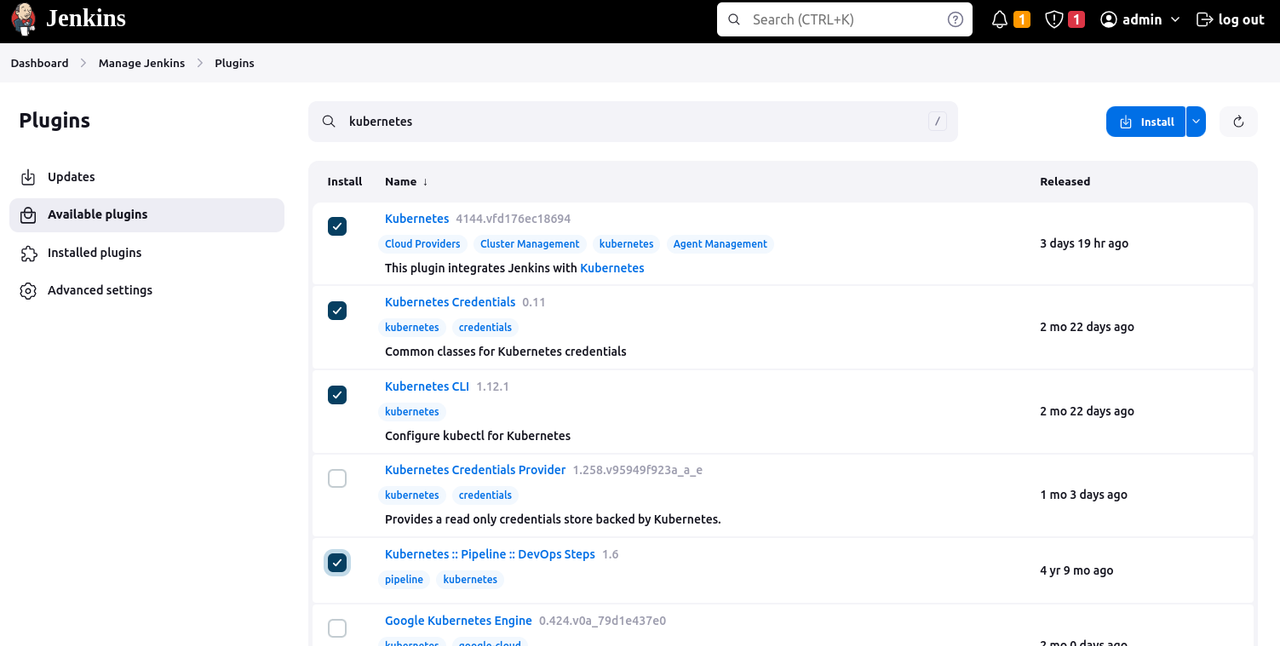
Create a New GitHub Repository Webhook
A GitHub repository webhook triggers Jenkins to automatically start the build process whenever push and pull events occur in the linked repository. This integration facilitates Continuous Integration and Delivery (CI/CD) workflows. Follow the steps below to create a new GitHub repository webhook to integrate with your Jenkins dashboard.
Log in to your GitHub account.
Click the
+sign in the top right corner and select New repository to set up a new repository.Enter your desired repository name, for example,
node-application. Then, choose your desired visibility type, and click Create repository to publish the new repository.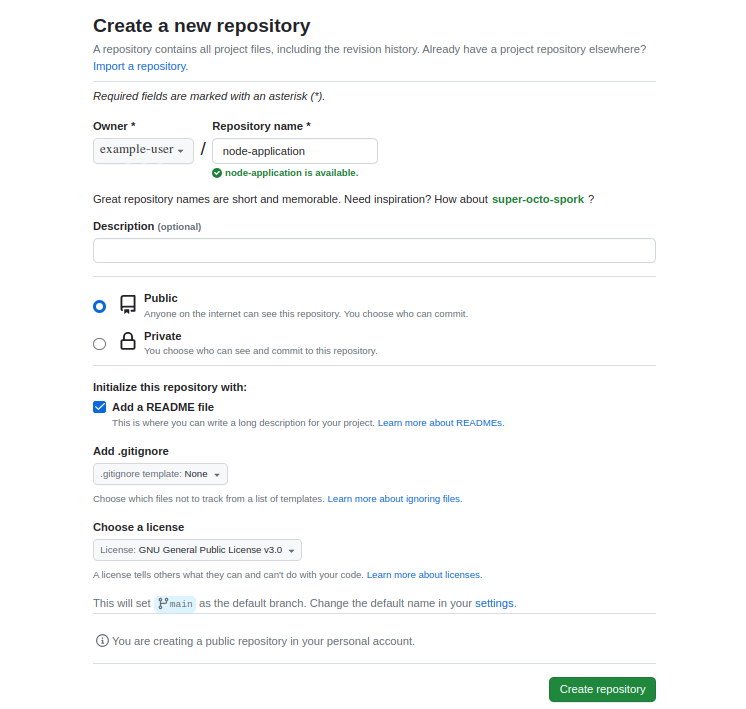
Navigate to the repository page, and click Settings on the top navigation bar.
Click Webhooks on the left navigation menu.

Click Add webhook to set up a new webhook.
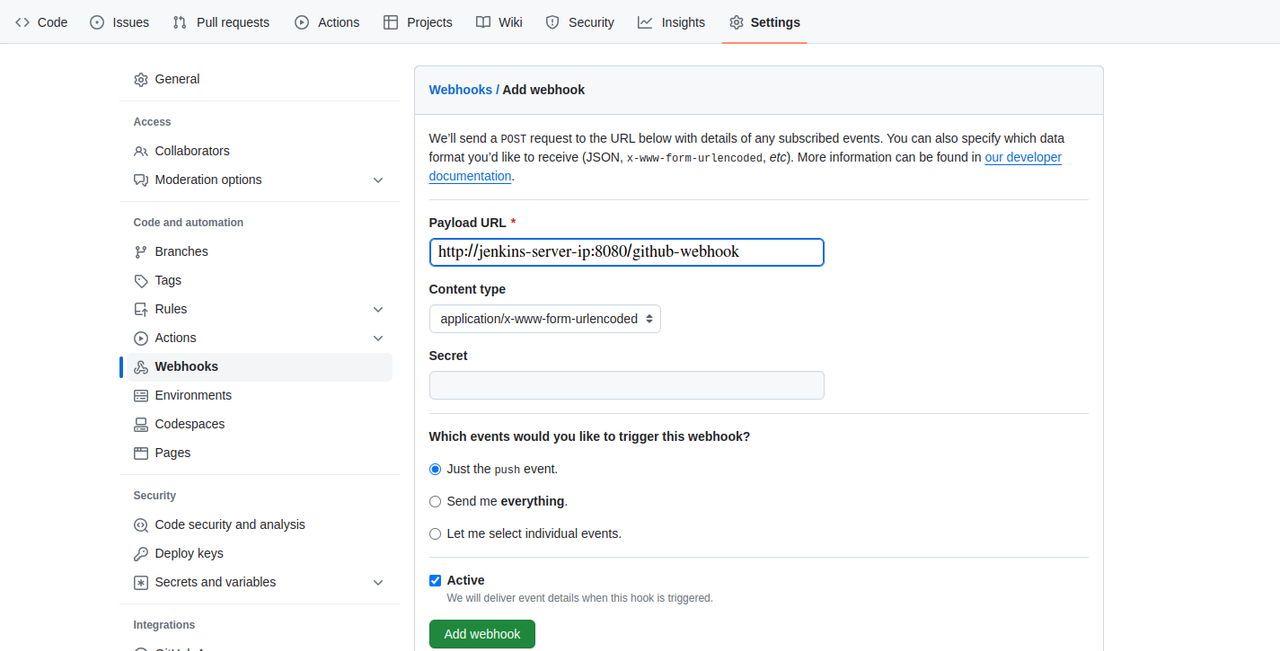
- Enter your Jenkins server URL in the Payload URL to receive payloads.
- Keep the Just the push event radio button selected.
Click Add webhook to apply your new repository webhook.
Create New Jenkins Credentials
To communicate with your GitHub repository, the Vultr Container Registry, and your VKE cluster, set up new credentials within your Jenkins dashboard to store the access details for each platform as described in the steps below.
Navigate to your Jenkins dashboard and click Manage Jenkins.
Click Credentials from the list of available options to set up a new profile.
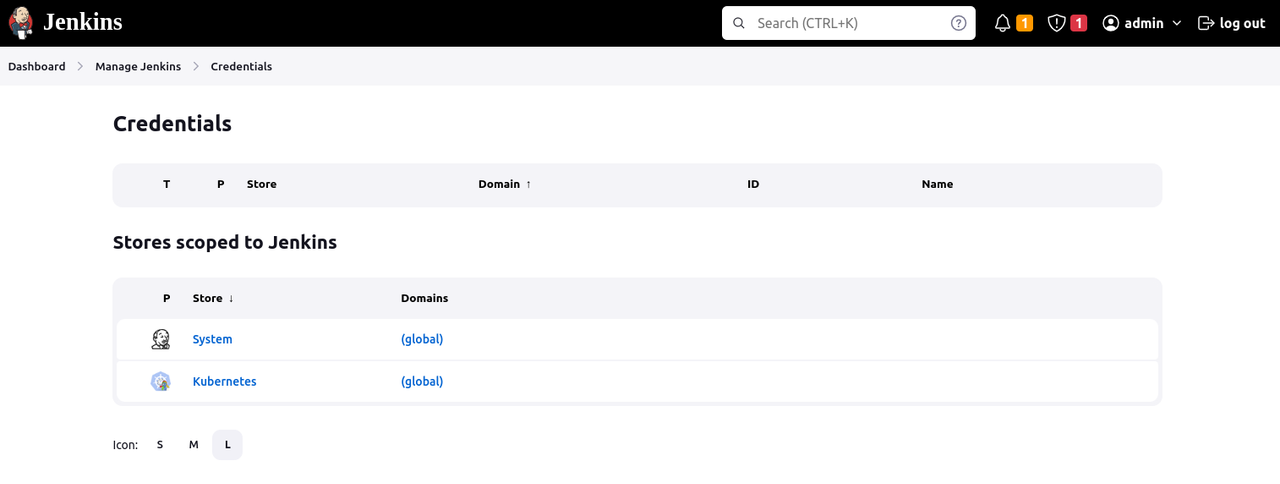
Click the
(global)Domains value and select Add credentials from the list of options.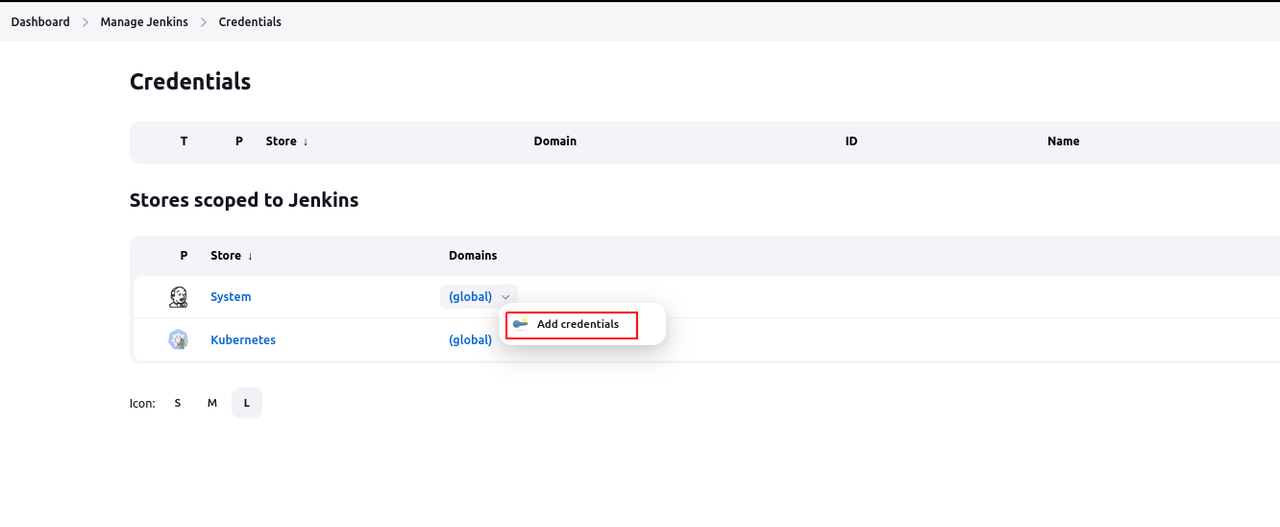
Keep Username with password as the credential type and enter your Vultr Container Registry username and password in the respective fields.
Enter
vcr-credentialsin the ID field and click Create to save the new credential.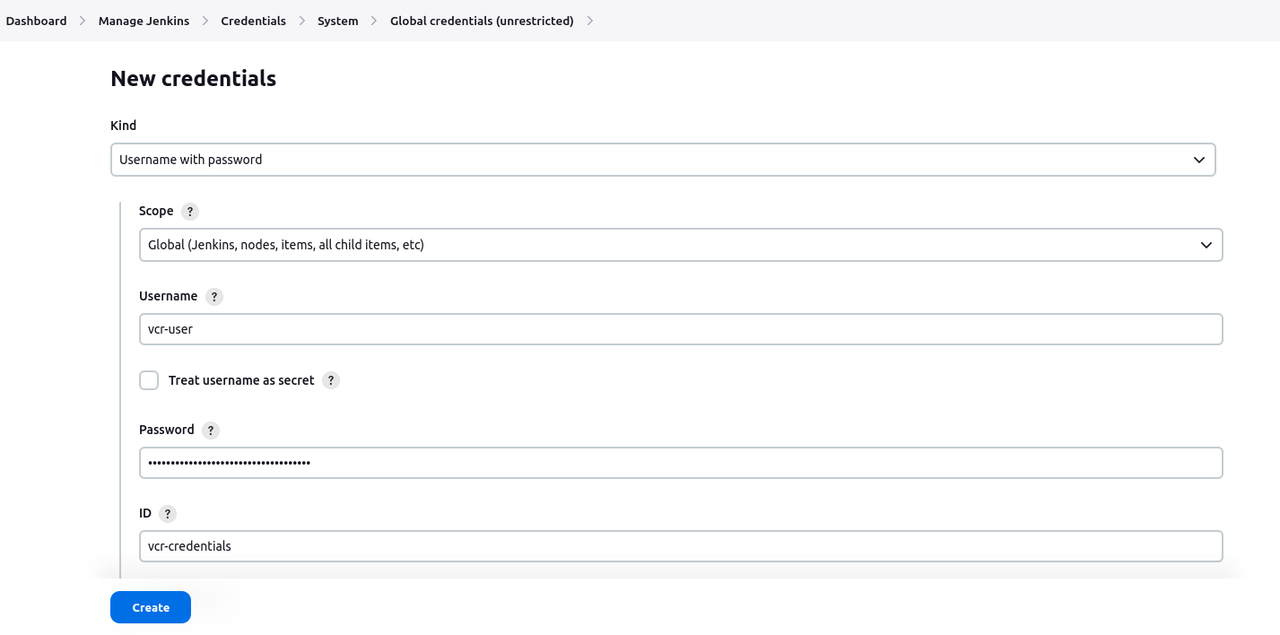
When successful, click Add credentials to set up a new GitHub credential.
Keep Username with password selected as the credential type, and enter your GitHub username, and password in the respective fields.
Enter
github-credentialin the ID field and click Create to save the new credential.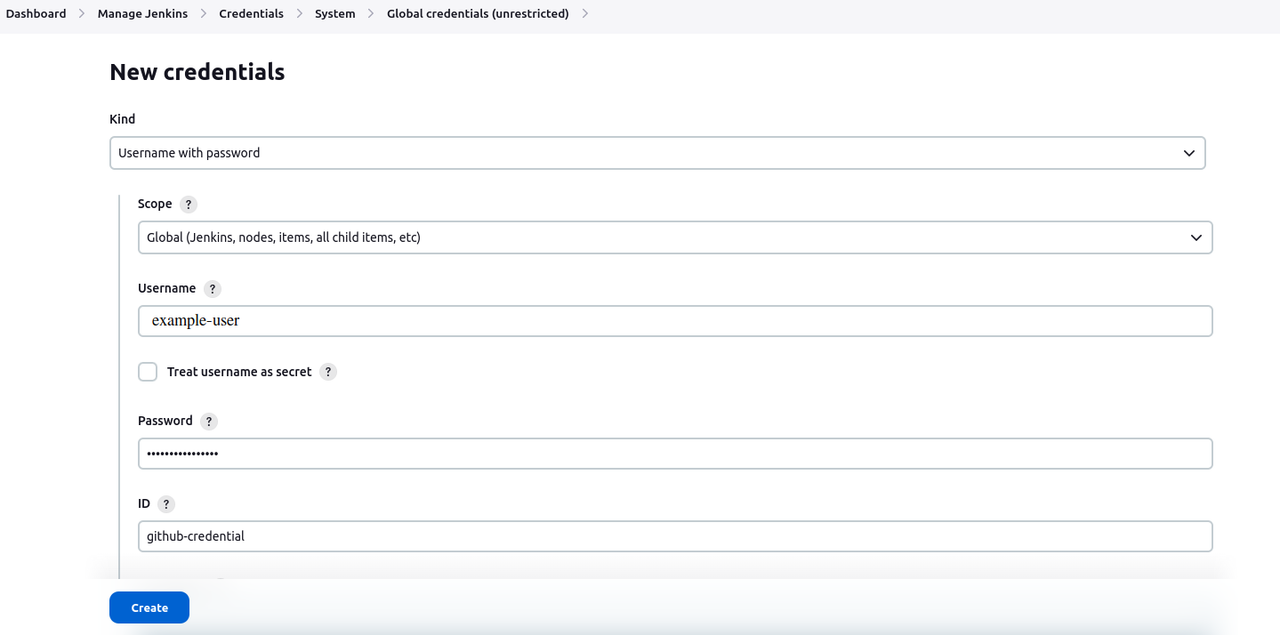
When successful, click Add credentials to set up a new GitHub credential. To set up the Kubernetes credential, click Add credentials.
Click the Kind drop-down and select Secret file from the list of options.
Click the Choose File button in the File section, browse, and upload your VKE cluster YAML file.
Enter
kubeconfigin the ID field and click Create to save the new credential.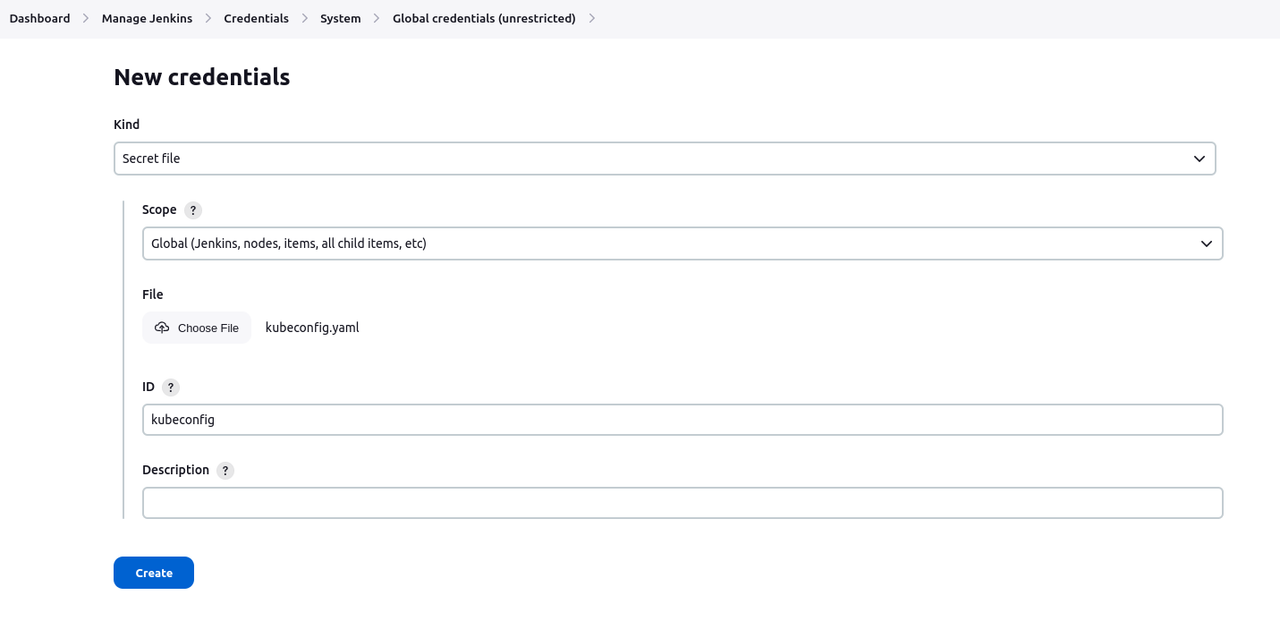
Create a Node.js Application
Clone your GitHub
node-applicationrepository you created earlier.console$ git clone https://github.com/example-user/node-application.git
Switch to the new repository directory.
console$ cd node-application
Create a new
package.jsonfile to define the application dependencies.console$ nano package.json
Add the following configurations to the file.
json{ "name": "simple-node-app", "version": "1.0.0", "description": "Node Hello World Application", "main": "app.js", "scripts": { "start": "node app.js" }, "dependencies": { "express": "4.17.1" } }
Save and close the file.
Create a new
app.jsfile to define the application structure.console$ nano app.js
Add the following contents to the file.
js'use strict'; const express = require('express'); const PORT = process.env.PORT || 8080; const app = express(); app.get('/', function (req, res) { res.send('Node Hello World Application!\n'); }); app.listen(PORT); console.log('Running on http://localhost:' + PORT);
Save and close the file.
The above Node.js application code sets up a basic server that listens on port
8080and responds withNode Hello World Application!when accessed.Create a new
Dockerfileto define the application image structure.console$ nano Dockerfile
Add the following configurations to the file.
dockerfileFROM node:18-alpine as builder ENV NODE_ENV="production" # Copy app's source code to the /app directory COPY . /app # The application's directory will be the working directory WORKDIR /app # Install Node.js dependencies defined in '/app/package.json' RUN npm install FROM node:18-alpine ENV NODE_ENV="production" COPY --from=builder /app /app WORKDIR /app ENV PORT 8080 EXPOSE 8080 # Start the application CMD ["npm", "start"]
Save and close the file.
Set Up the Pipeline Kubernetes Resources
In this section, create the necessary Kubernetes resources that pull your Node.js application container image from the Vultr Container Registry and deploy it to your cluster. Each time Jenkins starts the build process, the resource files run again to update your cluster.
Create a
deployment.ymlfile.console$ nano deployment.yml
Add the following configurations to the file. Replace
example-userwith your actual GitHub username.yamlkind: Deployment apiVersion: apps/v1 metadata: name: node-app spec: replicas: 1 selector: matchLabels: app: node-app template: metadata: labels: app: node-app spec: containers: - name: node-app image: example-user/node-app:latest ports: - containerPort: 8080
Save and close the file.
The above deployment configuration defines your application replicas, Docker image, and port to expose the application within the cluster.
Create a new Service resource file
service.ymlto expose the Node.js application outside the Kubernetes cluster.console$ nano service.yml
Add the following contents to the file.
yamlapiVersion: v1 kind: Service metadata: name: load-balancer labels: app: node-app spec: type: LoadBalancer ports: - port: 8080 targetPort: 8080 selector: app: node-app
Save and close the file.
Create the Pipeline Jenkinsfile
A Jenkinsfile file defines a Jenkins Pipeline for your CI/CD processes. It includes the entire build process steps from pulling the source code to deploying the application to your cluster. Follow the steps in this section to set up a new Jenkinsfile that includes all build processes to prepare the Node.js application for deployment in your cluster.
Create a new
Jenkinsfile.console$ nano Jenkinsfile
Add the following configurations to the file. Replace
https://sjc.vultrcr.com/jenkinsregistrywith your actual Vultr Container Registry URL.jsonpipeline { agent any environment { PROJECT_ID = 'jenkins' CLUSTER_NAME = 'cluster' LOCATION = 'usa' CREDENTIALS_ID = 'vultr' } stages { stage("Checkout code") { steps { checkout scm } } stage("Build image") { steps { script { myapp = docker.build("sjc.vultrcr.com/jenkinsregistry/node-app:${env.BUILD_ID}") } } } stage("Push image") { steps { script { docker.withRegistry('https://sjc.vultrcr.com/jenkinsregistry', 'vcr-credentials') { myapp.push("latest") myapp.push("${env.BUILD_ID}") } } } } stage("Deploy to Vultr Kubernetes") { steps { sh "sed -i 's/node-app:latest/node-app:${env.BUILD_ID}/g' deployment.yml" script { withKubeConfig([credentialsId: 'kubeconfig']) { sh "kubectl apply -f deployment.yml" sh "kubectl apply -f service.yml" } } } } } }
Save and close the file.
Below is what the above pipeline executes:
agent any: Specifies that the pipeline can run on any available agent (Jenkins node).stage("Checkout code"): Checks out the source code from the version control system (specified by scm), and enables the pipeline to access the application code.stage("Build image"): Builds a new Docker image of the Node.js applicatiom tagged with a version identifier based on the Jenkins build number(${env.BUILD_ID}).stage("Push image"): Pushes the application Docker image to your defined registrysjc.vultrcr.com/jenkinsregistryusing thevcr-credentialsvariable.stage("Deploy to Vultr Kubernetes"): Updates the Kubernetes deployment configurationdeployment.ymlto use the new Docker image tagged with the latest Jenkins build number. Then, it applies the updated deployment and service configurations to your cluster usingkubectl.sed: Replaces all occurrences of the previous image tagnode-app:latestwith the new image tagnode-app:${env.BUILD_ID}in thedeployment.ymlfile.withKubeConfig: Specifies the Kubernetes configurationkubeconfigto use in the pipeline processes. Theshcommand runskubectlto deploy the deployment and service configurations to your VKE cluster.
![NOTE] If you applied different ID values in your Jenkins dashboard, replace
vcr-credentialswith your Vultr Container Registry credential, andkubeconfigwith your actual cluster credential ID.
Upload the Application Files to your GitHub Repository
All files, including your Node.js application, Dockerfile, Jenkinsfile, and Kubernetes resources, are ready for deployment. Configure Git to commit and push all files from your management machine to the GitHub repository as described in the steps below.
Configure a global username to associate with your Git operations. Replace
Example Userwith your actual username.console$ git config --global user.name "Example User"
Configure a global email. Replace
user@example.comwith your active email address.console$ git config --global user.name "user@example.com"
Initialize the Git repository.
console$ git init
Add your GitHub repository as the remote repository to push changes.
console$ git remote add origin https://github.com/example-user/node-application.git
Stage all files in your working directory.
console$ git add .
Commit the staged changes with a descriptive commit message of your choice. For example,
Initial Commit.console$ git commit -m "Initial commit"
Push the changes to your GitHub repository.
console$ git push origin HEAD:master
When prompted, enter your GitHub username and personal access token to successfully push changes to your repository.
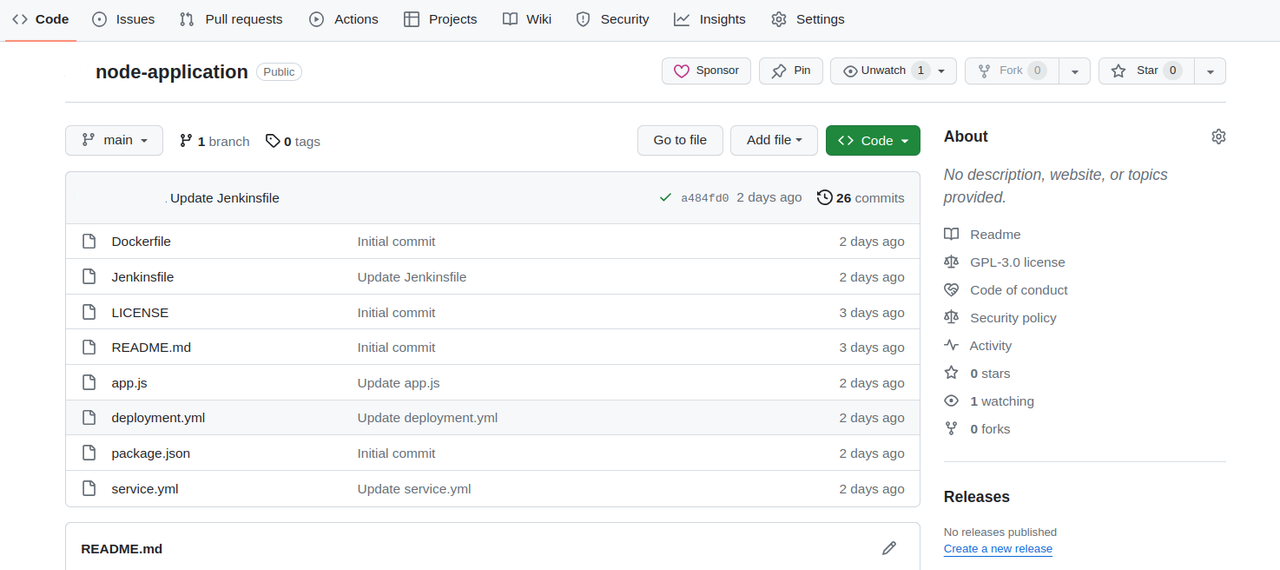
When successful, visit your GitHub repository and verify that the new files are available.
Create a Jenkins Pipeline for Kubernetes Deployment
At this point, you have Jenkins integrated with the Kubernetes cluster. Now, you will create a Jenkins pipeline to deploy your application. Follow the steps below to create a new pipeline.
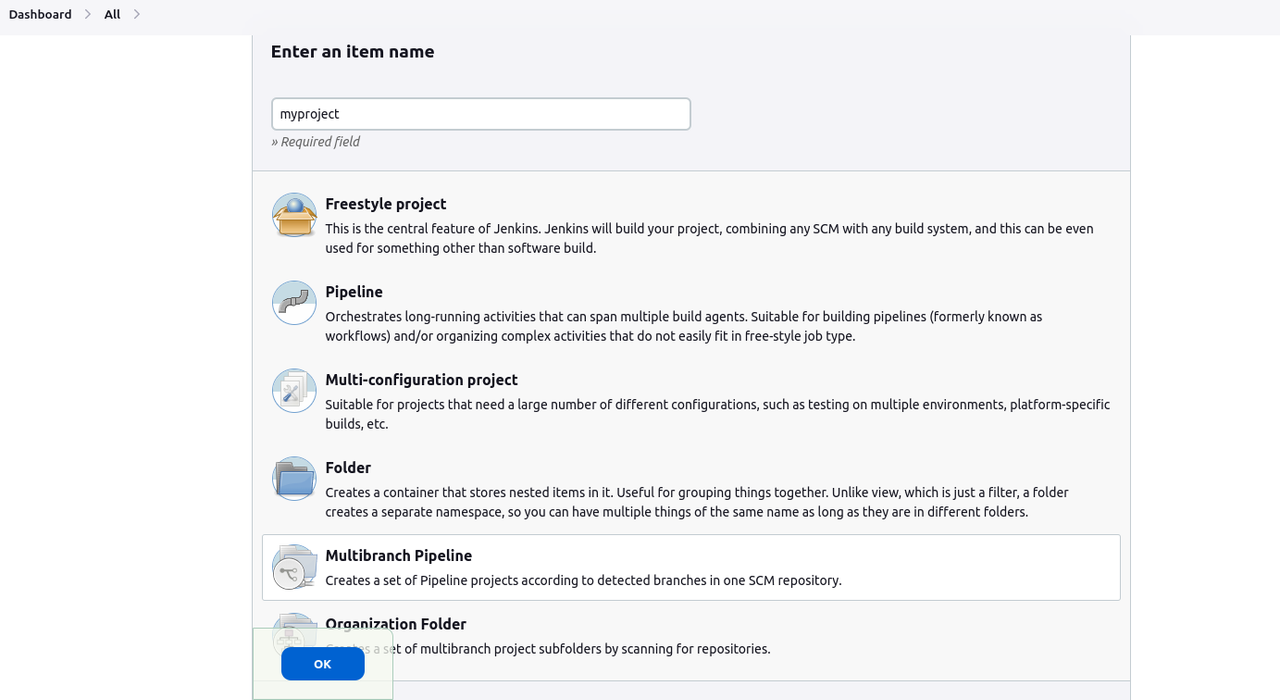
Access your Jenkins dashboard and click New Item.
Enter a name for your project. For example
myproject.Select Multibranch Pipeline, and click OK to save changes.
Apply the following changes on the project configuration page:
- Enter a name and description for your new project.
- In the Branch Sources section, click the Add Source drop-down and select GitHub.
- Select your Jenkins GitHub credentials ID.
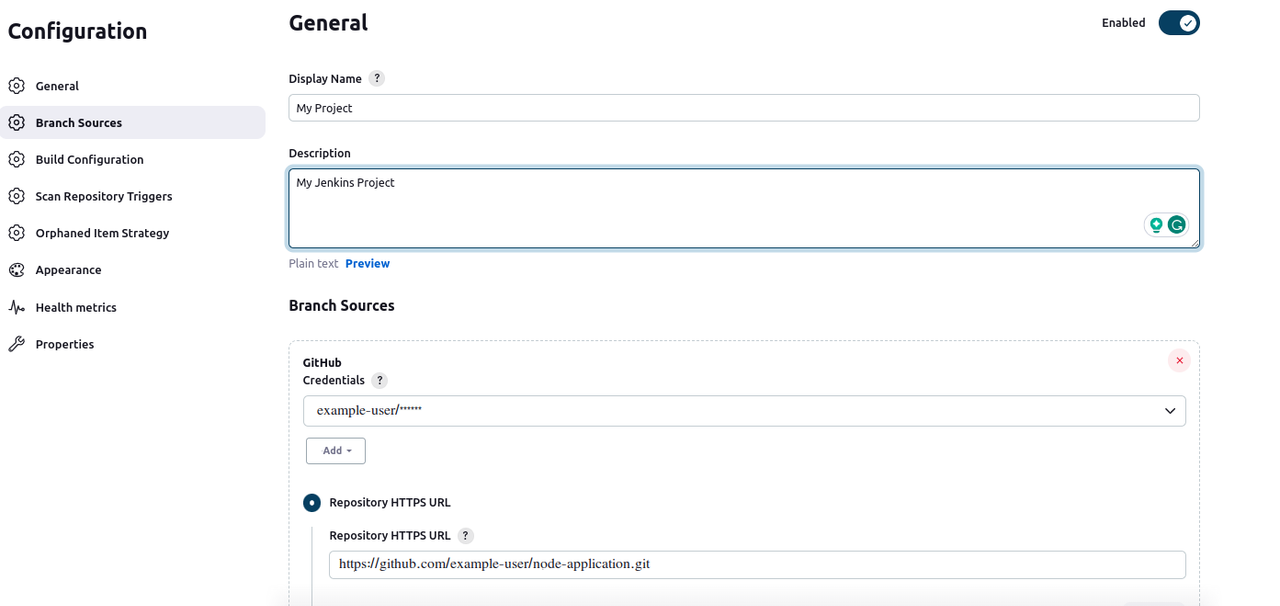
- Enter your GitHub repository URL in the
Repository HTTPS URLfield. - Scroll to the Properties section, and enter your desired Docker label.
- Enter your Vultr Container Registry URL in the Docker registry URL field, and click the Registry credentials drop-down to select the credential you created earlier.
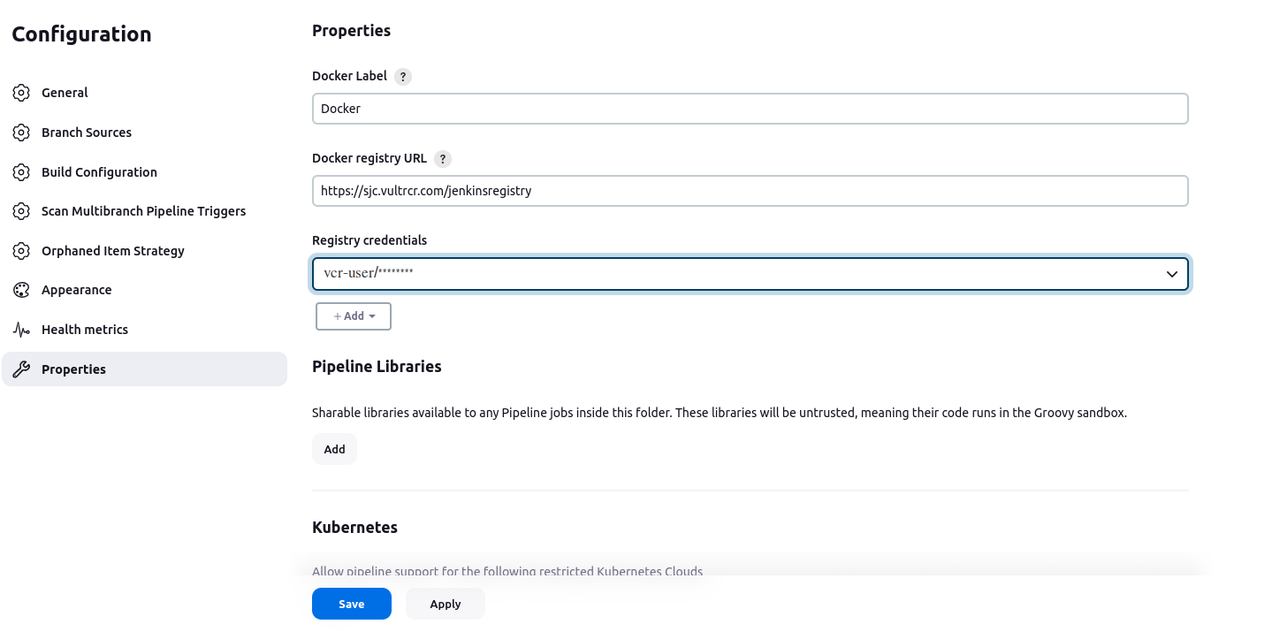
Click Save to apply your new project configuration.
Monitor the new Jenkins scan progress and verify that the scan log includes a
FINISHED SUCCESSresult.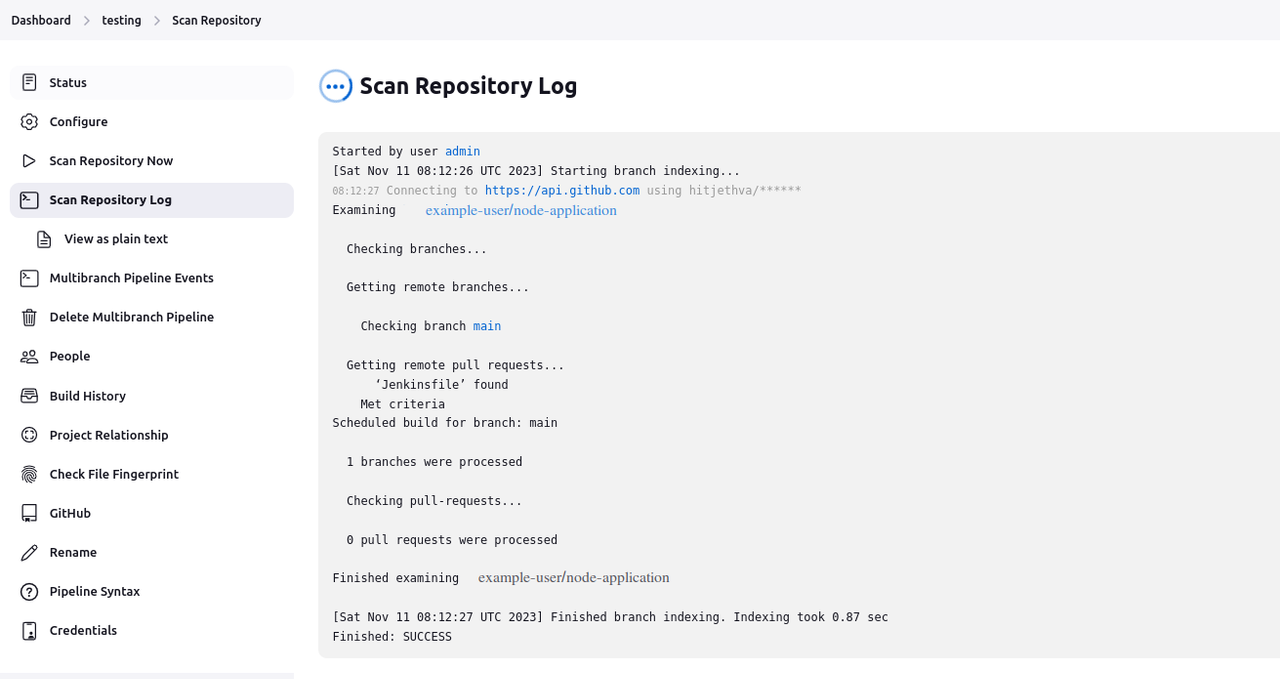
Run the Jenkins Pipeline
Navigate to the pipeline project Status page.
Verify that a green checkmark is available and the Last Success field includes a time value that represents a successful build process.
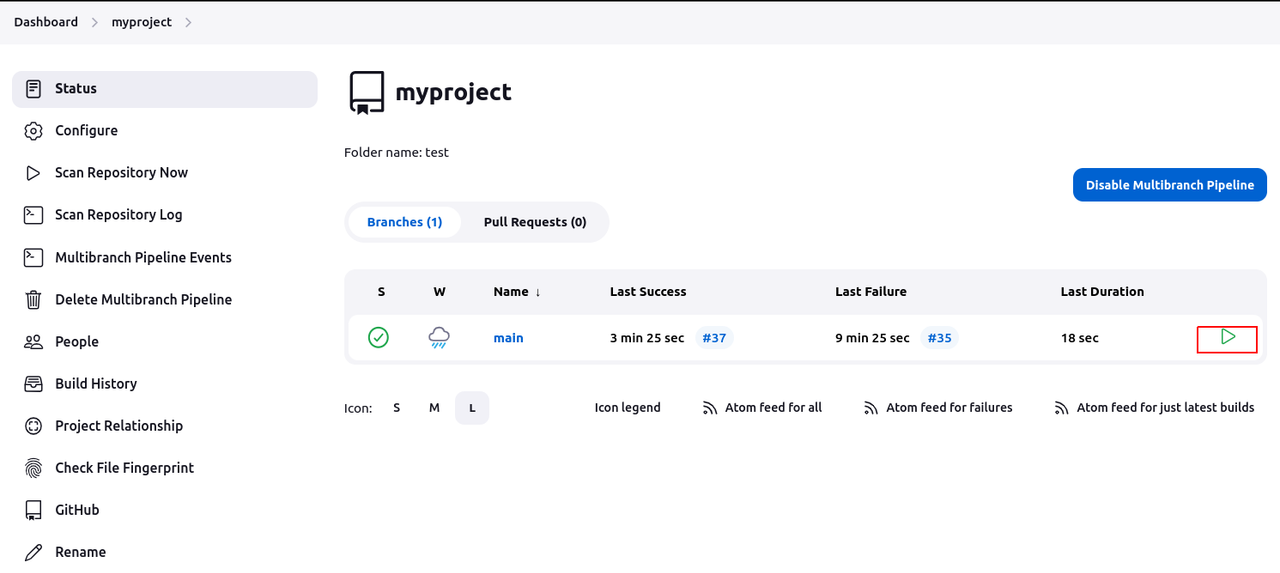
Click the
mainvalue to view the pipeline processes page and verify that all processes are successful.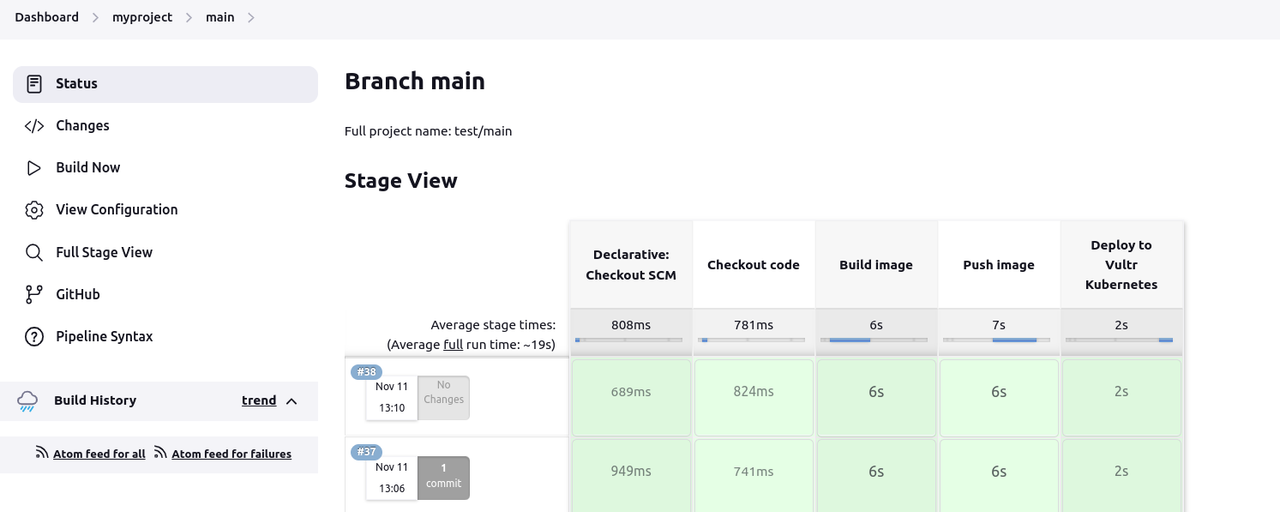
Access your server terminal session to verify the new deployment in your cluster.
console$ kubectl get deployment
Output:
NAME       READY   UP-TO-DATE   AVAILABLE   AGE
node-app   1/1     1            1           36m
As displayed in the above output, the Node.js application deployment is available in your cluster.
View the cluster services and verify that a new
LoadBalancerservice is available.console$ kubectl get services
Output:
NAME            TYPE           CLUSTER-IP       EXTERNAL-IP     PORT(S)          AGE
kubernetes      ClusterIP      10.96.0.1        <none>          443/TCP          5h4m
load-balancer   LoadBalancer   10.101.168.242   172.16.10.10   8080:32732/TCP   35m
Keep note of the Node.js application
LoadBalancerEXTERNAL-IP value to use when accessing your Node.js application.Access your Node.js application using the Load Balancer IP on port
8080. Replace the example IP172.16.10.10with your actual IP Address.http://172.16.10.10:8080Verify that the
Node Hello World Applicationprompt displays in your browser session.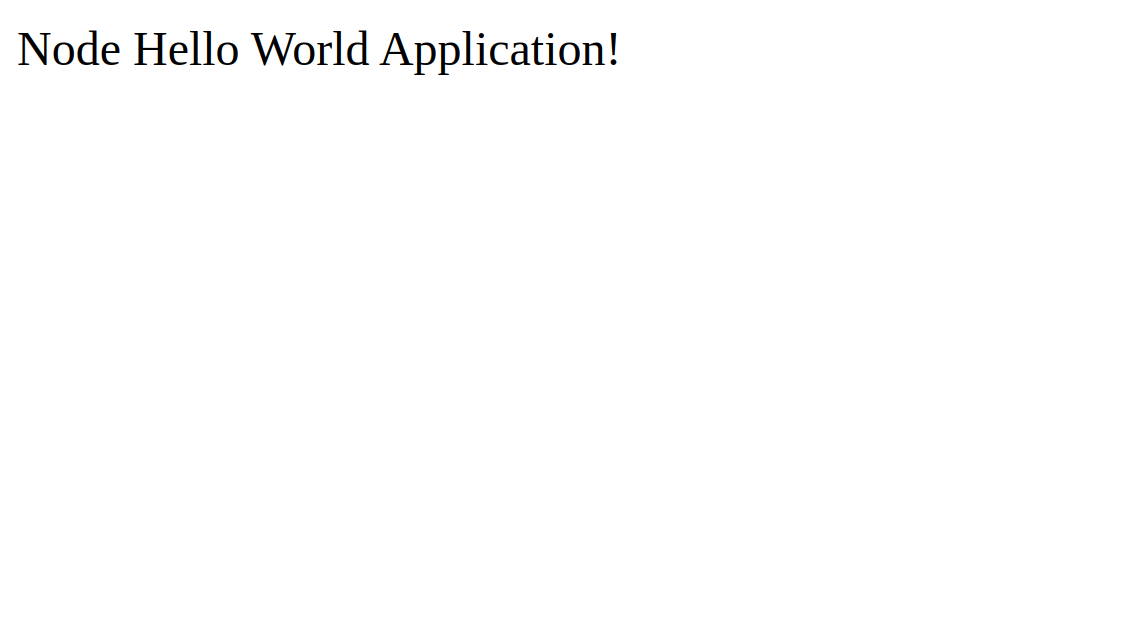
Verify the CI/CD Pipeline
Switch to your
node-applicationdirectory.console$ cd node-application
Change the
Node Hello World Applicationmessage in theapp.jsfile using thesedcommand to theNode Hello World Application Updated.console$ sed -i 's/Node Hello World Application/Node Hello World Application Updated/g' app.js
Stage changes in your local repository.
console$ git add .
Commit new changes.
console$ git commit -m "Modify Node App"
Push the changes to your GitHub repository.
console$ git push origin HEAD:master
Wait for at least
2minutes for Jenkins to trigger the pipeline, rebuild the Node.js container image, and deploy it to your Kubernetes cluster.When the pipeline execution process is successful. Visit your cluster Load Balancer IP to view the updated application.

Conclusion
You have implemented a CI/CD pipeline with Jenkins on a Vultr Kubernetes Engine (VKE) cluster. By setting up a CI/CD pipeline with Jenkins and Kubernetes, you can generate an efficient, reliable, and scalable software delivery cycle. This integration automates the software deployment process and allows you to focus on innovation and collaboration. For more information, visit the official Jenkins documentation.