How to Deploy SFTPGo as an AWS Transfer Family Alternative
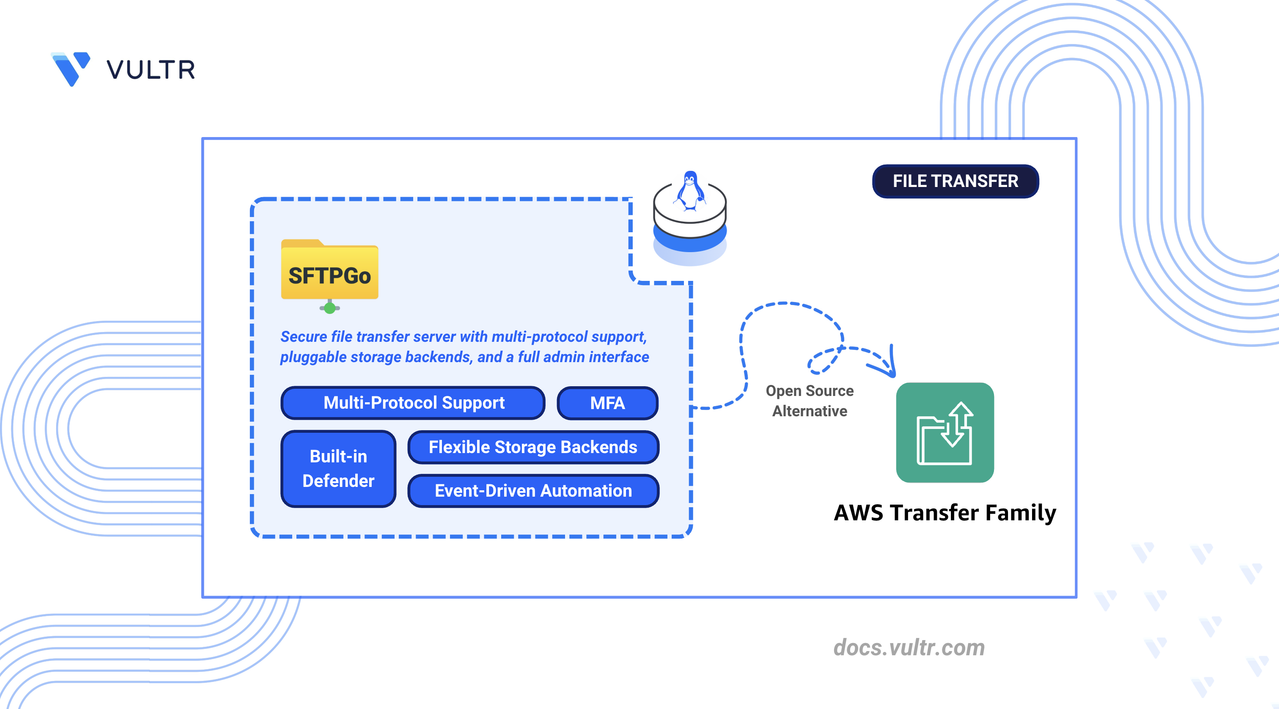
AWS Transfer Family is Amazon's managed file transfer service that provides SFTP, FTPS, and FTP endpoints with S3 and EFS storage backends as hosted services within the AWS ecosystem. It abstracts server management but ties teams to AWS-specific IAM authentication, per-protocol endpoint pricing, and hourly charges regardless of usage.
SFTPGo is an open-source file transfer server that replaces Transfer Family with a self-hosted deployment supporting SFTP, FTP/S, and WebDAV. It provides equivalent user management, S3-compatible storage backends, and multi-protocol access on any infrastructure without per-endpoint billing or AWS API dependencies.
This article explains how to deploy SFTPGo as a self-hosted alternative to AWS Transfer Family using Docker Compose with Traefik for automatic HTTPS. It covers user authentication with SSH keys and passwords, storage backend configuration with local filesystem and S3-compatible object storage, multi-protocol access (SFTP, FTP/S, WebDAV), event notifications, and migration from AWS Transfer Family.
Understanding SFTPGo Architecture
The following table maps AWS Transfer Family components to their SFTPGo equivalents:
SFTPGo runs as a single binary or Docker container that handles all protocols and administrative functions. The architecture includes:
- Protocol Handlers: Separate listeners for SFTP (port
2022), FTP/S (port2121), and WebDAV (port10080). - Web Admin Interface: Management dashboard accessible on port
8080. - Data Provider: SQLite (default), MySQL, or PostgreSQL database for user and configuration storage.
- Storage Backends: Local filesystem, S3-compatible storage (including Vultr Object Storage), Azure Blob, or Google Cloud Storage.
Prerequisites
Before you begin, you need to:
- Have access to a Linux-based server as a non-root user with sudo privileges.
- Install Docker and Docker Compose.
- Create a DNS A record pointing to your server's IP address (for example,
sftp.example.com). - (Optional) Provision an S3-compatible object storage bucket for cloud storage backends.
Deploy SFTPGo with Docker Compose
Docker Compose orchestrates the SFTPGo and Traefik containers, defines persistent storage volumes, and manages networking between services.
Create the project directory with subdirectories for data and configuration persistence.
CONSOLENavigate to the project directory.
CONSOLECreate the
.envfile to store the domain and Let's Encrypt email used by Traefik.CONSOLEAdd the following variables. Replace
sftp.example.comwith your domain andadmin@example.comwith your email address.INISave and close the file.
Create the Docker Compose configuration file.
CONSOLEAdd the following configuration:
YAMLSave and close the file.
The configuration exposes:
- Port 80, 443: Traefik HTTP/HTTPS entry points for the web admin interface.
- Port 2022: SFTP protocol connections.
- Port 2121: FTP/S protocol connections.
- Port 10080: WebDAV protocol connections.
Traefik routes the web admin interface (internal port
8080) through HTTPS on the configured domain using Let's Encrypt certificates.Start the SFTPGo and Traefik containers.
CONSOLEVerify the container is running.
CONSOLEThe output displays two running containers: SFTPGo and Traefik with Traefik listening on ports 80 and 443.
Check the service logs for any errors.
CONSOLEFor more information on managing a Docker Compose stack, see the How To Use Docker Compose article.
Configure SFTPGo Server
The web administration interface provides initial setup and ongoing configuration management.
Open a web browser and navigate to the SFTPGo admin interface at
https://sftp.example.com/web/admin, replacingsftp.example.comwith your configured domain.Create the administrator account on first access:
- Enter a username (for example,
admin). - Set a strong password.
- Confirm the password in the Confirm password field.
- Click Create admin and Sign in.
- Enter a username (for example,
After the first login, SFTPGo redirects to the two-factor authentication setup page. Select Default and click Enable.
Scan the QR code with your authenticator app.
Enter the verification code to confirm setup.
Save the recovery codes in a secure location.
Enable SFTPGo Defender
The SFTPGo Defender protects against brute-force login attempts by tracking failed logins and automatically banning offending IP addresses. The Defender is disabled by default and must be enabled through environment variables.
Open the Docker Compose file.
CONSOLEAdd the following environment variables under the
sftpgoserviceenvironment:block:YAMLSave and close the file.
These variables configure:
DEFENDER__ENABLED: Activates the brute-force protection.DEFENDER__DRIVER: Stores defender events in memory (useproviderfor database-backed persistence).DEFENDER__BAN_TIME: Ban duration in minutes.DEFENDER__THRESHOLD: Score threshold that triggers a ban.DEFENDER__SCORE_INVALID: Score added for invalid login attempts.DEFENDER__SCORE_VALID: Score added for valid logins.
Redeploy the SFTPGo container to apply the changes.
CONSOLELog back in to the admin portal and navigate to IP Manager in the left sidebar. The IP Manager provides two options:
- IP Lists: Manage and add trusted IP addresses to the Defender allow list.
- Auto Block List: View all IP addresses automatically blocked by the Defender.
Set Up User Authentication
SFTPGo supports multiple authentication methods including passwords, SSH public keys, and multi-factor authentication. Create users that mirror your AWS Transfer Family user configuration.
Create an SFTP User with Password Authentication
Password authentication uses a username and password pair stored in the SFTPGo data provider. Each user has an isolated root directory on the local filesystem.
Navigate to Users in the left sidebar.
Click Add to create a new user.
Configure the user account:
- Username: Enter the SFTP username.
- Password: Set a strong password.
- Under Profile, set Status to Active.
Under File system, keep Local disk selected for local storage.
Set the Root directory to
/srv/sftpgo/USERNAME, replacingUSERNAMEwith the SFTP username configured in the previous step.Click Save to create the user.
Configure SSH Key Authentication
SSH key authentication enables passwordless logins using cryptographic key pairs, matching the key-based authentication model used by AWS Transfer Family.
Generate an SSH key pair on the client machine (if not already available).
CONSOLEWhen prompted for a passphrase, press Enter twice to create the key without a passphrase for passwordless authentication.
Display and copy the public key content.
CONSOLEIn the SFTPGo web interface, navigate to Users, click Actions next to the target user, and select Edit.
Scroll to the Public keys section.
Paste the entire public key string into the text field.
Click Save.
Test SSH key authentication from the client. Replace
USERNAMEwith the SFTPGo username andsftp.example.comwith your configured domain.CONSOLEType
exitto close the SFTP session.CONSOLE
Enable Multi-Factor Authentication
Multi-Factor Authentication (MFA) requires users to provide a Time-based One-Time Password (TOTP) code in addition to their primary credentials when accessing protected protocols.
Navigate to Users, click Actions next to the target user, and select Edit.
Expand the ACLs section and locate Require 2FA for.
Select the protocols for which 2FA is required.
Click Save.
The user must configure their authenticator app on next login via the WebClient portal.
Configure Storage Backends
SFTPGo supports multiple storage backends including local filesystem, S3-compatible object storage, Azure Blob, Google Cloud Storage, and SFTP. Each user can have a different backend, allowing you to mix local storage and cloud object storage in the same deployment.
Configure Local Filesystem Storage
Local filesystem is the default storage type for SFTPGo users. Each user requires an explicit root directory path on the host, which maps to a directory inside the mounted /srv/sftpgo volume in the container.
Navigate to Users, click Actions next to the target user, and select Edit.
Under File system, verify Local disk is selected in the Storage dropdown.
Set the Root directory to a path such as
/srv/sftpgo/USERNAMEor any custom path you want. ReplaceUSERNAMEwith the SFTP username.Click Save.
Configure S3-Compatible Object Storage
Connect SFTPGo to any S3-compatible storage service such as MinIO or Vultr Object Storage.
Retrieve your S3-compatible storage credentials from your provider:
- Hostname/Endpoint (for example,
ewr1.vultrobjects.com). - Access Key.
- Secret Key.
- Bucket Name.
- Hostname/Endpoint (for example,
Navigate to Users, click Actions next to the target user, and select Edit.
Under File system, select S3 (Compatible) from the Storage dropdown.
Configure the S3 backend settings:
- Bucket: Enter your bucket name.
- Region: Enter the region code (for example,
ewr1). - Access Key: Enter your access key.
- Access Secret: Enter your secret key.
- Endpoint: Enter the full endpoint URL (for example,
https://ewr1.vultrobjects.com). - Key Prefix: Optionally specify a folder prefix to isolate user data.
Configure the upload settings:
- Enable Use path-style addressing for S3-compatible storage endpoints.
- Set Upload Part Size (MB) to
5(minimum for multipart uploads). - Set Upload Concurrency to
2.
Click Save.
Create a test file on the client machine.
CONSOLEConnect via SFTP to test the configuration. Replace
USERNAMEwith your SFTPGo username andsftp.example.comwith your configured domain.CONSOLEUpload the test file.
CONSOLEVerify the file appears in the bucket.
CONSOLEType
exitto close the SFTP session.CONSOLE
S3 Backend Limitations
S3-compatible storage has some limitations compared to local filesystem:
- Resume uploads are disabled by default.
- Symbolic links are not supported.
- Directory rename operations are not atomic.
chmodandchownoperations are silently ignored.
Enable Additional Protocols
SFTPGo runs SFTP on port 2022 by default, but it also supports FTP with TLS (FTP/S) and WebDAV for legacy clients and HTTP-based file access. Enabling these protocols extends SFTPGo to match the protocol coverage of AWS Transfer Family, which supports SFTP, FTP/S, and FTP. Each protocol uses its own listener port and shares the same user accounts, authentication backends, and storage configuration.
Set Up Access Controls and Quotas
SFTPGo supports per-user quotas, bandwidth throttling, IP-based restrictions, and directory-level permissions that map directly to AWS Transfer Family's access control features. Each setting applies independently and can be combined to enforce strict resource boundaries.
Configure User Quotas
User quotas restrict how much storage and how many files a user can store.
Navigate to Users, click Actions next to the target user, and select Edit.
Expand the Disk quota and bandwidth limits section and configure:
- Quota size: Maximum storage allowed for the user. Set
0for no limit. The field accepts size suffixes such asMB,GB, orTB. - Quota files: Maximum number of files (for example,
10000).
- Quota size: Maximum storage allowed for the user. Set
Click Save.
Configure Bandwidth Limits
Bandwidth limits cap the maximum upload and download speed for a user.
Navigate to Users, click Actions next to the target user, and select Edit.
Expand the Disk quota and bandwidth limits section and set:
- Bandwidth UL (KB/s): Maximum upload speed (for example,
5120for 5 MB/s). - Bandwidth DL (KB/s): Maximum download speed.
- Bandwidth UL (KB/s): Maximum upload speed (for example,
Click Save.
Configure IP Restrictions
IP restrictions limit which IP addresses or CIDR ranges can connect with a given user account.
Navigate to Users, click Actions next to the target user, and select Edit.
Expand the ACLs section and locate Allowed IP/Mask.
Add allowed IP addresses or CIDR ranges:
TEXTAlternatively, configure Denied IP/Mask to block specific addresses.
Click Save.
Configure Directory Permissions
Directory permissions grant fine-grained access controls per path within a user's root directory.
Navigate to Users, click Actions next to the target user, and select Edit.
Expand the ACLs section and under Per-directory permissions, configure directory-level access:
- Click Add to create a new permission entry.
- Specify the Path (for example,
/uploads). - Select allowed operations: List, Download, Upload, Delete, Rename, Create directories.
Click Save.
Configure Event Notifications and Logging
SFTPGo provides built-in logging, syslog forwarding, and HTTP webhook event hooks that replace AWS Transfer Family's CloudWatch integration. Log files capture protocol activity and authentication events, while event hooks trigger actions on filesystem operations such as uploads or downloads.
Configure File Logging
Create the logs directory.
CONSOLEOpen the Docker Compose file.
CONSOLEAppend the logs volume to the existing
volumes:block under thesftpgoservice:YAMLAppend the following logging environment variables to the existing
environment:block under thesftpgoservice:YAMLSave and close the file.
Redeploy the container.
CONSOLE
Configure Event Hooks
SFTPGo supports HTTP webhooks for event notifications.
Navigate to Event Manager, then click Actions in the left sidebar.
Click Add to create a new action.
Configure the action:
- Name: Enter an action name (for example,
webhook-action). - Type: Select HTTP.
- Server URL: Enter your webhook URL.
- Method: Select POST.
- Name: Enter an action name (for example,
Click Save.
Click Rules in the left sidebar.
Click Add to create a new event rule.
Configure the event trigger:
- Name: Enter a descriptive name (for example,
upload-notification). - Trigger: Select Filesystem events.
- Filesystem events: Select Upload.
- Name: Enter a descriptive name (for example,
Under Actions, select the action you created in the previous step.
Click Save.
Configure Syslog Integration
Forward logs to a centralized logging system.
Append the following syslog environment variables to the existing
environment:block under thesftpgoservice indocker-compose.yml. ReplaceSYSLOG-SERVERwith your syslog server address.YAMLRedeploy the container.
CONSOLE
Test the Deployment
Verify the deployment by testing connections across the enabled protocols. The following sections cover password-based SFTP, SSH key-based SFTP, and FTP/S connections.
Test SFTP with Password Authentication
Create a test file on the client machine.
CONSOLEConnect to the SFTP server. Replace
USERNAMEwith your SFTPGo username andsftp.example.comwith your configured domain.CONSOLEEnter the password when prompted.
Upload the test file.
CONSOLEDownload the file to verify.
CONSOLEList the directory contents.
CONSOLEExit the session.
CONSOLE
Test SFTP with SSH Key Authentication
Connect using the private key. Replace
USERNAMEwith your SFTPGo username andsftp.example.comwith your configured domain.CONSOLEThe SFTP session opens without prompting for a password, confirming SSH key authentication is working.
Type
exitto close the session.CONSOLE
Test FTP/S with lftp
Install the
lftpclient on the local machine.CONSOLEConnect with explicit TLS. Replace
USERNAMEwith your FTP username andsftp.example.comwith your configured domain.CONSOLEList files to verify the connection.
CONSOLEType
exitto close the session.CONSOLE
Migrate from AWS Transfer Family to SFTPGo
Migrating from AWS Transfer Family to SFTPGo involves exporting users, transferring file data, and updating client connection details. The following subsections cover each migration phase along with AWS-specific features that require manual reconfiguration.
User Migration
Export user configurations from AWS Transfer Family and recreate them in SFTPGo.
List AWS Transfer Family users using the AWS CLI.
CONSOLEExport user details including SSH keys.
CONSOLEFor each user, note the following information:
- Username.
- SSH public keys.
- Home directory mapping.
- IAM role (for permission reference only — IAM roles cannot be directly migrated to SFTPGo).
Generate an SFTPGo API access token using the admin credentials. Replace
ADMIN-USERNAMEandADMIN-PASSWORDwith your SFTPGo admin credentials andsftp.example.comwith your configured domain.CONSOLEThe response contains an
access_tokenvalue. The token expires after 15 minutes. Copy it and complete the next step before it expires.Create corresponding users in SFTPGo via the REST API.
CONSOLEReplace:
sftp.example.comwith your configured domain.ACCESS-TOKENwith the token from the previous step.USERNAMEwith the new SFTP username.PASSWORDwith a strong password for the user.SSH-PUBLIC-KEYwith the user's SSH public key string.
The
"status": 1field activates the user account. Without it, the user is created in a disabled state and cannot log in.
Data Migration
Transfer files from S3 to your SFTPGo storage backend.
If using S3 backend with SFTPGo, configure the same bucket or migrate data between buckets:
CONSOLEFor local filesystem backend, use the AWS CLI to download files:
CONSOLESet correct ownership on downloaded files.
CONSOLE
Authentication Migration
Convert AWS IAM-based authentication to SFTPGo methods.
For custom identity providers, configure an external authentication hook:
Create an authentication script or HTTP endpoint that validates credentials.
Configure SFTPGo to use external authentication:
JSON
Client Configuration Updates
Update client applications with the new endpoint information.
Document the new connection parameters:
- Host:
sftp.example.com(your SFTPGo server). - Port:
2022(SFTP). - Authentication: SSH key or password.
- Protocol: SFTP.
- Host:
Distribute updated connection profiles to users.
Update automated scripts and integrations with the new endpoint.
Test each client configuration before decommissioning AWS Transfer Family.
Things to Consider During Migration
Address the following AWS-specific features when migrating:
- IAM Role Permissions: Map IAM policy permissions to SFTPGo user permissions. SFTPGo uses directory-level permissions rather than IAM policies.
- S3 Lifecycle Policies: SFTPGo does not manage S3 lifecycle rules. Configure lifecycle policies directly in your S3-compatible storage provider.
- CloudWatch Logs: Replace CloudWatch logging with SFTPGo's built-in logging, syslog forwarding, or webhook integrations.
- VPC Endpoints: AWS Transfer Family VPC endpoints provide private connectivity. For SFTPGo, use private networks or VPN connections for internal-only access.
- Managed Host Keys: AWS Transfer Family manages SSH host keys automatically. Export the host key from SFTPGo (
/var/lib/sftpgo/id_*) and distribute the fingerprint to clients to prevent man-in-the-middle warnings. - Elastic IPs: If clients rely on static IP addresses, configure a reserved IP on your server.
Conclusion
You have successfully deployed SFTPGo as a self-hosted alternative to AWS Transfer Family using Docker Compose with Traefik for automatic HTTPS. The configuration includes multi-protocol support (SFTP, FTP/S, WebDAV), S3-compatible storage backends, user authentication with SSH keys and passwords, user quotas, bandwidth throttling, IP restrictions, and per-directory permissions. For advanced configuration options including clustering, plugins, and enterprise features, visit the official SFTPGo documentation.


0 Comments
Be the first to comment and share your perspective with the community.