
How to Install a Let’s Encrypt SSL/TLS Certificate on Windows Server 2019 with Internet Information Services (IIS)
Securing your web applications with HTTPS is essential for protecting data in transit and improving user trust. This article explains how to install a free Let's Encrypt SSL/TLS certificate on Windows Server using Internet Information Services (IIS).
In this article, you’ll use the win-acme client to request and apply a certificate, bind it in IIS, and enable automatic HTTPS redirection. Optional instructions for Certbot and manual .pfx conversion are also included for advanced use cases.
Install IIS
IIS is a built-in feature on Windows Server that you can enable using Server Manager.
Open Server Manager from the Start menu.
Click Add Roles and Features.
Choose Role-based or feature-based installation, then select your server.
On the Server Roles screen, check Web Server (IIS).
Add any additional features you need, then click Install.
After installation, test the setup by visiting your public server IP in a browser:
http://YOUR-SERVER-IPYou should see the default IIS welcome page.
Create a Simple Web Application
To verify that IIS is serving content correctly, create a basic HTML application:
Open File Explorer and create a folder for your website.
Press
Win + R, typenotepad, and press Enter.Paste the following HTML code into Notepad:
html<html> <head> <title>Hello World</title> </head> <body> <h1>Hello World!</h1> </body> </html>
Save the file as
index.htmlin the folder you just created.
Next, you’ll add this directory as a site in IIS and map it to your domain.
Set Up an IIS Site with Your Domain
After creating your web files, configure a new IIS site that maps your domain to the correct folder.
Open IIS Manager from the Start Menu under Windows Administrative Tools.
In the Connections pane, expand your server name and right-click Sites, then select Add Website.
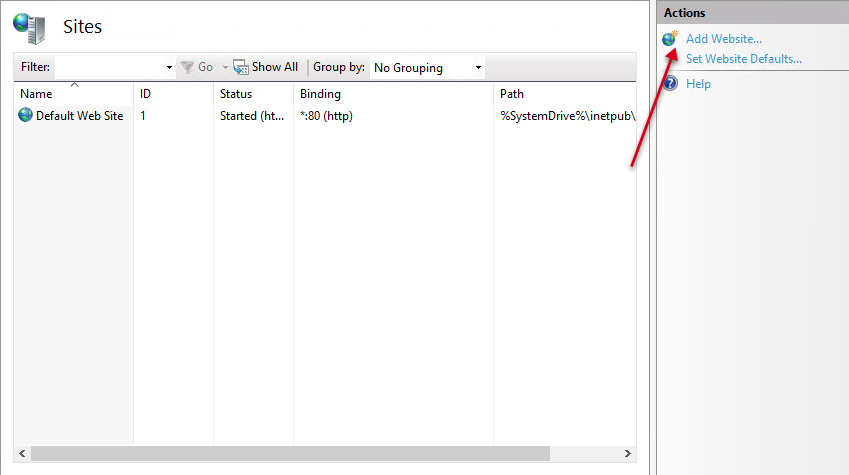
In the Add Website window, configure the following:
- Site name: Enter a name to identify the site internally (e.g.,
example.com). - Physical path: Click
...and select the folder you created earlier. - Binding:
- Type: Select
http. - IP address: Leave as All Unassigned unless you're using a dedicated IP.
- Port: Use
80. - Hostname: Enter your domain name (e.g.,
example.com).
- Type: Select
- Site name: Enter a name to identify the site internally (e.g.,
Click OK to create and start the site.
To verify the setup, open a browser and navigate to:
http://example.comYou should see the "Hello World" page you created earlier.
Request and Install a Let's Encrypt Certificate
You can install a free SSL/TLS certificate from Let's Encrypt using one of two tools:
- Win-acme : Recommended for most users; installs directly into IIS and automates renewal.
- Certbot : More advanced; offers flexible control and cross-platform support.
Review both methods below and choose the one that best suits your workflow.
Win-acme is a lightweight Let's Encrypt client that installs certificates directly into the IIS certificate store and configures HTTPS bindings automatically.
- Download the latest Win-acme zip archive.
- Extract the contents and run
wacs.exeas Administrator. - Click More info > Run anyway if SmartScreen appears.
- When prompted, press
Nto create a new certificate. - Choose the site from the list that matches your IIS domain.
- Press
Ato apply the certificate to all bindings. - Accept all defaults (
Yto continue, open in IIS, agree to Let's Encrypt terms). - Enter your email address when prompted.
Win-acme automatically:
- Requests the certificate
- Stores it in the Windows certificate store
- Binds it to your IIS website
- Sets up automatic renewal
Once complete, visit https://example.com in a browser to verify HTTPS is active.
Certbot is a versatile Let's Encrypt client that offers flexible control, but requires manual certificate binding in IIS.
Install Certbot
Download Certbot for Windows and run the installer.
Open PowerShell as Administrator and run:
pwshcertbot -d example.com -m admin@example.com --agree-tos --webroot
Enter the site directory path when prompted.
This stores certificates as .pem files in:
C:\Certbot\live\example.com\Convert to .pfx Using OpenSSL
Open PowerShell and navigate to OpenSSL's
bindirectory:pwshcd "C:\Program Files\OpenSSL-Win64\bin"
Convert your certificate to
.pfxformat:pwsh.\openssl.exe pkcs12 -export ` -out C:\Certbot\live\example.com\certificate.pfx ` -inkey C:\Certbot\live\example.com\privkey.pem ` -in C:\Certbot\live\example.com\fullchain.pem
Import and Bind the Certificate
- Open IIS Manager.
- Select the server name, then open Server Certificates.
- Click Import, select your
.pfxfile, enter the password, and confirm. - Navigate to Sites, select your domain, and click Bindings.
- Click Add, select
https, and assign:- Port:
443 - Hostname:
example.com - Certificate: Select from dropdown
- Port:
- Check Require Server Name Indication and confirm with OK.
Visit https://example.com to confirm your certificate is active.
Redirect HTTP Requests to HTTPS
Use the IIS URL Rewrite module to automatically redirect all HTTP traffic to HTTPS.
Install the URL Rewrite Module
- Download the URL Rewrite module.
- Run the installer and complete the setup.
- Open IIS Manager, click your server name, and confirm that URL Rewrite is available in Features View.
Create a Redirect Rule in IIS
In IIS Manager, expand your server and select your site under Sites.
Double-click URL Rewrite.
In the Actions pane, click Add Rules.
Under Inbound Rules, select Blank rule and click OK.
Name your rule (e.g.,
Redirect to HTTPS).Keep Requested URL as
Matches the Pattern, Using asRegular Expressions.Set the Pattern to:
(.*)Uncheck Ignore case.
Add a Condition
Expand Conditions and click Add.
Set Condition input to:
{HTTPS}Leave Check if input string as
Matches the Pattern.Set Pattern to:
^OFF$Click OK.
Define Redirect Action
Scroll to Action settings and configure:
Action type:
RedirectRedirect URL:
https://{HTTP_HOST}{REQUEST_URI}Uncheck Append query string
Set Redirect type to
Permanent (301)
Click Apply in the Actions pane.
Test the Redirect
Open your browser and visit:
http://example.comYou should be redirected to the HTTPS version automatically.
If the redirect does not work, confirm that a web.config file exists in your site root. If missing, create one with the following content:
<?xml version="1.0" encoding="UTF-8"?>
<configuration>
  <system.webServer>
    <rewrite>
      <rules>
        <rule name="Redirect to HTTPS" stopProcessing="true">
          <match url="(.*)" />
          <conditions>
            <add input="{HTTPS}" pattern="^OFF$" />
          </conditions>
          <action type="Redirect" url="https://{HTTP_HOST}{REQUEST_URI}" appendQueryString="false" />
        </rule>
      </rules>
    </rewrite>
  </system.webServer>
</configuration>
Save the file and re-test the redirect in your browser.
Conclusion
In this article, you learned how to secure a website hosted on Internet Information Services (IIS) with a free Let's Encrypt SSL/TLS certificate on Windows Server. You set up IIS, deployed a basic web application, installed the certificate using Certbot or win-acme, configured HTTPS bindings, and redirected HTTP traffic to HTTPS.
With SSL properly configured, your server is now ready for secure web hosting. To build on this setup, you can install WordPress on IIS or set up PHP Manager to support dynamic web applications.