
How to Setup PHP Manager on Windows with IIS
PHP Manager is a graphical tool that simplifies the installation and management of PHP on Windows servers running Internet Information Services (IIS), Microsoft's flexible, secure, and high-performance web server. IIS is widely used for hosting websites and web applications on Windows environments, and PHP Manager makes it easier to integrate PHP into this setup. With PHP Manager, you can install and manage multiple PHP versions, enable or disable extensions, and configure PHP settings through the php.ini file, all from an intuitive interface tailored for IIS.
In this article, you will learn how to install PHP Manager for IIS on a Windows Server. This step-by-step article on how to set up PHP Manager on Windows with IIS will also walk you through deploying a sample PHP application to verify that the installation is working correctly.
Prerequisites
- Deploy a Windows Server on Vultr.
- Remotely login to the server.
- Download and Install the Microsoft Web Platform Installer.
Step 1: Install IIS on Windows Server
- Open the Windows Server Manager.
- Select Add roles and features.
- In the open window, navigate through the options and select Role-based or feature-based installation, click Next to continue.
- Then, scroll through the list of roles and select Web Server (IIS).
- Click Next, and confirm IIS installation.
- Finally, visit your Windows Server Public IP address in a web browser.
Step 2: Install PHP Manager on Windows Server
- Download PHP Manager from the Microsoft Portal here.
- Install the downloaded
.msisetup file on the server.
Step 3: Install PHP and IIS CGI
- From the Start menu, locate and open Microsoft Web Platform Installer from the applications list.
- Now, in the search bar (top right), enter the keyword IIS CGI.
- From the list of results, click Add next to IIS: CGI.
- Next, enter PHP 7.4 in the search bar and select PHP 7.4 (x86) from install.
- Click Install to download and add the packages to your server.
Step 4: Setup PHP Manager on Windows with IIS
- Open the Windows Start Menu, then locate and open the Internet Information Services (IIS) manager under the Windows Administrative Tools group.
- Now, select your Server name in the IIS Manager Window.
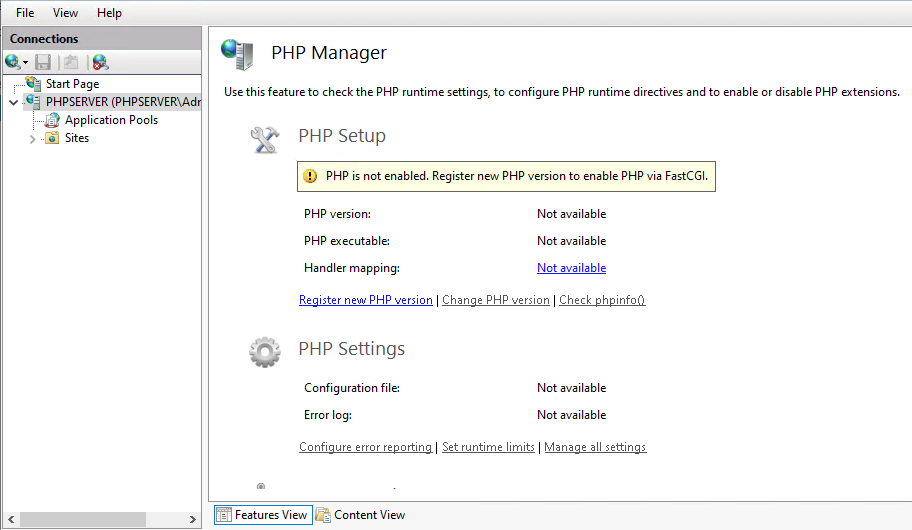
- Then, click PHP Manager from the tabbed IIS group.
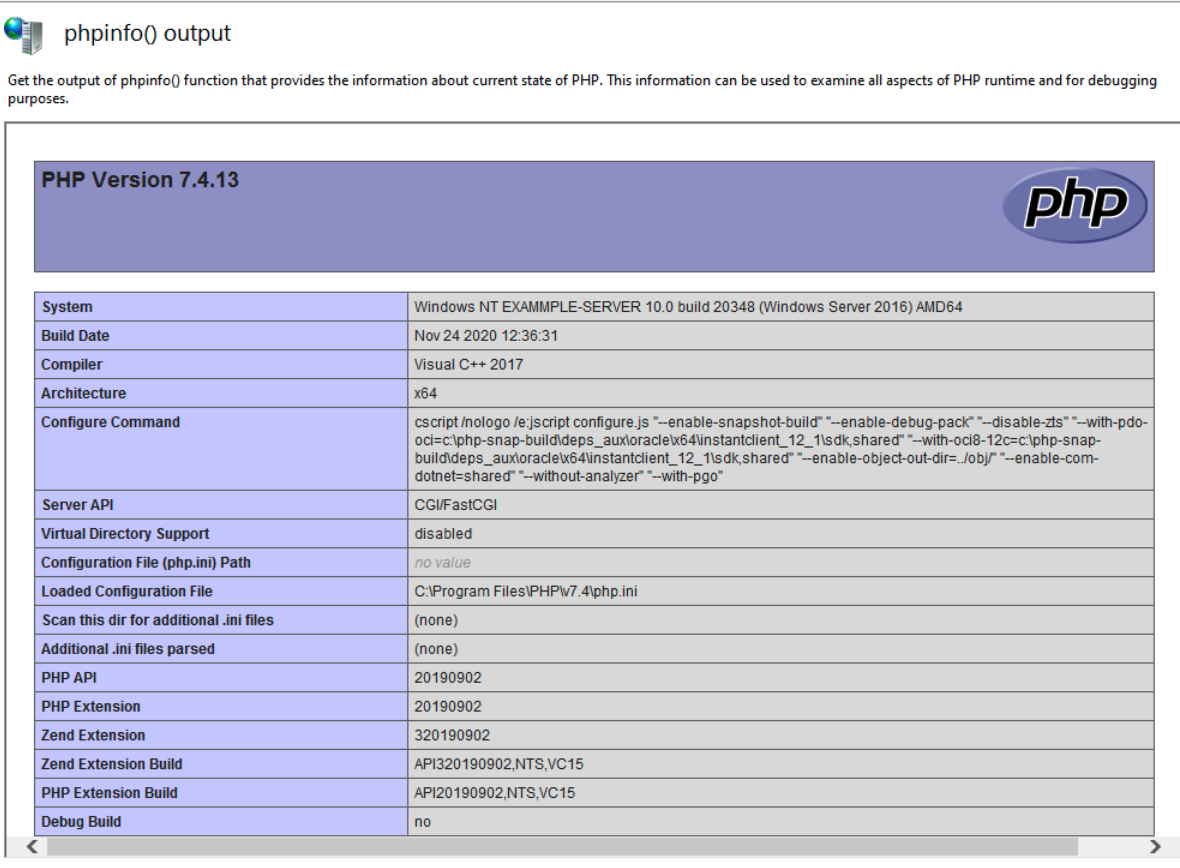
- Verify the installed PHP version, and click Check phpinfo().
- In the open dialog, select localhost as the test URL and click OK to view your current PHP information.
- To install multiple PHP versions, download the PHP version, and click Register new PHP version in PHP Manager.
- To configure PHP and the
phpinifile, navigate to the PHP Settings section in PHP manager. - To install, enable or disable extensions, navigate to the PHP Extensions section.
Step 5: Test PHP on Windows
From the start menu, locate and open Notepad as an administrator from the Windows Accessories group.
Then, add the following contents to the file:
   <?php

  echo "<h1> PHP is sucessfully installed on this Windows Server </h1><br>";

  echo "<h3> Below is the current installed PHP version and Information: </h3> <br>";

  phpinfo();

  ?>
Save the file in the C:\inetpub\wwwroot\ directory as All Files, with a custom name and the .php extension, for example, test.php.
Now, open a browser and load the PHP file on your server.
http://windows-server-ip/test.phpYour PHP application should load and display the server PHP Information.
Conclusion
You have successfully set up PHP Manager and installed PHP on your Windows Server. Next, you can build and run PHP applications on the server. For further information on how to use PHP Manager, refer to the Microsoft documentation page.