
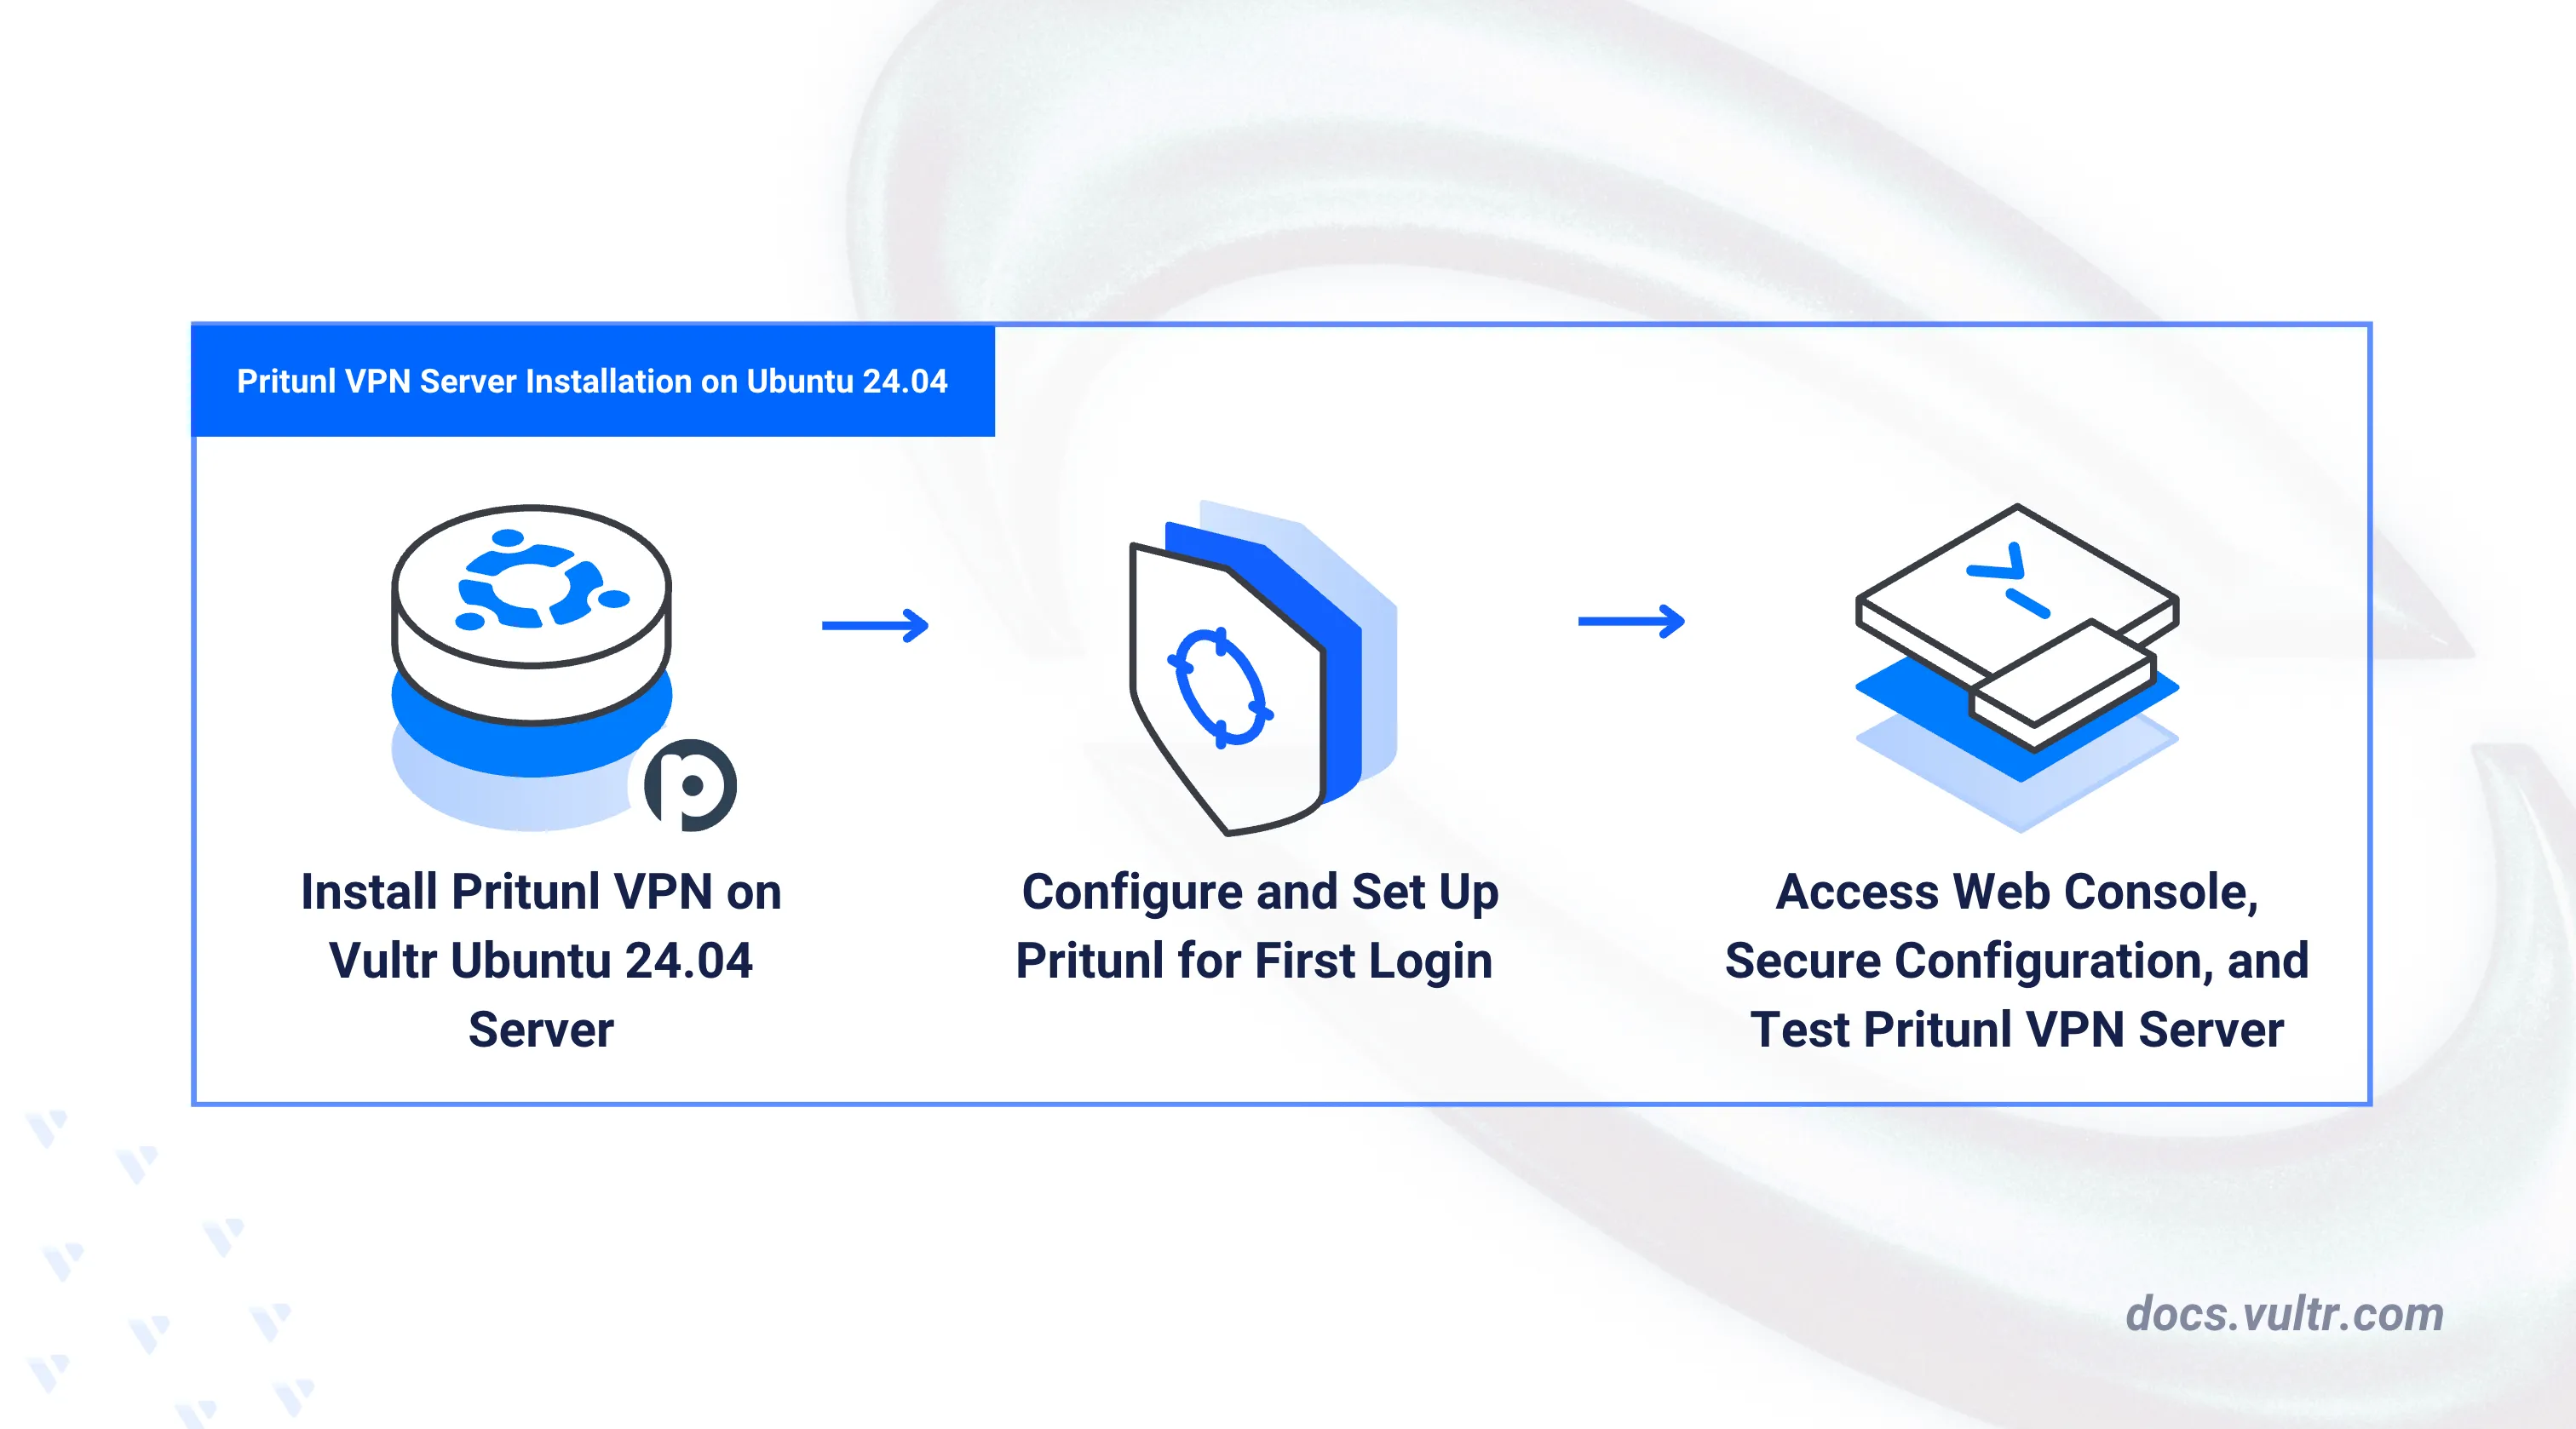
How to Install and Setup Pritunl VPN Server on Ubuntu 24.04
Pritunl is an open-source Virtual Private Networking (VPN) solution that supports multiple VPN protocols, including OpenVPN and WireGuard. It offers a user-friendly web console for creating organizations, users, servers, and client configurations. Pritunl automatically forwards VPN traffic and handles network address translation (NAT). It also generates SSL certificates using Let's Encrypt for secure client connections. This enables VPN clients to connect securely to the VPN server with Transport Layer Security (TLS).
This article covers installing and setting up a Pritunl VPN Server on Ubuntu 24.04. It also covers creating a VPN server, organizations, and users, creating client profiles compatible with the OpenVPN protocol, and enabling VPN connections on the server.
Prerequisites
Before you begin:
- Have access to an Ubuntu 24.04 server as a non-root sudo user.
- Create a domain A record pointing to the instance's public IP address, such as,
pritunlvpn.example.com.
Install Pritunl
Pritunl is unavailable in the default package repositories on Ubuntu 24.04 and requires multiple dependencies to run on a server. Pritunl requires MongoDB, OpenVPN, and WireGuard to store management data and create VPN connections. Follow the steps below to install all the necessary dependencies and Pritunl on your Ubuntu 24.04 server.
Update the APT package index.
console$ sudo apt update
Upgrade the system packages.
console$ sudo apt upgrade -y
Install the
gnupgdependency package to verify the authenticity of repository keys.console$ sudo apt install gnupg -y
Add the MongoDB 8.0 repository to your APT sources.
console$ sudo tee /etc/apt/sources.list.d/mongodb-org.list << EOF deb [ signed-by=/usr/share/keyrings/mongodb-server-8.0.gpg ] https://repo.mongodb.org/apt/ubuntu noble/mongodb-org/8.0 multiverse EOF
Add the OpenVPN repository to your APT sources.
console$ sudo tee /etc/apt/sources.list.d/openvpn.list << EOF deb [ signed-by=/usr/share/keyrings/openvpn-repo.gpg ] https://build.openvpn.net/debian/openvpn/stable noble main EOF
Add the Pritunl repository to your APT sources.
console$ sudo tee /etc/apt/sources.list.d/pritunl.list << EOF deb [ signed-by=/usr/share/keyrings/pritunl.gpg ] https://repo.pritunl.com/stable/apt noble main EOF
Fetch the MongoDB, OpenVPN, and Pritunl GPG public keys to verify the authenticity of the respective repository packages.
console$ curl -fsSL https://www.mongodb.org/static/pgp/server-8.0.asc | sudo gpg -o /usr/share/keyrings/mongodb-server-8.0.gpg --dearmor --yes $ curl -fsSL https://swupdate.openvpn.net/repos/repo-public.gpg | sudo gpg -o /usr/share/keyrings/openvpn-repo.gpg --dearmor --yes $ curl -fsSL https://raw.githubusercontent.com/pritunl/pgp/master/pritunl_repo_pub.asc | sudo gpg -o /usr/share/keyrings/pritunl.gpg --dearmor --yes
Update the APT package index to apply the repository changes.
console$ sudo apt update
Install MongoDB, OpenVPN, and WireGuard.
console$ sudo apt install mongodb-org openvpn wireguard wireguard-tools -y
Install Pritunl.
console$ sudo apt install pritunl -y
Verify the installed Pritunl version.
console$ pritunl version
Output:
pritunl v1.32.4278.46
Manage the Pritunl System Service
Follow the steps below to manage the Pritunl system service.
Enable the Pritunl system service to start at boot.
console$ sudo systemctl enable pritunl
Output:
Created symlink /etc/systemd/system/multi-user.target.wants/pritunl.service → /etc/systemd/system/pritunl.service.Start the Pritunl service.
console$ sudo systemctl start pritunl
Check the Pritunl service status and verify that it's running.
console$ sudo systemctl status pritunl
Output:
● pritunl.service - Pritunl Daemon
     Loaded: loaded (/etc/systemd/system/pritunl.service; enabled; preset: enabled)
     Active: active (running) since Fri 2025-07-25 07:15:43 UTC; 2h 34min ago
...
Pritunl requires the MongoDB service to store management data. Enable the MongoDB service to start at boot.
console$ sudo systemctl enable mongod
Output:
Created symlink /etc/systemd/system/multi-user.target.wants/mongod.service → /usr/lib/systemd/system/mongod.service.Start the MongoDB service.
console$ sudo systemctl start mongod
Configure Pritunl
Pritunl supports multiple VPN protocols, including OpenVPN and WireGuard, which you can configure using the web console. Follow the steps below to generate a setup key and enable access to the Pritunl web console.
Check the Pritunl service status and verify that it's running.
console$ sudo systemctl status pritunl
Run the following command to generate a new Pritunl setup key.
console$ sudo pritunl setup-key
The setup key, as shown below, is a one-time-use token required to initialize the Pritunl web console. Once used during the initial setup, it cannot be reused. Keep this key secure until the web console initialization is complete.
ef5e2ae11293466daba9c20d12cfc50eAllow connections to the HTTP port
80to enable Let's Encrypt validations.console$ sudo ufw allow 80/tcp
Allow connections to the HTTPS port
443through the firewall to enable access to the Pritunl web console.console$ sudo ufw allow 443/tcp
Reload UFW to apply the firewall configuration changes.
console$ sudo ufw reload
Check the UFW status to verify the active firewall rules.
console$ sudo ufw status
Access your server's IP using a web browser like Firefox.
http://YOUR-SERVER-IPAccept the SSL warning for an insecure connection when prompted to access the Pritunl login page.
Enter the setup key you generated earlier using the
pritunl setup-keycommand to initialize the Pritunl web console.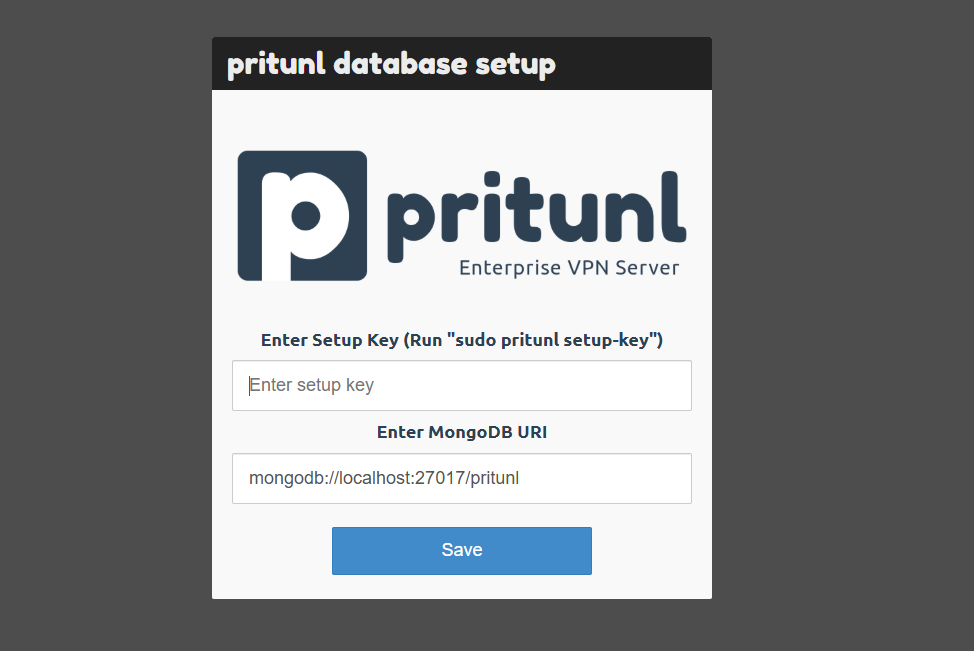
Verify that the MongoDB URI points to your localhost address.
Click Save to load the setup key and MongoDB URI.
Access your server's terminal.
Generate the default Pritunl password for accessing the web console.
console$ sudo pritunl default-password
Note the username and password generated in the output.
Administrator default password:
  username: "pritunl"
  password: "i8g1JLkZQmdl"
Access the Pritunl login page in your web browser.
http://YOUR-SERVER-IP/loginEnter the default username and password you generated using the
pritunl default-passwordcommand.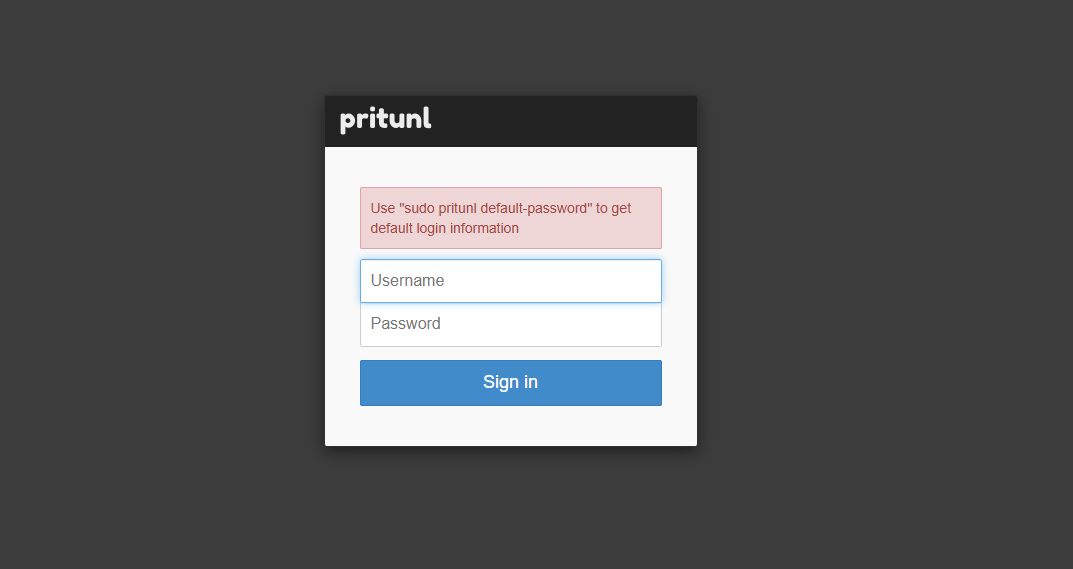
Click Sign in to log in to the Pritunl web console.
Enter a new strong password in the Initial Setup dialog.
Verify the server's public IP address in your client configurations.
Enter your domain such as
pritunlvpn.example.comin the Let's Encrypt Domain field.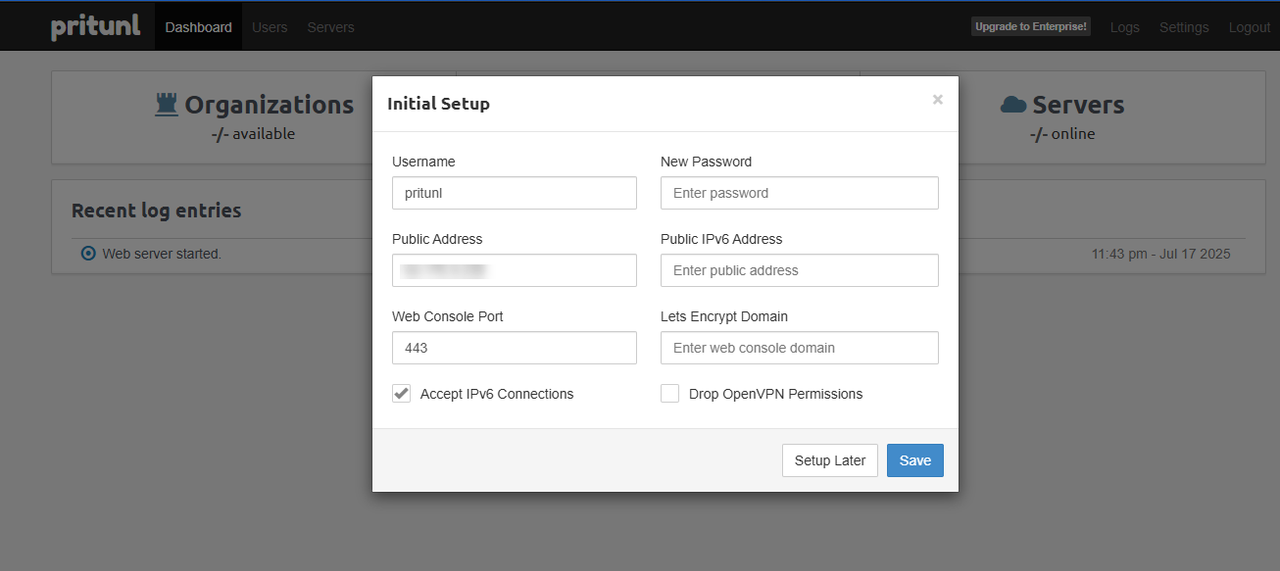
To generate Let's Encrypt certificates, ensure that your domain name's A record points to your server's public IP address.
Click Save to apply the Pritunl configuration changes.
Access the Pritunl Web Console
Pritunl uses the following organization structure to enable VPN connections and configurations on a server.
- Server: The actual VPN endpoint clients use to establish VPN tunnel connections. A server hosts VPN protocols like OpenVPN or WireGuard to handle routing, encryption, and client connections.
- Organization: A security and management workspace for users. Each organization is a standalone CA that issues and manages unique user certificates, allowing separate permissions and management on a server.
- User: An individual profile that uses a VPN client application to connect to a server. A user is part of an organization with a unique client certificate signed by the respective CA. Client devices connect to the VPN server using the profile configuration and the associated PIN or password.
Follow the steps below to access the Pritunl web console and create a new server, organization, and user to create VPN connections.
Access your domain in a new web browser window to open the Pritunl login page.
https://pritunlvpn.example.comLog in to the Pritunl web console using the administrator username and password you configured earlier.
Navigate to Servers on the top navigation bar.

Click Add Server to set up a new server.
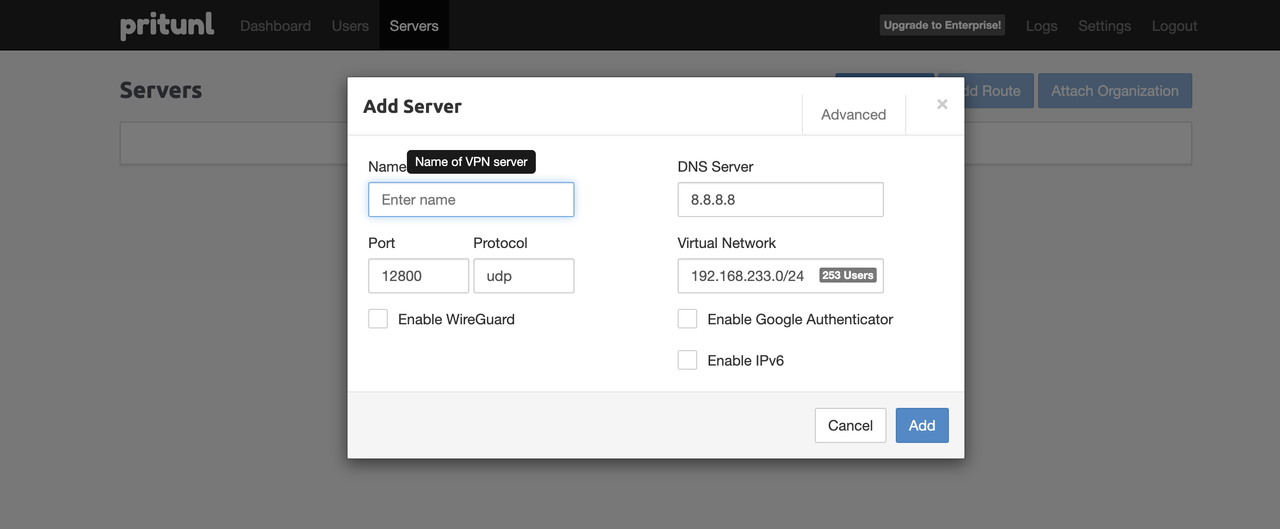
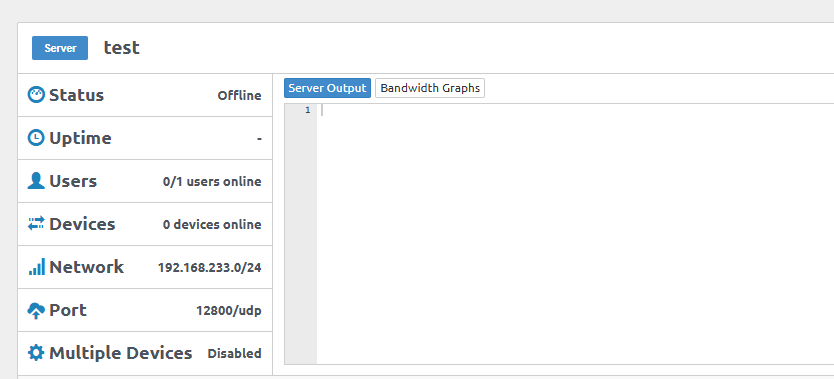
Enter your server information in the respective fields, including:
- Name: The server name to identify the organization and user structure.
- DNS Server: The preferred DNS server address to assign to the client configurations.
- Port: The default port to connect to the server.
- Protocol: The default protocol to connect to the server using the port.
- Virtual Network: The private networking subnet to assign client devices connected to the VPN server.
Click ADD to save the server configuration changes.
Verify that the server is created with a
Successfully added server.message.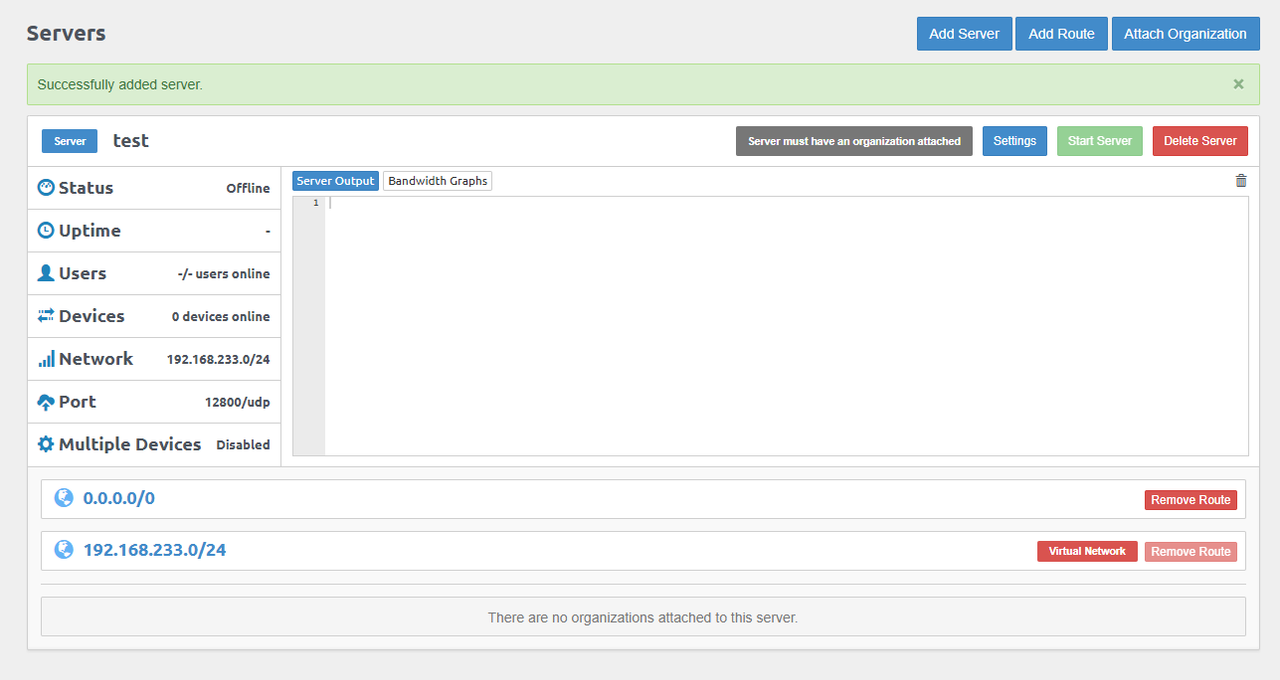
To start the server, you must create and attach an organization first.
Create an Organization
Follow the steps to create an organization to assign new VPN users.
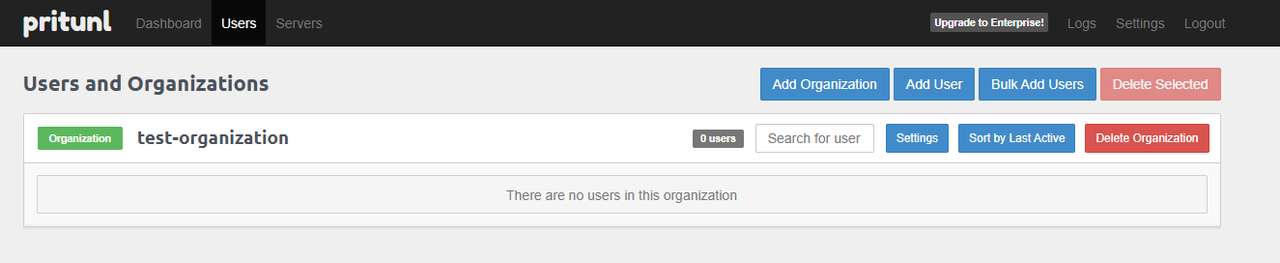
Navigate to Users and click Add Organization.

Enter the organization name and click Add.
Verify that the new organization is created and ready to assign users.

Navigate to Servers and select your target server.
Click Attach Organization to attach the organization to a server.
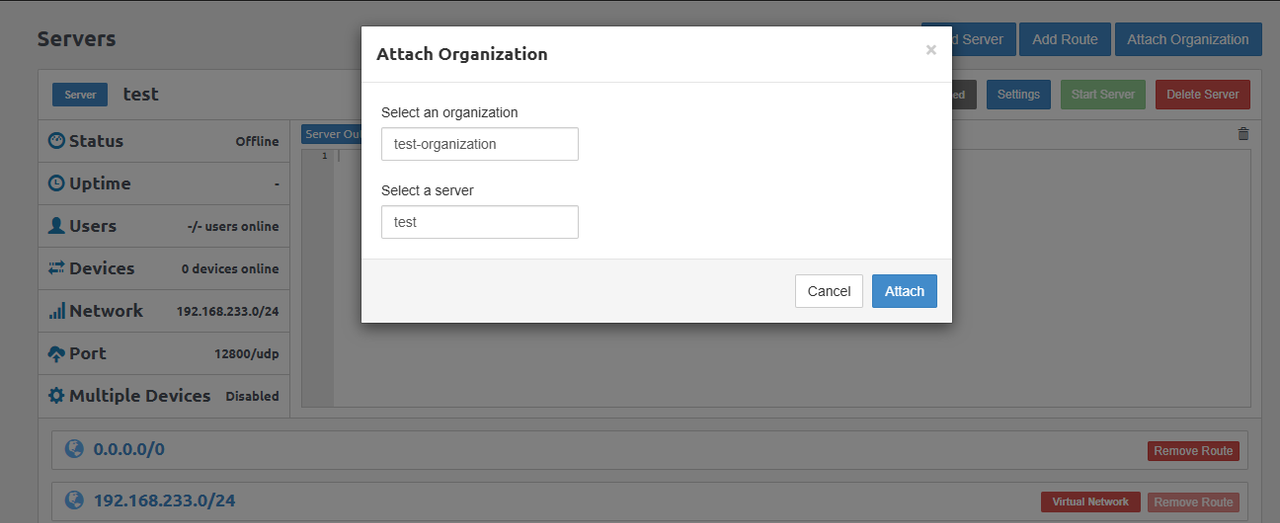
Select the target organization and a server, then click Attach to add the organization to the server.
Click Start Server to start the VPN server.
Create VPN Users
Follow the steps below to create a new user profile to connect to the VPN server.
Navigate to Users and click Add User.
Enter the new user's name and select the organization to assign the user.
Enter the user's email address and specify a strong PIN to authenticate client VPN connections.
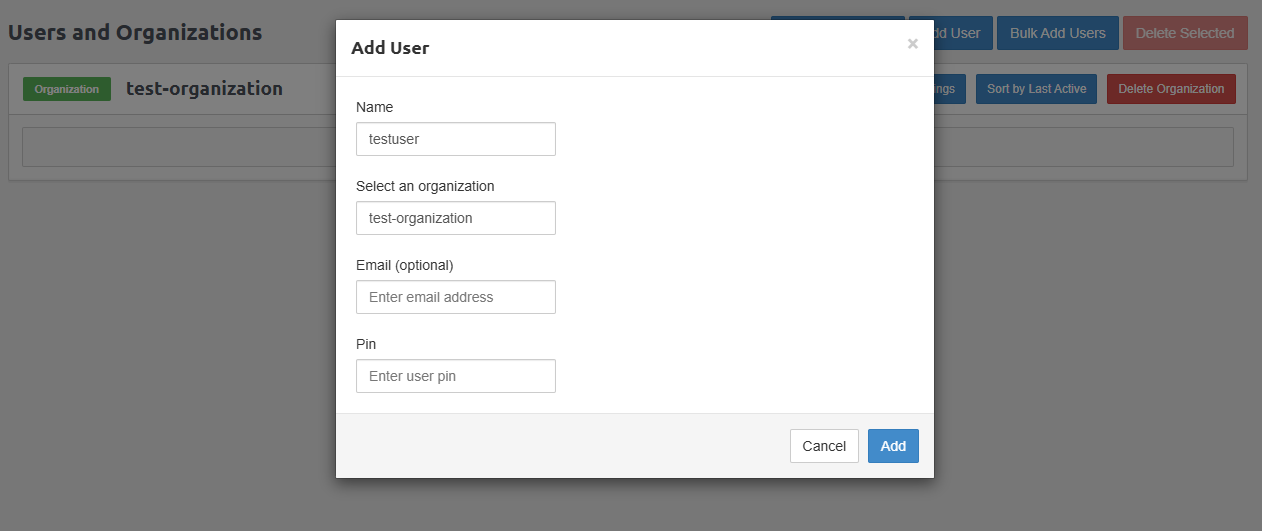
Click Add to create the new user.
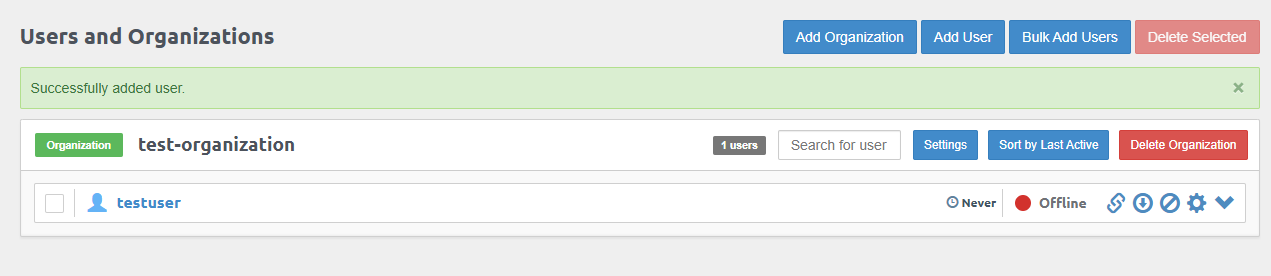
Verify that the new user is created and attached to the organization.
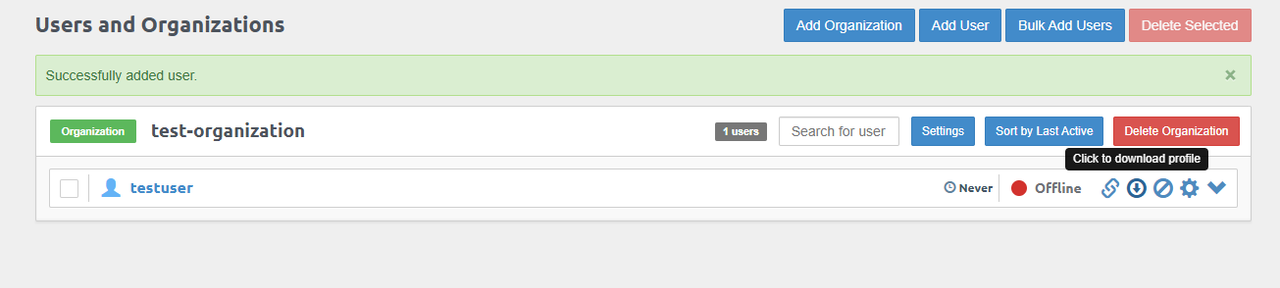
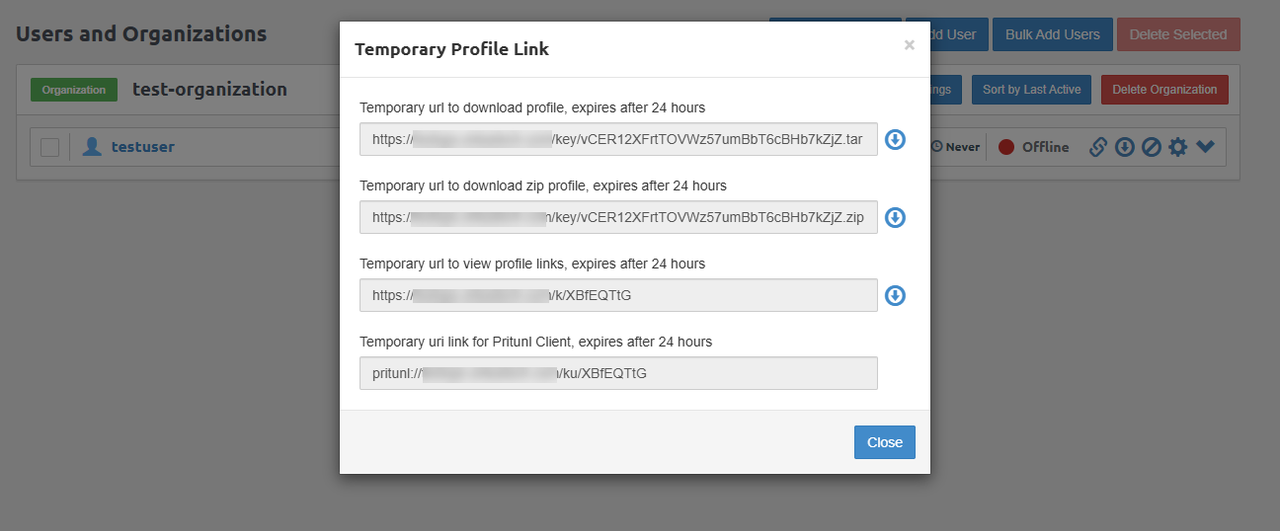
Click Download Profile within the user's options to download the archived user profile to your workstation.
Alternatively, click Link to browse the public links you can share with users to download the profile with a Pritunl VPN client.
Secure the Pritunl VPN Server
Follow the steps below to verify the active firewall rules and secure the Pritunl VPN server.
Navigate to Servers within the Pritunl web console.
Check every server's Port configuration to allow it through the firewall.
Access your server's terminal.
Check the UFW status and verify the active firewall rules.
console$ sudo ufw status
Allow the Pritunl VPN server port (based on your server profile's port), such as
12800/udp.console$ sudo ufw allow 12800/udp
Reload UFW to apply the firewall configuration changes.
console$ sudo ufw reload
Check the UFW status to verify the active firewall rules.
console$ sudo ufw status
Each server in the Pritunl web console uses a different port and protocol. Navigate to Servers -> Server to verify the port on each profile and allow it through the firewall to enable VPN connections to the server.Note
Test the Pritunl VPN Server
Pritunl supports multiple VPN clients that connect to the server, depending on your configured VPN protocol. Depending on the VPN protocol configured on your server, you can use the Pritunl Client, OpenVPN Connect, or WireGuard client applications to connect. Follow the steps below to download a Pritunl user profile and connect to the VPN server using the Pritunl Client application on your device.
Use the direct download links in your web console to download a user profile archive from the Pritunl server.
Download and install the Pritunl VPN Client application for your device, such as Windows, Mac, or Linux desktop.
Open Pritunl from your device's applications menu.
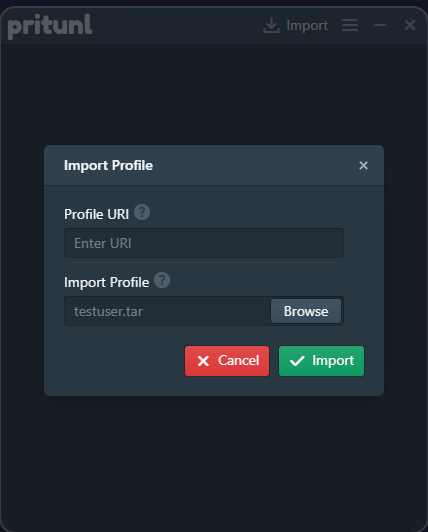
Click Import on the top navigation menu to import a user profile.

Click Browse to find the downloaded
.tararchive on your device and open it.Click Import to add the user profile to the Pritunl client.
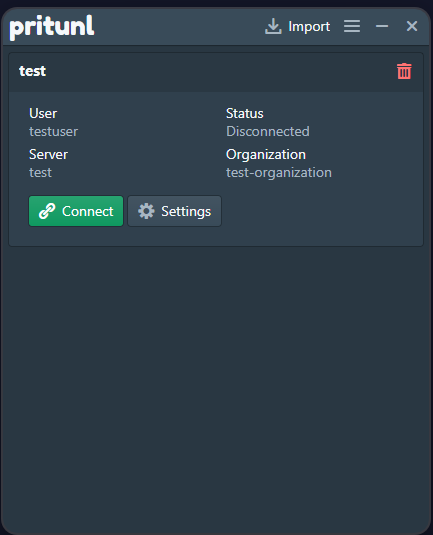
Verify the user information and server name, then click Connect to establish a VPN connection to the server.
When prompted, enter the user's PIN and click Connect to validate it and connect to the VPN server.
Verify the connection status and traffic statistics in your client application.
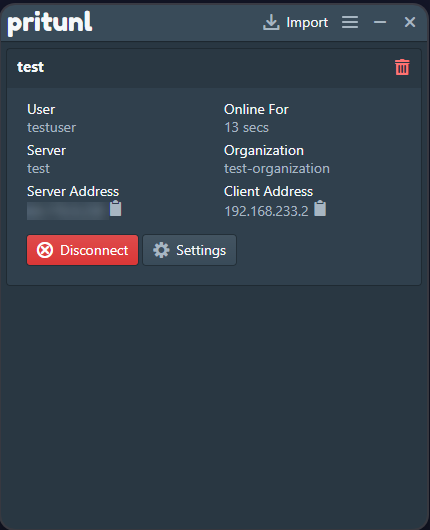
Visit an IP address checker and verify that your active IP information corresponds with your Pritunl VPN server.
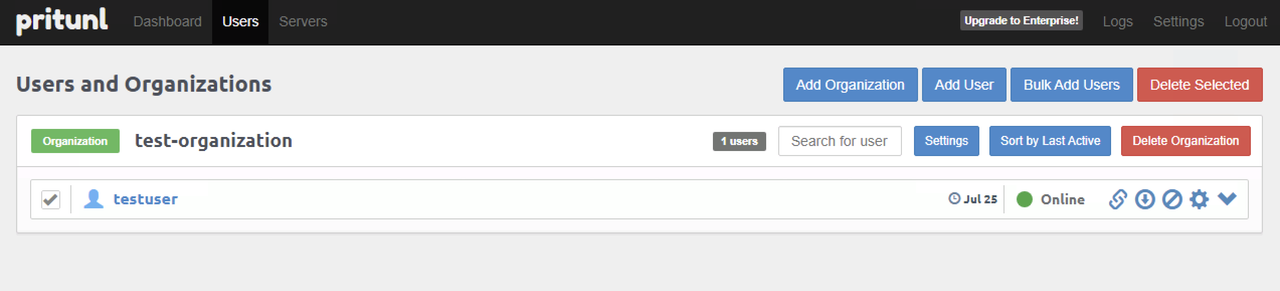
Navigate to Users within the Pritunl web console.
Verify that the user status changes from Offline to Online, and monitor the usage information depending on the organization.
Revoke VPN Users
To revoke access for a user, navigate to Users within the Pritunl web console.
Select the user you want to remove.
Click the Delete Selected button in the top right corner of the web console.
Conclusion
In this article, you have installed Pritunl on Ubuntu 24.04 and set up a VPN server. Pritunl is an easy-to-use VPN server that provides a user-friendly web console to manage servers, organizations, and users connected to the server. You can use Pritunl VPN User profiles with standard protocols like OpenVPN and WireGuard by specifying the target protocol in the server configuration. For more information, visit the Pritunl documentation.