
How to Install Wireguard VPN on Ubuntu 24.04
Introduction
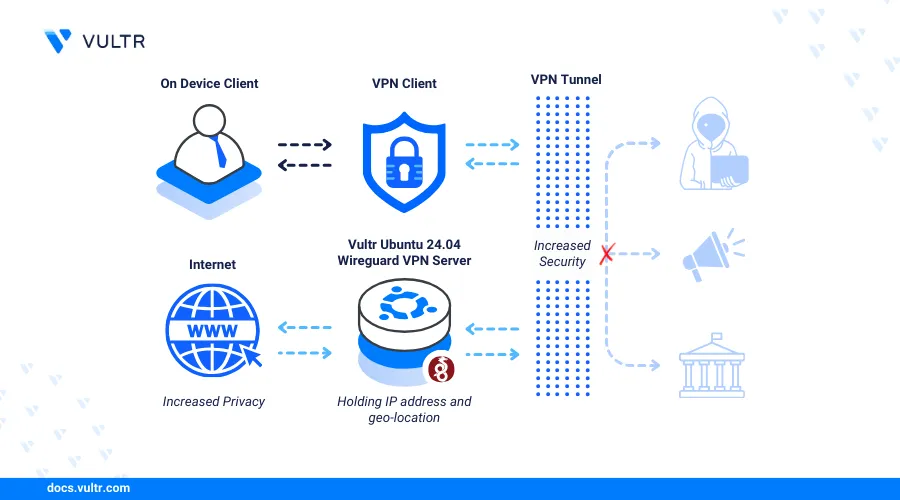
WireGuard is an open-source virtual private network (VPN) solution that utilizes complex modern cryptography to secure server-client network communications. WireGuard is lightweight and has a smaller codebase that focuses on core functionalities for enhanced server speed and security as compared to other VPN solutions such as OpenVPN.
This article explains how to install WireGuard VPN on Ubuntu 24.04 and configure it to create secure network tunnel connections on the server.
Prerequisites
Before you begin:
Deploy a Ubuntu 24.04 server on Vultr to use the WireGuard VPN server.
Access the server using SSH as a non-root user with sudo privileges.
Install WireGuard
WireGuard is available in the default APT repositories on Ubuntu 24.04. Follow the steps below to install the latest WireGuard package on your server and enable the application to start at boot time.
Install WireGuard.
console$ sudo apt install wireguard -y
View the installed WireGuard version on your server.
console$ sudo wg --version
Your output should be similar to the one below.
wireguard-tools v1.0.20210914 - https://git.zx2c4.com/wireguard-tools/
Configure WireGuard
WireGuard uses Cryptokey routing to enable VPN tunnels on your server by validating public keys associated with specific IP addresses. A valid WireGuard server configuration must contain a private key and public key to associate with an interface. Follow the steps below to configure a new WireGuard interface and generate keypairs to use on your server.
Generate a new WireGuard private key and save it as
/etc/wireguard/server_private.key.console$ sudo wg genkey | sudo tee /etc/wireguard/server_private.key
Copy the generated private key like the one below.
UOO//MO2GCC+5hHOz91YCP60/Zv/cnSskEH2j4eRPXo=Modify the
server_private.keyfile permissions to600to disable access privileges all users exceptroot.console$ sudo chmod 600 /etc/wireguard/server_private.key
Generate a new public key from the private key and save it as
/etc/wireguard/server_public.key.console$ sudo cat /etc/wireguard/server_private.key | wg pubkey | sudo tee /etc/wireguard/server_public.key
Copy the generated public key like the one below.
W+l7Uapd98bsNhN1g3Hs4iTCfKzcV03KNwhDPFgzqR4=View your available server network interfaces and verify the main interface details.
console$ ip a
Note the main network interface name and IP address similar to the following output.
1: lo: <LOOPBACK,UP,LOWER_UP> mtu 65536 qdisc noqueue state UNKNOWN group default qlen 1000 link/loopback 00:00:00:00:00:00 brd 00:00:00:00:00:00 inet 127.0.0.1/8 scope host lo valid_lft forever preferred_lft forever inet6 ::1/128 scope host noprefixroute valid_lft forever preferred_lft forever 2: enp1s0: <BROADCAST,MULTICAST,UP,LOWER_UP> mtu 1500 qdisc pfifo_fast state UP group default qlen 1000 link/ether 56:00:04:f8:7f:67 brd ff:ff:ff:ff:ff:ff inet 192.0.2.161/24 metric 100 brd 192.0.2.255 scope global dynamic enp1s0 valid_lft 56853sec preferred_lft 56853sec inet6 2a05:0000:0000:000:5400:4ff:0000:7f67/64 scope global dynamic mngtmpaddr noprefixroute valid_lft 2591775sec preferred_lft 604575sec inet6 2a05:0000:0000:000:5400:4ff:0000:7f67/64 scope link valid_lft forever preferred_lft foreverenp1s0is the main public network interface and uses the IP address192.0.2.161based on the above output. WireGuard uses the main interface to translate and forward network requests to the Internet.Create a new WireGuard server configuration file using a text editor such as Nano.
console$ sudo nano /etc/wireguard/wg0.conf
Add the following configurations to the file. Replace
UOO//MO2GCC+5hHOz91YCP60/Zv/cnSskEH2j4eRPXo=with the private key you generated earlier andenp1s0with your server's main network interface name.ini[Interface] Address = 10.8.0.1/24 SaveConfig = true PrivateKey = UOO//MO2GCC+5hHOz91YCP60/Zv/cnSskEH2j4eRPXo= # Server-Private-Key PostUp = ufw route allow in on wg0 out on enp1s0 PostUp = iptables -t nat -I POSTROUTING -o enp1s0 -j MASQUERADE PreDown = ufw route delete allow in on wg0 out on enp1s0 PreDown = iptables -t nat -D POSTROUTING -o enp1s0 -j MASQUERADE ListenPort = 51820
Save and close the file.
The above WireGuard configuration creates a new interface with the
10.8.0.1private IP address and enables connected clients to access the Internet using NAT routing rules. Within the configuration:Address: Sets the private IP subnet to assign the interface.SaveConfig: Enables saving of the runtime interface configuration. When set totrue, WireGuard saves the runtime configuration in case the interface shuts down whilefalsediscards all runtime changes.PrivateKey: Sets the WireGuard server private key.PostUp = ufw route allow in on wg0 out on enp1s0: Adds a new Uncomplicated Firewall (UFW) rule that enables incoming traffic from the WireGuard interfacewg0to the external server interfaceenp1s0when the interface starts.PreDown = ufw route delete allow in on wg0 out on enp1s0: Removes the UFW incoming traffic rule when the interface shuts down.PostUp = iptables -t nat -I POSTROUTING -o enp1s0 -j MASQUERADE: Adds a newiptablesrule that enables Network Address Translation (NAT) on the server using theenp1s0interface. TheMASQUERADEoption enables VPN clients to access the internet using the server's public IP address by translating the tunnel IP addresses.PreDown = iptables -t nat -D POSTROUTING -o enp1s0 -j MASQUERADE: Removes theiptablesNAT rule when the interface shuts down.ListenPort = 51820: Sets the WireGuard interface port to listen for incoming connection requests on the server.
Generate WireGuard Client Configurations
All WireGuard clients require a valid public key enabled in your interface configuration to connect to a WireGuard interface on your server. Follow the steps below to create a new WireGuard client configuration and enable it to create VPN tunnels on your server.
Generate a new client private key and save it to the WireGuard directory
/etc/wireguard/. Replaceclient1with your desired client naming scheme.console$ sudo wg genkey | sudo tee /etc/wireguard/client1_private.key
Generate a new public key from the private key.
console$ sudo cat /etc/wireguard/client1_private.key | wg pubkey | sudo tee /etc/wireguard/client1_public.key
View the generated WireGuard client private key.
console$ sudo cat /etc/wireguard/client1_private.key
Copy the private key value to your clipboard.
KBUxCUqNEJqN3DBO5xu2kiBQFT8Gv46Kkqu6OIKZu3Q=View the generated public key.
console$ sudo cat /etc/wireguard/client1_public.key
Copy the public key to your clipboard.
xZB9I6953ebGqWVLCR7L6yJw7YJi0shJ+Sub9gfUFVU=Create a new WireGuard client configuration file.
console$ sudo nano /etc/wireguard/client1.conf
Add the following configurations to the file. Replace
KBUxCUqNEJqN3DBO5xu2kiBQFT8Gv46Kkqu6OIKZu3Q=with your generated private key,W+l7Uapd98bsNhN1g3Hs4iTCfKzcV03KNwhDPFgzqR4=with your server public key and192.0.2.161with your actual WireGuard server public IP address.ini[Interface] PrivateKey = KBUxCUqNEJqN3DBO5xu2kiBQFT8Gv46Kkqu6OIKZu3Q= # Client-Private-Key Address = 10.8.0.2/24 DNS = 8.8.8.8 [Peer] PublicKey = W+l7Uapd98bsNhN1g3Hs4iTCfKzcV03KNwhDPFgzqR4= # Server-Public-Key AllowedIPs = 0.0.0.0/0 Endpoint = 192.0.2.161:51820 PersistentKeepalive = 15
Save and close the file.
The above WireGuard client configuration enables a client device to create a new VPN tunnel to the WireGuard server and access the internet using the tunnel IP address
10.8.0.2. Within the configuration:PrivateKey: Sets the WireGuard client private key.Public Key: Sets the WireGuard server public key.AllowedIPs: Specifies the IP addresses and subnets the client can use when connected to the VPN.Endpoint: Sets the public WireGuard server IP address and port to create a tunnel.PersistentKeepalive: Sends continuous data packets to the server every 15 seconds to keep the VPN connection active.
Copy the client configuration to your user home directory to avoid directory read errors when downloading the file.
console$ sudo cp /etc/wireguard/client1.conf client1.conf
Open the WireGuard server interface configuration to add the new Client configurations.
console$ sudo nano /etc/wireguard/wg0.conf
Add the following configurations at the end of the file. Replace
xZB9I6953ebGqWVLCR7L6yJw7YJi0shJ+Sub9gfUFVU=with your generated WireGuard client public key.ini[Peer] PublicKey = xZB9I6953ebGqWVLCR7L6yJw7YJi0shJ+Sub9gfUFVU= AllowedIPs = 10.8.0.2/32
Save and close the file.
Manage WireGuard VPN Server System Processes
WireGuard VPN server processes are managed by systemd on your server. In addition, the wg-quick utility enables access to established WireGuard interfaces on your server. Follow the steps below to enable your WireGuard interface to start at boot time and allow VPN tunnels on your server.
Start the WireGuard server
wg0interface you created earlier.console$ sudo systemctl start wg-quick@wg0.service
Enable the WireGuard interface to start at boot time.
console$ sudo systemctl enable wg-quick@wg0.service
View the WireGuard interface service status and verify that it's active.
console$ sudo systemctl status wg-quick@wg0.service
Output:
● wg-quick@wg0.service - WireGuard via wg-quick(8) for wg0
     Loaded: loaded (/usr/lib/systemd/system/wg-quick@.service; disabled; preset: enabled)
     Active: active (exited) since Wed 2024-06-12 04:47:53 UTC; 38s ago
       Docs: man:wg-quick(8)
             man:wg(8)
             https://www.wireguard.com/
             https://www.wireguard.com/quickstart/
             https://git.zx2c4.com/wireguard-tools/about/src/man/wg-quick.8
             https://git.zx2c4.com/wireguard-tools/about/src/man/wg.8
    Process: 2384 ExecStart=/usr/bin/wg-quick up wg0 (code=exited, status=0/SUCCESS)
   Main PID: 2384 (code=exited, status=0/SUCCESS)
        CPU: 125ms
View the WireGuard interface status using the
wgquickutility.console$ sudo wg show wg0
Output:
interface: wg0
  public key: W+l7Uapd98bsNhN1g3Hs4iTCfKzcV03KNwhDPFgzqR4=
  private key: (hidden)
  listening port: 51820

peer: xZB9I6953ebGqWVLCR7L6yJw7YJi0shJ+Sub9gfUFVU=
  allowed ips: 10.8.0.2/32
The WireGuard interface status displays active network traffic on the VPN tunnel when clients connect to the interface.
Run the following command when viewing the WireGuard interface logs for troubleshooting purposes.
console$ sudo journalctl -u wg-quick@wg0.service
Set Up Firewall Rules
Uncomplicated Firewall (UFW) is active on Vultr Ubuntu 24.04 servers by default. Configure the firewall to allow network connections on the WireGuard serve port 51820 specified in your interface configurations. In addition, enable port forwarding on your server to forward network requests from the WireGuard interface addresses to the internet using Network Address Translation (NAT).
View the UFW status and verify that the application is active.
console$ sudo ufw status
When the UFW status is
inactive, run the following command to allow the SSH port22and enable the firewall.console$ sudo ufw allow 22 && sudo ufw enable
Allow the WireGuard interface UDP port
51820through the firewall.console$ sudo ufw allow 51820/udp
Reload UFW to apply changes.
console$ sudo ufw reload
View the UFW table to verify the firewall changes.
console$ sudo ufw status
Output:
Status: active

To                         Action      From

22/tcp                     ALLOW       Anywhere
51820/udp                  ALLOW       Anywhere
22/tcp (v6)                ALLOW       Anywhere (v6)
51820/udp (v6)             ALLOW       Anywhere (v6)

Anywhere on enp1s0         ALLOW FWD   Anywhere on wg0
Anywhere (v6) on enp1s0    ALLOW FWD   Anywhere (v6) on wg0
Run the following command to enable IPV4 forwarding and forward packets from one network interface to another on your server.
console$ echo 'net.ipv4.ip_forward = 1' | sudo tee -a /etc/sysctl.conf
Output:
net.ipv4.ip_forward = 1Reload your
sysctlconfiguration to apply the configuration changes.console$ sudo sysctl -p
Enable main server network interface
enp1s0to translate network requests from the WireGuard VPN subnet10.8.0.0/24.console$ sudo iptables -t nat -A POSTROUTING -s 10.8.0.0/24 -o enp1s0 -j MASQUERADE
Permanently save the above
iptablesrules to the/etc/iptables/rules.v4file on your server.console$ sudo iptables-save | sudo tee /etc/iptables/rules.v4
Connect VPN Clients to the WireGuard VPN Server
WireGuard clients connect to your VPN server using configuration files. Follow the steps below to use the client configuration you created earlier to connect to your WireGuard VPN server and test access to all VPN clients using the Ping utility.
Download your WireGuard client configuration from your user home on the VPN server to your device using a secure transfer protocol such as
scpin your working directory.console$ scp linuxuser@wireguard-server-ip:client1.conf .
Download and install the latest WireGuard VPN application on your device. For example, WireGuard for Windows.
Open the WireGuard Client application on your device.
Click Add Tunnel or
Import tunnel(s) from fileto load your client configuration.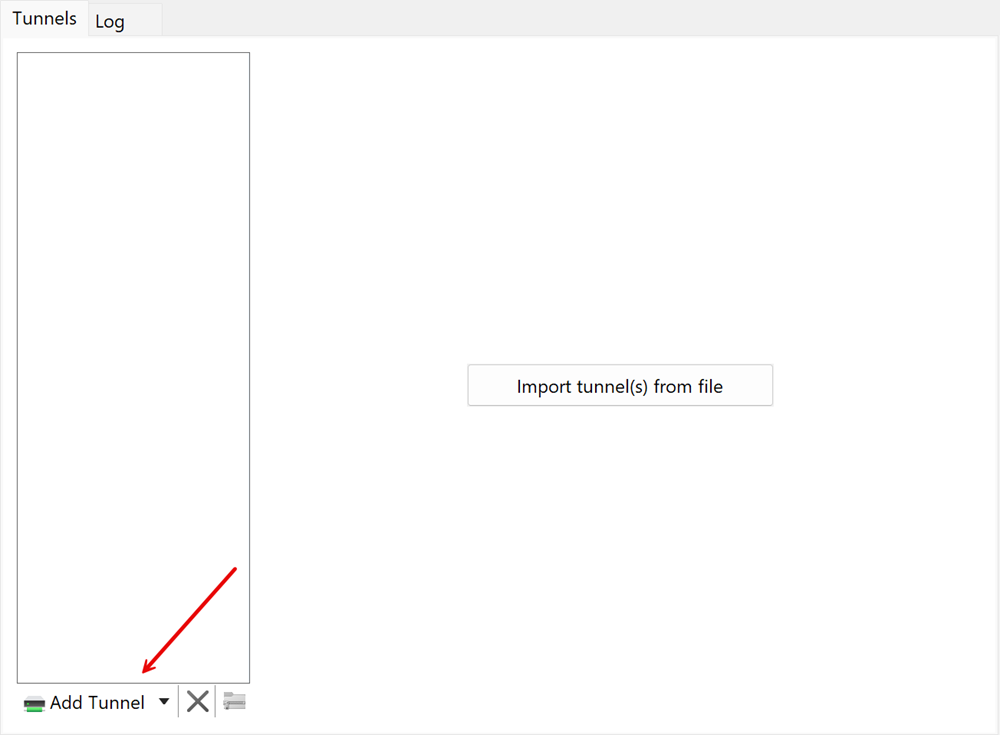
Browse and open the client configuration file on your device to add it to your tunnel list.
Verify that a new WireGuard tunnel is available in your application.
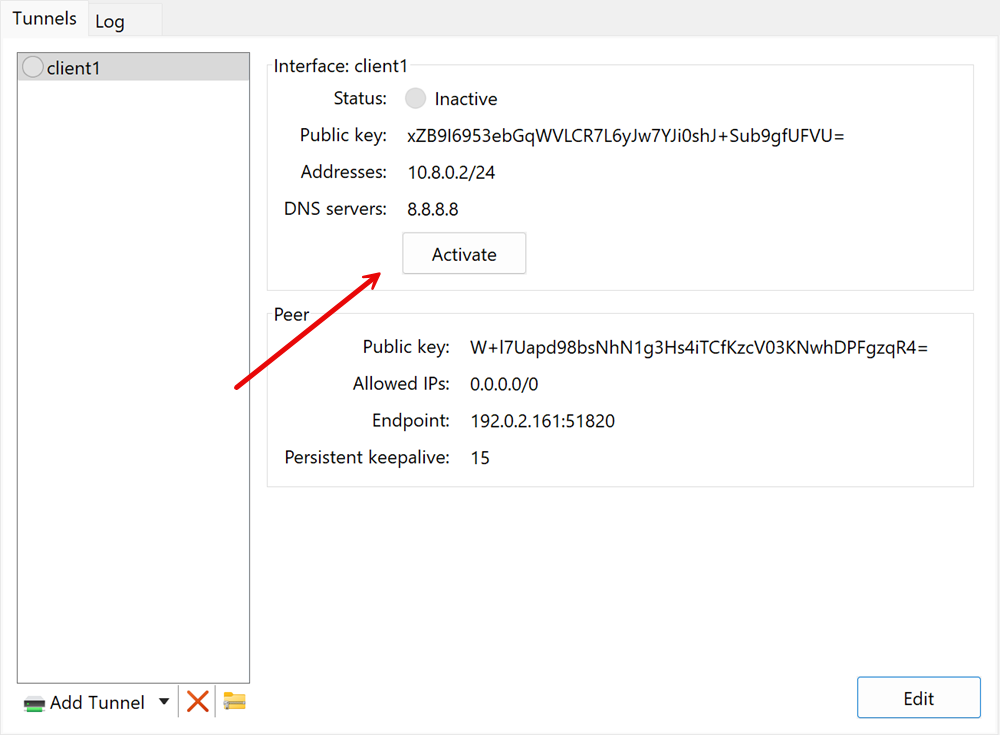
Click Activate to connect to your WireGuard VPN Server and verify your new tunnel connection statistics.

Open a new terminal window on your device and test connectivity to the WireGuard VPN private IP address
10.8.0.1using the Ping utility.console$ ping -c 4 10.8.0.1
When successful, your output should look like the one below.
PING 10.8.0.1 (10.8.0.1) 56(84) bytes of data.
64 bytes from 10.8.0.1: icmp_seq=1 ttl=64 time=0.056 ms
64 bytes from 10.8.0.1: icmp_seq=2 ttl=64 time=0.076 ms
64 bytes from 10.8.0.1: icmp_seq=3 ttl=64 time=0.064 ms
64 bytes from 10.8.0.1: icmp_seq=4 ttl=64 time=0.065 ms

--- 10.8.0.1 ping statistics ---
4 packets transmitted, 4 received, 0% packet loss, time 3049ms
rtt min/avg/max/mdev = 0.056/0.065/0.076/0.007 ms
Conclusion
You have installed WireGuard VPN on Ubuntu 24.04 server and configured client connections to the tunnel interface. You can create multiple WireGuard VPN interfaces on your server with different private IP addresses to separate specific user groups and create different client configurations you can share with your end users to connect to the tunnel. For more information and configuration options, visit the WireGuard documentation.