
How to Install Wireguard VPN on Rocky Linux 9
Introduction
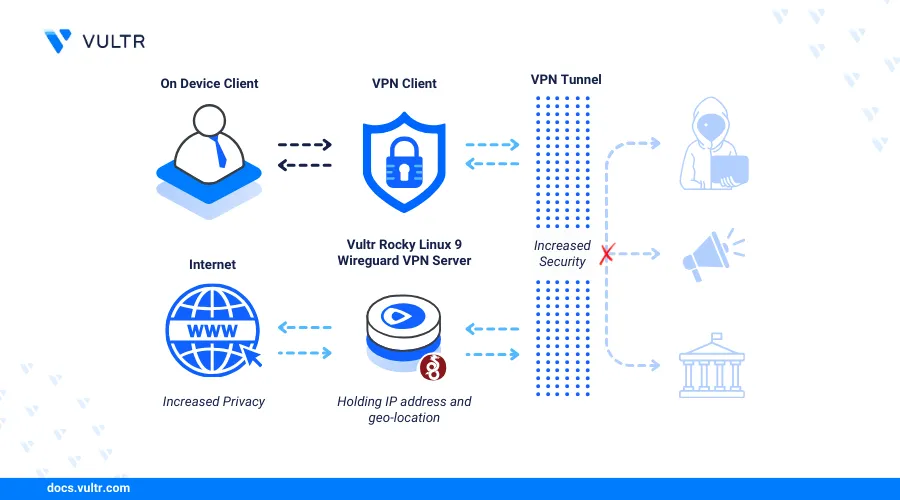
WireGuard is a modern, open-source and high-performance VPN (Virtual Private Network) solution known for its simplicity and efficiency. It aims offers secure and fast connections between different using tunnels to enable remote access, site-to-site connections, or protect outgoing network traffic. WireGuard offers improved speed, reliability, and ease of use as compared to traditional VPN protocols such as OpenVPN and IPSec.
This article explains how to install WireGuard VPN on Rocky Linux 9 to enable secure network tunnel connections on the server.
Prerequisites
Before you begin:
- Deploy two Vultr Rocky Linux 9 servers to use as the VPN server and client.
- Disable the SELinux.
- Access the server using SSH as a non-root user with sudo privileges.
- Update the server.
Install WireGuard
WireGuard is not available in the default repositories on Rocky Linux 9. Follow the steps below to enable the EPEL (Extra Packages for Enterprise Linux) repository and install WireGuard on your server.
Install the EPEL repository.
console$ sudo dnf install epel-release -y
Install the WireGuard tools package.
console$ sudo dnf install wireguard-tools -y
View the installed WireGuard version on your server.
console$ sudo wg --version
Your output should be similar to the one below.
wireguard-tools v1.0.20210914 - https://git.zx2c4.com/wireguard-tools/
Configure WireGuard
WireGuard uses the cryptokey routing mechanism to create VPN tunnels on your server by checking public keys linked to specific IP addresses. WireGuard requires a private key that matches a valid public key to enable VPN tunnel connections on a network interface. Follow these steps to set up a new WireGuard interface and create key pairs to use on your server.
Generate a new WireGuard server private and public key pair in the
/etc/wireguarddirectory.console$ wg genkey | sudo tee /etc/wireguard/server_private.key | wg pubkey | sudo tee /etc/wireguard/server_public.key
Modify the file permissions to grant only privileged users read access to the generated keys.
console$ sudo chmod 600 /etc/wireguard/server_private.key /etc/wireguard/server_public.key
View your available server network interfaces and verify your main interface details.
console$ ip a
Your output should be similar to the one below.
1: lo: <LOOPBACK,UP,LOWER_UP> mtu 65536 qdisc noqueue state UNKNOWN group default qlen 1000
    link/loopback 00:00:00:00:00:00 brd 00:00:00:00:00:00
    inet 127.0.0.1/8 scope host lo
       valid_lft forever preferred_lft forever
    inet6 ::1/128 scope host
       valid_lft forever preferred_lft forever
2: enp1s0: <BROADCAST,MULTICAST,UP,LOWER_UP> mtu 1500 qdisc noqueue state UP group default qlen 1000
    link/ether 38:7a:0e:10:5a:ae brd ff:ff:ff:ff:ff:ff
    inet 192.0.2.161/24 brd 172.20.10.15 scope global dynamic noprefixroute wlp0s20f3
       valid_lft 85088sec preferred_lft 85088sec
    inet6 2409:40c1:14:6eab:ce6f:8e79:efc5:60c/64 scope global temporary dynamic
       valid_lft 603489sec preferred_lft 84553sec
    inet6 2409:40c1:14:6eab:ef9d:ccec:abeb:e230/64 scope global mngtmpaddr noprefixroute
       valid_lft forever preferred_lft forever
Based on the above output.
enp1s0is the main public network interface name and uses the public IP address192.0.2.161required by WireGuard to translate and forward network requests to the Internet.Create a new WireGuard server interface configuration file. For example,
wg0.conf.console$ sudo nano /etc/wireguard/wg0.conf
Add the following configurations to the file. Replace
<Server_Private_Key>with the actual private key you generated earlier.ini[Interface] Address = 172.16.0.1/24 SaveConfig = true PrivateKey = <Server_Private_Key> ListenPort = 51820
Save and close the file.
The above WireGuard configuration creates a new interface with the private IP address
172.16.0.1. Within the configuration:Address = 172.16.0.1/24: Assigns the private IP address172.16.0.1to the WireGuard interface, with a subnet mask of255.255.255.0.SaveConfig = true: Enables WireGuard to automatically save the configuration when the server shuts down.PrivateKey = <Server_Private_Key>: Sets the WireGuard server's private key.ListenPort = 51820: Sets the WireGuard server port51820to listen for incoming VPN connection requests.
Generate WireGuard Client Configurations
A WireGuard client configuration consists of a private and public key pair allowed to create connections through the WireGuard server tunnel interface. In the following steps, create a new WireGuard client configuration that includes new private and public keys, permitted addresses, and traffic to allow on the VPN tunnel connections.
Generate new private and public keys in the WireGuard directory
/etc/wireguard/. Replaceclientwith your desired client naming scheme.console$ wg genkey | sudo tee /etc/wireguard/client_private.key | wg pubkey | sudo tee /etc/wireguard/client_public.key
View the generated WireGuard client private and public key values.
console$ sudo cat /etc/wireguard/client_private.key /etc/wireguard/client_public.key
Copy the generated private and public key values to your clipboard.
Create a new WireGuard client configuration file.
console$ sudo nano /etc/wireguard/client.conf
Add the following configurations to the file. Replace
<Client_Private_Key>with your generated private key,<Server_Public_Key>,192.0.2.161with your actual WireGuard server's public key and IP address respectively.ini[Interface] PrivateKey = <Client_Private_Key> Address = 172.16.0.2/24 DNS = 8.8.8.8 [Peer] PublicKey = <Server_Public_Key> AllowedIPs = 0.0.0.0/0 Endpoint = 192.0.2.161:51820 PersistentKeepalive = 15
Save and close the file.
The above configuration assigns creates a new WireGuard client with the private VPN tunnel IP address
172.16.0.2. Within the configuration:PrivateKey: Sets the WireGuard client's private key used for encryption and authentication in the VPN tunnel.Address: Sets the WireGuard client's private IP address172.16.0.2with a subnet mask of255.255.255.0.DNS: Sets Google public DNS server8.8.8.8as the DNS resolver to resolve domain names when connected to the VPN tunnel.PublicKey: Sets the public key of the destination WireGuard server.AllowedIPs: Defines the network client network addresses allowed to connect through the VPN tunnel.Endpoint: Sets the WireGuard server public IP address192.0.2.161and port51820to use when connecting to the VPN tunnel.PersistentKeepalive: Keeps the VPN connection active by sending keep-alive packets every15seconds.
Open the WireGuard server interface configuration to enable the new client configuration.
console$ sudo nano /etc/wireguard/wg0.conf
Add the following configurations at the end of the file. Replace
<Client_Public_Key>with your actual WireGuard client's public key you generated earlier.ini[Peer] PublicKey = <Client_Public_Key> AllowedIPs = 172.16.0.2/32
Save and close the file.
Manage WireGuard VPN Processes
The WireGuard wg-quick utility starts and manages VPN processes on your server. Follow the steps below to enable your WireGuard interface to start at boot time and allow VPN tunnels on your server using the wg-quick utility.
Start the WireGuard server
wg0interface.console$ sudo systemctl start wg-quick@wg0.service
Enable the WireGuard
wg0interface to automatically start at boot time.console$ sudo systemctl enable wg-quick@wg0.service
View the WireGuard interface status and verify that it's active on your server.
console$ sudo systemctl status wg-quick@wg0.service
Output.
● wg-quick@wg0.service - WireGuard via wg-quick(8) for wg0
Loaded: loaded (/usr/lib/systemd/system/wg-quick@.service; disabled; preset: disabled)
Active: active (exited) since Thu 2024-06-20 04:43:08 UTC; 7s ago
  Docs: man:wg-quick(8)
   man:wg(8)
   https://www.wireguard.com/
   https://www.wireguard.com/quickstart/
   https://git.zx2c4.com/wireguard-tools/about/src/man/wg-quick.8
   https://git.zx2c4.com/wireguard-tools/about/src/man/wg.8
Process: 1593 ExecStart=/usr/bin/wg-quick up wg0 (code=exited, status=0/SUCCESS)
   Main PID: 1593 (code=exited, status=0/SUCCESS)
   CPU: 27ms

Jun 20 04:43:08 server systemd[1]: Starting WireGuard via wg-quick(8) for wg0...
Jun 20 04:43:08 server wg-quick[1593]: [#] ip link add wg0 type wireguard
Jun 20 04:43:08 server wg-quick[1593]: [#] wg setconf wg0 /dev/fd/63
Jun 20 04:43:08 server wg-quick[1593]: [#] ip -4 address add 172.16.0.1/24 dev wg0
Jun 20 04:43:08 server wg-quick[1593]: [#] ip link set mtu 1420 up dev wg0
Jun 20 04:43:08 server systemd[1]: Finished WireGuard via wg-quick(8) for wg0.
View the WireGuard interface logs to verify the tunnel processes.
console$ sudo journalctl -u wg-quick@wg0.service
Set Up Firewall Rules
FirewallD is available and active on Vultr Rocky Linux 9 servers by default. In the following steps, configure the firewall to allow network connections on the default WireGuard server port 51820. In addition, enable port forwarding to forward network requests from the WireGuard interface to the internet using Network Address Translation (NAT) on your server.
View the
firewalldstatus and verify that it's active.console$ sudo systemctl status firewalld
If the
firewalldstatus isinactive, run the following command to allow the SSH port22and enable the firewall.console$ sudo firewall-cmd --permanent --add-port=22/tcp && sudo firewall-cmd --reload
Allow the default WireGuard interface UDP port
51820through the firewall.console$ sudo firewall-cmd --permanent --add-port=51820/udp
Reload
firewalldto apply your configuration changes.console$ sudo firewall-cmd --reload
View all available
firewalldport rules on your server and verify that the WireGuard port is available.console$ sudo firewall-cmd --list-ports
Output.
51820/udp
22/tcp
Enable IPV4 forwarding to forward packets from the WireGuard network to the server's public interface.
console$ echo 'net.ipv4.ip_forward = 1' | sudo tee -a /etc/sysctl.conf
Reload your
sysctlconfiguration to apply the configuration changes.console$ sudo sysctl -p
Enable address translation of network requests from the WireGuard interface
172.16.0.0/24subnet to allow client connections to the Internet.console$ sudo firewall-cmd --permanent --add-rich-rule='rule family="ipv4" source address="172.16.0.0/24" masquerade'
Reload
firewalldto apply the new configuration changes.console$ sudo firewall-cmd --reload
Connect VPN Clients to the WireGuard VPN Server
Each WireGuard client requires a valid configuration file with a public key allowed to connect to the WireGuard VPN server interface. In the following steps, connect VPN clients to your WireGuard VPN server using the configuration you created earlier and test the VPN tunnel connections using the Ping utility.
Access your Rocky Linux 9 client server using SSH.
console$ ssh exampleuser@SERVER-IP
Install the EPEL repository and the WireGuard tools package on your server.
console$ sudo dnf install epel-release -y && sudo dnf install wireguard-tools -y
Download your WireGuard client configuration file from the VPN server using a file transfer protocol such as
scp.console$ sudo scp root@wireguard-server-ip:/etc/wireguard/client.conf /etc/wireguard/wg0.conf
Enable the
systemd-resolvedservice to enable DNS resolutions on the WireGuard network.console$ sudo systemctl enable systemd-resolved && sudo systemctl start systemd-resolved
Enable the WireGuard client interface
wg0to connect to the VPN tunnel.console$ sudo wg-quick up wg0
Output:
[#] ip link add wg0 type wireguard
[#] wg setconf wg0 /dev/fd/63
[#] ip -4 address add 172.16.0.2/24 dev wg0
[#] ip link set mtu 1420 up dev wg0
[#] resolvconf -a wg0 -m 0 -x
View the WireGuard tunnel status to verify that a VPN connection is established.
console$ sudo wg
Your output should be similar to the one below.
interface: wg0
  public key: 5HIoIGQlOWBiFJ0GjDLcoYsnsJOXfEKTPrHkOuDlzBQ=
  private key: (hidden)
  listening port: 48387

peer: l91LF+SGHAep7KzVrVkz4REH5WQORceqXP1QxLR5Hyw=
  endpoint: 192.0.2.161:51820
  allowed ips: 172.16.0.0/24
  latest handshake: 31 seconds ago
  transfer: 92 B received, 244 B sent
  persistent keepalive: every 15 seconds
Test connectivity to the WireGuard VPN server private IP address
172.16.0.1using the Ping utility.console$ ping -c 5 172.16.0.1
Verify that the connection is successful similar to the following output:
PING 17.16.0.1 (17.16.0.1) 56(84) bytes of data.
64 bytes from 17.16.0.1: icmp_seq=1 ttl=64 time=0.056 ms
64 bytes from 17.16.0.1: icmp_seq=2 ttl=64 time=0.076 ms
64 bytes from 17.16.0.1: icmp_seq=3 ttl=64 time=0.064 ms
64 bytes from 17.16.0.1: icmp_seq=4 ttl=64 time=0.065 ms
64 bytes from 17.16.0.1: icmp_seq=4 ttl=64 time=0.068 ms

--- 17.16.0.1 ping statistics ---
4 packets transmitted, 4 received, 0% packet loss, time 3049ms
rtt min/avg/max/mdev = 0.056/0.065/0.076/0.007 ms
Conclusion
You have installed WireGuard on your Rocky Linux 9 server and connected clients to a VPN tunnel. WireGuard supports multiple client connections using valid key pairs allowed in your configurations. In addition, you can set up different interfaces and enable multiple client connections on the server. For more information, visit the WireGuard documentation.