
How to Install Laravel on Ubuntu 24.04
Laravel is a dynamic, object-oriented programming framework based on PHP for creating applications from basic to complex web solutions. Laravel offers a modern syntax for productivity, runs with an interpreter instead of a compiler, and integrates with multiple frameworks for use in various projects.
This article explains how to install Laravel on Ubuntu 24.04 and configure the server to run Laravel applications.
Prerequisites
Before you begin, you need to:
- Have access to an Ubuntu 24.04 instance.
- Create a domain A record pointing to the server's IP address. For example,
laravelapp.example.com.
Create a MySQL Database for Laravel
Laravel supports multiple database engines you can configure and integrate to store application data. Follow the steps below to create a new dedicated MySQL database to use with Laravel on your server.
Verify that the MySQL database server is active and running.
console$ sudo systemctl status mysql
Output:
● mysql.service - MySQL Community Server
 Loaded: loaded (/usr/lib/systemd/system/mysql.service; enabled; preset: enabled)
 Active: active (running) since Wed 2024-12-04 13:03:09 UTC; 19s ago
Process: 2843 ExecStartPre=/usr/share/mysql/mysql-systemd-start pre (code=exited, status=0/SUCCESS)
Main PID: 2857 (mysqld)
 Status: "Server is operational"
  Tasks: 39 (limit: 2269)
 Memory: 361.6M (peak: 377.9M)
    CPU: 646ms
 CGroup: /system.slice/mysql.service
         └─2857 /usr/sbin/mysqld
Log in to the MySQL database server.
console$ sudo mariadb
Create a new
laravelappdatabase for your Laravel project.sql> CREATE DATABASE laravelapp;
Create a new
laravelappuser with a strong password to use with the Laravel application. Replacepasswordwith a strong password of your choice.sql> CREATE USER laravelapp@localhost IDENTIFIED BY 'password';
Grant the new
laravelappuser full privileges to the Laravel database.sql> GRANT ALL PRIVILEGES ON laravelapp.* TO laravelapp@localhost;
Flush the MySQL privileges table to apply the database changes.
sql> FLUSH PRIVILEGES;
Exit the MySQL database console.
sql> EXIT;
Install Composer and Required PHP Extensions
Laravel requires composer dependency manager and specific PHP extensons to run and deliver dynamic web applications on a server. Follow the steps below to install Composer and all required PHP extensions on your server.
Update the server's package index.
console$ sudo apt update
Install Composer and all required extensions.
console$ sudo apt install composer php php-curl php-bcmath php-json php-mysql php-mbstring php-xml php-tokenizer php-zip git -y
View the installed PHP version.
console$ php -v
Output:
PHP 8.3.6 (cli) (built: Sep 30 2024 15:17:17) (NTS)
Copyright (c) The PHP Group
Zend Engine v4.3.6, Copyright (c) Zend Technologies
    with Zend OPcache v8.3.6, Copyright (c), by Zend Technologies
View the installed Composer version.
console$ sudo -u www-data composer -v
Output:
   ______
  / ____/___  ____ ___  ____  ____  ________  _____
 / /   / __ \/ __ `__ \/ __ \/ __ \/ ___/ _ \/ ___/
/ /___/ /_/ / / / / / / /_/ / /_/ (__  )  __/ /
\____/\____/_/ /_/ /_/ .___/\____/____/\___/_/
                    /_/
Composer version 2.7.1 2024-02-09 15:26:28

Usage:
  command [options] [arguments]
View the Apache service status and verify that it's active.
console$ sudo systemctl status apache2
Output:
enabled
● apache2.service - The Apache HTTP Server
     Loaded: loaded (/usr/lib/systemd/system/apache2.service; enabled; preset: enabled)
     Active: active (running) since Tue 2024-11-19 14:28:27 UTC; 5min ago
       Docs: https://httpd.apache.org/docs/2.4/
   Main PID: 20426 (apache2)
      Tasks: 6 (limit: 4607)
     Memory: 13.9M (peak: 14.1M)
        CPU: 71ms
     CGroup: /system.slice/apache2.service
             ├─20426 /usr/sbin/apache2 -k start
             └─20434 /usr/sbin/apache2 -k start
Create a new
info.phpfile in the default/var/www/htmlweb root directory to display all PHP configuration details.console$ sudo nano /var/www/html/info.php
Add the following
phpinfofunction to the file.php<?php phpinfo(); ?>
Save and close the file.
Allow HTTP connections through the default firewall configuration.
console$ sudo ufw allow 80/tcp
Reload UFW to apply the firewall changes.
console$ sudo ufw reload
Restart the Apache web server to apply your PHP application changes.
console$ sudo systemctl restart apache2
Access your server's IP address using the
/info.phppath in a web browser such as Chrome.http://SERVER-IP/info.phpView all installed extensions on your server and verify that the
fileinfo,mbstring, andopensslare available on the PHP information page.
Install Laravel on Ubuntu 24.04
Follow the steps below to set up all required project directories and create a new Laravel project using Composer with all necessary dependency packages.
Create all required project directories in the
/var/www/directory.console$ sudo mkdir -p /var/www/{.cache,.config,laravelapp}
The above command create the
/var/www/.cachedirectory to store the Composer cache files, while/var/www/.configstores configuration files for Composer, and/var/www/laravelappworks as the main Laravel project directory.Grant the Apache
www-datauser and group ownership privileges to all files in the Laravel project directory.console$ sudo chown -R www-data:www-data /var/www/{.cache,.config,laravelapp}
Navigate to the
laravelappproject directory.console$ cd /var/www/laravelapp/
Create a new project using Composer and the default Laravel application template.
console$ sudo -u www-data composer create-project laravel/laravel .
Output:
Creating a "laravel/laravel" project at "./my_laravel_project"
Installing laravel/laravel (v10.2.0)
  - Installing laravel/laravel (v10.2.0): Extracting archive
Created project in /var/www/html/my_laravel_project
Open the
.envfile using a text editor such asnanoto set up the Laravel database connection information.console$ sudo nano .env
Find the following
DB_CONNECTIONdirective.iniDB_CONNECTION=sqlite
Change the default value from
sqlitetomysql.iniDB_CONNECTION=mysql
Uncomment the DB_ directives and replace the default values with your actual Laravel database information.
iniAPP_URL=http://laravelapp.example.com DB_CONNECTION=mysql DB_HOST=127.0.0.1 DB_PORT=3306 DB_DATABASE=laravelapp DB_USERNAME=laravelapp DB_PASSWORD=password
Save and close the file.
Run the database migration script to create the default database structure for your Laravel project.
console$ sudo -u www-data php artisan migrate
Output:
 INFO  Preparing database.

  Creating migration table .................................................................................... 5.68ms DONE

   INFO  Running migrations.

  0001_01_01_000000_create_users_table ........................................................................ 15.56ms DONE
  0001_01_01_000001_create_cache_table ......................................................................... 4.07ms DONE
  0001_01_01_000002_create_jobs_table ......................................................................... 12.17ms DONE
Create a New Apache Virtual Host Configuration for Laravel
Apache serves web application files using virtual host configurations in the /etc/apache2 directory. Follow the steps below to create a new Apache virtual host configuration to serve the Laravel project files using your laravelapp.example.com domain.
Enable the Apache rewrite module
mod_rewriteto enable Laravel to process clean URLs.console$ sudo a2enmod rewrite
Create a new
laravelapp.confvirtual host configuration file.console$ sudo nano /etc/apache2/sites-available/laravelapp.conf
Add the following contents to the file. Replace
laravelapp.example.comwith your actual domain.apacheconf<VirtualHost *:80> ServerAdmin admin@example.com ServerName laravelapp.example.com DocumentRoot /var/www/laravelapp/public <Directory /> Options FollowSymLinks AllowOverride None </Directory> <Directory /var/www/laravelapp> AllowOverride All </Directory> ErrorLog ${APACHE_LOG_DIR}/error.log CustomLog ${APACHE_LOG_DIR}/access.log combined </VirtualHost>
Save and close the file.
The above apache virtual host configuration listens for connection requests on the HTTP port
80and serves the Laravel web application files from the/var/www/laravelappdirectory.Enable the Laravel virtual host configuration.
console$ sudo a2ensite laravelapp.conf
Disable the default Apache virtual host configuration to avoid port conflicts.
console$ sudo a2dissite 000-default.conf
Test the Apache configuration for errors.
console$ sudo apachectl configtest
Output:
Enabling site laravelapp.
To activate the new configuration, you need to run:
  systemctl reload apache2
Syntax OK
If you see
Syntax OK, the configuration is valid.Restart the Apache service to apply the configuration changes.
console$ sudo systemctl restart apache2
Access Laravel
Follow the steps below to access your Laravel application using your laravelapp.example.com virtual host domain on your server.
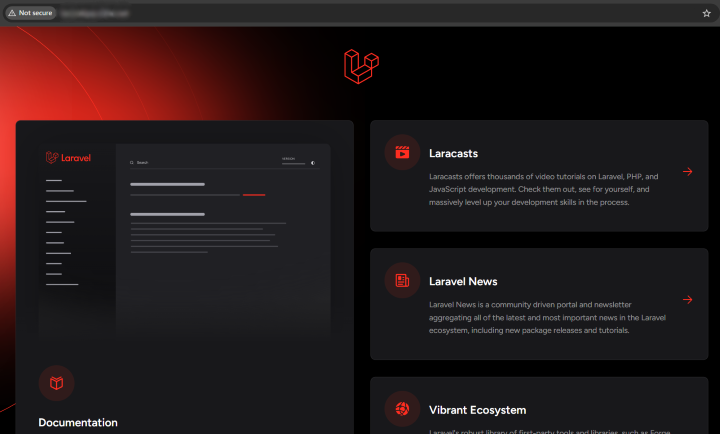
Access the Laravel application using your domain in a web browser such as Chrome. Replace
laravelapp.example.comwith your actual domain.http://laravelapp.example.comOutput:
Conclusion
You have installed Laravel on Ubuntu 24.04 and set up a default project to run on your server. You can create new models, views and controller files in your Laravel project directory to run frameworks such as Blade and customize your dynamic Laravel web application functionalities.