
How to Install LM Studio - A Graphical Application for Running Large Language Models (LLMs)
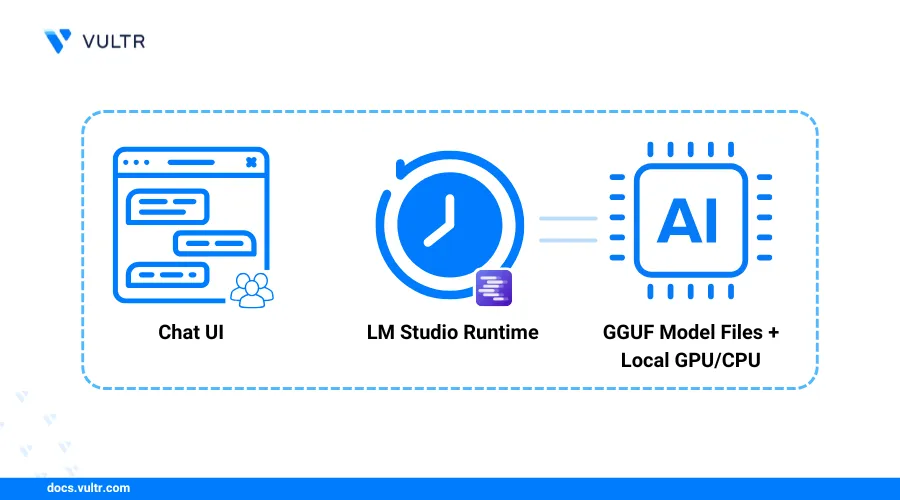
LM Studio is a graphical desktop application based on llama.cpp that runs Large Language Models (LLMs) locally. It supports GGUF and open-source models from platforms like Hugging Face, which you can download directly from the LM Studio interface. You can run popular models such as Llama, DeepSeek-R1, Mistral, Gemma, Granite, and Phi locally after installation.
This article explains how to install LM Studio on Linux and run Large Language Models (LLMs) locally on your workstation. You will enable API access and use LM Studio to download and run models like DeepSeek-R1, and Gemma 3 for integration in your existing applications.
Prerequisites
Before you begin, you need to:
Have access to a GUI-enabled Linux based remote instance with GPU or a desktop workstation with the
x86 with AVX2processor architecture.This article uses Ubuntu 24.04 to demonstrate the installation steps.NoteA Domain name such as
example.comif you want to use your LM Studio remotely with TLS encryption.
Install LM Studio
LM Studio is available as a standalone application file you can download and install from the official website. Follow the steps below to download and install LM Studio on your workstation.
Visit the official LM Studio download page.
Select the Linux operating system and the LM Studio version to download.
Click Download LM Studio to download the latest release package for your operating system. If you're using a remote server, copy the download link and use the
wgettool to download the AppImage.console$ wget https://installers.lmstudio.ai/linux/x64/0.3.15-11/LM-Studio-0.3.15-11-x64.AppImage
Open a new terminal window.
Install the required dependencies for LM Studio.
console$ sudo apt install libatk1.0-0 libatk-bridge2.0-0 libcups2 libgdk-pixbuf2.0-0 libgtk-3-0 libpango-1.0-0 libcairo2 libxcomposite1 libxdamage1 libasound2t64 libatspi2.0-0
Navigate to the directory where you saved the LM Studio AppImage, for example, the Downloads directory.
console$ cd ~/Downloads
Add execute privileges to the LM Studio AppImage file.
console$ sudo chmod +x LM-Studio-0.3.15-11-x64.AppImage
Extract the LM Studio AppImage contents.
console$ ./LM-Studio-0.3.15-11-x64.AppImage --appimage-extract
Navigate to the extracted
squashfs-rootdirectory.console$ cd squashfs-root
Change the
chrome-sandboxownership to therootuser and group.console$ sudo chown root:root chrome-sandbox
Set the file permission as
4755to thechrome-sandboxbinary file.console$ sudo chmod 4755 chrome-sandbox
Run the
lmstudioscript to open LM Studio and verify the installation is success.console$ ./lm-studio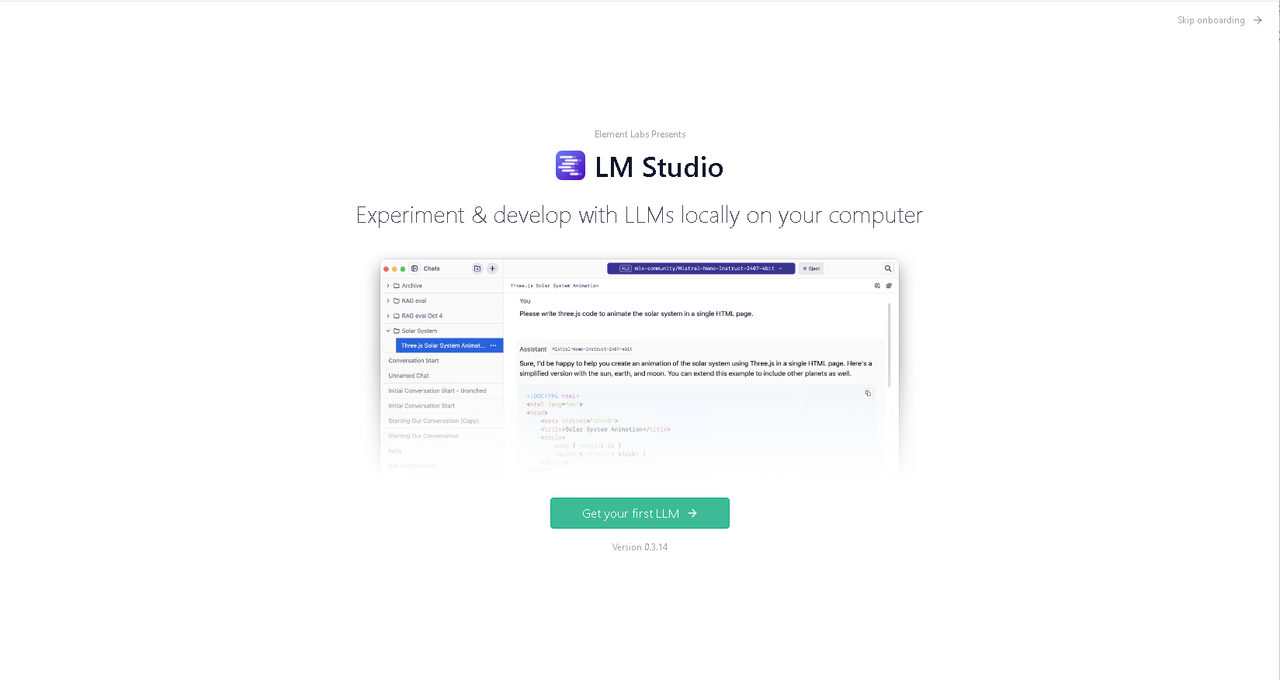 To run theNote
lm-studiobinary on a remote server with no GUI interface, you can use the X11 forwarding by logging into your server usingssh -X linuxuser@hostname. Without this, you'll get an error.
Configure LM Studio as a System Service in Linux
You can start LM Studio by running the lmstudio script on a Linux desktop or lms server start on a Linux server. Configuring LM Studio as a system service creates a desktop application icon that lets you open LM Studio on your server. Follow the steps below to create a new system service to automatically start LM Studio at boot, manage API connections, and run LLMs.
Press Control + C to close LM Studio in your terminal.
Move the LM Studio
squash-fsdirectory to/optand rename it to/lm-studio.console$ sudo mv ~/Downloads/squashfs-root/ /opt/lm-studio
Note your current display session to use in the system service.
console$ echo $DISPLAY
Output:
:1Create a new
lmstudio.servicefile.console$ sudo nano /etc/systemd/system/lmstudio.service
Enter the following service configurations into the file.
systemd[Unit] Description=LM Studio Service After=network.target [Service] Type=simple ExecStart=/opt/lm-studio/lm-studio --run-as-a-service Restart=always User=<user> Group=<group> Environment=DISPLAY=:1 Environment=XDG_RUNTIME_DIR=/run/user/$(id -u <user>) [Install] WantedBy=multi-user.target
In the above file:
- Set the User variable with your user name.
- Set the Group variable with your user group.
- Set the Environment=DISPLAY= variable with your current session's
$DISPLAYvariable value which you noted earlier. - In the last configuration line of
[SERVICE], replace<user>with your user name.
Save the file and close the text editor.
The system service configuration above runs the LM Studio script in the installation directory with your Linux user profile, allowing you to start LM Studio as a service.
Reload systemd to apply the service configuration.
console$ sudo systemctl daemon-reload
Start the LM Studio system service.
console$ sudo systemctl start lmstudio
The LM Studio's GUI interface opens.
View the LM Studio service status and verify it’s running.
console$ sudo systemctl status lmstudio
Output:
● lmstudio.service - LM Studio Service
 Loaded: loaded (/etc/systemd/system/lmstudio.service; enabled; preset: enabled)
 Active: active (running) since Thu 2025-04-03 20:38:12 EAT; 397ms ago
  Main PID: 1145694 (lm-studio)
  Tasks: 18 (limit: 37946)
 Memory: 113.7M (peak: 113.7M)
    CPU: 433ms
 CGroup: /system.slice/lmstudio.service
         ├─1145694 /opt/lm-studio/lm-studio --run-as-a-service
         ├─1145697 "/opt/lm-studio/lm-studio --type=zygote --no-zygote-sandbox"
         ├─1145698 /opt/lm-studio/chrome-sandbox /opt/lm-studio/lm-studio --type=zygote
         ├─1145699 "/opt/lm-studio/lm-studio --type=zygote"
         └─1145701 "/opt/lm-studio/lm-studio --type=zygote"
To stop the LM Studio, use:
console$ sudo systemctl stop lmstudio.service
Configure LM Studio
You can configure LM Studio directly through the application interface or using the lms cli tool. Follow the steps below to configure LM Studio to browse and download LLMs on your workstation.
Open LM Studio if it's not running.
Click Get your first LLM to set up LM Studio.
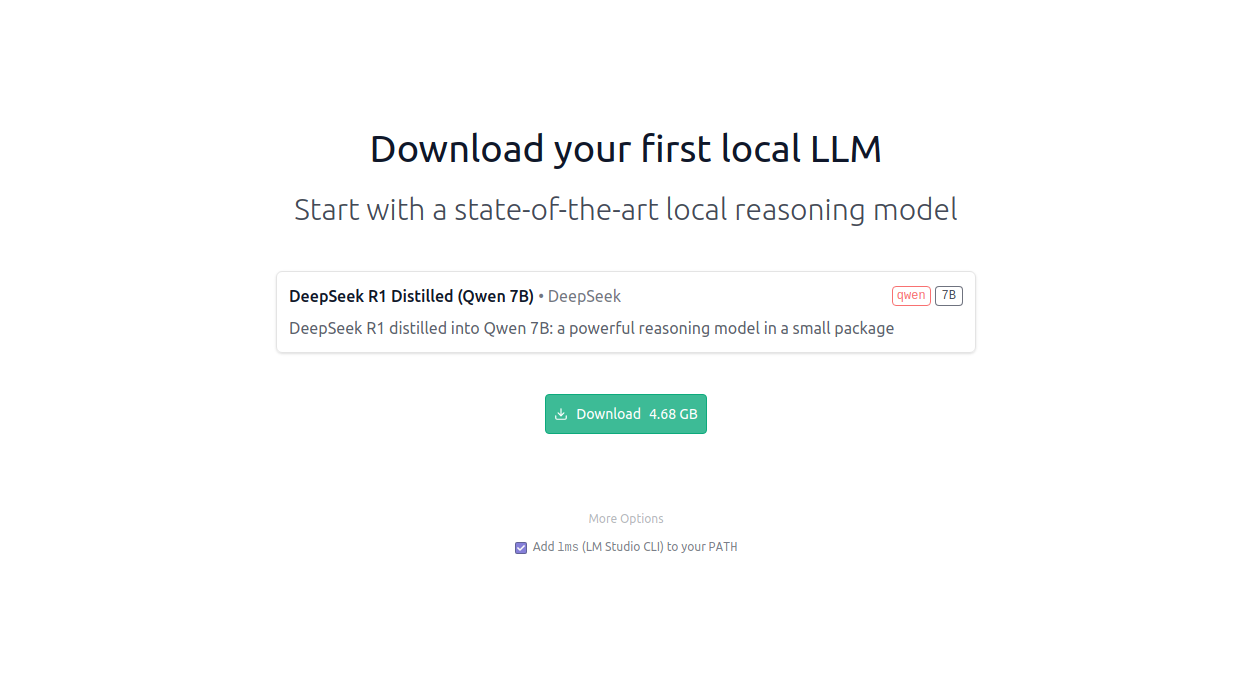
Click Download to fetch the model files for the default model.
Click Start New Chat to open the LM Studio chat interface.
Click Select a model to load on the top selection bar.

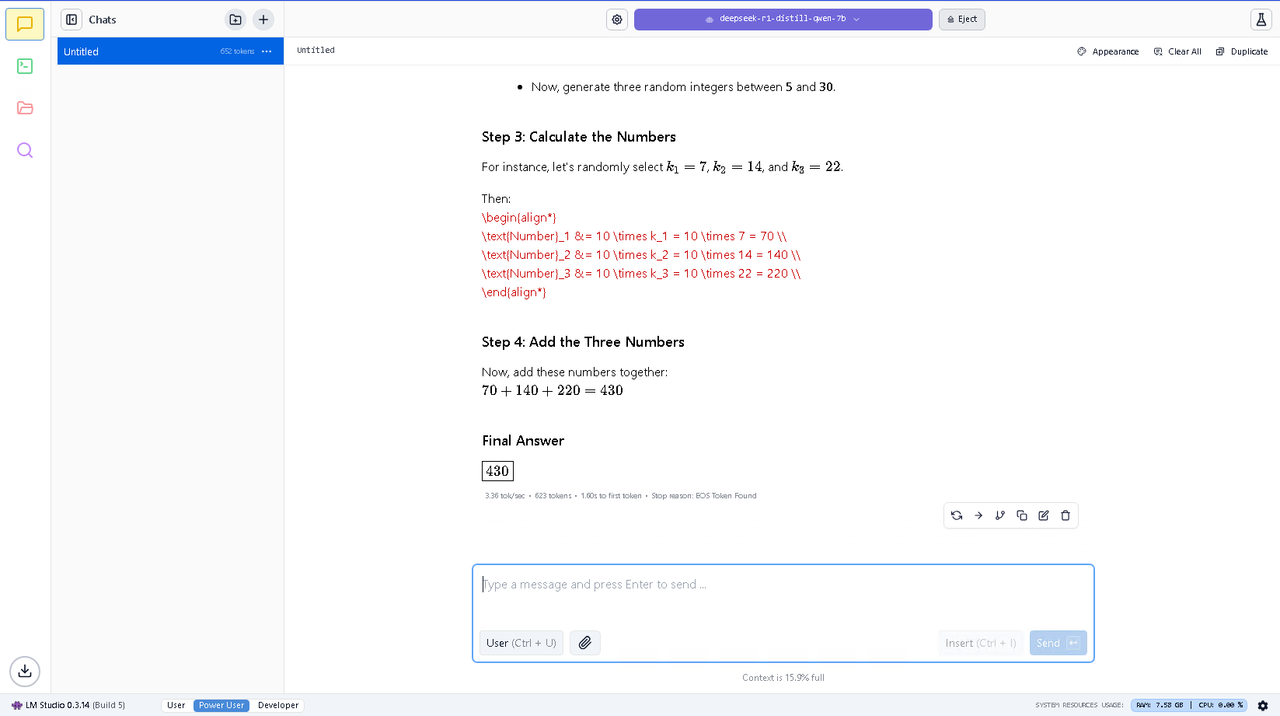
Verify the downloaded model parameters, version, and size. Then, click the model to load it in your chat interface. For example, load the default
deepseek-r1-distill-qwen-7bmodel.Enter a prompt like
Add 3 random numbers divisible by 10.Check the number of input tokens and press Enter to send the prompt.
Verify the generated result and processing summary in the model output.
Click Power User or Developer on the bottom navigation bar to switch to advanced configuration options in LM Studio.
Click Discover on the main navigation menu.
Click Model Search to find new models to download.
Click Runtime to manage the runtime extension packs.
Click Hardware to verify the system architecture and memory.
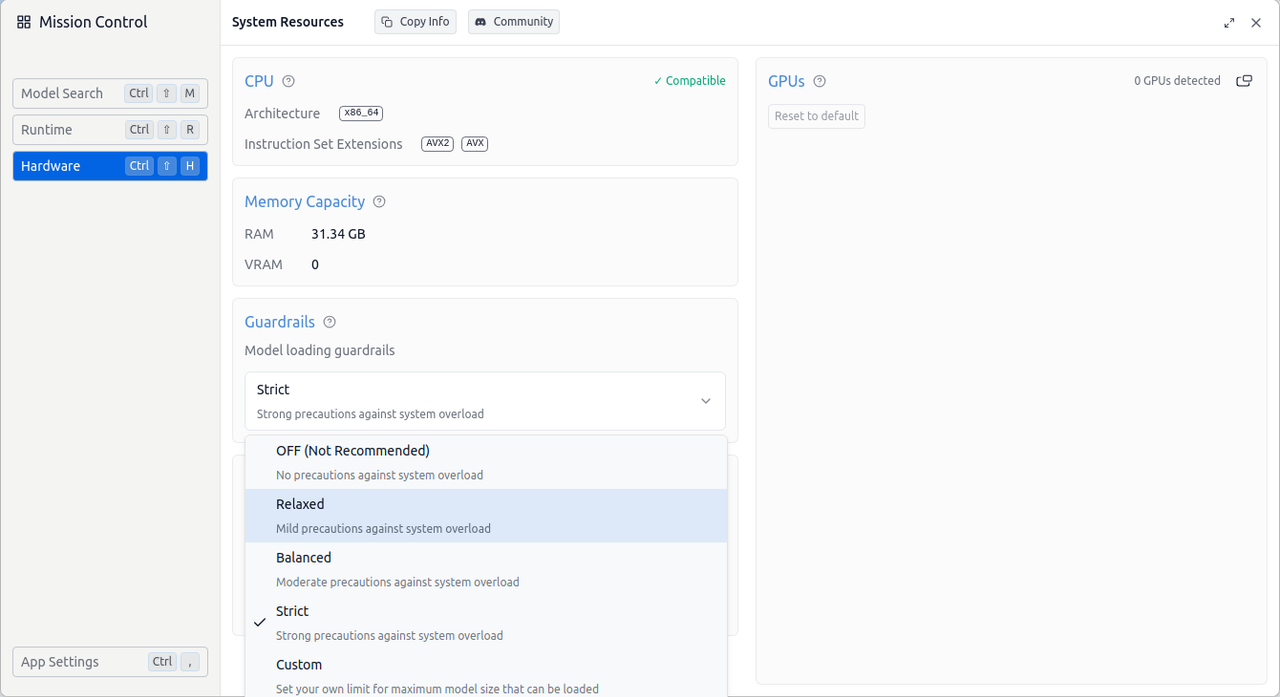
You can change the default Guardrails policy to specify the default setting for loading models based on system memory and performance.
Click App Settings to modify the LM Studio application interface.

Click Check for updates to check for newer versions and update LM Studio to the latest version.
Download and Run LLMs in LM Studio
You can browse, download, and run LLMs in LM Studio to interact with models on your workstation. LM Studio includes a default models library linked to Hugging Face, which includes popular LLMs like DeepSeek, and Gemma. You can use the downloaded models locally without an internet connection after download. Follow the steps below to download and run LLMs in LM Studio.
Click Discover on the main navigation menu.
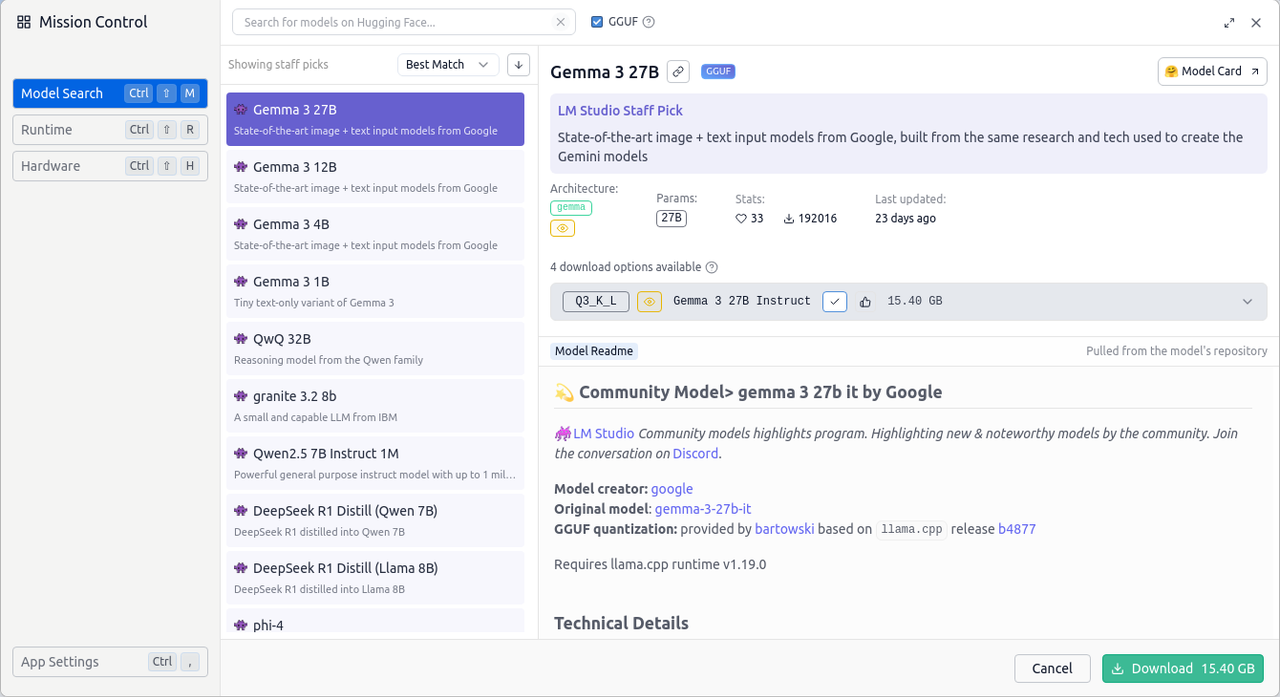
Click Model Search to browse the models library.
Enter a model name in the search bar.
Browse the available models based on:
- LM Studio Staff Picks: Models quantized and managed by the LM Studio community.
- Hugging Face: Opensource models from Hugging Face and the LM Studio community repository.
Select a model from the list.
Click Download to fetch the model files and add the model to LM Studio.
Click Downloads in the bottom left corner to monitor downloads in LM Studio.
Click Models to view all downloaded models available in LM Studio.
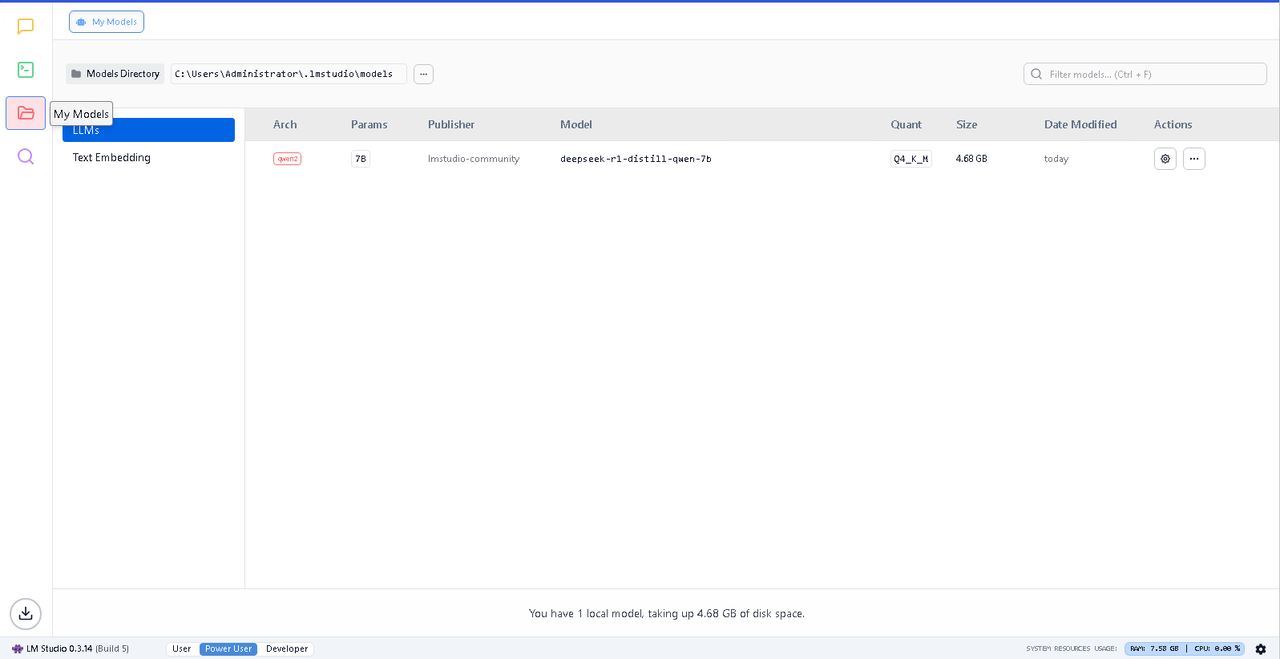
Click LLMs or Text Embedding to view the models locally available in LM Studio.
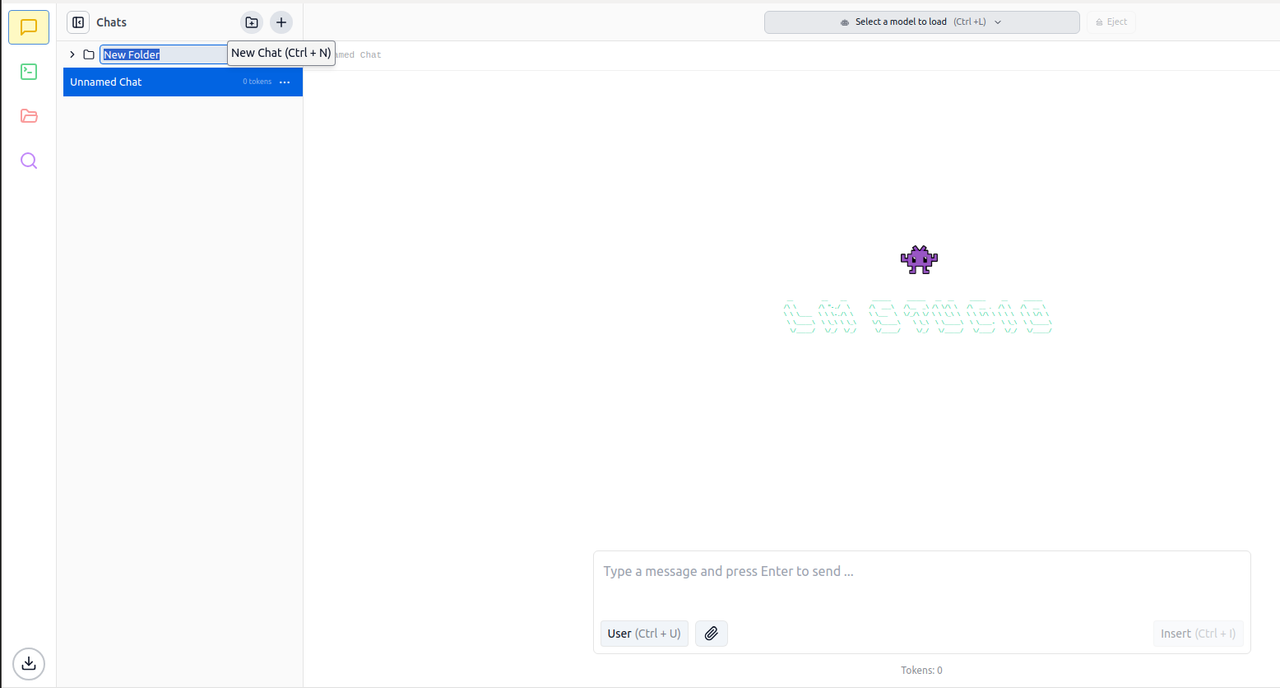
Click Chat to open the LM Studio chat interface.
Select a model to load in LM Studio.
Type a message in the prompt field and press Enter to send the prompt.
Verify the model processing time, tokens information, and results in the chat output.
Click New Chat in the open Chats pane to create a new chat.
Click New Folder to organize and archive chats in folders.
Enable API Access in LM Studio
Enabling the LM Studio server lets you run LLMs remotely on your system in headless mode without opening the graphical application. This allows you to run LM Studio on a remote server and a custom port to access downloaded models via API. Follow the steps below to enable the LM Studio server and run LLMs with unique OpenAI-like endpoints.
Click Developer to access the LM Studio server options.
Click Settings.
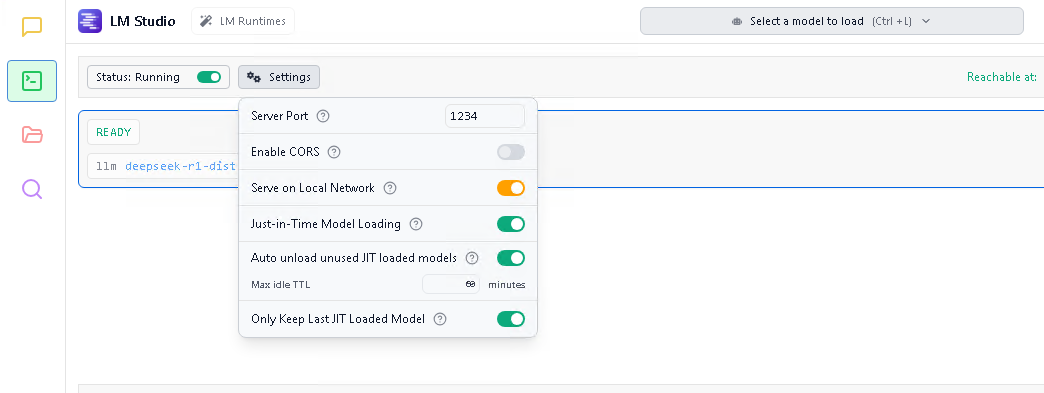
Replace
1234with a custom port to set as the server port.Click Serve on Local Network to enable LM Studio to listen for connections on all IP addresses instead of localhost
127.0.0.1. Keep the option off when using a reverse proxy like Nginx.Click Just-in-Time Model Loading to automatically load models immediately after an API request.
Click Auto Unload unused JIT loaded models to specify the
max Idle TTLto automatically unload inactive models.Change the server status from Stopped to Running to start the LM Studio API server.
Configure your firewall to allow connections to the LM Studio API server port.
Open a new terminal on your local workstation or use an API testing tool like Postman to test LM Studio API.
Send an API request to the LM Studio API to test the connection to your server. For example, send an API request to the
/v1/modelsendpoint, specifying your workstation's IP and LM Studio port to list all available models.console$ curl -X GET http://SERVER-IP:1234/v1/models
Output:
{
  "data": [
    {
      "id": "deepseek-r1-distill-qwen-7b",
      "object": "model",
      "owned_by": "organization_owner"
    },
    {
      "id": "text-embedding-nomic-embed-text-v1.5",
      "object": "model",
      "owned_by": "organization_owner"
    }
  ],
  "object": "list"
}
Configure Nginx as a Reverse Proxy for LM Studio on Linux
Nginx is an open-source web server and reverse proxy application that securely forwards connections to backend services. Configuring LM Studio with Nginx secures connections to your API server. It enables you to customize API requests with your domain to integrate LLMs with applications such as websites or for RAG processing in your projects. Follow the steps below to install Nginx on your Ubuntu Linux server and configure it as a reverse proxy to forward API requests to the LM Studio server.
Update the APT package index.
console$ sudo apt update
Install Nginx.
console$ sudo apt install nginx -y
Start the Nginx system service.
console$ sudo systemctl start nginx
Create a new
lmstudio.confNginx server block configuration in the/etc/sites-availabledirectory.console$ sudo nano /etc/nginx/sites-available/lmstudio.conf
Add the following configurations to the
lmstudio.conffile. Replacelmstudio.example.comwith your actual domain that points to your server's public IP address.iniserver { listen 80; server_name lmstudio.example.com; location / { proxy_pass http://127.0.0.1:1234; proxy_http_version 1.1; proxy_set_header Upgrade $http_upgrade; proxy_set_header Connection 'upgrade'; proxy_set_header Host $host; proxy_cache_bypass $http_upgrade; } }
Save and close the file.
The Nginx configuration above listens for HTTP connection requests using the
lmstudio.example.comdomain and forwards all incoming requests to the1234LM Studio API server port.To bring this configuration into effect, link the
lmstudio.conffile to the/etc/nginx/sites-enableddirectory.console$ sudo ln -s /etc/nginx/sites-available/lmstudio.conf /etc/nginx/sites-enabled/
Test the Nginx configuration for syntax errors.
console$ sudo nginx -t
Output:
nginx: the configuration file /etc/nginx/nginx.conf syntax is ok
nginx: configuration file /etc/nginx/nginx.conf test is successful
Restart Nginx to apply the configuration changes.
console$ sudo systemctl restart nginx
Install the Certbot plugin for Nginx to generate SSL certificates.
console$ sudo apt install certbot python3-certbot-nginx -y
Allow HTTP connections through the default firewall to enable SSL verifications.
console$ sudo ufw allow http
Restart UFW to apply the firewall changes.
console$ sudo ufw reload
Generate a new SSL certificate for your
lmstudio.example.comdomain.console$ sudo certbot --nginx -d lmstudio.example.com -m email@example.com --agree-tos
Restart Nginx to apply the SSL configurations.
console$ sudo systemctl restart nginx
Allow HTTPS connections through the firewall.
console$ sudo ufw allow https
Restart UFW.
console$ sudo ufw reload
Send a
GETrequest to the/v1/modelsLM Studio server endpoint using your domain to list all available models.console$ curl -X GET https://lmstudio.example.com/v1/models
Your output should be similar to the one below.
{
  "data": [
    {
      "id": "deepseek-r1-distill-qwen-7b",
      "object": "model",
      "owned_by": "organization_owner"
    },
    {
      "id": "text-embedding-nomic-embed-text-v1.5",
      "object": "model",
      "owned_by": "organization_owner"
    }
  ],
  "object": "list"
}
Get Information about a model available on the LM Studio server.
console$ curl https://lmstudio.example.com/api/v0/models/<model-name>
Send a request to the
completionsendpoint, specifying a model and prompt to perform text completions.console$ curl https://lmstudio.example.com/api/v0/completions \ -H "Content-Type: application/json" \ -d '{ "model": "<model-name>", "prompt": "<prompt>", "temperature": 0.7, "max_tokens": 20, "stream": false, "stop": "\n" }'
Conclusion
You have installed LM Studio and run Large Language Models (LLMs) on your workstation. You can download and run open-source models on your desktop workstation using LM Studio, providing multiple options to integrate LLMs into your applications. Installing LM Studio on a remote desktop server allows you to use API endpoints to interact with models and incorporate them into your applications. For more information and application options, visit the LM Studio documentation.