
How to Install Nginx Web Server on FreeBSD 14.0
Introduction
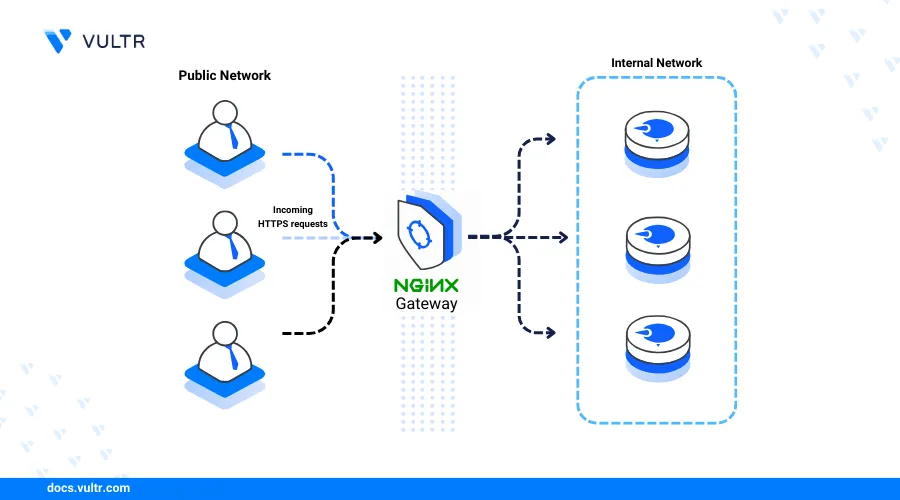
Nginx web server is a high-performance web server application that delivers static web applications and also acts as a reverse proxy or load balancer to process connections to backend services on a server. Nginx is commonly used with high-traffic web applications and works with dynamic processors such as PHP to deliver dynamic applications on your server.
This article explains how to install the Nginx web server on FreeBSD 14.0 and deliver sample web applications on your server.
Prerequisites
Before you begin:
- Deploy a FreeBSD 14.0 server on Vultr.
- Create a new DNS A record pointing to your server IP. For example,
app.example.com. - Access the server using SSH.
- Create a non-root user with sudo privileges and switch to the user.
Install Nginx
Nginx is available in the default FreeBSD package repositories and you can install a specific version from source code or ports collections on your server. Follow the steps below to install the Nginx web server package using the default pkg package manager.
Update the FreeBSD server package catalog.
console$ sudo pkg update
Install the Nginx web server package.
console$ sudo pkg install -y nginx
Verify the Nginx version installed on your server.
console$ sudo nginx -v
Output:
nginx version: nginx/1.24.0Test the default Nginx configurations for errors.
console$ sudo nginx -t
Output:
nginx: the configuration file /usr/local/etc/nginx/nginx.conf syntax is ok
nginx: configuration file /usr/local/etc/nginx/nginx.conf test is successful
Manage the Nginx System Service
Enable the Nginx web server to automatically start at system boot.
console$ sudo sysrc nginx_enable=yes
Output:
nginx_enable: -> yesStart the Nginx web server.
console$ sudo service nginx start
Output:
Performing sanity check on nginx configuration:
nginx: the configuration file /usr/local/etc/nginx/nginx.conf syntax is ok
nginx: configuration file /usr/local/etc/nginx/nginx.conf test is successful
Starting nginx.
View the Nginx service status and verify that it's running.
console$ sudo service nginx status
Output:
nginx is running as pid 1350.Stop the Nginx web server.
console$ sudo service nginx stop
Restart the Nginx web server.
console$ sudo service nginx restart
Access your FreeBSD server IP address in a web browser such as Chrome to verify that the default Nginx virtual host profile is running on your server.
http://SERVER-IP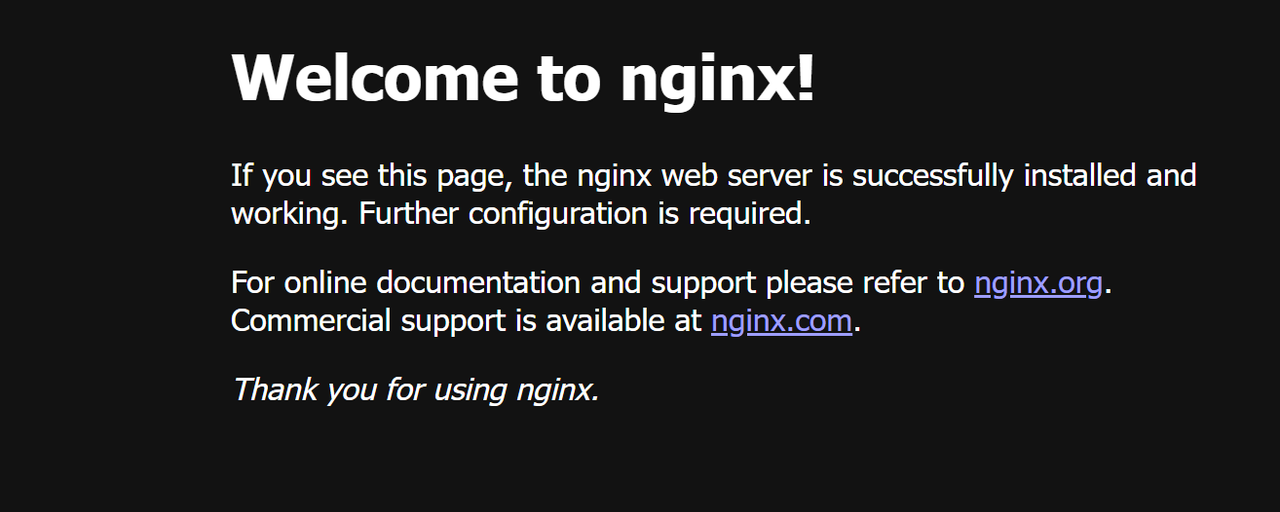
Create a New Nginx Virtual Host
Nginx uses the /usr/local/etc/nginx directory to store web server configuration files. The sites-available and conf.d directories are not available by default, but you can modify the nginx.conf file to create new virtual hosts. In the following steps, create a new virtual host files directory and set up a new Nginx virtual host configuration to serve web applications using a domain name on your server.
Switch to the Nginx configuration files directory
/usr/local/etc/nginx.console$ cd /usr/local/etc/nginx/
Create a new directory to store your virtual host configurations. For example,
conf.d.console$ sudo mkdir -p conf.d/
Open the main Nginx configuration
nginx.confusing a text editor such as Easy Editoree.console$ sudo ee nginx.conf
Add the following
includedirective at the end of the file before the closing}tag.iniinclude /etc/nginx/conf.d/*.conf;Press Esc + Enter to save the file and close the
eetext editor.Within the above configuration, the
includedirective enables Nginx to access virtual host configurations in your specified directory/usr/local/etc/nginx/conf.d. Storing the virtual host configurations separately allows you to troubleshoot the web server in case of errors.Test the Nginx configuration for errors.
console$ sudo nginx -t
Output:
nginx: the configuration file /usr/local/etc/nginx/nginx.conf syntax is ok
nginx: configuration file /usr/local/etc/nginx/nginx.conf test is successful
Restart Nginx to apply the new configuration changes.
console$ sudo service nginx restart
Switch to your Nginx virtual host configurations directory.
console$ cd /usr/local/etc/nginx/conf.d/
Create a new virtual host configuration such as
app.example.com.confto serve a new web application on your server.console$ sudo ee app.example.com.conf
Add the following configurations to the file. Replace
app.example.comwith your actual domain.nginxserver { listen 80; server_name app.example.com; root /usr/local/www/app.example.com/; index index.html index.htm; location / { try_files $uri $uri/ =404; } # Deny access to .htaccess if available location ~ /\.ht { deny all; } }
Save and close the file.
Create a new webroot directory to store your web application files. For example,
/usr/local/www/app.example.com.console$ sudo mkdir -p /usr/local/www/app.example.com/
Create a new HTML web application file
index.htmlin your webroot directory.console$ sudo ee /usr/local/www/app.example.com/index.html
Add the following HTML code to the file that outputs the heading
Greetings from Vultr.html<html> <head> <title>Greetings from Vultr!</title> </head> <body> <br> <br> <h1 align="center">Hello World! Greetings from Vultr!</h1> </body> </html>
Save and close the file.
Verify the active Nginx user profile on your server to grant permission to your web application files.
console$ ps aux | grep nginx
Output:
root   2930   0.0  0.5 20724  9572  -  Is   01:00      0:00.00 nginx: master p
www    2931   0.0  0.5 20724 10044  -  I    01:00      0:00.05 nginx: worker p
root  12876   0.0  0.0   432   264  0  R+   22:26      0:00.00 grep nginx
Based on the above output, Nginx worker process runs with the
wwwuser on your server.Grant the Nginx user
wwwfull privileges on your webroot directory.console$ sudo chown -R www: /usr/local/www/app.example.com/
Restart Nginx to apply your virtual host configuration changes.
console$ sudo service nginx restart
Output:
Performing sanity check on nginx configuration:
nginx: the configuration file /usr/local/etc/nginx/nginx.conf syntax is ok
nginx: configuration file /usr/local/etc/nginx/nginx.conf test is successful
Stopping nginx.
Performing sanity check on nginx configuration:
nginx: the configuration file /usr/local/etc/nginx/nginx.conf syntax is ok
nginx: configuration file /usr/local/etc/nginx/nginx.conf test is successful
Starting nginx.
Secure the Nginx Web Server
The Nginx web server accepts connections from any service or client on the Internet by default. Enable the FreeBSD Packet Filter (pf) firewall to block requests to unpermitted ports on your server. Then, generate trusted SSL certificates to encrypt connection requests to the Nginx web server using HTTPS. Follow the sections below to secure the server using the pf firewall and secure the Nginx web server with trusted Let's Encrypt SSL certificates.
Set Up Firewall Rules
Enable the Packet Filter firewall to start at boot time.
console$ sudo sysrc pf_enable=yes
Output:
pf_enable: NO -> yesView your FreeBSD server interfaces and note the main public interface name.
console$ ifconfigYour output should be similar to the one below.
vtnet0: flags=1008843<UP,BROADCAST,RUNNING,SIMPLEX,MULTICAST,LOWER_UP> metric 0 mtu 1500 options=4c07bb<RXCSUM,TXCSUM,VLAN_MTU,VLAN_HWTAGGING,JUMBO_MTU,VLAN_HWCSUM,TSO4,TSO6,LRO,VLAN_HWTSO,LINKSTATE,TXCSUM_IPV6> ether 56:00:00:fa:ae:e9 inet 10.10.10.1 netmask 0xfffffe00 broadcast 10.10.10.255 media: Ethernet autoselect (10Gbase-T <full-duplex>) status: active nd6 options=29<PERFORMNUD,IFDISABLED,AUTO_LINKLOCAL> lo0: flags=1008049<UP,LOOPBACK,RUNNING,MULTICAST,LOWER_UP> metric 0 mtu 16384 options=680003<RXCSUM,TXCSUM,LINKSTATE,RXCSUM_IPV6,TXCSUM_IPV6> inet 127.0.0.1 netmask 0xff000000 inet6 ::1 prefixlen 128 inet6 fe80::1%lo0 prefixlen 64 scopeid 0x2 groups: lo nd6 options=21<PERFORMNUD,AUTO_LINKLOCAL>vtnet0is the main FreeBSD server network interface based on the example public IP address10.10.10.1associated with the server.Create a new firewall configuration file
pf.conf.console$ sudo touch /etc/pf.conf
Open the
pf.conffirewall configuration file.console$ sudo ee /etc/pf.conf
Add the following firewall rules to the file. Replace
vtnet0with your actual public network interface name.ini# Set the public Vultr Server Interface ext_if = "vtnet0" # Allow Network ports allowed_ports = "{ 22, 80, 443 }" # Block non-permitted traffic block all # Allow internal traffic set skip on lo # Allow incoming traffic pass in on $ext_if proto tcp to port $allowed_ports # Allow outgoing traffic pass out on $ext_if from any to any keep state
Save and close the file.
In the above configuration, network connection requests to the HTTP port
80, HTTPS port443, and the SSH port22are allowed through the firewall. As a result, the Nginx web server can deliver web applications on your server using HTTP and HTTPS.Test your firewall configuration for errors.
console$ sudo pfctl -vnf /etc/pf.conf
Output:
ext_if = "vtnet0"
allowed_ports = "{ 22, 80, 443 }"
set skip on { lo }
block drop all
pass in on vtnet0 proto tcp from any to any port = ssh flags S/SA keep state
pass in on vtnet0 proto tcp from any to any port = http flags S/SA keep state
pass in on vtnet0 proto tcp from any to any port = https flags S/SA keep state
pass out on vtnet0 all flags S/SA keep state
Enable the firewall to use your
/etc/pf.confconfiguration.consolesudo pfctl -f /etc/pf.conf
Start the Packet Filter firewall.
console$ sudo pfctl -e
View all active firewall rules on your server and verify that your new connection rules are available.
console$ sudo pfctl -sr
Output:
block drop all
pass in on vtnet0 proto tcp from any to any port = ssh flags S/SA keep state
pass in on vtnet0 proto tcp from any to any port = http flags S/SA keep state
pass in on vtnet0 proto tcp from any to any port = https flags S/SA keep state
pass out on vtnet0 all flags S/SA keep state
Generate Let’s Encrypt SSL Certificates
Install the Certbot package for Nginx on your server.
console$ sudo pkg install security/py-certbot-nginx
Generate a new Let’s Encrypt SSL certificate using your domain name. Replace
app.example.comwith your actual domain anduser@example.comwith your email.console$ sudo certbot --nginx --domain app.example.com --email user@example.com --agree-tos
Output:
Deploying certificate
Successfully deployed certificate for app.example.com to /usr/local/etc/nginx/conf.d/app.example.com.conf
Congratulations! You have successfully enabled HTTPS on https://app.example.com
Verify that Certbot autorenews your SSL certificate upon expiry.
console$ sudo certbot renew --dry-run
Restart Nginx to apply your SSL configuration changes.
console$ sudo service nginx restart
Open your domain name in a new web browser window and verify that Nginx securely serves your virtual host web application files using HTTPS.
https://app.example.com
Conclusion
You have installed the Nginx web server on FreeBSD 14.0. Nginx is a high-performance application you can configure to securely deliver or load balance between multiple backend services on your server. For more information and configuration options, visit the Nginx documentation.