
How to Install PHP and PHP-FPM on Rocky Linux 9
Introduction
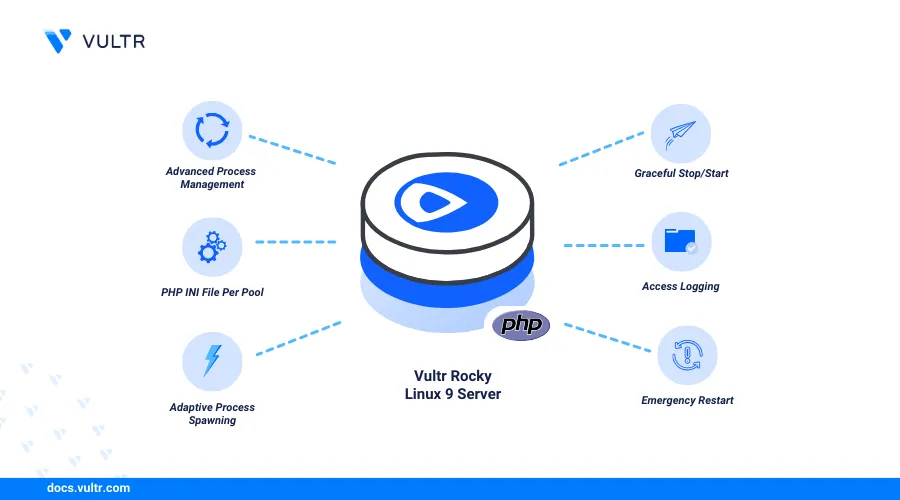
PHP (Hypertext Preprocessor) is an open-source server-side scripting language that enables the development of dynamic web applications.PHP-FPM (FastCGI Process Manager) is an implementation of PHP FastCGI that enables processing of PHP requests using pools configurations with optimized performance and faster response times.
This article explains how to install PHP and PHP-FPM on Rocky Linux 9, configure the default pool to enable integrations with other applications such as web servers and run sample dynamic web applications.
Prerequisites
Before you begin:
- Deploy a Rocky Linux 9 instance on Vultr.
- Access the server using SSH as a non-root user with sudo privileges.
- Update the server.
Install PHP
PHP is available in the default repositories on Rocky Linux 9 with the latest version information. Follow the steps below to install PHP and PHP-FPM using the default DNF package manager on your server.
Update the server packages index.
console$ sudo dnf update -y
Install PHP.
console$ sudo dnf install -y php
View the installed PHP on your server.
console$ php -v
Output:
PHP 8.0.30 (cli) (built: Aug  3 2023 17:13:08) ( NTS gcc x86_64 )
Copyright (c) The PHP Group
Zend Engine v4.0.30, Copyright (c) Zend Technologies
    with Zend OPcache v8.0.30, Copyright (c), by Zend Technologies
View the installed PHP-FPM version and verify that it matches your PHP version.
console$ php-fpm -v
Output:
PHP 8.0.30 (fpm-fcgi) (built: Aug  3 2023 17:13:08)
Copyright (c) The PHP Group
Zend Engine v4.0.30, Copyright (c) Zend Technologies
    with Zend OPcache v8.0.30, Copyright (c), by Zend Technologies
Install PHP Extensions
PHP extensions enable additional functionalities and integration of dynamic features required by modern web applications. Follow the steps below to install common PHP extensions required by most web applications.
Install common PHP extensions.
console$ sudo dnf install -y php-mysqlnd php-pgsql php-redis php-curl php-json php-gd php-xml php-mbstring php-zip
The above command installs the following PHP extensions:
- php-mysqlnd: Enables PHP to connect and interact with MySQL databases.
- php-pgsql: Enables PHP to interact with PostgreSQL databases.
- php-redis: Allows PHP scripts to interact with Redis databases.
- php-curl: Enables PHP applications to create requests to other servers or http services.
- php-json: Provides JSON handling functionalities.
- php-gd: Enables PHP to create and manipulate images.
- php-xml: Provides functionalities to parse and generate XML contents in PHP applications.
- php-mbstring: Enables PHP to process multi-byte encodings.
- php-zip: Enables PHP to read and modify ZIP archives.
View the installed PHP modules on your server.
console$ php -m
Output:
[PHP Modules]
............
json
libxml
mbstring
msgpack
mysqli
mysqlnd
openssl
pcntl
pcre
PDO
pdo_mysql
pdo_pgsql
pdo_sqlite
pgsql
Phar
readline
redis
Reflection
session
SimpleXML
..............
[Zend Modules]
Zend OPcache
Configure PHP-FPM
PHP-FPM is available and included in the PHP package during installation. PHP-FPM acts as a gateway to the PHP processes and handles multiple PHP requests depending on your pool configurations. Follow the steps below to configure the default PHP-FPM pool to process requests depending on your server performance.
Switch to the PHP-FPM configuration files directory.
console$ cd /etc/php-fpm.d/
Open the default PHP-FPM pool configuration
www.conf.console$ sudo nano /etc/php-fpm.d/www.conf
- Verify the default pool name
www.
ini[www]- Find the following user and group directives to enable PHP-FPM run with the same user as your web server. For example, change the default value
apachetonginxwhen using the Nginx web server and vice versa.
iniuser = nginx group = nginx
- Find the following
listendirective and verify the PHP-FPM UNIX socket path to use when connecting to the pool.
inilisten = /run/php-fpm/www.sock
- Find the
pm.max_childrendirective and set the value depending on your available server memory. A higher value enables processing of multiple workers while a lower value may enforce queueing.
inipm.max_children = 50
- Find and uncomment the
pm.max_requestsdirective to set the number of processes each child process can run before it's terminated.
inipm.max_requests = 500
Save and close the file.
- Verify the default pool name
Enable the PHP-FPM service to start automatically start at boot time.
console$ sudo systemctl enable php-fpm
Start the PHP-FPM service.
console$ sudo systemctl start php-fpm
View the PHP-FPM service status and verify that it's running.
console$ sudo systemctl status php-fpm
Output:
● php-fpm.service - The PHP FastCGI Process Manager
  Loaded: loaded (/usr/lib/systemd/system/php-fpm.service; enabled; preset: disabled)
  Active: active (running) since Thu 2024-06-27 02:23:24 UTC; 7s ago
Main PID: 51711 (php-fpm)
  Status: "Ready to handle connections"
   Tasks: 6 (limit: 48896)
  Memory: 13.9M
     CPU: 42ms
  CGroup: /system.slice/php-fpm.service
          ├─51711 "php-fpm: master process (/etc/php-fpm.conf)"
          ├─51712 "php-fpm: pool www"
          ├─51713 "php-fpm: pool www"
          ├─51714 "php-fpm: pool www"
          ├─51715 "php-fpm: pool www"
          └─51716 "php-fpm: pool www"
Test PHP and PHP-FPM
PHP includes a default web server package that lets you run applications by specifying a specific listen address. Follow the steps below to set up a sample PHP application and use the built-in PHP web server utility to run the application.
Create a new directory to store your PHP application files. For example,
/var/www/php-test.console$ sudo mkdir -p /var/www/php-test
Create a new sample PHP application file
info.php.console$ sudo nano /var/www/php-test/info.php
Add the following contents to the file.
php<?php phpinfo(); ?>
Save and close the file.
The above application code displays full information about your PHP installation including the version, and installed modules on the server.
Run the application directory using the built-in PHP web server utility on the HTTP port
80.console$ php -S 0.0.0.0:80 -t /var/www/php-test &
Output:
PHP 8.0.30 Development Server (http://0.0.0.0:80) startedAllow connections to the HTTP port
80through the defaultfirewalldutility.console$ sudo firewall-cmd --permanent --add-service=http
Reload the firewall configuration to apply changes.
$ sudo firewall-cmd --reloadAccess your server IP using a web browser such as Chrome and load the
/info.phppath to access your PHP application.http://SERVER-IP/info.php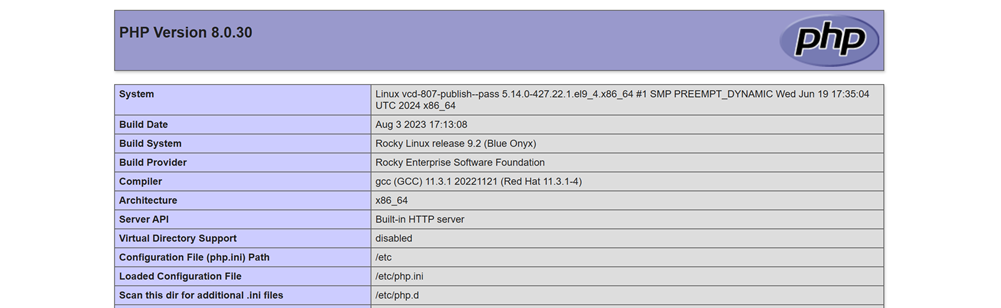
Install Multiple PHP Versions
Running multiple PHP projects requires specific package versions depending on your deployment environment. You can run multiple PHP versions on your server that include specific features or functionalities available in a specific PHP version required by your application. Follow the steps below to install the phpbrew utility and manage multiple PHP versions on your server.
Update your server's package index.
console$ sudo dnf update -y
Install the EPEL repository on your server.s
console$ sudo dnf install epel-release -y
Enable the CRB (CodeReady Builder) repository.
console$ sudo dnf config-manager --set-enabled crb
Install all required dependencies packages.
console$ sudo dnf install -y gcc gcc-c++ kernel-devel make autoconf automake bzip2-devel libcurl-devel libjpeg-devel libpng-devel freetype-devel libxml2-devel libxslt-devel libzip-devel oniguruma-devel readline-devel libmcrypt-devel libpq-devel openldap-devel openssl-devel re2c bison
Download the latest
phpbrewbinary file to install on your server.console$ curl -L -O https://github.com/phpbrew/phpbrew/raw/master/phpbrew
Enable execution privileges on the file.
console$ sudo chmod +x phpbrew
Move the binary file to the
/usr/local/bindirectory to enablephpbrewas a system-wide command.console$ sudo mv phpbrew /usr/local/bin/phpbrew
View the installed
phpbrewversion to verify access to the utility.console$ phpbrew -v
Output:
______ _   _ ____________
| ___ \ | | || ___ \ ___ \
| |_/ / |_| || |_/ / |_/ /_ __ _____      __
|  __/|  _  ||  __/| ___ \ '__/ _ \ \ /\ / /
| |   | | | || |   | |_/ / | |  __/\ V  V /
\_|   \_| |_/\_|   \____/|_|  \___| \_/\_/

Brew your latest php!

.................

phpbrew 2.1.0           powered by https://github.com/c9s/CLIFramework
Initialize
phpbrewto work in your user environment.console$ phpbrew init
Output:
Using root: /home/exampleuser/.phpbrew
Initialization successfully finished!
<=====================================================>
Phpbrew environment is initialized, required directories are created under

    /home/exampleuser/.phpbrew
Run the following command to add your local
phpbrewdirectory to the.bashrcfile and enable your configurations to work in multiple terminal sessions. Replaceexampleuserwith your actual user.console$ echo "[[ -e /home/exampleuser/.phpbrew/bashrc ]] && source /home/exampleuser/.phpbrew/bashrc" >> /home/exampleuser/.bashrc
Reload the
.bashrcfile to apply changes.console$ source /home/exampleuser/.bashrc
Install one or more PHP versions on your server. For example:
- Install PHP 8.1 with the
+defaultand+mysqlextensions.
console$ phpbrew install php-8.1 +default +mysql
- Install PHP 8.2 with the
+defaultand+mysqlextensions.
console$ phpbrew install php-8.2 +default +mysql
- Install PHP 8.3 with the
+defaultand+mysqlextensions.
console$ phpbrew install php-8.3 +default +mysql
- Install PHP 8.1 with the
View all installed versions on your server.
console$ phpbrew list
Output:
* (system)
php-8.1.29
php-8.2.20
php-8.3.8
View the active PHP version on your server.
console$ php -v
Output:
PHP 8.0.30 (cli) (built: Aug  3 2023 17:13:08) ( NTS gcc x86_64 )
Copyright (c) The PHP Group
Zend Engine v4.0.30, Copyright (c) Zend Technologies
    with Zend OPcache v8.0.30, Copyright (c), by Zend Technologies
Switch to a specific PHP version available on your
phpbrewlist.console$ phpbrew switch php-8.3.8
View the active PHP version in your user environment.
console$ php -v
Output:
PHP 8.3.8 (cli) (built: Jun 27 2024 03:04:29) (NTS)
Copyright (c) The PHP Group
Zend Engine v4.3.8, Copyright (c) Zend Technologies
Based on the above output, the PHP version
8.3.8is active in your user's environment. When using multiple PHP versions on your server, ensure to create independent PHP-FPM pools to define specific resource limits for each PHP version depending on your project requirements.
Conclusion
You have installed PHP and PHP-FPM on your Rocky Linux 9 server to efficiently process dynamic web applications. In addition, you installed common PHP extensions to enable additional application functionalities and switched between multiple versions to match your project needs. For more information and PHP-FPM configuration options, visit the official PHP documentation.