
How to Install phpMyAdmin on Ubuntu 24.04
phpMyAdmin is an open-source web-based tool used to manage MySQL databases. If you install phpMyAdmin on Ubuntu 24.04, you’ll gain access to a user-friendly interface for creating, modifying, and deleting databases, tables, and fields. It also allows you to manage users, import and export databases, and execute SQL statements. With phpMyAdmin, you can easily run SQL queries on a database server without needing to use the command-line interface (CLI).
This article explains how to install phpMyAdmin on Ubuntu 24.04. You will create MySQL databases, and access the phpMyAdmin interface to manage users and databases.
Prerequisites
Before you begin, you need to:
- Have access to an Ubuntu 24.04 instance as a non-root sudo user.
Set Up the MySQL Database Server
Follow the steps below to set up the MySQL database server and create a sample database to use with phpMyAdmin.
Update the APT package information index.
console$ sudo apt update
Install MySQL server if it's not installed.
console$ sudo apt install mysql-server -y
Log in to the MySQL database server.
console$ sudo mysql
Create a sample
my_companydatabase.sqlmysql> CREATE DATABASE my_company;
Create a new
company_adminMySQL user with a strong password. Replaceyour_passwordwith a strong password.sqlmysql> CREATE USER 'company_admin'@'localhost' IDENTIFIED BY 'your_password';
Grant the
company_adminuser full privileges to themy_companydatabase.sqlmysql> GRANT ALL PRIVILEGES ON my_company.* TO 'company_admin'@'localhost';
Flush the MySQL privileges table to apply the user changes.
sqlmysql> FLUSH PRIVILEGES;
Exit the MySQL console.
sqlmysql> EXIT;
Install phpMyAdmin on Ubuntu 24.04
phpMyAdmin is available in the default package repositories on Ubuntu 24.04. Follow the steps below to install phpMyAdmin using the APT package manager.
Update the APT package information index.
console$ sudo apt update
Install PHP and all required PHP extensions.
console$ sudo apt install php php-mysql php-mbstring php-json php-xml php-curl php-zip php-common -y
Install phpMyAdmin.
console$ sudo apt install phpmyadmin -y
Select the following phpMyAdmin configuration options when prompted:
- Web server to reconfigure automatically: Press Space to select
apache2and press Enter to save your selection. - Configure database for phpmyadmin with dbconfig-common? Keep
Yesselected and press Enter to configure the MySQL database. - MySQL application password for phpmyadmin: Enter a strong password for the phpMyAdmin database and press Enter to confirm it. Then, enter the password again and press Enter to apply the database changes.
- Web server to reconfigure automatically: Press Space to select
Verify that the phpMyAdmin installation is successful.
console$ dpkg -l | awk '/phpmyadmin / {print}'
Output:
ii phpmyadmin 4:5.2.1+dfsg-3 all MySQL web administration tool
Configure phpMyAdmin
phpMyAdmin includes a default Apache virtual host configuration file used to serve the /phpmyadmin endpoint using your server's IP or domain. Follow the steps below to verify that the phpMyAdmin configuration is enabled and start the Apache web server.
Enable the phpMyAdmin virtual host configuration using the
a2enconfcommand.console$ sudo a2enconf phpmyadmin.conf
Output:
Conf phpmyadmin already enabledRestart Apache to apply the configuration changes.
console$ sudo systemctl restart apache2
View the Apache web server status and verify that it's running.
console$ sudo systemctl status apache2
Output:
● apache2.service - The Apache HTTP Server
     Loaded: loaded (/usr/lib/systemd/system/apache2.service; enabled; preset: enabled)
     Active: active (running) since Wed 2025-02-19 14:03:08 UTC; 5min ago
       Docs: https://httpd.apache.org/docs/2.4/
    Process: 84623 ExecReload=/usr/sbin/apachectl graceful (code=exited, status=0/SUCCESS)
   Main PID: 74567 (apache2)
      Tasks: 6 (limit: 1061)
View the UFW status and verify that the firewall is active.
console$ sudo ufw status
Run the following command to install UFW and allow SSH connections if it's unavailable.
console$ sudo apt install ufw -y && sudo ufw allow ssh
Allow the
Apache Fullprofile through the firewall to enable HTTP and HTTPS connections on the server.console$ sudo ufw allow 'Apache Full'
Reload UFW to apply the firewall configuration changes.
console$ sudo ufw reload
Access phpMyAdmin
Follow the steps below to access phpMyAdmin and manage the sample MySQL database you created earlier.
Access the
/phpmyadminendpoint using your server's IP address or domain name in a web browser such as Chrome.http://your_server_ip/phpmyadminLog in to phpMyAdmin using the sample
company_adminMySQL user account credentials you created earlier.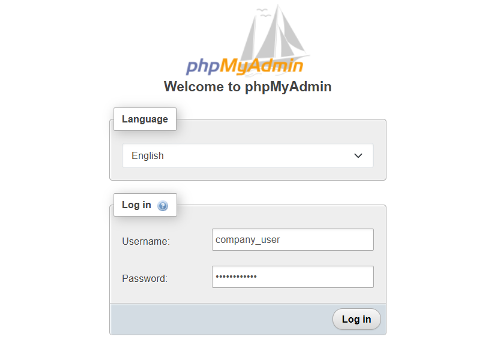
Verify that the phpMyAdmin interface loads correctly in your web browser.
Click the
my_companydatabase on the left navigation menu to manage it.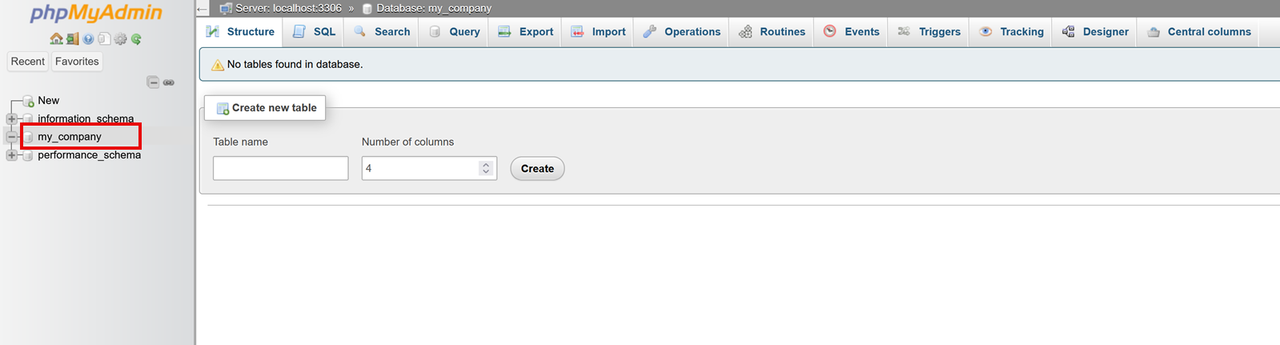 Avoid logging in to phpMyAdmin using the MySQLWarning
rootuser account as this poses significant risks, including accidental deletions, modifications, and security vulnerabilities. Instead, always create a dedicated user account with the necessary permissions for a specific database(s). This ensures a more secure and controlled environment, reducing the risk of unintentional actions that could compromise your data and server incase a malicious user gets access to your database account.
Secure phpMyAdmin Endpoint
Basic authentication prompts users for a password to access the phpMyAdmin interface. Follow the steps below to secure the phpMyAdmin endpoint with basic authentication to prompt users for a password to manage databases.
Create a new
.htpasswdfile with a new username and password. Replaceyour_usernamewith your desired username such assmithand enter your desired password when prompted.console$ sudo htpasswd -c /etc/phpmyadmin/.htpasswd your_username
Open the Apache virtual host configuration for phpMyAdmin.
console$ sudo nano /etc/apache2/conf-available/phpmyadmin.conf
Add the following
AllowOverride Alldirective within the/usr/share/phpmyadmindirectory block.apacheconfAllowOverride All
Your modified directory block should be similar to the one below.
apacheconf<Directory /usr/share/phpmyadmin> AllowOverride All ... </Directory>
Create a new
.htaccessfile in the/usr/share/phpmyadmin/directory.console$ sudo nano /usr/share/phpmyadmin/.htaccess
Add the following configurations to the
.htaccessfile.apacheconfAuthType Basic AuthName "Restricted Access to PhpMyAdmin" AuthUserFile /etc/phpmyadmin/.htpasswd Require valid-user
In the above .htaccess file:
The above
.htaccessconfiguration enables basic authentication on the phpMyAdmin endpoint. Within the configuration:AuthType Basic: Specifies the authentication type asBasic.AuthName "Restricted Access to PhpMyAdmin": Sets a custom message to display in the sign-in prompt.AuthUserFile /etc/phpmyadmin/.htpasswd: Sets/etc/phpmyadmin/.htpasswdas the basic authentication file that includes the allowed users and encrypted passwords.Require valid-user:Requests a valid user to access the phpMyAdmin interface.
Restart Apache to apply the configuration changes.
console$ sudo systemctl restart apache2
Access phpMyAdmin again and verify that you are prompted for a user password to log in.
http://your_server_ip/phpmyadmin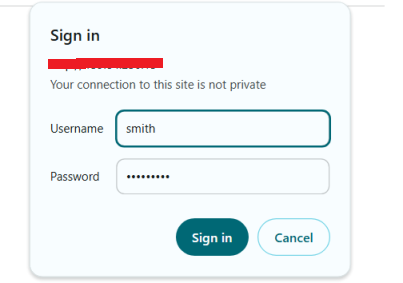
Log in to phpMyAdmin using your MySQL user credentials to manage databases on your server.
Troubleshoot phpMyAdmin
Follow the sections below to troubleshoot your phpMyAdmin installation in case of any common errors.
phpMyAdmin Login Fails
Verify that the MySQL database server is running.
console$ sudo systemctl status mysql
Verify your MySQL username and password.
View the phpMyAdmin configuration file and find any possible errors.
console$ sudo nano /etc/phpmyadmin/config.inc.php
Internal Server Error
View Apache error logs for detailed information.
console$ sudo tail -f /var/log/apache2/error.log
Install all required PHP extensions.
console$ sudo apt install php-mysql php-mbstring php-json php-xml php-curl php-zip php-common -y
Access Denied
Log in to the MySQL server.
console$ sudo mysql
Create a new MySQL user.
sqlmysql> CREATE USER 'your_username'@'localhost' IDENTIFIED BY 'your_password';
Grant the user full privileges to your target database.
sqlmysql> GRANT ALL PRIVILEGES ON *.* TO 'your_username'@'localhost' WITH GRANT OPTION;
Flush the MySQL privileges table to apply changes.
sqlmysql> FLUSH PRIVILEGES;
Exit the MySQL database console and access phpMyAdmin again.
sqlmysql> EXIT;
Conclusion
You have installed phpMyAdmin on Ubuntu 24.04. phpMyAdmin provides a convenient web-based interface for managing your MySQL databases. You can now use phpMyAdmin to perform database administration tasks to manage databases, insert records, and query tables to generate reports. For more information and configuration options, visit the phpMyAdmin documentation.