
How to Install Apache, MySQL, PHP (FAMP Stack) on FreeBSD 14.0
Introduction
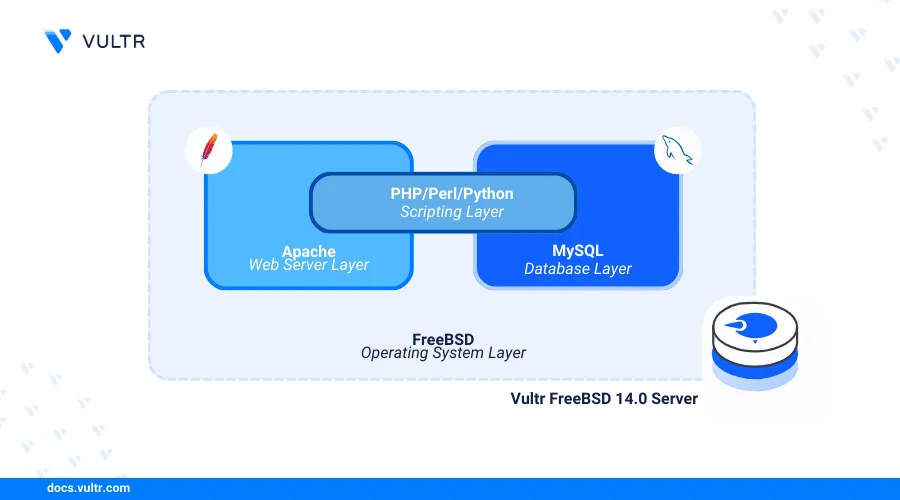
FreeBSD, Apache, MySQL, and PHP (FAMP stack) is a collection of open-source software applications that manage the runtime and development of dynamic web applications on a server. Apache works as a web server to delivers web application files while MySQL functions as the database backend, and PHP processes dynamic web application contents.
This article explains how to install the Apache, MySQL, and PHP (FAMP) stack on FreeBSD 14.0 and deliver dynamic web applications on your server.
Prerequisites
Before you begin:
Deploy a FreeBSD 14.0 instance on Vultr.
Create a new domain A record pointing to the instance IP address. For example,
app.example.com.Access the server using SSH.
Create a non-root user with sudo privileges and switch to the user.
Install Apache
Apache is available in the default repositories on FreeBSD 14.0 with the latest package information. Follow the steps below to install the latest Apache web server package and enable the application to run on your server.
Update the server packages catalog.
console$ sudo pkg update
Install Apache on your server.
console$ sudo pkg install -y apache24
Verify that Apache is installed on your server.
console$ apachectl -v
Output:
Server version: Apache/2.4.59 (FreeBSD)
Server built:   unknown
Enable Apache to automatically start at boot.
console$ sudo service apache24 enable
Start the Apache web server.
console$ sudo service apache24 start
View the Apache service status and verify that the web server is running.
console$ sudo service apache24 status
Output:
apache24 is running as pid 2536.Access your server IP address using a web browser such as Chrome and verify that the default Apache virtual host web page displays.
http://SERVER-IP
Install MySQL
MySQL is available in the default FreeBSD 14.0 repositories with multiple versions. Follow the steps below to install the latest MySQL database server version and enable it to run on your server.
Search all MySQL versions available in the default FreeBSD repositories.
console$ sudo pkg search mysql
Output:
...
mysql80-client-8.0.35          Multithreaded SQL database (client)
mysql80-server-8.0.35_1        Multithreaded SQL database (server)
mysql81-client-8.1.0           Multithreaded SQL database (client)
mysql81-server-8.1.0           Multithreaded SQL database (server)
...
Install the latest MySQL server and client packages.
console$ sudo pkg install mysql81-server mysql81-client
View the installed MySQL version on your server.
console$ mysql --version
Output:
mysql Ver 8.1.0 for FreeBSD14.0 on amd64 (Source distribution)Enable the MySQL server to automatically start at boot.
console$ sudo service mysql enable
Output:
mysql enabled in /etc/rc.confStart the MySQL database server.
console$ sudo service mysql-server start
View the MySQL server status and verify that it's running.
console$ sudo service mysql-server status
Output:
mysql is running as pid 3266.Start the MySQL secure installation script.
console$ sudo mysql_secure_installation
- Enter Y when prompted to enable the VALIDATE PASSWORD component and set strict password policies on the database server.
VALIDATE PASSWORD COMPONENT can be used to test passwords and improve security. It checks the strength of password and allows the users to set only those passwords which are secure enough. Would you like to setup VALIDATE PASSWORD component? Press y|Y for Yes, any other key for No: Y- Enter your desired password strength level to enable on your server. For example, enter 2 to require strong passwords with mixed characters.
There are three levels of password validation policy: LOW Length >= 8 MEDIUM Length >= 8, numeric, mixed case, and special characters STRONG Length >= 8, numeric, mixed case, special characters and dictionary file Please enter 0 = LOW, 1 = MEDIUM and 2 = STRONG:- Enter a new strong password to assign the
rootdatabase user.
Please set the password for root here. New password:- Repeat the password and verify the estimated password strength.
Re-enter new password: Estimated strength of the password: 8- Enter Y when prompted to validate and continue with the new user password.
Do you wish to continue with the password provided?(Press y|Y for Yes, any other key for No) :- Enter Y and press Enter to remove anonymous database users on your server.
Remove anonymous users? (Press y|Y for Yes, any other key for No) :- Enter Y when prompted to disable remote access to your database server using the root user account.
Disallow root login remotely? (Press y|Y for Yes, any other key for No) :- Enter Y when prompted to remove the test databases on your server.
`Remove test database and access to it? (Press y|Y for Yes, any other key for No) :- Enter Y and press Enter to reload the MySQL privilege tables and apply your configuration changes.
Reload privilege tables now? (Press y|Y for Yes, any other key for No) :Restart the MySQL database server to apply changes.
console$ sudo service mysql-server restart
Install PHP and Configure PHP-FPM
PHP is available in the default FreeBSD repositories and includes the PHP-FPM package that manages connection requests using pool configurations on your server. Follow the steps below to install the latest PHP version on your server.
Search all available PHP packages in the default FreeBSD repositories.
console$ pkg search php | egrep '^php[0-9]+-[0-9]'
Output:
php81-8.1.29                   PHP Scripting Language (8.1.X branch)
php82-8.2.18                   PHP Scripting Language (8.2.X branch)
php83-8.3.6                    PHP Scripting Language (8.3.X branch)
Install the latest PHP package. For example, PHP version
8.3.console$ sudo apt install php83
Install common PHP modules required to enable application functionalities.
console$ sudo pkg install -y php83-mysqli php83-curl php83-zip php83-gd php83-xml php83-mbstring
View the installed PHP version on your server..
console$ php -v
Output:
PHP 8.3.6 (cli) (built: Jun 20 2024 02:08:30) (NTS)
Copyright (c) The PHP Group
Zend Engine v4.3.6, Copyright (c) Zend Technologies
View the installed PHP-FPM version on your server.
console$ php-fpm -v
Output:
PHP 8.3.6 (fpm-fcgi) (built: Jun 20 2024 02:08:43)
Copyright (c) The PHP Group
Zend Engine v4.3.6, Copyright (c) Zend Technologies
Enable PHP-FPM to automatically start at boot.
console$ sudo service php-fpm enable
View the PHP-FPM service status and verify that it's running.
console$ sudo service php-fpm status
Output:
php_fpm is running as pid 2558.
Configure Apache with PHP-FPM
Apache uses the mod_proxy and mod_proxy_fcgi modules to process FastCGI requests and connect to the PHP-FPM service. Follow the steps below to enable the required Apache modules and forward all PHP application requests to the PHP-FPM service port 9000.
Open the default PHP-FPM pool configuration file using a text editor such as the Easy Editor (
ee).console$ sudo ee /usr/local/etc/php-fpm.d/www.conf
- Find the
userandgroupdirectives and verify that PHP-FPM runs with the web server user profilewww.
iniuser = www group = www
- Find the
listendirective and verify that PHP-FPM listens for connection requests on the localhost port9000.
inilisten = 127.0.0.1:9000
Save and close the file.
- Find the
Run the following command to enable the
mod_proxyandmod_proxy_fcgiApache modules on your server.console$ sudo sed -i '' -e 's/^#LoadModule proxy_module libexec\/apache24\/mod_proxy.so/LoadModule proxy_module libexec\/apache24\/mod_proxy.so/' -e 's/^#LoadModule proxy_fcgi_module libexec\/apache24\/mod_proxy_fcgi.so/LoadModule proxy_fcgi_module libexec\/apache24\/mod_proxy_fcgi.so/' /usr/local/etc/apache24/httpd.conf
The above command uncomments the following Apache configuration directives to enable the modules on your server.
apacheconfLoadModule proxy_module libexec/apache24/mod_proxy.so LoadModule proxy_fcgi_module libexec/apache24/mod_proxy_fcgi.so
Open the main Apache configuration file.
console$ sudo ee /usr/local/etc/apache24/httpd.conf
Add the following configurations at the end of the file to forward all PHP file requests to the PHP-FPM port
9000.apacheconf<FilesMatch "\.php$"> SetHandler "proxy:fcgi://127.0.0.1:9000" </FilesMatch>
Save and close the file.
Test the Apache configuration for errors.
console$ sudo apachectl configtest
Your output should look like the one below when the test is successful:
Performing sanity check on apache24 configuration:
AH00558: httpd: Could not reliably determine the server's fully qualified domain name, using 127.0.0.1. Set the 'ServerName' directive globally to suppress this message
Syntax OK
Restart PHP-FPM to apply changes.
console$ sudo service php-fpm restart
Restart Apache to apply the configuration changes.
console$ sudo service apache24 restart
Test the Installation
Log in to the MySQL database server using the
rootuser and password you set earlier.console$ mysql -u root -p
Create a new sample database
exampledb.sqlmysql> create database exampledb;
Create a new database user such as
dbadminwith a strong password.sqlmysql> create user 'dbadmin'@'localhost' IDENTIFIED BY 'strong@@password25Bb';
Grant the
dbadminuser full privileges to theexampledbdatabase.sqlmysql> GRANT ALL PRIVILEGES ON exampledb.* TO 'dbadmin'@'localhost';
Flush the MySQL privileges table to apply changes.
sqlmysql> FLUSH PRIVILEGES;
Switch to the sample database
exampledb.sqlmysql> use exampledb;
Create a new sample table
exampletablewith the following columns to store integer and string values.sqlmysql> CREATE TABLE exampletable (id INT AUTO_INCREMENT PRIMARY KEY, messages VARCHAR(255) NOT NULL);
The above SQL statement creates a new table with the columns:
idthat stores numeric data, andmessagesthat stores mixed characters.Insert sample data into the table. For example,
Greetings from Vultr.sqlmysql> INSERT INTO exampletable (messages) VALUES ('Greetings from Vultr');
Exit the MySQL database console.
sqlmysql> EXIT;
Create a new directory to store your web application files. For example,
app.example.comin the default Apache web root path.console$ sudo mkdir -p /usr/local/www/apache24/app.example.com
Create a new sample PHP application file in the directory. For example,
index.php.console$ sudo ee /usr/local/www/apache24/app.example.com/index.php
Add the following contents to the file.
php<?php $servername = "localhost"; $username = "dbadmin"; $password = "strong@@password25Bb"; $dbname = "exampledb"; // Connect to the MySQL database $conn = new mysqli($servername, $username, $password, $dbname); // Test the MySQL database connection if ($conn->connect_error) { die("Database Connection Failed." . $conn->connect_error); } // Fetch a string from exampletable $sql = "SELECT messages FROM exampletable"; $result = $conn->query($sql); if ($result->num_rows > 0) { $row = $result->fetch_assoc(); echo "<h1 align='center'> <br> <br>" . $row["messages"]. "</h1>"; } else { echo "<h1 align='center'> <br> No Data Found.</h1>"; } $conn->close(); ?>
Save the file and exit the text editor.
The above PHP application connects to the MySQL database server and queries the
exampledbdatabase to output values in theexampledatacolumn within themessagestable. The application displays aGreetings from Vultrheading when successful orNo Data Foundwhen unsuccessful.Create a new Apache virtual host configuration file. For example,
app.example.com.conf.console$ sudo ee /usr/local/etc/apache24/Includes/app.example.com.conf
Add the following configurations to the file.
apacheconf<VirtualHost *:80> ServerAdmin webmaster@yourdomain.com DocumentRoot "/usr/local/www/apache24/app.example.com/" ServerName app.example.com <Directory "/usr/local/www/apache24/app.example.com/"> Options Indexes FollowSymLinks AllowOverride All Require all granted DirectoryIndex index.php index.html </Directory> ErrorLog "/var/log/app.example.com-error.log" </VirtualHost>
Save the file and exit the text editor.
The above Apache configuration creates a new virtual host that listens for connections using the domain
app.example.comon the default HTTP port80. All PHP requests are forwarded to PHP-FPM on the host port9000applied in your main Apache configuration.Test the Apache configuration for errors.
console$ sudo apachectl configtest
Output:
Performing sanity check on apache24 configuration:
AH00558: httpd: Could not reliably determine the server's fully qualified domain name, using 127.0.0.1. Set the 'ServerName' directive globally to suppress this message
Syntax OK
Restart Apache to apply the new virtual host configuration.
console$ sudo service apache24 restart
Access your domain using a web browser and verify that you can access the PHP web application.
http://app.example.com
Secure the Server
Install the Certbot Let's Encrypt client for Apache.
console$ sudo pkg install py39-certbot-apache
Run the following commands to enable the Apache
mod_rewriteandmod_sslmodules to allow SSL configurations on your web server.console$ sudo sed -i '' 's/#LoadModule rewrite_module libexec\/apache24\/mod_rewrite.so/LoadModule rewrite_module libexec\/apache24\/mod_rewrite.so/' /usr/local/etc/apache24/httpd.conf $ sudo sed -i '' 's/#LoadModule ssl_module libexec\/apache24\/mod_ssl.so/LoadModule ssl_module libexec\/apache24\/mod_ssl.so/' /usr/local/etc/apache24/httpd.conf
The above commands uncomment and enable the following directives in the
/usr/local/etc/apache24/httpd.confApache configuration file:apacheconfLoadModule ssl_module libexec/apache24/mod_ssl.so LoadModule rewrite_module libexec/apache24/mod_rewrite.so
Generate a new SSL certificate for your domain. Replace
app.example.comwith your actual domain.console$ sudo certbot --apache -d app.example.com --agree-tos
Test the Certbot SSL certificate automatic renewal process.
console$ sudo certbot renew --dry-run
Output:
Account registered.
Simulating renewal of an existing certificate for app.example.com

- - - - - - - - - - - - - - - - - - - - - - - - - - - - - - - - - - - - - - - -
Congratulations, all simulated renewals succeeded:
  /usr/local/etc/letsencrypt/live/app.example.com/fullchain.pem (success)
- - - - - - - - - - - - - - - - - - - - - - - - - - - - - - - - - - - - - - - -
Restart Apache to apply your SSL configuration changes.
console$ sudo service apache24 restart
Create a new Packet Filter (
pf) firewall configuration.console$ sudo ee /etc/pf.conf
Add the following configurations to the file. Replace
vtnet0with your public server interface name.iniext_interface = "vtnet0" # The external server interface pass quick on lo0 all # Allow all connections on the loopback interface # Filter rules block in all # Block incoming unpermitted traffic pass out all keep state # Allow outgoing traffic pass in on $ext_interface proto tcp from any to any port 22 keep state # Allow SSH pass in on $ext_interface proto tcp from any to any port 80 keep state # Allow HTTP pass in on $ext_interface proto tcp from any to any port 443 keep state # Allow HTTPS
Save the file and exit the text editor.
The above firewall configuration enables network connections to the SSH port
22, HTTP port80, and the HTTPS port443. In addition, the firewall blocks any other network connections to other ports on your server.Enable the firewall to automatically start at boot.
console$ sudo sysrc pf_enable="YES"
Output:
pf_enable: NO -> YESLoad your firewall configuration.
console$ sudo pfctl -f /etc/pf.conf
Start the Packet Filter firewall.
console$ sudo pfctl -e
Output:
pf enabledView all firewall rules and verify that your SSH, HTTP, and HTTPS ports are available.
console$ sudo pfctl -sr
Output:
pass quick on lo0 all flags S/SA keep state
block drop in all
pass in on vtnet0 proto tcp from any to any port = ssh flags S/SA keep state
pass in on vtnet0 proto tcp from any to any port = http flags S/SA keep state
pass in on vtnet0 proto tcp from any to any port = https flags S/SA keep state
pass out all flags S/SA keep state
Access your domain using HTTPS to verify that your SSL certificate is valid and encrypted by the Apache web server.
https://app.example.com
Conclusion
You have successfully installed the Apache, MySQL, and PHP (FAMP) stack on your FreeBSD 14.0 server. All applications in the stack run collectively on the server to deliver dynamic web applications. You can configure the Apache web server and set up MySQL databases to securely deliver web applications or frameworks such as WordPress on your server.