
How to Install Apache, MySQL, PHP (LAMP Stack) on Rocky Linux 9

Introduction
Linux, Apache, MySQL, and PHP (LAMP Stack) is a collection of open-source software applications that manage the runtime and development of dynamic web applications on a server. Apache works as a web server to deliver web application files, MySQL as the database backend, and PHP processes dynamic web application contents to deliver web applications on the server.
This article explains how to install the LAMP stack on Rocky Linux 9 to enable the development and delivery of web applications on your server.
Prerequisites
Before you begin:
- Deploy a Rocky Linux 9 instance on Vultr.
- Create a new domain A record pointing to the instance's IP address. For example,
app.example.com. - Access the server using SSH as a non-root user with sudo privileges.
- Update the server.
Install Apache
Apache is available in the default repositories on Rocky Linux 9 and uses the httpd web server package to run. Follow the steps below to update the DNF package index and install the Apache on your server.
Update the server's package index.
console$ sudo dnf update
Install the
httpdApache web server package.console$ sudo dnf install httpd -y
Enable the
httpdApache service to automatically start at system boot.console$ sudo systemctl enable httpd
Output:
Created symlink /etc/systemd/system/multi-user.target.wants/httpd.service → /usr/lib/systemd/system/httpd.service.Start the Apache web server.
console$ sudo systemctl start httpd
View the Apache service status and verify that it's running.
console$ sudo systemctl status httpd
Output:
● httpd.service - The Apache HTTP Server
  Loaded: loaded (/usr/lib/systemd/system/httpd.service; enabled; preset: disabled)
  Active: active (running) since Thu 2024-06-20 09:28:49 UTC; 16s ago
    Docs: man:httpd.service(8)
Main PID: 48262 (httpd)
  Status: "Total requests: 0; Idle/Busy workers 100/0;Requests/sec: 0; Bytes served/sec:   0 B/sec"
   Tasks: 177 (limit: 48896)
  Memory: 38.3M
     CPU: 64ms
  CGroup: /system.slice/httpd.service
          ├─48262 /usr/sbin/httpd -DFOREGROUND
          ├─48263 /usr/sbin/httpd -DFOREGROUND
          ├─48264 /usr/sbin/httpd -DFOREGROUND
          ├─48265 /usr/sbin/httpd -DFOREGROUND
          └─48266 /usr/sbin/httpd -DFOREGROUND
The Apache service is active and running on your server based on the
active (running)value in the above output.Temporarily stop the default
firewalldutility to enable access to the Apache HTTP port80.console$ sudo systemctl stop firewalld
Access your server IP address using a web browser such as Chrome to verify that Apache is actively delivering web applications.
http://SERVER-IP
Install MySQL
MySQL is available in the default package repositories on Rocky Linux 9. Follow the steps below to install the latest MySQL version on your server using the default DNF package manager.
Install the MySQL database server package.
console$ sudo dnf install mysql-server -y
View the installed MySQL version on your server.
console$ mysql --version
Your output should be similar to the one below:
mysql Ver 8.0.36 for Linux on x86_64 (Source distribution)Enable MySQL to automatically start at system boot.
console$ sudo systemctl enable mysqld
Output:
Created symlink /etc/systemd/system/multi-user.target.wants/mysqld.service → /usr/lib/systemd/system/mysqld.service.Start the MySQL service.
console$ sudo systemctl start mysqld
View the MySQL service status and verify that it's running.
console$ sudo systemctl status mysqld
Output:
    ● mysqld.service - MySQL 8.0 database server
     Loaded: loaded (/usr/lib/systemd/system/mysqld.service; enabled; preset: disabled)
     Active: active (running) since Thu 2024-06-20 09:40:44 UTC; 1min 30s ago
   Main PID: 49549 (mysqld)
     Status: "Server is operational"
      Tasks: 38 (limit: 48896)
     Memory: 473.7M
        CPU: 2.210s
     CGroup: /system.slice/mysqld.service
             └─49549 /usr/libexec/mysqld --basedir=/usr
The MySQL service is active and running on your server based on the above output.
Run the MySQL secure installation script to enable authentication on your database server.
console$ sudo mysql_secure_installation
Reply to the following prompts to set up the
rootdatabase user password, remove anonymous users, disallow remote root login, and remove the test database on your server.- VALIDATE PASSWORD component: Enter Y and press Enter to enable password validation.
- Password Validation Policy: Enter 2 to enable strong password usage on the server.
- New password: Enter a new
rootdatabase user password. - Re-enter new password: Enter the user password again and press Enter to validate the password strength.
- Do you wish to continue with the password provided? Enter Y to apply the new
rootdatabase user password. - Remove anonymous users? Enter Y to remove anonymous users from your database server.
- Disallow root login remotely? Enter Y to disable remote access to the
rootdatabase user. - Remove test database and access to it? Enter Y to remove the test database.
- Reload privilege tables now? Enter Y to reload the MySQL privilege tables and press Enter to apply your configuration changes.
Restart the MySQL service to apply changes.
console$ sudo systemctl restart mysqld
Access MySQL
Log in to the MySQL console as the
rootuser.console$ sudo mysql -u root -p
Enter the
rootuser password you set earlier when prompted to access the console.Create a new sample database
example_vultr.sqlmysql> CREATE DATABASE example_vultr;
List all available databases to verify that the new database is created.
sqlmysql> SHOW DATABASES;
Output:
+--------------------+
| Database           |
+--------------------+
| example_vultr      |
| information_schema |
| mysql              |
| performance_schema |
| sys                |
+--------------------+
5 rows in set (0.00 sec)
Exit the MySQL console.
sqlmysql> EXIT
Install PHP and Configure PHP-FPM
PHP enables the processing of dynamic web contents and PHP-FPM manages PHP connections to process requests using pools with specific resource configurations. Follow the steps below to install PHP and configure PHP-FPM on the server.
Install PHP and PHP-FPM.
console$ sudo dnf install php php-fpm -y
Install common PHP extensions required by most dynamic web applications.
console$ sudo dnf install php-mysqlnd php-gd php-curl php-mbstring php-xml php-zip -y
View the installed PHP version on your server.
console$ php -v
Your output should be similar to the one below:
PHP 8.0.30 (cli) (built: Aug  3 2023 17:13:08) ( NTS gcc x86_64 )
Copyright (c) The PHP Group
Zend Engine v4.0.30, Copyright (c) Zend Technologies
    with Zend OPcache v8.0.30, Copyright (c), by Zend Technologies
View the installed PHP-FPM version and verify that it matches your PHP version information.
console$ php-fpm -v
Your output should be similar to the one below:
PHP 8.0.30 (fpm-fcgi) (built: Aug  3 2023 17:13:08)
Copyright (c) The PHP Group
Zend Engine v4.0.30, Copyright (c) Zend Technologies
    with Zend OPcache v8.0.30, Copyright (c), by Zend Technologies
Enable the PHP-FPM service to automatically at system boot.
console$ sudo systemctl enable php-fpm
Output:
Created symlink /etc/systemd/system/multi-user.target.wants/php-fpm.service → /usr/lib/systemd/system/php-fpm.service.Start the PHP-FPM service.
console$ sudo systemctl start php-fpm
View the PHP-FPM service status and verify that it's running.
console$ sudo systemctl status php-fpm
Output:
● php-fpm.service - The PHP FastCGI Process Manager
     Loaded: loaded (/usr/lib/systemd/system/php-fpm.service; enabled; preset: disabled)
     Active: active (running) since Fri 2024-07-19 21:35:13 UTC; 55s ago
   Main PID: 52503 (php-fpm)
     Status: "Processes active: 0, idle: 5, Requests: 0, slow: 0, Traffic: 0req/sec"
      Tasks: 6 (limit: 4632)
     Memory: 12.9M
        CPU: 53ms
     CGroup: /system.slice/php-fpm.service
             ├─52503 "php-fpm: master process (/etc/php-fpm.conf)"
             ├─52504 "php-fpm: pool www"
             ├─52505 "php-fpm: pool www"
             ├─52506 "php-fpm: pool www"
             ├─52507 "php-fpm: pool www"
             └─52508 "php-fpm: pool www"
PHP-FPM is active and running on your server based on the above service output.
Open the default PHP-FPM pool configuration using a text editor such as
nano.console$ sudo nano /etc/php-fpm.d/www.conf
- Find the following user and group directives. Keep
apacheas the default value to enable PHP-FPM connections to the Apache web server.
iniuser = apache group = apache
- Find the following
listendirective and verify the PHP-FPM UNIX socket path to use when connecting to the service.
listen = /run/php-fpm/www.sockSave and close the file.
- Find the following user and group directives. Keep
Restart PHP-FPM to apply your configuration changes.
console$ sudo systemctl restart php-fpm
Configure Apache with PHP-FPM
Apache connects to the PHP-FPM service using the UNIX socket path defined in your pool configuration. PHP-FPM uses a virtual host configuration in the /etc/httpd/conf.d/ directory by default to handle connections to the Apache web server. Follow the steps below to modify the virtual host file and configure Apache with PHP-FPM to process PHP requests on your server.
Open the default PHP-FPM virtual host configuration
php.confusing a text editor such asnano.console$ sudo nano /etc/httpd/conf.d/php.conf
Find the following
mod_phpblock and verify thatSetHandlerpoints to your PHP-FPM UNIX socket path/run/php-fpm/www.sock.apacheconf<FilesMatch \.(php|phar)$> SetHandler "proxy:unix:/run/php-fpm/www.sock|fcgi://localhost" </FilesMatch>
Save and close the file.
The above configuration enables Apache to process and forward PHP requests to your PHP-FPM UNIX socket path. Replace the default path
/run/php-fpm/www.sockwith the value in your PHP-FPM pool configuration.Test the Apache configuration for syntax errors.
console$ sudo apachectl configtest
Output:
Syntax OKRestart Apache to apply your configuration changes.
console$ sudo systemctl restart httpd
Create a new sample PHP application file
phptest.phpin the default web root directory/var/www/html/.console$ sudo nano /var/www/html/phptest.php
Add the following contents to the file.
php<?php phpinfo(); ?>
Save and close the file.
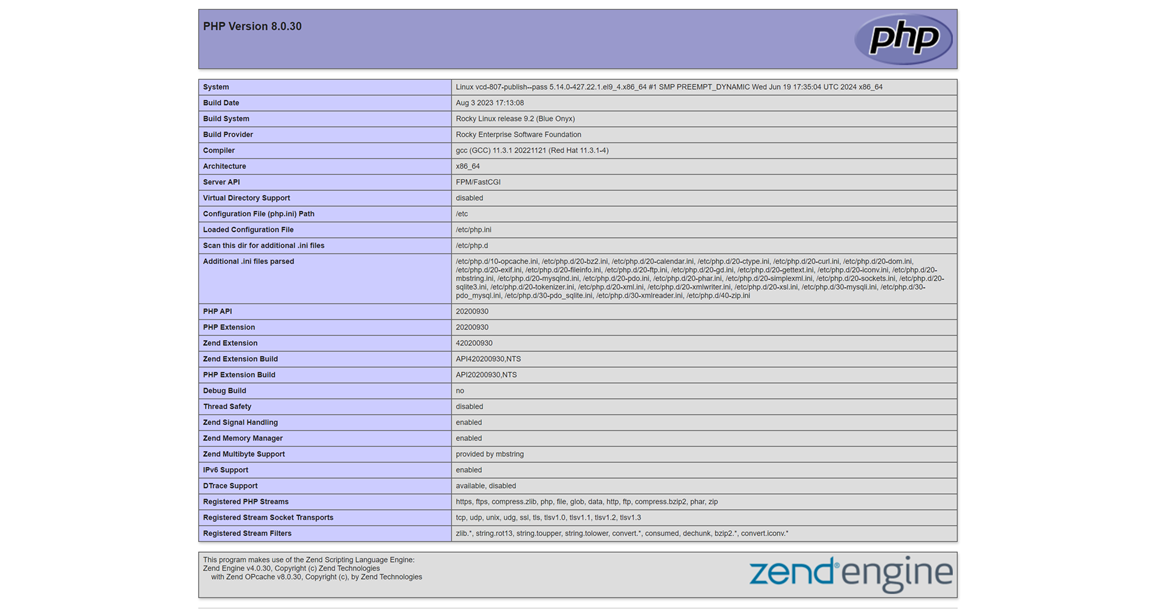
The above PHP application code displays your installed PHP version information when accessed in a web browser.
Access your server IP address in a new web browser window using the
/phptest.phpURL path.http://SERVER-IP/phptest.phpVerify that the Apache web server delivers your PHP application and displays the version information in your browser.
Test the Installation
Apache delivers web applications using virtual host configurations on your server. PHP-FPM processes dynamic web application requests while the MySQL database server interacts with PHP using the php-mysqlnd module. Follow the steps below to create a new sample PHP application that queries the MySQL database to output a Greetings from Vultr message when accessed in a web browser.
Log in to the MySQL database server as the
rootuser.console$ sudo mysql -u root -p
Create a new user
dbadminto use with theexample_vultrdatabase you created earlier. ReplaceStrong@@password123with your desired password.sqlmysql> CREATE USER 'dbadmin'@'localhost' IDENTIFIED BY 'Strong@@password123';
Grant the user full privileges to the
example_vultrdatabase.sqlmysql> GRANT ALL PRIVILEGES ON example_vultr.* TO 'dbadmin'@'localhost';
Switch to the database.
sqlmysql> use example_vultr;
Create a new sample table
greetingswith two columns.sqlmysql> CREATE TABLE greetings ( id INT AUTO_INCREMENT PRIMARY KEY, message VARCHAR(255) );
The above SQL query creates a new
greetingstable with the following columns:id: Stores numeric data that is auto-incremented whenever a new record is created.message: Stores mixed character data (VARCHAR) such as strings.
Add a new
Greetings from Vultr!string in themessagecolumn within the table.sqlmysql> INSERT INTO greetings (message) VALUES ('Greetings from Vultr!');
Exit the MySQL console.
sqlmysql> EXIT
Create a new Apache virtual host configuration in the
/etc/httpd/conf.d/directory. For example,app.example.com.conf.console$ sudo nano /etc/httpd/conf.d/app.example.com.conf
Add the following contents to the file.
apacheconf<VirtualHost *:80> ServerAdmin webmaster@app.example.com ServerName app.example.com ServerAlias app.example.com DocumentRoot /var/www/app.example.com <Directory /var/www/app.example.com> Options Indexes FollowSymLinks AllowOverride All Require all granted </Directory> <IfModule dir_module> DirectoryIndex index.php index.html </IfModule> ErrorLog /var/log/httpd/app.example.com_error.log CustomLog /var/log/httpd/app.example.com_access.log combined </VirtualHost>
Save and close the file.
The above configuration creates a new Apache virtual host that listens for incoming connections on the HTTP port
80using your domainapp.example.comto deliver web application files from the/var/www/app.example.comdirectory. The default PHP-FPM virtual host configuration/etc/httpd/conf.d/php.confprocesses all dynamic PHP requests to the Apache web server.Test the Apache configuration for errors.
console$ sudo apachectl configtest
Output:
Syntax OKCreate the new virtual host's web root directory
/var/www/app.example.com.console$ sudo mkdir /var/www/app.example.com
Create a new sample PHP application file
index.phpin the directory.console$ sudo nano /var/www/app.example.com/index.php
Add the following contents to the file.
php<?php $servername = "localhost"; $username = "dbadmin"; $password = "Strong@@password123"; $dbname = "example_vultr"; // Create connection $conn = new mysqli($servername, $username, $password, $dbname); // Check connection if ($conn->connect_error) { die("Connection failed: " . $conn->connect_error); } $sql = "SELECT message FROM greetings"; $result = $conn->query($sql); if ($result->num_rows > 0) { while($row = $result->fetch_assoc()) { echo '<h1 style="text-align: center;">'.$row["message"].'</h1>'; } } else { echo "0 results"; } $conn->close(); ?>
Save and close the file.
The above PHP application connects to the MySQL database server using your provided user details to select and display all records in the
messagecolumn within thegreetingstable.Enable the Apache SELinux web server context on the virtual host's web root directory and all files.
console$ sudo semanage fcontext -a -t httpd_sys_content_t "/var/www/app.example.com(/.*)?"
Apply the SELinux context.
console$ sudo restorecon -Rv /var/www/app.example.com/
Restart the Apache web server to apply changes.
console$ sudo systemctl restart httpd
Access your domain in a new web browser window.
http://app.example.comVerify that Apache serves your PHP application and displays the message
Greetings from Vultrwhen the database connection is successful.
Secure the Server
Firewalld is the default firewall management utility that is available and active on Vultr Rocky Linux 9 servers by default. Use the firewall to allow network connections on the Apache HTTP port 80 to deliver web applications on a server. In addition, generate trusted SSL certificates using a trusted authority such as Let's Encrypt to secure connections to the Apache web server with HTTPS traffic. Follow the steps below to set up new firewall rules and secure your Apache virtual host domain with SSL certificates.
Start the
firewalldutility.console$ sudo systemctl start firewalld
Allow network connections to the Apache HTTP port
80.console$ sudo firewall-cmd --permanent --add-service=http
Allow network connections to the Apache HTTPS port
443.console$ sudo firewall-cmd --permanent --add-service=https
Reload the firewall configuration to apply changes.
console$ sudo firewall-cmd --reload
View all services allowed through your firewall configuration.
console$ sudo firewall-cmd --list-services
Output:
cockpit dhcpv6-client http https ssh
Generated Trusted Let's Encrypt SSL Certificates
Install the Certbot Let's Encrypt client plugin for Apache.
console$ sudo dnf install certbot-apache
Generate a new SSL certificate for your virtual host domain. Replace
app.example.comwith your actual domain andadmin@example.comwith your email address.console$ sudo certbot --apache -d app.example.com -m admin@example.com --agree-tos
Output:
Account registered.
Requesting a certificate for vultrtest.ddns.net

Successfully received certificate.
Certificate is saved at: /etc/letsencrypt/live/vultrtest.ddns.net/fullchain.pem
Key is saved at:         /etc/letsencrypt/live/vultrtest.ddns.net/privkey.pem
This certificate expires on 2024-10-17.
These files will be updated when the certificate renews.
Certbot has set up a scheduled task to automatically renew this certificate in the background.
Test the Certbot automatic SSL renewal process.
console$ sudo certbot renew --dry-run
Restart Apache to apply your configuration changes.
console$ sudo systemctl restart apache
Access your domain in a new web browser window using HTTPS and verify that Apache serves your web application files.
http://app.example.com
Conclusion
You have installed Apache, MySQL, and PHP (LAMP stack) on your Rocky Linux 9 server to deliver dynamic web applications. You can create multiple virtual host configurations and deliver web applications on your server using different domains that point to your server's IP address. For more information and configuration options on each application within the stack, visit the following resources: