Snipe-IT is an open-source Information Technology asset management tool that works on a Linux, Apache, MySQL, and PHP (LAMP) stack. With a powerful and user-friendly interface, Snipe-IT eliminates the need for complex IT asset tracking spreadsheets.
Thousands of customers use this free web-based application, and its code-base is updated frequently to fix bugs and improve reliability. If you run an IT department, you can use Snipe-IT to track the staff members assigned to computer hardware, accessories, and consumables. In addition, you can audit warranty and license information for all your IT components.
This guide explains how to install Snipe-IT on Ubuntu 20.04 server.
Prerequisites
To follow this tutorial, you need:
- An Ubuntu 20.04 server.
- A non-root sudo user.
- A LAMP Stack. This guide should work well on either a MySQL or a MariaDB database server.
A domain name such as example.com is optional.
1. Install Dependencies
SSH to your server as a non-root sudo user, update your software information index, and upgrade the installed packages.
$ sudo apt update && sudo apt -y upgradeEnable Apache's mod_rewrite module. Snipe-IT requires this extension to rewrite URLs more cleanly.
$ sudo a2enmod rewriteInstall the PHP extensions required by both the Snipe-IT application and a PHP Composer tool.
$ sudo apt install -y php-{opcache,pdo,bcmath,bz2,calendar,ctype,exif,ffi,fileinfo,ftp,gd,iconv,intl,json,mbstring,mysqli,phar,posix,readline,shmop,sockets,sysvmsg,sysvsem,sysvshm,tokenizer,zip,curl,ldap}Restart your Apache web server to apply the changes.
$ sudo systemctl restart apache22. Install PHP Composer
Set up PHP Composer, which is a PHP dependency management tool to install and update libraries in your Snipe-IT environment.
Navigate to your home directory.
$ cd ~Download the Composer installer.
$ curl -sS https://getcomposer.org/installer | phpMove the composer.phar executable to /usr/local/bin/.
$ sudo mv composer.phar /usr/local/bin/composer3. Create a Database
Snipe-IT uses MySQL/MariaDB for data storage. To create the database, log in to your MySQL/MariaDB server as a root user.
$ sudo mysql -u root -pWhen prompted, enter your root password for your MySQL/MariaDB server and press Enter to proceed.
Create a snipe_it database. To access the snipe_it database, Snipe-IT requires a dedicated non-root MySQL user. Therefore, you must set up a snipe_it_user with full privileges to the snipe_it database. You'll require these database credentials later when setting up the Snipe-IT .env configuration file.
Replace EXAMPLE_PASSWORD with a strong password.
If your LAMP stack uses MySQL, run these commands.
  mysql> CREATE DATABASE snipe_it;
         CREATE USER 'snipe_it_user'@'localhost' IDENTIFIED WITH mysql_native_password BY 'EXAMPLE_PASSWORD';
         GRANT ALL PRIVILEGES ON snipe_it.* TO 'snipe_it_user'@'localhost';
         FLUSH PRIVILEGES;
If your LAMP stack uses MariaDB, run these commands.
  MariaDB [(none)]> CREATE DATABASE snipe_it;
                    CREATE USER 'snipe_it_user'@'localhost' IDENTIFIED BY 'EXAMPLE_PASSWORD';
                    GRANT ALL PRIVILEGES ON snipe_it.* TO 'snipe_it_user'@'localhost';
                    FLUSH PRIVILEGES;
                    EXIT;
4. Install Snipe-IT
Navigate to the root directory of your web server.
$ cd /var/www/Use git to clone the latest Snipe-IT repository from the https://github.com/snipe/snipe-it URL and copy the downloaded files to a snipe-it directory.
$ sudo git clone https://github.com/snipe/snipe-it snipe-itSwitch to the snipe-it directory.
$ cd /var/www/snipe-itSnipe-IT ships with a sample configuration file. Copy it to /var/www/snipe-it/.env.
$ sudo cp /var/www/snipe-it/.env.example /var/www/snipe-it/.envEdit the configuration file.
$ sudo nano /var/www/snipe-it/.envIn the Snipe-IT configuration file, locate these settings.
APP_URL=null
APP_TIMEZONE='UTC'
Set APP_URL to your server's Fully Qualified Domain Name, or it's public IP address. If you use a time zone other than UTC, change the timezone to a PHP-supported timezone, and enclose it in single quotes.
APP_URL=example.com
APP_TIMEZONE='America/New_York'
Locate these settings.
DB_DATABASE=null
DB_USERNAME=null
DB_PASSWORD=null
Change those values to the database information you set up in Step 3.
DB_DATABASE=snipe_it
DB_USERNAME=snipe_it_user
DB_PASSWORD=EXAMPLE_PASSWORD
Save and close the file.
Set the correct ownership and permission for the Snipe-IT data directory.
$ sudo chown -R www-data:www-data  /var/www/snipe-it
$ sudo chmod -R 755 /var/www/snipe-it
Install the unzip tool to avoid unpacking zip files using the PHP zip extensions, which might trigger some errors.
$ sudo apt-get install -y unzipInstall the Snipe-IT dependencies with Composer. You'll receive a warning not to run this as root on each command. It's okay to continue as root for the Snipe-IT install, so type yes and hit Enter.
$ sudo composer update --no-plugins --no-scripts
$ sudo composer install --no-dev --prefer-source --no-plugins --no-scripts
Once the Composer finishes running, generate a Laravel APP_Key value in the /var/www/snipe-it/.env configuration file you created earlier. Type yes and hit Enter when prompted to continue.
$ sudo php artisan key:generate5. Create a Virtual Host File
Apache comes with a default virtual host file named 000-default.conf. To make troubleshooting easier, disable the default Apache configuration file and create a new Apache configuration file for Snipe-IT.
Disable the default Apache configuration file.
$ sudo a2dissite 000-default.confCreate a new Apache configuration file.
$ sudo nano /etc/apache2/sites-available/snipe-it.confPaste the information below and replace example.com with your server's domain name or public IP address.
<VirtualHost *:80>
    ServerName example.com
    DocumentRoot /var/www/snipe-it/public
    <Directory /var/www/snipe-it/public>
        Options Indexes FollowSymLinks MultiViews
        AllowOverride All
        Order allow,deny
        allow from all
    </Directory>
</VirtualHost>
Save and exit the file.
Enable your new configuration file.
$ sudo a2ensite snipe-it.confRestart your Apache web server to apply the changes.
$ sudo systemctl restart apache26. Run the Setup Wizard
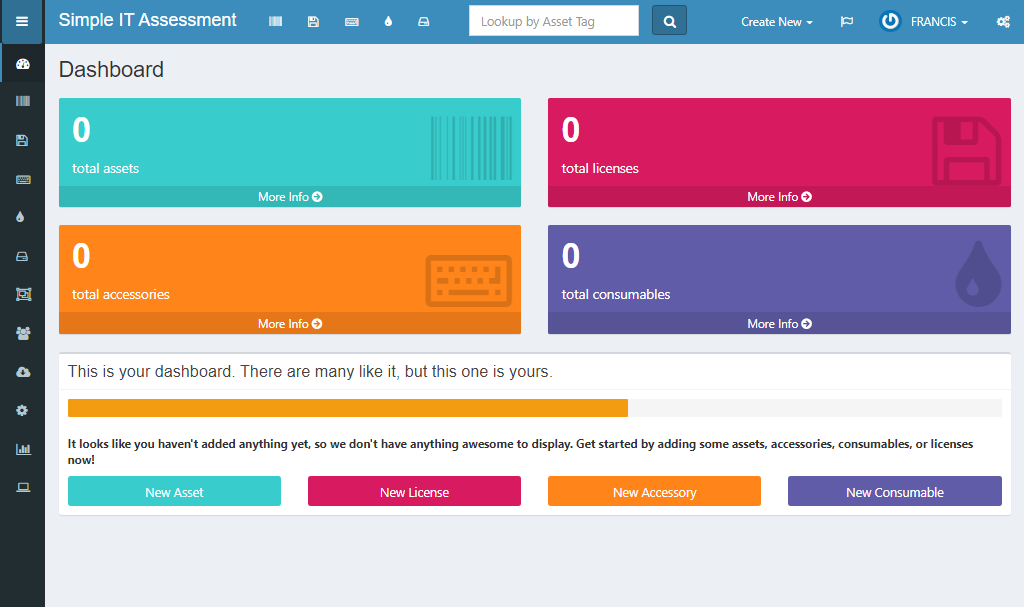
In a web browser, visit your server using its domain name or public IP address. Follow the prompts on the setup wizard to complete the installation. When finished, you should see the dashboard.

Conclusion
In this guide, you've installed the Snipe-IT asset management tool on your Ubuntu 20.04 server. Use the cloud-based application to manage your IT resources in your organization.