
How to Install SonarQube on Rocky Linux 9
SonarQube is an open-source and self-hosted static code analysis platform for analyzing code to identify bugs, code smells and security vulnerabilities. SonarQube supports multiple programming languages and provides automated code reviews to maintain high code quality standards. It's based on Java, allowing you to deploy it on different operating systems, including containerized platforms like Docker or Kubernetes.
This article explains how to install and use SonarQube on Rocky Linux 9. You will install all required dependencies and configure SonarQube to analyze code in your projects.
Prerequisites
Before you begin, you need to:
- Have access to a Rocky Linux 9 instance with at least
4 GBRAM. - Create a domain A record pointing to your instance's IP address. For example,
sonarqube.example.com.
Install OpenJDK 17
SonarQube server requires the Java Runtime Environment (JRE) and Java Development Kit (JDK) to run on a server. The SonarQube long-term active (LTA) version 2025. It requires Java 17 or 21 to run. Follow the steps below to install OpenJDK 17 required by SonarQube on Rocky Linux 9.
Update the DNF package index.
console$ sudo dnf update -y
Install the OpenJDK 17 package.
console$ sudo dnf install java-17-openjdk java-17-openjdk-devel -y
Verify the installed Java version.
console$ java -version
Output:
openjdk version "17.0.14" 2025-01-21 LTS
OpenJDK Runtime Environment (Red_Hat-17.0.14.0.7-1) (build 17.0.14+7-LTS)
OpenJDK 64-Bit Server VM (Red_Hat-17.0.14.0.7-1) (build 17.0.14+7-LTS, mixed mode, sharing)
If the installed Java version is below 17, run the following command to update it.
console$ sudo alternatives --config java
Create a Dedicated SonarQube User
SonarQube uses Elasticsearch for search and indexing, which requires a non-root system user. Follow the steps below to create a dedicated sonarqube user for SonarQube.
Create a new
sonarqubesystem user.console$ sudo useradd --system sonarqube
The above command creates a dedicated
sonarqubeuser you will use to run and configure SonarQube.
Create a PostgreSQL Database for SonarQube
SonarQube supports multiple database engines including PostgreSQL which offers advanced SQL functions. Follow the steps below to install PostgreSQL if it's not installed and create a new database to use with SonarQube.
Install the PostgreSQL database server packages.
console$ sudo dnf install postgresql-server postgresql-contrib -y
Initialize the PostgreSQL database server.
console$ sudo postgresql-setup --initdb
Enable the PostgreSQL database server to start at boot.
console$ sudo systemctl enable postgresql
Start the PostgreSQL database server.
console$ sudo systemctl start postgresql
Log in to your PostgreSQL database server with the default
postgresuser.console$ sudo -i -u postgres psql
Change the default
postgresuser password and enter a new strong password when prompted.psqlpostgres=# \password postgres
Create a
sonardbdatabase for SonarQube.psqlpostgres=# CREATE DATABASE sonardb;
Create a new
sonaruserPostgreSQL user. Replace<YOUR_PASSWORD>with a strong password.psqlpostgres=# CREATE USER sonaruser WITH ENCRYPTED PASSWORD '<YOUR_PASSWORD>';
Grant the
sonaruserfull privileges to thesonardbdatabase.psqlpostgres=# GRANT ALL PRIVILEGES ON DATABASE sonardb TO sonaruser;
Quit the PostgreSQL console.
psqlpostgres=# \q
Open the
/var/lib/pgsql/data/pg_hba.conffile using a text editor such asnanoto modify the PostgreSQL configuration.console$ sudo nano /var/lib/pgsql/data/pg_hba.conf
Change
peertotrustandidenttomd5to enable password-based authentication.ini# TYPE DATABASE USER ADDRESS METHOD # "local" is for Unix domain socket connections only local all all trust # IPv4 local connections: host all all 127.0.0.1/32 md5 # IPv6 local connections: host all all ::1/128 md5 ...
Save and close the file.
Restart the PostgreSQL service to apply the configuration changes.
console$ sudo systemctl restart postgresql
Install SonarQube
SonarQube is not available as a standalone package in the default DNF package repository sources. Follow the steps below to download and install the latest SonarQube binary on Rocky Linux 9.
Install Unzip to extract files from the SonarQube archive.
console$ sudo dnf install unzip -y
Create a dedicated
sonarqubedirectory in a system-wide location such as/opt.console$ sudo mkdir -p /opt/sonarqube
Switch to the
/tmpdirectory to store temporary files.console$ cd /tmp
Visit the SonarQube downloads page, verify the latest LTA version, and download it using Wget. For example, run the following command to download the
25.1.0.102122SonarQube archive.console$ wget https://binaries.sonarsource.com/Distribution/sonarqube/sonarqube-25.1.0.102122.zip
Extract files from the downloaded archive using Unzip.
console$ unzip sonarqube-25.1.0.102122.zip
Move all the extracted files to the
/opt/sonarqubedirectory.console$ sudo mv sonarqube-25.1.0.102122/* /opt/sonarqube
Install SonarScanner CLI
Follow the steps below to install the SonarScanner CLI on Rocky Linux 9.
Create the
sonarscannerdirectory in/opt.console$ sudo mkdir -p /opt/sonarscanner
Check your working directory and verify that it's
/tmp.console$ pwd
Visit the SonarScanner CLI releases page and verify the latest version to download using Wget. For example, run the following command to download the
7.0.2SonarScanner archive.console$ wget https://binaries.sonarsource.com/Distribution/sonar-scanner-cli/sonar-scanner-cli-7.0.2.4839-linux-x64.zip
Extract files from the downloaded archive using Unzip.
console$ unzip sonar-scanner-cli-7.0.2.4839-linux-x64.zip
Move the extracted files to the
/opt/sonarscannerdirectory.console$ sudo mv sonar-scanner-7.0.2.4839-linux-x64/* /opt/sonarscanner
Open the
sonar-scanner.propertiesconfiguration file.console$ sudo nano /opt/sonarscanner/conf/sonar-scanner.properties
Find the
sonar.host.urlproperty and set its value tohttp://127.0.0.1.inisonar.host.url=http://127.0.0.1
Save and close the configuration file.
Enable execute permissions for the
sonar-scannerbinary.console$ sudo chmod +x /opt/sonarscanner/bin/sonar-scanner
Link the
sonar-scannerbinary to the/usr/local/bindirectory to enable it as a system-wide command.console$ sudo ln -s /opt/sonarscanner/bin/sonar-scanner /usr/local/bin/sonar-scanner
Verify installed SonarScanner version.
console$ sonar-scanner -v
Your output should be similar to the one below.
17:31:54.027 INFO  Scanner configuration file: /opt/sonarscanner/conf/sonar-scanner.properties
17:31:54.030 INFO  Project root configuration file: NONE
17:31:54.044 INFO  SonarScanner CLI 7.0.2.4839
17:31:54.045 INFO  Java 17.0.13 Eclipse Adoptium (64-bit)
17:31:54.046 INFO  Linux 5.14.0-503.29.1.el9_5.x86_64 amd64
Configure SonarQube
Follow the steps below to configure SonarQube to run on your Rocky Linux 9 server.
Open the
/opt/sonarqube/conf/sonar.propertiesto modify the SonarQube configuration properties.console$ sudo nano /opt/sonarqube/conf/sonar.properties
Add the following configurations at the end of the
sonar.propertiesfile. Replacesonaruser,sonardb, and<YOUR_SONAR_USER_PASSWORD>with the actual PostgreSQL database details you created earlier.inisonar.jdbc.username=sonaruser sonar.jdbc.password=<YOUR_PASSWORD> sonar.jdbc.url=jdbc:postgresql://localhost/sonardb sonar.web.host=0.0.0.0 sonar.web.port=9000 sonar.web.javaOpts=-Xmx512m -Xms256m -XX:+HeapDumpOnOutOfMemoryError sonar.search.javaOpts=-Xmx1g -Xms1g -XX:MaxDirectMemorySize=512m -XX:+HeapDumpOnOutOfMemoryError sonar.path.data=data sonar.path.temp=temp
Save and close the file.
The above SonarQube properties configure PostgreSQL, the default address SonarQube should listen for incoming requests
0.0.0.0, java options, and the default storage path.Grant the
sonarqubeuser ownership privileges to the/opt/sonarqubedirectory.console$ sudo chown --recursive sonarqube:sonarqube /opt/sonarqube
Change the permissions mode to
775to grant the/opt/sonarqubedirectory owner full privileges to all SonarQube files.console$ sudo chmod --recursive 775 /opt/sonarqube
Open the
/etc/sysctl.confconfiguration file to update the memory map limit to the required SonarQube count for memory-mapped files.console$ sudo nano /etc/sysctl.conf
Add the following memory configurations to the
/etc/sysctl.conffile.inivm.max_map_count=524288 fs.file-max=131072
Save and close the file.
The above configuration updates the memory map limit to the required SonarQube count for memory-mapped files.
Reload the kernel parameters to apply the configuration changes.
console$ sudo sysctl -p
Create a SonarQube System Service
The SonarQube directory includes a /bin/linux-x86-64/sonar.sh startup script you can use to start or stop the SonarQube server. Follow the steps below to create a system service for SonarQube to start, stop, or restart the script.
Change the
/opt/sonarqubeSELinux content tousr_tto enable thesonaruserto execute scripts in the directory.console$ sudo chcon -t bin_t /opt/sonarqube/bin/linux-x86-64/sonar.sh
Restore the
/opt/sonarqubeSELinux context to apply the changes.console$ sudo restorecon -Rv /opt/sonarqube
Create a new
sonarqube.serviceservice file.console$ sudo nano /etc/systemd/system/sonarqube.service
Add the following contents to the
sonarqube.servicefile.ini[Unit] Description=SonarQube service After=syslog.target network.target [Service] Type=forking User=sonarqube Group=sonarqube PermissionsStartOnly=true ExecStart=/opt/sonarqube/bin/linux-x86-64/sonar.sh start ExecStop=/opt/sonarqube/bin/linux-x86-64/sonar.sh stop Restart=always RestartSec=10 LimitNOFILE=131072 LimitNPROC=8192 SuccessExitStatus=143 TimeoutStartSec=300 [Install] WantedBy=multi-user.target
Save and close the file.
The above service configuration uses the
/opt/sonarqube/bin/linux-x86-64/sonar.shscript to start and stop SonarQube with thesonarqubeuser, allowing you to manage the application's runtime processes.Reload Systemd to apply the service configuration changes.
console$ sudo systemctl daemon-reload
Enable the SonarQube service to start at boot.
console$ sudo systemctl enable sonarqube
Start the SonarQube service.
console$ sudo systemctl start sonarqube
View the SonarQube service status and verify that it's running.
console$ sudo systemctl status sonarqube
Output:
● sonarqube.service - SonarQube service
     Loaded: loaded (/etc/systemd/system/sonarqube.service; enabled; preset: disabled)
     Active: active (running) since Thu 2025-04-03 17:46:16 UTC; 12s ago
    Process: 80430 ExecStart=/opt/sonarqube/bin/linux-x86-64/sonar.sh start (code=exited, status=0/SUCCESS)
   Main PID: 80453 (java)
      Tasks: 120 (limit: 48879)
     Memory: 1.8G
        CPU: 37.191s
     CGroup: /system.slice/sonarqube.service
             ├─80453 java -Xms8m -Xmx32m --add-exports=java.base/jdk.internal.ref=ALL-UNNAMED --add-opens=java.base/java.lang=ALL-UNNAMED --add-opens=java.base/java.nio=ALL-UNNAMED --add-opens=java.base/sun.nio.ch=ALL-UNNAMED --add-op>
             ├─80481 /usr/lib/jvm/java-17-openjdk-17.0.14.0.7-2.el9.x86_64/bin/java -Xms4m -Xmx64m -XX:+UseSerialGC -Dcli.name=server -Dcli.script=./bin/elasticsearch -Dcli.libs=lib/tools/server-cli -Des.path.home=/opt/sonarqube/elast>
             ├─80551 /usr/lib/jvm/java-17-openjdk-17.0.14.0.7-2.el9.x86_64/bin/java -Des.networkaddress.cache.ttl=60 -Des.networkaddress.cache.negative.ttl=10 -Djava.security.manager=allow -XX:+AlwaysPreTouch -Xss1m -Djava.awt.headles>
             └─80601 /usr/lib/jvm/java-17-openjdk-17.0.14.0.7-2.el9.x86_64/bin/java -Djava.awt.headless=true -Dfile.encoding=UTF-8 -Djava.io.tmpdir=/opt/sonarqube/temp -XX:-OmitStackTraceInFastThrow --add-opens=java.base/java.util=ALL>
Configure Apache as a Reverse Proxy for SonarQube
The SonarQube web management interface is available and active on the localhost port 9000 after installation. Follow the steps below to configure Apache as a reverse proxy to securely forward all incoming connections to the SonarQube port 9000 using HTTP or HTTPS.
Install the Apache webserver if its not installed.
console$ sudo dnf install httpd -y
Enable Apache to automatically at boot.
console$ sudo systemctl enable httpd
Start the Apache webserver.
console$ sudo systemctl start httpd
Verify that the Apache
mod_proxy,mod_proxy_http, andmod_proxy_balancermodules are enabled.console$ sudo httpd -M | grep proxy
Your output should be similar to the one below.
proxy_module (shared)
proxy_balancer_module (shared)
proxy_http_module (shared)
..................
Follow the steps below to enable the modules if they are not active.
Open the
httpd.confApache configuration file to enable any missing modules.console$ sudo nano /etc/httpd/conf/httpd.conf
Uncomment the appropiate directives to load the necessary modules:
iniLoadModule proxy_module modules/mod_proxy.so LoadModule proxy_http_module modules/mod_proxy_http.so LoadModule proxy_balancer_module modules/mod_proxy_balancer.so
Save and close the file.
Create a new
sonarqube.confvirtual host configuration file in the/etc/httpd/conf.d/directory to use with SonarQube.console$ sudo nano /etc/httpd/conf.d/sonarqube.conf
Add the following contents to the
sonarqube.conffile. Replacesonarqube.example.comwith your actual domain.ini<VirtualHost *:80> ServerName sonarqube.example.com ServerAdmin me@sonarqube.example.com ProxyPreserveHost On ProxyPass / http://localhost:9000/ ProxyPassReverse / http://localhost:9000/ TransferLog /var/log/httpd/access.log ErrorLog /var/log/httpd/error.log </VirtualHost>
Save and close the file.
Test the Apache configuration for errors.
console$ sudo apachectl configtest
Output:
Syntax OKRestart the Apache webserver to apply the configuration changes.
console$ sudo systemctl restart httpd
Allow Apache to make outgoing network connections.
console$ sudo setsebool -P httpd_can_network_connect 1
Allow connections to the HTTP port
80through the default firewall configuration.console$ sudo firewall-cmd --add-service=http --permanent
Reload Firewalld to apply the configuration changes.
console$ sudo firewall-cmd --reload
Secure SonarQube with Trusted SSL Certificates
Apache accepts HTTP connections for forwarding to the SonarQube localhost port 9000. HTTP uses plain text by default without any encryption. Follow the steps below to generate trusted SSL certificates to secure SonarQube with encrypted HTTPS connections between a client's browser and the webserver.
Install the Certbot Let's Encrypt client for Apache to generate SSL certificates.
console$ sudo dnf install certbot python3-certbot-apache -y
Generate a new SSL certificate using your virtual host domain. Replace
sonarqube.example.comwith your actual domain andadmin@sonarqube.example.comwith your active email address.console$ sudo certbot --apache -d sonarqube.example.com -m admin@sonarqube.example.com --agree-tos
Allow HTTPS connections through the firewall.
console$ sudo firewall-cmd --add-service=https --permanent
Reload Firewalld to apply the configuration changes.
console$ sudo firewall-cmd --reload
Configure SELinux for SonarQube
SELinux is active on Rocky Linux 9 by default and prevents other system applications to serve content from the /opt/sonarqube directory. Follow the steps below to configure SELinux and enable Apache to serve content from SonarQube directory.
Check the SELinux status and verify that the current mode is enforcing.
console$ sestatusOutput:
SELinux status:                 enabled
SELinuxfs mount:                /sys/fs/selinux
SELinux root directory:         /etc/selinux
Loaded policy name:             targeted
Current mode:                   enforcing
Mode from config file:          enforcing
Check the
/opt/sonarqubeSELinux context and verify that itsunconfined_u:object_r:usr_tto enable thesonarqubeuser to access the directory files.console$ ls -lZ /opt/sonarqube
Output:
total 128
drwxrwxr-x. 6 sonarqube sonarqube unconfined_u:object_r:bin_t:s0  4096 Jan  7 10:30 bin
drwxrwxr-x. 2 sonarqube sonarqube unconfined_u:object_r:usr_t:s0  4096 Jan  7 10:30 conf
-rwxrwxr-x. 1 sonarqube sonarqube unconfined_u:object_r:usr_t:s0  7796 Jan  7 10:30 COPYING
drwxrwxr-x. 4 sonarqube sonarqube unconfined_u:object_r:usr_t:s0  4096 Apr 22 18:18 data
............................
Verify that the SELinux boolean
httpd_can_network_connectis enabled for Apache.console$ getsebool httpd_can_network_connect
Output:
httpd_can_network_connect --> onRestart the Apache service.
console$ sudo systemctl restart httpd
Restart the SonarQube service.
console$ sudo systemctl restart sonarqube
Access SonarQube
Follow the steps below to access SonarQube using its web management interface on your Rocky Linux 9 server.
Access your
sonarqube.example.comdomain in a web browser such as Chrome to open the SonarQube dashboard.https://sonarqube.example.comLog in to SonarQube using the default
adminusername, andadminpassword credentials.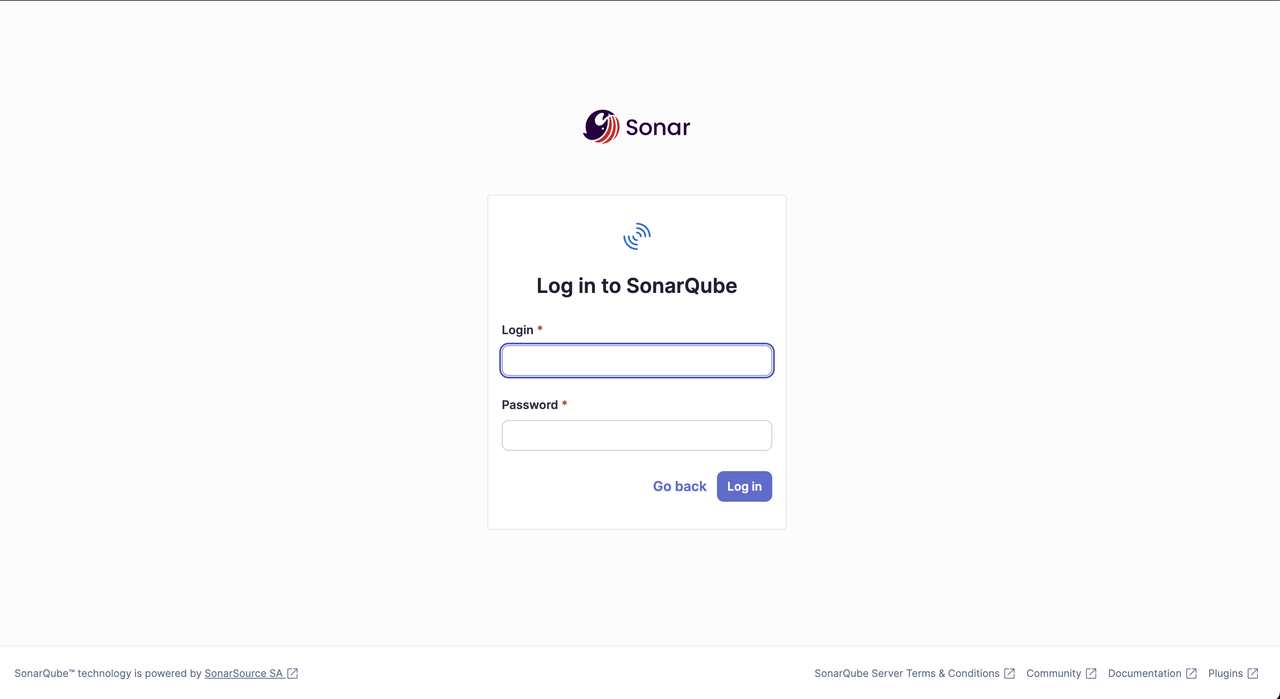
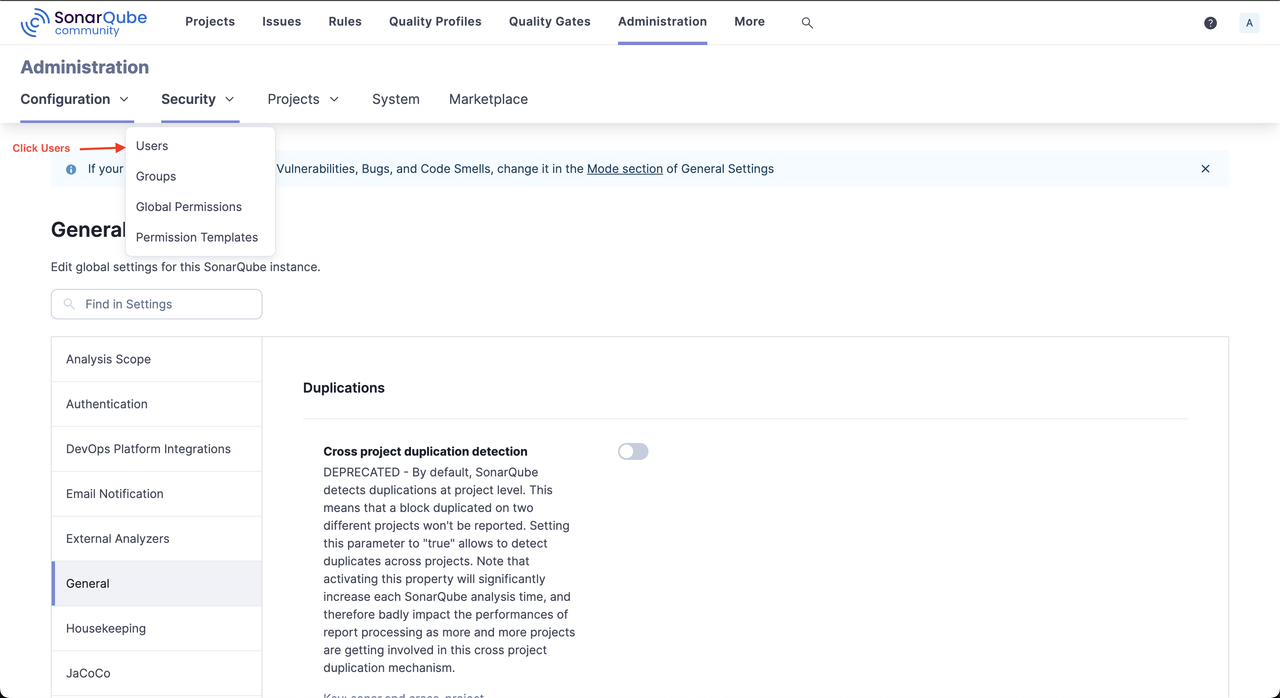
Change the default password for the
adminaccount when prompted.Click Administration within the SonarQube interface, select Security from the list of options, and click Users.
Click Create User to set up a new user for code scanning.
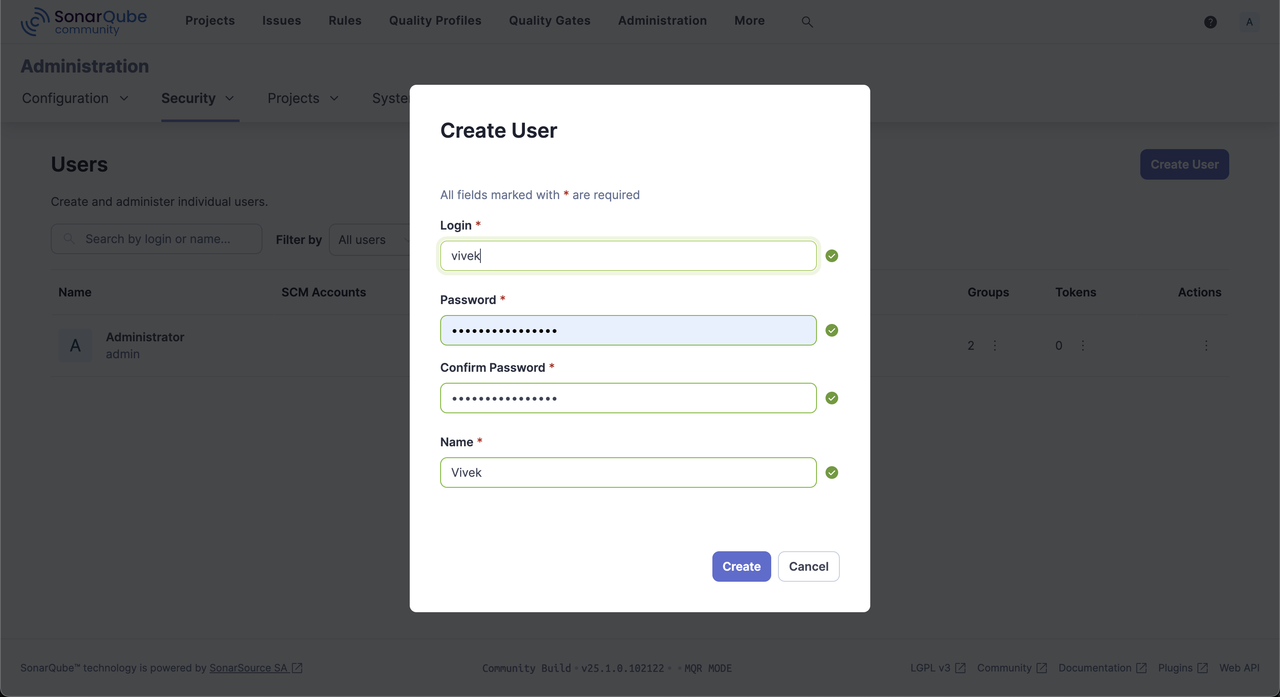
Click the options in the Tokens column within the new user's row.
Enter a new token name, set its expiry period, and click Generate.
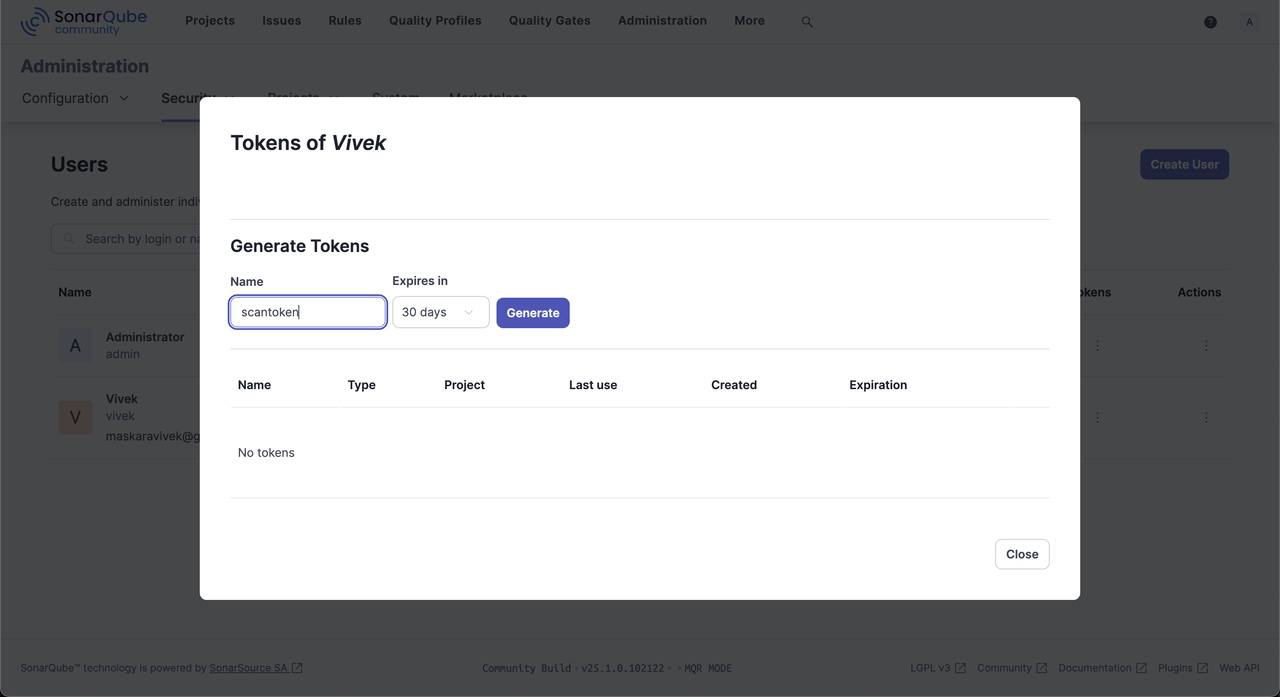
Copy the generated token to use in your code analysis tasks.
Scan SonarQube Example Projects
Follow the steps below to clone and scan example projects from the official SonarQube repository to test the installation on your Rocky Linux 9 server.
Navigate to your user's home directory.
console$ cd
Create a new
projectsdirectory.console$ mkdir projects
Navigate to the
projectsdirectory.console$ cd projects
Clone the sonar-scanning-examples repository using Git.
console$ git clone https://github.com/SonarSource/sonar-scanning-examples
Navigate to the downloaded
sonar-scannerproject directory.console$ cd sonar-scanning-examples/sonar-scanner
Scan the code in the directory using SonarScanner. Replace
<YOUR_SONAR_TOKEN>with the actual user token you generated earlier.console$ sonar-scanner -D sonar.token=<YOUR_SONAR_TOKEN>
Your output should be similar to the one below when successful.
20:38:34.725 INFO  Scanner configuration file: /opt/sonarscanner/conf/sonar-scanner.properties
20:38:34.731 INFO  Project root configuration file: /home/linuxuser/sonar-scanning-examples/sonar-scanner/sonar-project.properties
20:38:34.764 INFO  SonarScanner CLI 7.0.2.4839
...
20:39:17.256 INFO  Analysis total time: 38.112 s
20:39:17.259 INFO  SonarScanner Engine completed successfully
20:39:17.628 INFO  EXECUTION SUCCESS
20:39:17.630 INFO  Total time: 42.907s
Access the
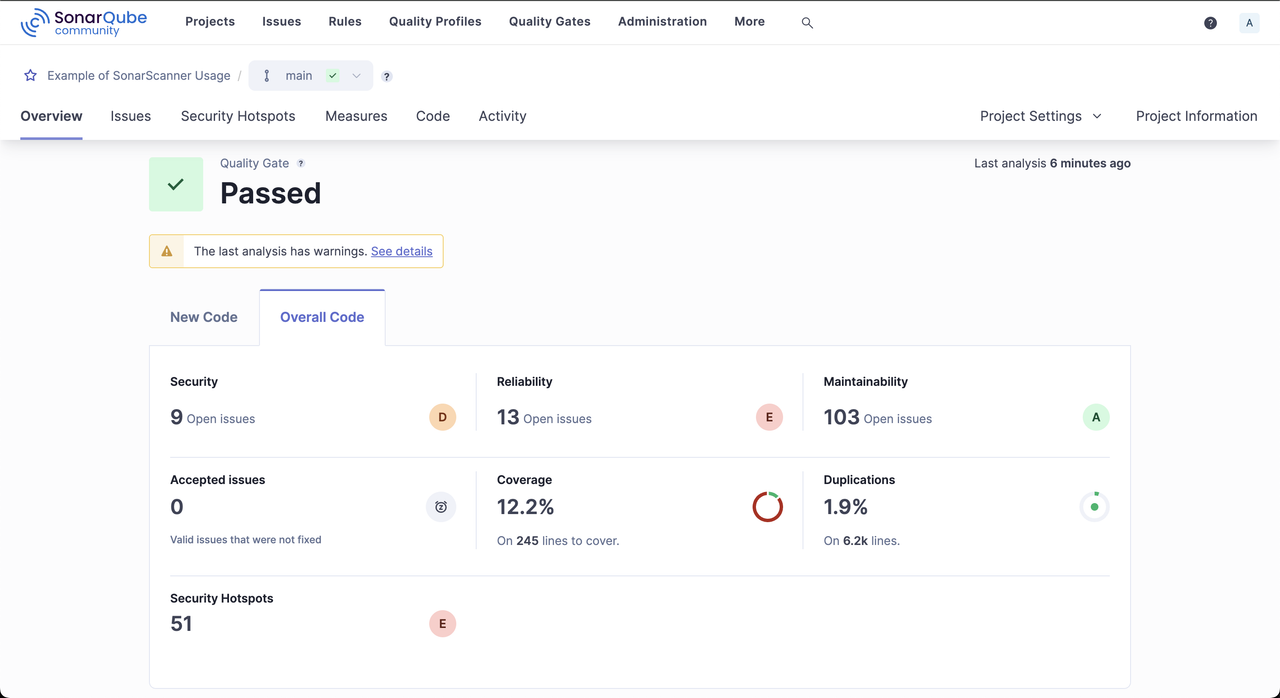
/projectspath in your web browser.https://sonarqube.example.com/projectsClick the Example of SonarScanner Usage project.

Explore the scanned project report to verify the code's security, maintainability, code coverage, and duplication issues.
Conclusion
You have installed and configured SonarQube on Rocky Linux 9 to perform code analysis in projects. You scanned the example SonarQube project files using the SonarScanner and access the web management interface using your domain. For more information and configuration samples, visit the SonarQube Documentation.