
How to Upgrade from Rocky Linux 8 to Rocky Linux 9
Introduction
Rocky Linux 9 is a major operating system that succeeds Rocky Linux 8 and offers improved security, better performance, and up-to-date software packages. Rocky Linux 9 also supports modern hardware with new Kernel features to improve system management and automate processes. Upgrading Rocky Linux 8 to Rocky Linux 9 ensures that your server is up to date and uses the latest security improvements.
This article explains how to upgrade from Rocky Linux 8 to Rocky Linux 9.
Prerequisites
Before you begin:
Deploy a Rocky Linux 8 instance on Vultr.
Access the instance using SSH as a non-root user with sudo privileges.
Verify that your instance has at least
2GBof free space.console$ df -h
Your output should be similar to the one below:
Filesystem      Size  Used Avail Use% Mounted on
udev            462M     0  462M   0% /dev
tmpfs            96M  1.9M   94M   2% /run
/dev/vda2        23G  5.1G   17G  23% /
tmpfs           480M     0  480M   0% /dev/shm
tmpfs           5.0M     0  5.0M   0% /run/lock
/dev/vda1       511M   12M  500M   3% /boot/efi
tmpfs            96M     0   96M   0% /run/user/0
Create a Full Server Backup
Upgrading to Rocky Linux 9 can corrupt the existing server packages, which may be incompatible with the new operating system. A snapshot is a point-in-time copy that captures the instance's state and file system for versioning and backup purposes. Follow the steps below to take a new snapshot to recover your instance if the upgrade process fails.
Log in to the Vultr Console.
Click Products and select Compute on the main navigation menu.

Select your target Rocky Linux 8 instance to open its management page.
Navigate to the Snapshots tab.

Enter a new snapshot label in the Label field and click Take Snapshot.
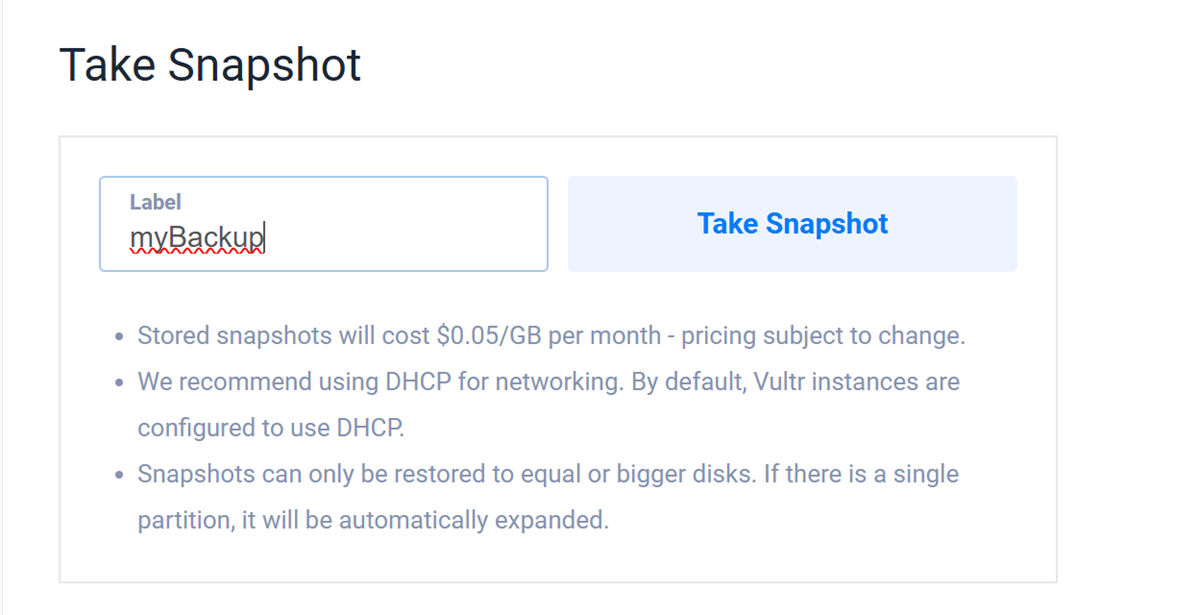
Monitor the snapshot's progress and verify the status changes from Pending to Available.

You have created a new snapshot that you can use to recover your original instance incase the upgrade fails. If you're upgrading a local server, use backup tools such as rsync or tar for back up before starting the upgrade process.
Test the Compatibility of Installed Applications
Follow the steps below to test the compatibility of installed applications on your server.
- Visit the Rocky Linux 9 official release notes page to view the latest features, deprecated packages, and known applications with compatibility issues.
- Verify that all software packages on the server are compatible with Rocky Linux 9.
- Test third-party repositories such as EPEL and RPM Fusion for compatibility updates and disable them to prevent package conflicts.
- Find and note packages that may require attention during the upgrade process.
Pre-upgrade Preparation
Preparing your server involves upgrading all the existing packages for a smooth and successful upgrade. Follow the steps below to prepare the server before upgrading to Rocky Linux 9.
Update the server's package information index.
console$ sudo dnf update -y
Upgrade all installed packages to the latest versions.
console$ sudo dnf upgrade --refresh
Remove any dependencies no longer required by the active packages.
console$ sudo dnf autoremove -y
Clear the DNF package manager cache to ensure a smooth upgrade process.
console$ sudo dnf clean all
Upgrade Rocky Linux 8 to Rocky Linux 9
Follow the steps below to install the Rocky Linux 9 GPG keys, release, and repository packages to replace Rocky Linux 8 version on your server.
Visit the Rocky Linux 9 packages page to verify the latest versions to apply to your server. Then, install the latest
rocky-release,rocky-repos, androcky-gpg-keyspackages.console$ sudo dnf install http://download.rockylinux.org/pub/rocky/9/BaseOS/x86_64/os/Packages/r/rocky-gpg-keys-9.4-1.7.el9.noarch.rpm http://download.rockylinux.org/pub/rocky/9/BaseOS/x86_64/os/Packages/r/rocky-release-9.4-1.7.el9.noarch.rpm http://download.rockylinux.org/pub/rocky/9/BaseOS/x86_64/os/Packages/r/rocky-repos-9.4-1.7.el9.noarch.rpm
Remove the
rpmconf,yum-utils, andepel-releasepackages to avoid installation conflicts.console$ sudo dnf -y remove rpmconf yum-utils epel-release
Remove the
redhat-logosfile to disable any branding changes.console$ sudo rm -rf /usr/share/redhat-logos
Upgrade the server to Rocky Linux 9.
console$ sudo dnf -y --releasever=9 --allowerasing --setopt=deltarpm=false distro-sync
The above command starts the upgrade process. The
--allowerasingoption removes packages with dependency conflicts during the upgrade process.Rebuild the database to switch from Rocky Linux 8's Berkeley DB toolkit to SQLite on Rocky Linux 9.
console$ sudo rpm --rebuilddb
Reboot the server to apply changes.
console$ sudo reboot
Test the Upgraded Rocky Linux 9 Server
Follow the steps below to test the upgraded Rocky Linux 9 server.
View the operating system release information and verify that it's
Rocky Linuxversion9.console$ cat /etc/os-release
Output:
NAME="Rocky Linux"
VERSION="9.4 (Blue Onyx)"
ID="rocky"
ID_LIKE="rhel centos fedora"
VERSION_ID="9.4"
PLATFORM_ID="platform:el9"
PRETTY_NAME="Rocky Linux 9.4 (Blue Onyx)"
ANSI_COLOR="0;32"
LOGO="fedora-logo-icon"
CPE_NAME="cpe:/o:rocky:rocky:9::baseos"
HOME_URL="https://rockylinux.org/"
BUG_REPORT_URL="https://bugs.rockylinux.org/"
SUPPORT_END="2032-05-31"
ROCKY_SUPPORT_PRODUCT="Rocky-Linux-9"
ROCKY_SUPPORT_PRODUCT_VERSION="9.4"
REDHAT_SUPPORT_PRODUCT="Rocky Linux"
REDHAT_SUPPORT_PRODUCT_VERSION="9.4"
Based on the above output, the Rocky Linux 9 version
9.4 (Blue Onyx)is the active operating system.Test access to external services such as
google.comusing the Ping utility.console$ ping -c 5 google.com
Troubleshooting
Follow the steps below to fix any possible issues you may encounter during the upgrade process.
List any conflicting modules that are incompatible with Rocky Linux 9.
console$ sudo dnf repoquery --unsatisfied
Reset any modules with conflicts to their initial state. Replace
module-namewith the module name.console$ sudo dnf module reset module-name
List all the obsolete packages.
console$ sudo dnf list obsoleted
Remove the obsolete packages. Replace
package-namewith your target package.console$ sudo dnf remove package-name
View the system logs and verify any errors or warnings on your server.
console$ sudo journalctl -p 3 -xb
Your output should be similar to the one below.
-- Logs begin at Thu 2024-08-08 10:40:50 UTC, end at Thu 2024-08-08 10:44:20 UTC. --
Aug 08 10:40:50 guest kernel: shpchp 0000:02:00.0: pci_hp_register failed with error -16
Aug 08 10:40:50 guest kernel: shpchp 0000:02:00.0: Slot initialization failed
Aug 08 10:40:53 rockylinux systemd-sysctl[588]: Line is not an assignment at '/usr/lib/sysctl.d/50-redhat.conf:8': (null)
Aug 08 10:40:53 rockylinux systemd[1]: Failed to start Apply Kernel Variables.
-- Subject: Unit systemd-sysctl.service has failed
-- Defined-By: systemd
-- Support: https://lists.freedesktop.org/mailman/listinfo/systemd-devel
-- Unit systemd-sysctl.service has failed.
-- The result is failed.
Aug 08 10:40:55 rockylinux smartd[708]: In the system's table of devices NO devices found to scan
The above error shows a syntax or configuration error in the
/usr/lib/sysctl.d/50-redhat.conffile.Open the
/usr/lib/sysctl.d/50-redhat.conffile.console$ sudo nano /usr/lib/sysctl.d/50-redhat.conf
Find the following directive.
-net.ipv4.conf.all.rp_filterComment and disable the directive by adding a
#character at the beginning of the line.Save and close the file.
Restart the
systemd-sysctlservice to apply the changes.console$ sudo systemctl start systemd-sysctl
Conclusion
You have upgraded your server from Rocky Linux 8 to Rocky Linux 9. Rocky Linux offers enhanced performance and features that allow you to securely run applications. For more information about the upgrade process, visit the Rocky Linux forums.