GitLab is an open-source platform for managing Git repositories. It provides a web-based interface for version control, CI/CD pipelines, issue tracking, and collaboration. It offers features like project management, code review, and integrations for streamlined software development. The Vultr Marketplace provides a pre-configured GitLab instance, enabling quick deployment and setup on a Vultr server.
This guide explains deploying and using Vultr's GitLab Marketplace Application. You will set up a GitLab instance, explore the dashboard, create a project, set up a CI/CD pipeline, and manage users and integrations.
Deploy Vultr's GitLab Marketplace Application
Log in to your Vultr Customer Portal and click the Deploy Server button.
Select your preferred server type.
Choose a server location.
Select a server plan with at least 2GB RAM and 2 CPU cores.
Click the Configure Software button to proceed.
Under Marketplace Apps, search for
Gitlaband select it as the Marketplace Application.Select the Limited User Login option under Additional Features to create a non-root user with sudo access.
Review your configurations and click the Deploy button to start deployment.
It may take up to 10 minutes for your server to finish installing GitLab.NoteAfter the instance status changes to Running, open
http://SERVER-IP/in a browser to set up your administrator account.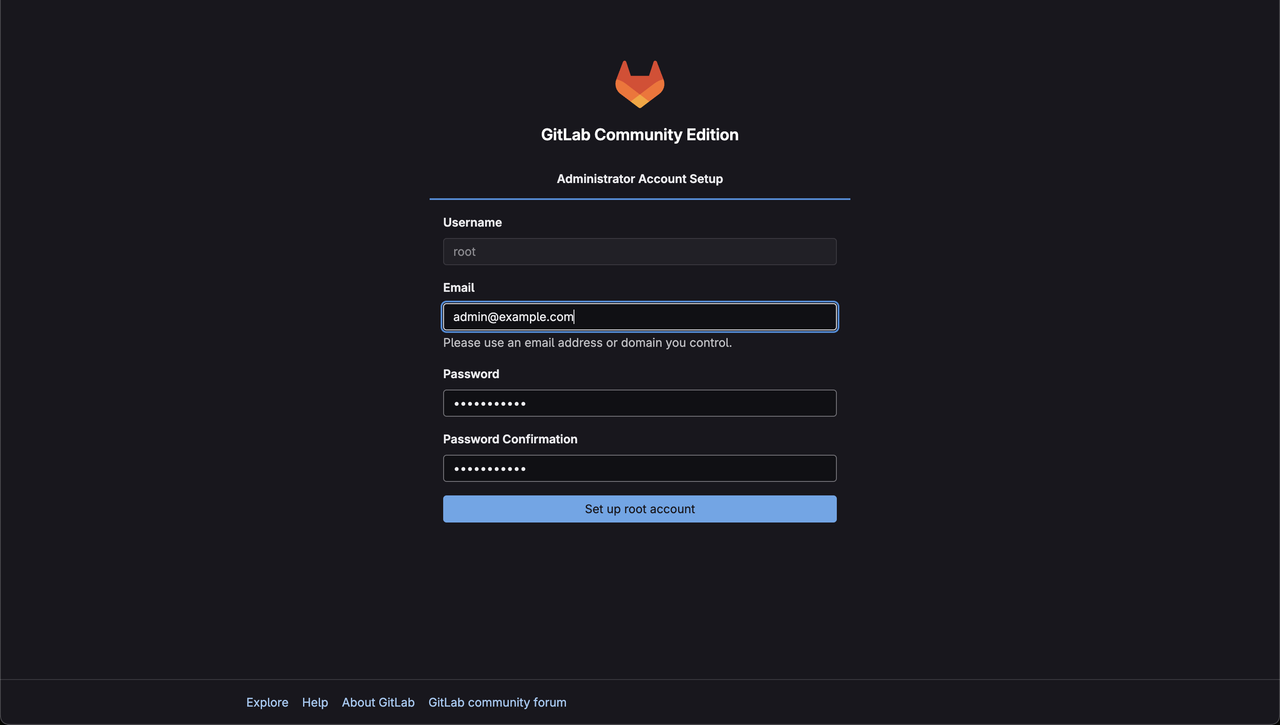
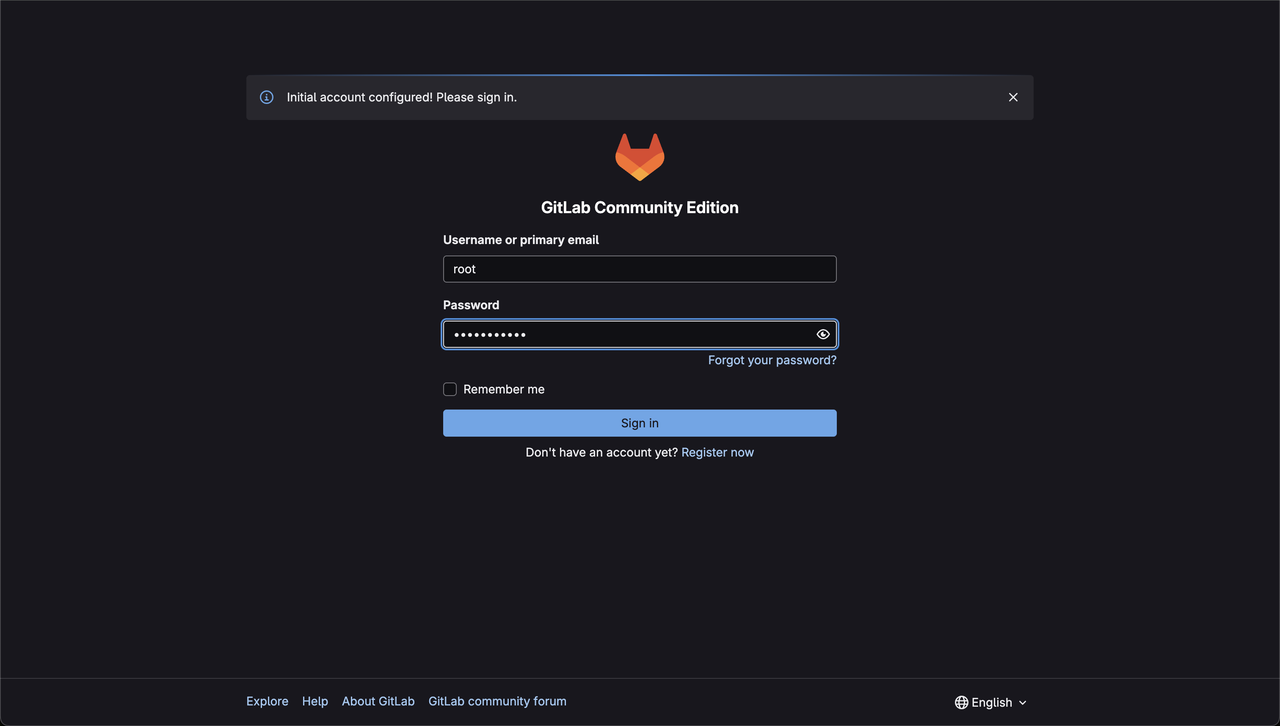
After the account setup, the page redirects to the Sign In page. Enter your credentials and proceed.
Initial Setup and Configuration
- Create a DNS A record pointing to your server's IP address, such as
gitlab.example.com. - Connect to your Vultr server instance via SSH with the credentials from the Server Information page.
Secure GitLab with TLS
To secure your GitLab instance with HTTPS and enable automatic TLS certificate management via Let's Encrypt, you need to update the GitLab configuration file. This ensures your domain is registered, and GitLab can request and apply a valid TLS certificate for encrypted access.
Edit the GitLab configuration file.
console$ sudo nano /etc/gitlab/gitlab.rb
Update the external URL to use your domain.
iniexternal_url "https://gitlab.example.com"
Enable Let's Encrypt and set your contact email.
iniletsencrypt['enable'] = true letsencrypt['contact_emails'] = ['admin@example.com']
Update the TLS/SSL certificate paths.
ininginx['ssl_certificate'] = "/etc/gitlab/ssl/gitlab.example.com.crt" nginx['ssl_certificate_key'] = "/etc/gitlab/ssl/gitlab.example.com.key"
Save and close the file.
Reconfigure GitLab to apply changes and generate the certificate.
console$ sudo gitlab-ctl reconfigure
This process contacts Let's Encrypt, validates your domain, and installs the certificate. It may take a few minutes.
Verify the configuration.
console$ sudo gitlab-ctl status
All services should display a status of
run.Access GitLab at
https://gitlab.example.comin a web browser.
Explore GitLab Dashboard
The GitLab dashboard provides a centralized interface for managing your projects and workflows. The sidebar navigation offers quick access to essential tools for collaboration, code management, and administration, tailored to your role and permissions.
The GitLab dashboard sidebar provides access to key features such as:
- Projects: Create and manage repositories for your code.
- Groups: Organize projects and manage team access.
- Issues: Track tasks, bugs, and feature requests.
- Merge Requests: Review and manage code contributions from team members.
- To-Do List: View pending tasks and action items assigned to you.
- Milestones: Set and track project milestones for releases or deadlines.
- Snippets: Share and manage small pieces of code or text.
- Activity: Monitor recent activities across projects and groups.
- Admin Area: Manage users, settings, and integrations (accessible to root users via the wrench icon).
Disable Auto DevOps
This section disables Auto DevOps to prevent automatic pipelines on commits. Auto DevOps is enabled by default and may trigger extra pipelines.
Log in to GitLab as root.
Click the wrench icon to access the Admin Area.
Go to Settings > CI/CD.
Expand the Continuous Integration and Deployment toggle and uncheck the Default to Auto DevOps pipeline for all projects option.
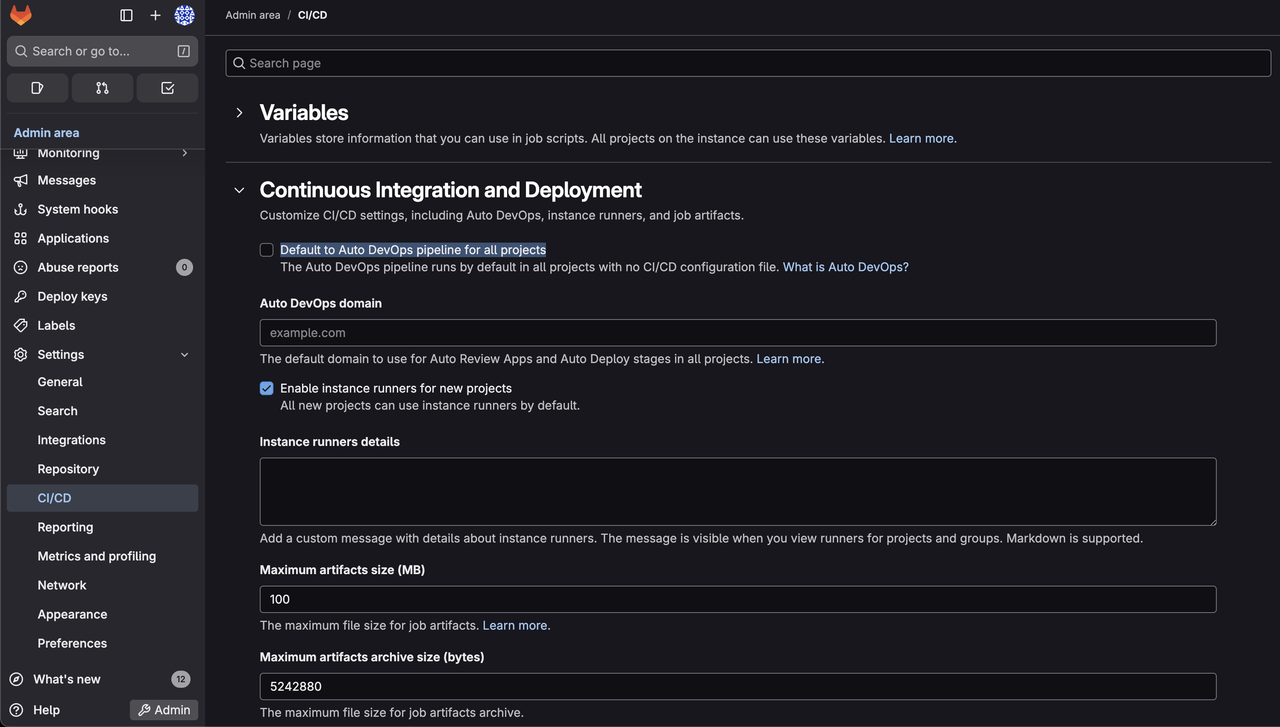
Click Save changes.
Create and Manage Projects
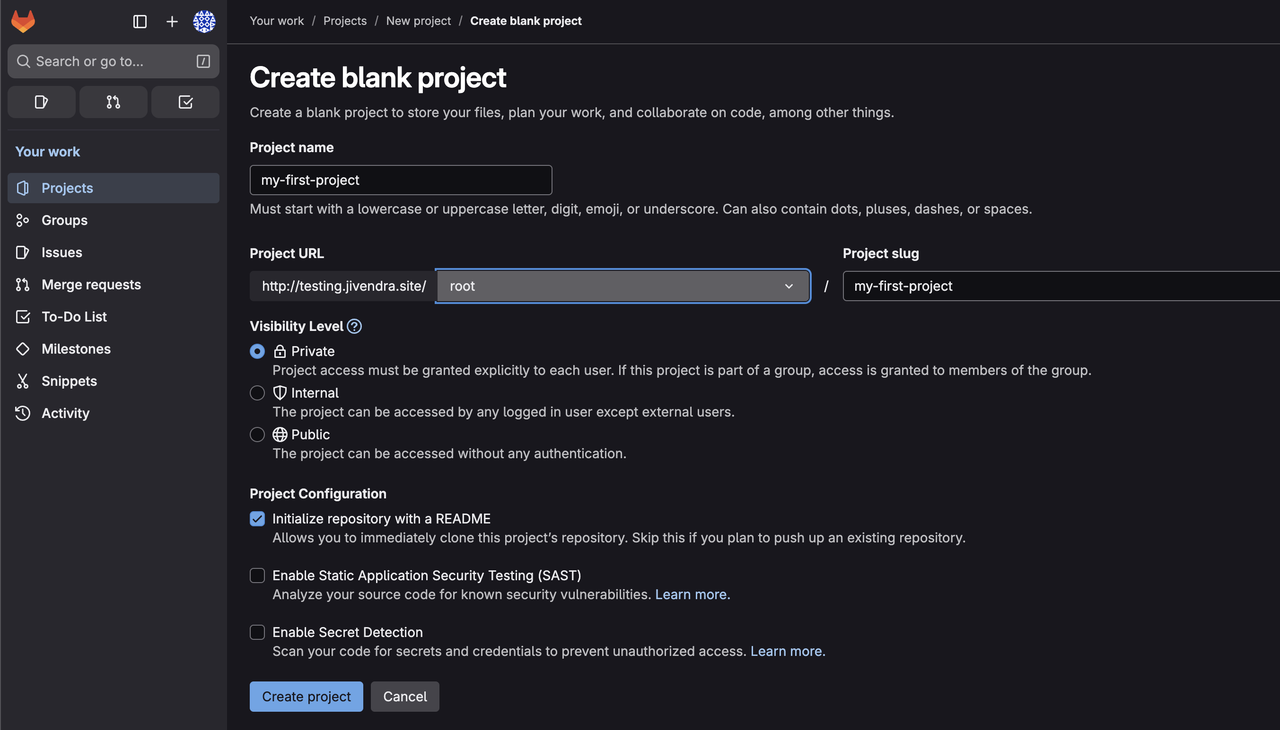
From the GitLab dashboard, click Create a project.
Choose Create blank project.
Fill in the project details.
Project name: Enter a name for your project, such as
my-first-project.Pick a group or namespace: Select
rootfrom the dropdown. This determines where the project is created and who owns it.Project slug: GitLab auto-generates a URL-friendly version of the name, such as
gitlab-project-example. You can customize this if needed.Visibility Level: Choose Private, Internal, or Public.
Click Create project to proceed.
Create Example Source Code Files
This section adds sample files to the project using the GitLab web interface.
In the project, click the + icon next to the branch name and select New file.
Name the file
index.jsand add the following content.javascriptconsole.log("Hello, GitLab!");
Enter a commit message and click Commit changes.
Repeat to create
package.jsonwith the following content.json{ "name": "gitlab-project-example", "version": "1.0.0", "description": "A sample Node.js project for GitLab CI/CD", "main": "index.js", "scripts": { "test": "echo 'Running tests...' && exit 0" }, "dependencies": {} }
Commit the changes.
Create
.gitlab-ci.ymlwith the following content.yamlstages: - test test_job: stage: test image: node:16 tags: - vultr-gitlab script: - npm install - npm test
Commit the changes. In the above yaml:
- stages: Defines the pipeline stages. For example,
test. - test_job: A job that runs in the test stage.
- image:
node:16: Uses a Node.js 16 Docker image to run the job. - tags:
vultr-gitlab: Only runners with thevultr-gitlabtag will pick up and execute the test_job. This allows you to control which runners are used based on their capabilities or environment. - script: Executes commands to install dependencies (npm install) and run the test script (npm test) defined in
package.json.
- stages: Defines the pipeline stages. For example,
Check the Repository section to confirm that
index.js,package.json, and.gitlab-ci.ymlare listed.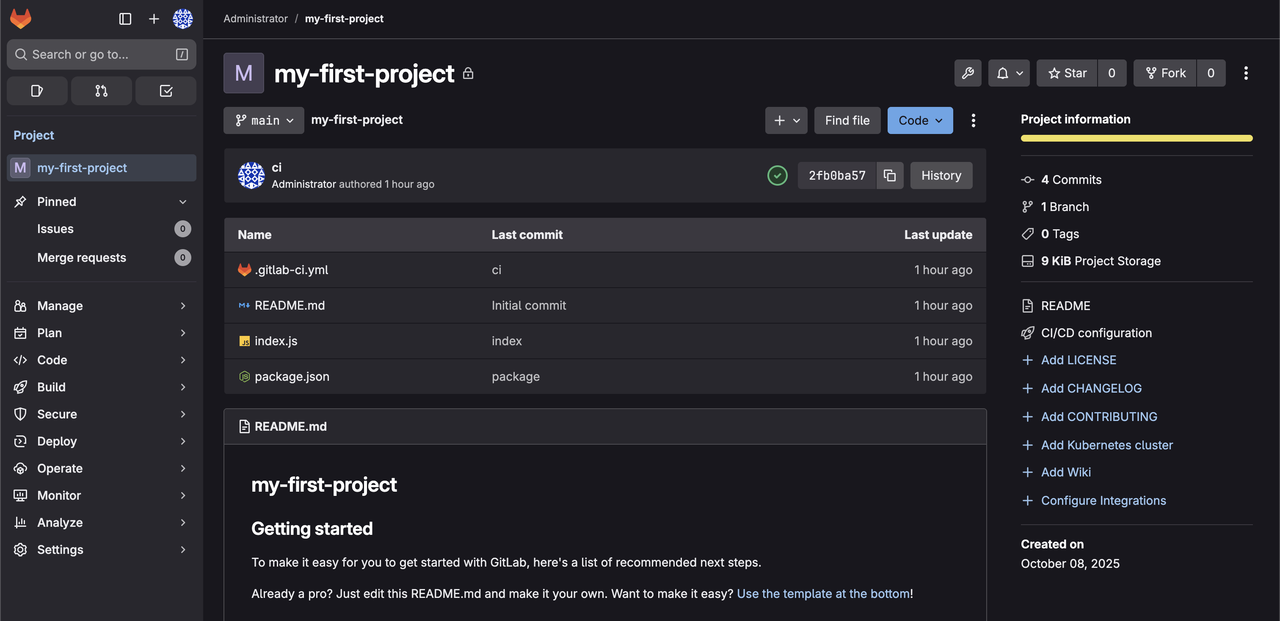
Configure CI/CD Pipelines
GitLab's CI/CD pipelines automate building, testing, and deploying your code, streamlining the development process. The .gitlab-ci.yml file created earlier defines a pipeline for a Node.js project, including a test_job that runs a test script. This section explains verifying, running the pipeline, and exploring additional CI/CD features.
Verify Pipeline Status
From the Project, go to Build > Pipelines in the left sidebar to see the pipeline in a pending state.
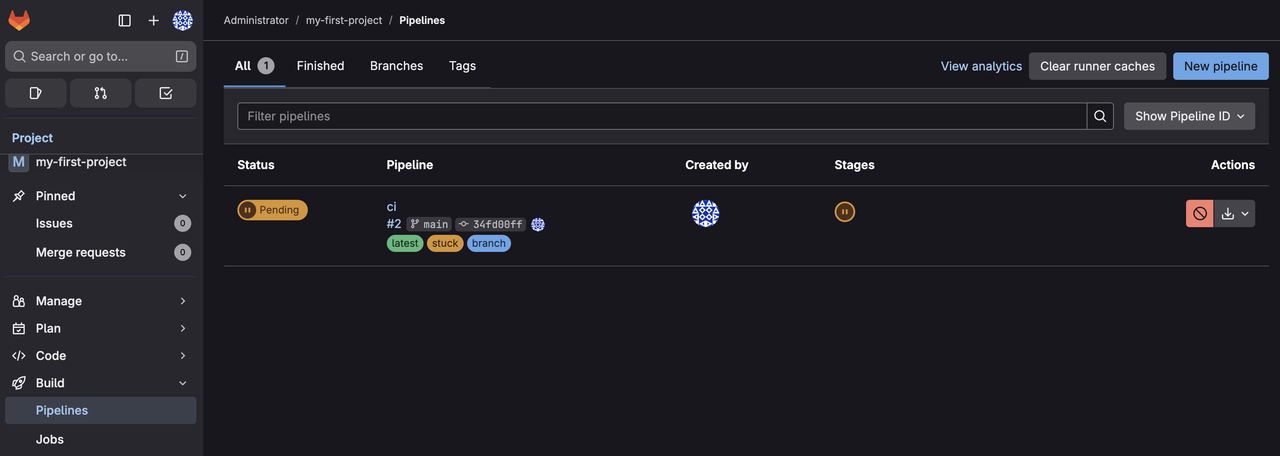
The pipeline is in a pending state, indicating that no GitLab Runner is available to execute the job.
GitLab Runners are agents that run jobs defined in yourNote.gitlab-ci.ymlfile.
Create a CI/CD Runner
In Settings > CI/CD, expand Runners and click Create project runner.
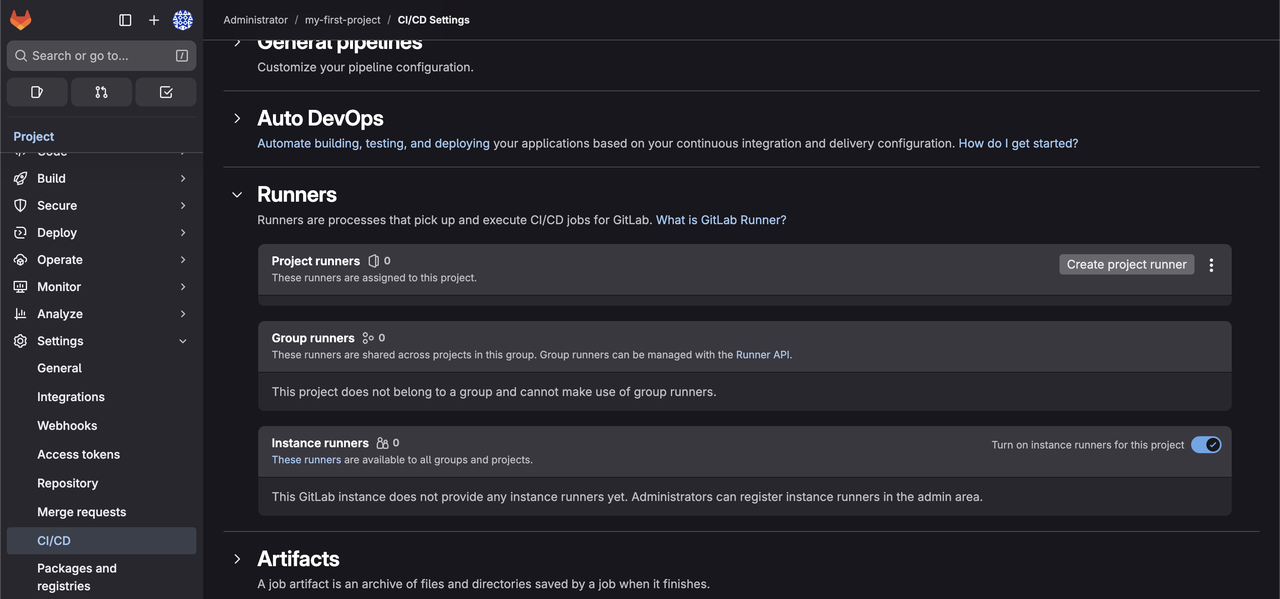
Enter tags, such as
vultr-gitlab.Enter a description, such as
test_job_runner.Click Create runner.
Copy the runner authentication token as shown below.
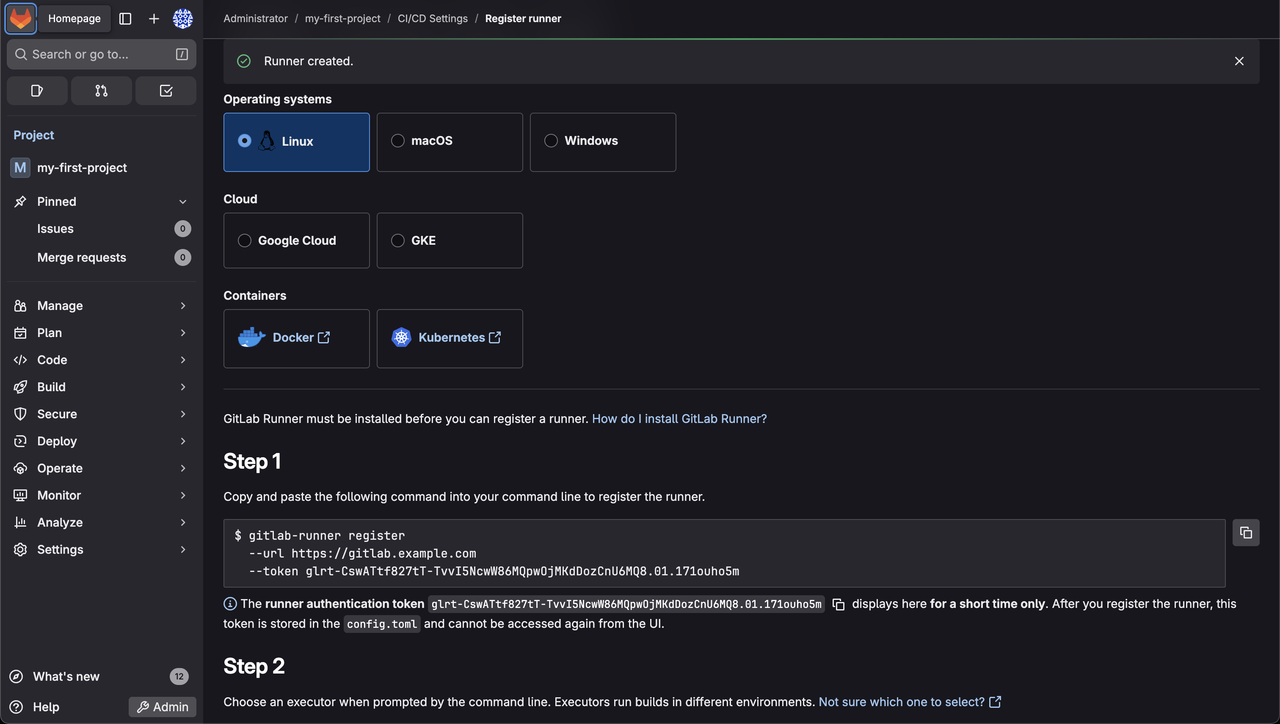
Install and Register GitLab Runner
Access your GitLab server's terminal.
Add the GitLab Runner repository.
console$ curl -L "https://packages.gitlab.com/install/repositories/runner/gitlab-runner/script.deb.sh" | sudo bash
Install GitLab Runner with the following command.
console$ sudo apt install -y gitlab-runner
Register the runner.
console$ sudo gitlab-runner register
It prompts you with:
- Enter the GitLab instance URL (for example, https://gitlab.com/):: Use the base URL of your GitLab server. For example,
https://gitlab.example.com. - Enter the registration token:: Enter the runner authentication token which you copied in the last section.
- Enter a name for the runner. This is stored only in the local config.toml file:: Enter a name, such as
gitlab_runner. - Enter an executor: Enter
docker. - Enter the default Docker image (for example, ruby:3.3)::
node:16.
- Enter the GitLab instance URL (for example, https://gitlab.com/):: Use the base URL of your GitLab server. For example,
Install and Configure Docker for GitLab Runner
To ensure the Docker executor works as expected, follow these steps:
Install Docker.
console$ sudo apt install -y docker.io
Start Docker.
console$ sudo systemctl start docker
Enable Docker to start automatically on system boot.
console$ sudo systemctl enable docker
Check Docker Status.
console$ sudo systemctl status docker
Add
gitlab-runnerto Docker Group.console$ sudo usermod -aG docker gitlab-runner
This grants the GitLab Runner permission to communicate with the Docker daemon.
Restart GitLab Runner.
console$ sudo systemctl restart gitlab-runner
Verify the Pipeline
This section checks the pipeline execution.
In your project, go to Build > Pipelines.
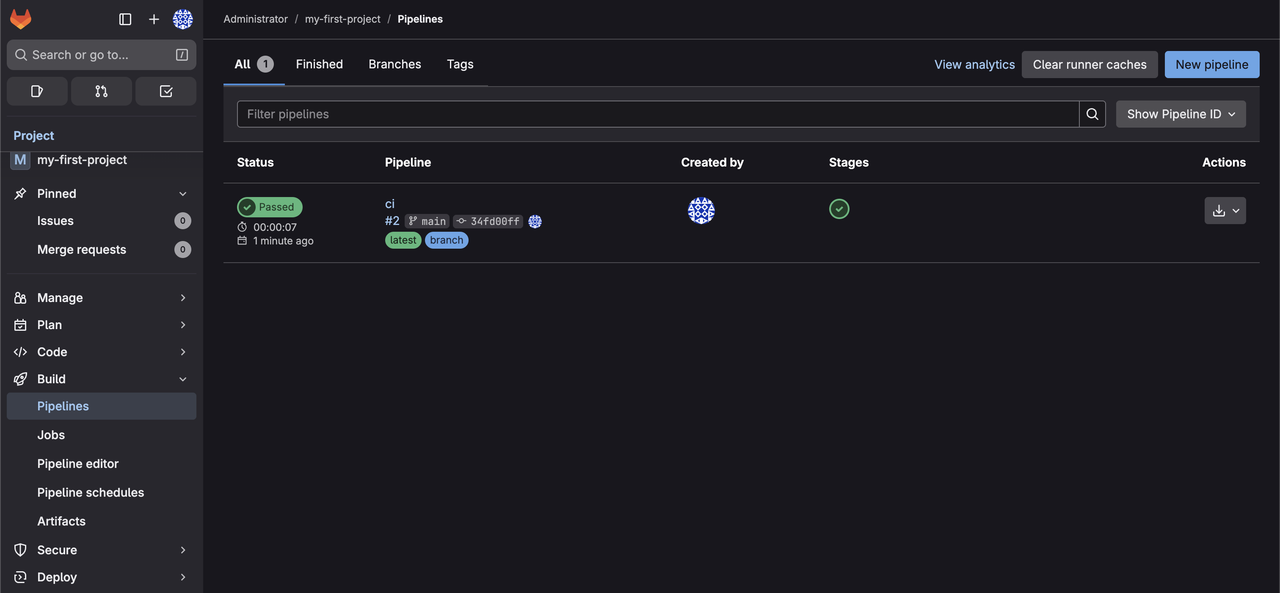
The Pipeline status should be Passed.
If the pipeline remains pending, click Retry to re-run it.
The pipeline should now run and pass.
Click the pipeline to view job logs.
Manage Users and Integrations
GitLab provides tools for managing users and integrating with external services to enhance collaboration and streamline workflows. This section explains how to add users, assign roles, and set up integrations.
Manage Users
GitLab allows administrators to invite team members, assign roles, and control access to projects and groups. Follow these steps to manage users:
Click the wrench icon in the left sidebar to enter the Admin Area and navigate to Users in the sidebar.
Create a new user by clicking New user in the Users section and filling in the required details:
- Name: Enter the user's full name.
- Username: Choose a unique username.
- Email: Enter a valid email address.
- Under the Access Section, assign a role:
- Regular: Standard user with access to projects and groups they are invited to.
- Administrator: Full administrative access to the GitLab instance.
Click Create User.
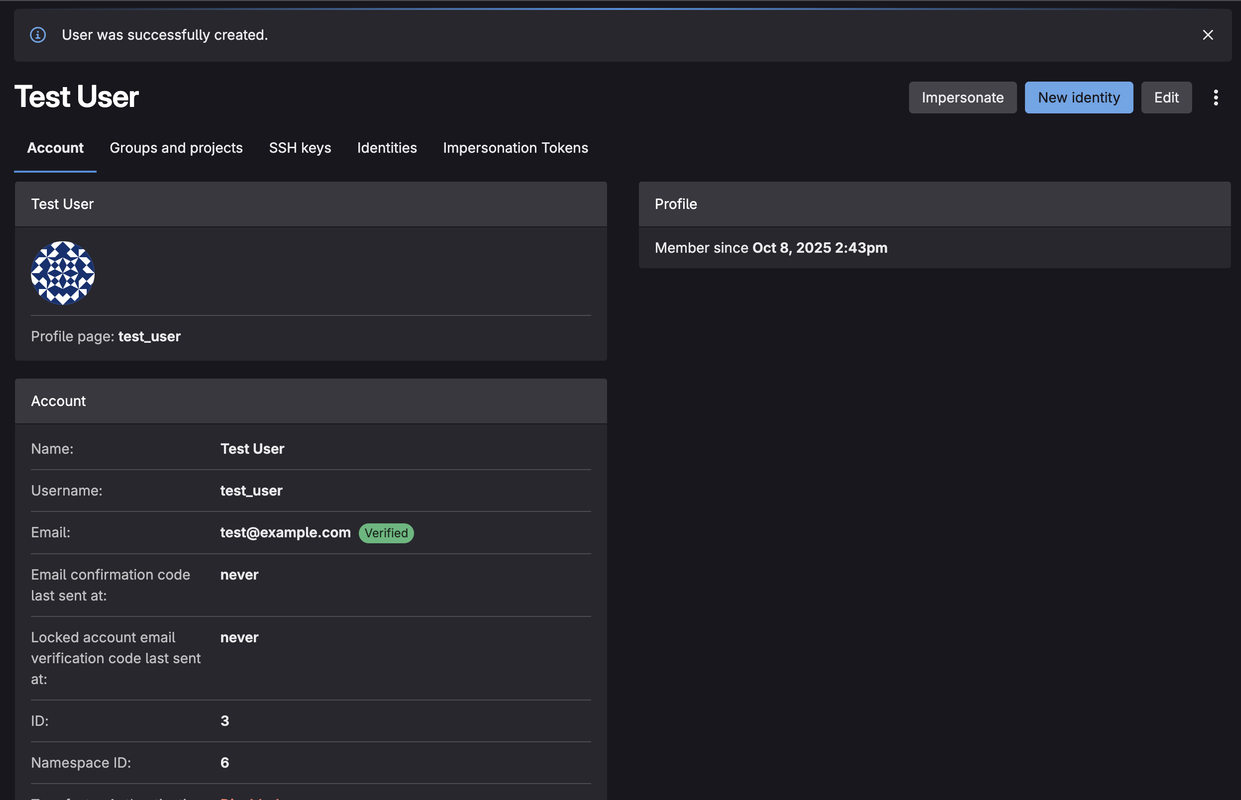
Navigate back to the Users tab.
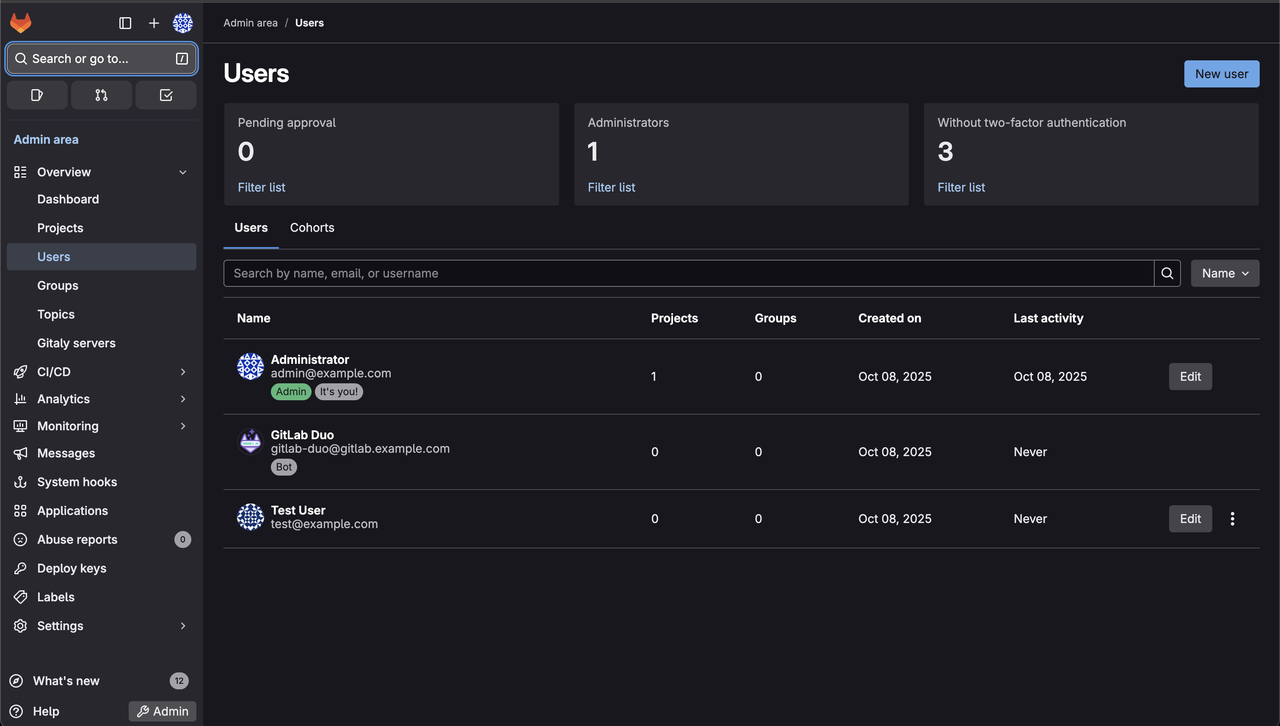
In the Users section of the Admin Area, you can activate, deactivate, or delete users.
Set Up Integrations
GitLab supports integrations with external tools for notifications, CI/CD, and project management. Below are the steps to configure a standard integration, such as Slack notifications, to enhance team collaboration.
Navigate to your project’s dashboard and select Settings > Integrations from the left sidebar.
Choose the desired integration, such as Slack, Jira, Jenkins, Microsoft Teams Notifications, Prometheus, or Phorge.
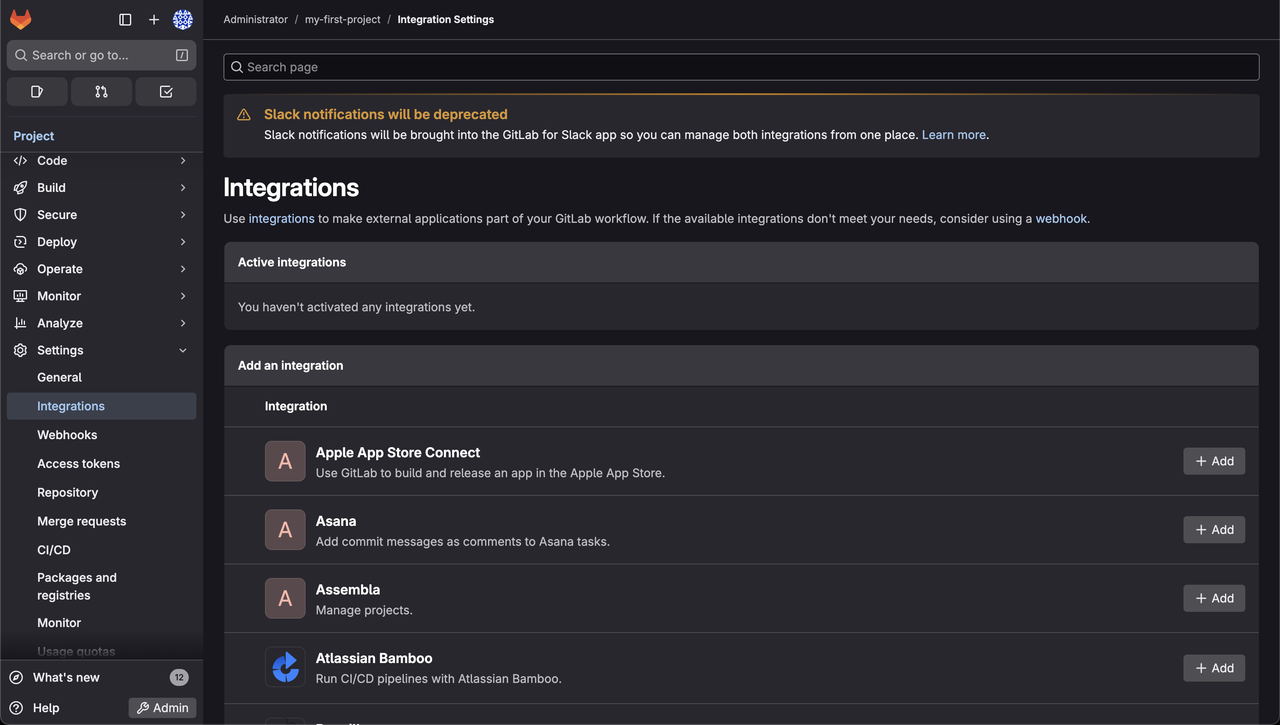
Follow the tool-specific setup instructions.
Click Save changes to activate the integration.
Conclusion
In this guide, you deployed Vultr's GitLab Marketplace Application. You configured the instance, explored the GitLab dashboard, created a project, set up a CI/CD pipeline, and managed users and integrations. With GitLab’s robust version control, automation, and collaboration features, teams can streamline their development workflows.